
When using an airless sprayer on popcorn ceilings, start by preparing your workspace—cover furniture, mask edges, and make certain good ventilation. Choose a sprayer with adjustable pressure and a tip suited for textured surfaces. Prime the ceiling first for smooth adhesion, then apply paint with steady, overlapping strokes from about 12 inches away. Control overspray and cleanup carefully for a professional finish. To learn the best techniques and tips, keep exploring this guide.
Key Takeaways
- Choose an airless sprayer with adjustable pressure and a tip suitable for textured surfaces to ensure even application.
- Always test spray on a small area to perfect technique and prevent damage or uneven texture.
- Maintain a consistent distance of about 12 inches from the ceiling and overlap passes for uniform coverage.
- Wear protective gear, ensure proper ventilation, and cover surrounding areas to manage overspray and fumes.
- Clean and maintain the sprayer thoroughly after use to prevent clogs and ensure optimal performance on future projects.

ZINSSER 03688 Covers Up Stain Sealing Ceiling Paint, White
- Vertical aerosol for overhead use: Ideal for ceiling projects
- Quick water stain cure: Fast drying and sealing
- Flat white finish: Matches most ceiling tiles
As an affiliate, we earn on qualifying purchases.
As an affiliate, we earn on qualifying purchases.
Preparing the Workspace and Ceiling Surface
Before you begin spraying, preparing your workspace and the ceiling surface properly is vital. Start by clearing the room of furniture or covering items with drop cloths to protect them from overspray. Guarantee good room ventilation by opening windows and using fans; this helps disperse fumes and keeps the air fresh. Examine your ceiling’s texture to identify any loose or damaged areas, which you should repair before painting. Remove any dust, dirt, or cobwebs using a vacuum or damp cloth, so the texture adheres evenly. Mask edges, trim, and walls with painter’s tape to prevent overspray on surfaces you want to keep clean. Proper preparation creates a safer, cleaner environment and ensures a smooth, professional popcorn ceiling finish. Additionally, understanding the texture quality of your ceiling helps determine the best spraying techniques and equipment settings for optimal results. Being aware of the surface condition can also influence the choice of spray pressure and nozzle size, leading to a more consistent texture application. Checking the filtration system of your sprayer ensures it captures overspray particles, reducing cleanup and environmental impact. Moreover, familiarizing yourself with the cost-effective options available can help you choose the right equipment for your project. Incorporating storage solutions to organize your tools and supplies can further streamline the process and prevent clutter during your project.
Choosing the Right Equipment and Materials
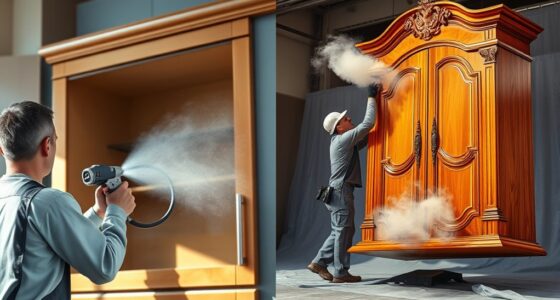
Choosing the right equipment and materials is key to a smooth popcorn ceiling project. You need to select an airless sprayer that’s powerful enough and compatible with your chosen coating. Don’t forget to follow safety precautions to safeguard yourself and ensure the job gets done right. Additionally, understanding automation technologies can help streamline your project process and improve efficiency. Being aware of tuning options can also inform your choice of equipment to achieve optimal results. Proper material selection, such as the type of popcorn texture and compatible paints, can significantly impact the final outcome. Using a high-quality spray tip designed for textured surfaces can help achieve a more uniform finish. Incorporating remote collaboration tools can also be beneficial if you’re coordinating with team members or seeking expert advice during your project.
Equipment Selection Tips
Selecting the right equipment is essential for a smooth and professional popcorn ceiling refinishing project. Start by choosing an airless sprayer with the appropriate pressure and nozzle size to handle ceiling texture removal effectively. A sprayer with adjustable pressure ensures you won’t damage the ceiling or create overspray. When selecting materials, opt for high-quality primers and paints that adhere well to textured surfaces and provide even coverage. Consider the paint color, as lighter shades often brighten the space, but make sure your sprayer can handle the viscosity of the chosen paint. Additionally, use drop cloths and masking tape to protect walls and fixtures. Proper equipment and material choices help you achieve a clean, professional finish without unnecessary mess or delays. Incorporating proper preparation techniques can also aid in minimizing surface imperfections and ensuring a smooth application. Being aware of retirement account rules can help you plan financing options for your home improvement projects effectively. Exploring sound therapy science and sound healing techniques can be beneficial for creating a calming environment during your project, reducing stress and improving focus. Utilizing appropriate safety gear such as masks and goggles is crucial to protect yourself from dust and fumes during the spraying process. Advanced machine learning tools can also assist in planning and optimizing your project workflow.
Material Compatibility Guidelines
Using the right equipment isn’t enough if your materials aren’t compatible with your ceiling’s surface. You need to guarantee your choice of ceiling texture, paint, and primers won’t cause peeling or damage. Always verify paint compatibility with existing popcorn texture to prevent uneven finishes. The table below highlights common surface types and suitable materials:
| Ceiling Texture | Recommended Paint Type | Compatible Primers |
|---|---|---|
| Standard popcorn | Latex or acrylic paint | Shellac or latex primer |
| Textured finishes | Oil-based or latex paint | Oil-based primer |
| Older surfaces | Vinyl-safe paint | Bonding primer |
| Damaged areas | Patching compounds | Sealers |
Matching materials carefully helps assure a smooth application and long-lasting results. Additionally, consulting material compatibility guidelines can help prevent costly mistakes during your project, especially when working with older surfaces that may require specialized primers. Recognizing surface condition and surface age is essential for choosing the appropriate materials and ensuring the durability of your ceiling finish. Being aware of surface type can also assist in selecting the most effective application techniques for your specific situation.
Safety Precautions Measures
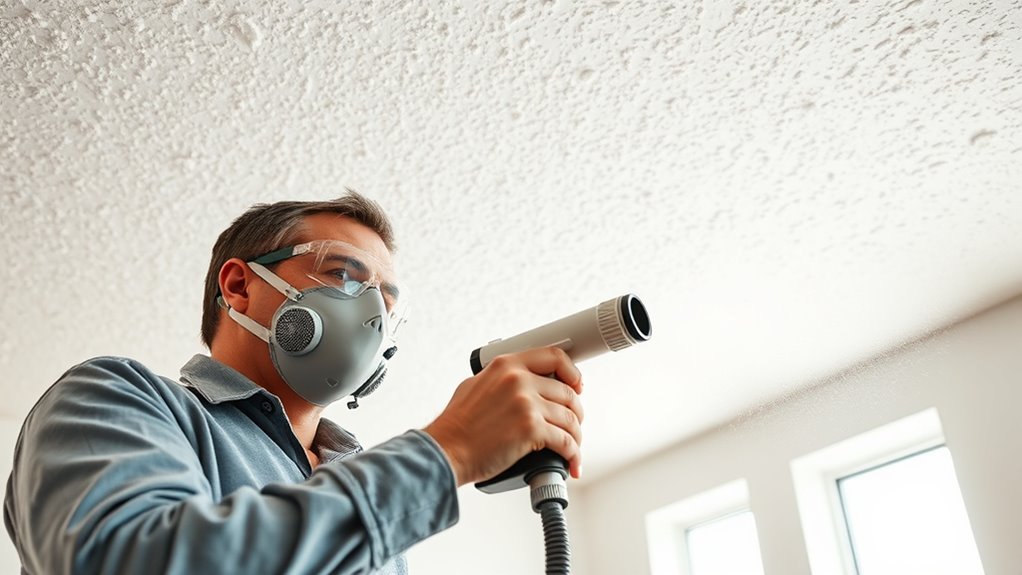
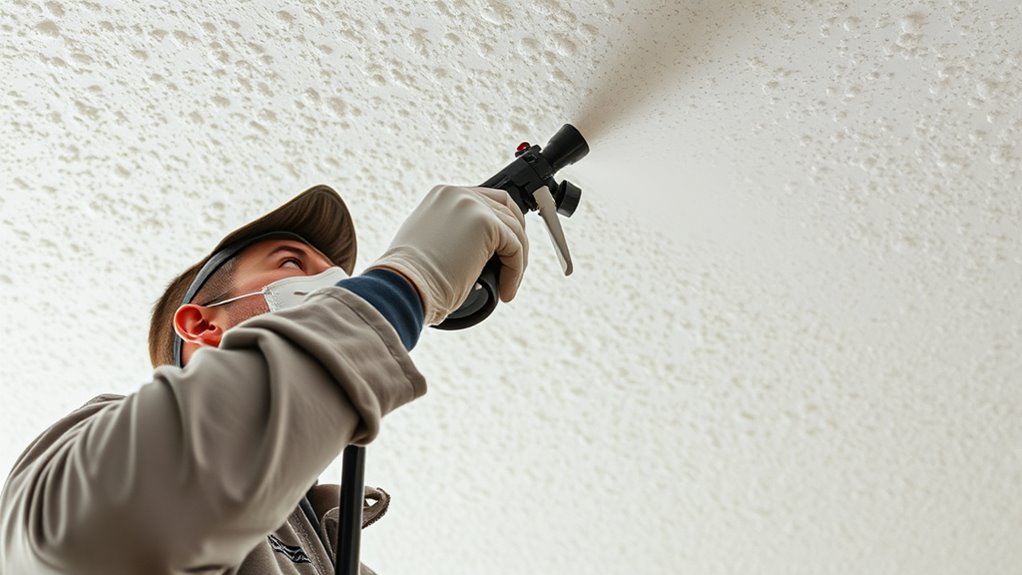
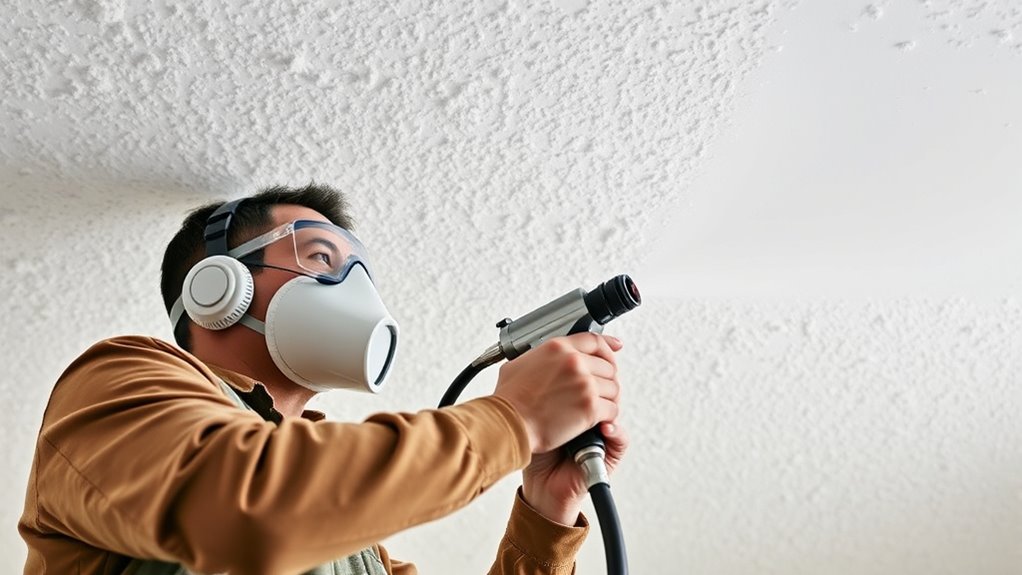
Before starting your popcorn ceiling project, taking safety into account is essential by selecting the appropriate equipment and materials. Using the right airless sprayer and materials tailored for popcorn ceiling texture ensures a smooth process. Pay attention to airflow considerations to prevent overspray and maintain control. Proper equipment reduces the risk of accidents and protects your health. Additionally, understanding technological influence can help you choose advanced sprayers that offer better precision and safety features. Incorporating safety precautions and proper protective gear further minimizes health risks associated with dust and fumes. Consider these safety measures:
- *Choose sprayers with adjustable pressure to prevent accidental damage or overspray.*
- *Use masks and goggles to avoid inhaling dust or fumes.*
- *Ensure proper ventilation to manage airflow considerations and keep the area safe.* Ventilation systems are also an important aspect of maintaining a safe working environment during your popcorn ceiling project.
Selecting suitable equipment not only boosts your confidence but also guarantees a safer, more efficient popcorn ceiling project.
Applying a Suitable Primer or Sealant
Applying a suitable primer or sealant is a crucial step to guarantee your popcorn ceiling is properly prepared for spraying. You need to ensure primer compatibility to avoid issues like uneven coverage or poor adhesion. Choose a primer designed for textured ceilings—latex-based primers typically work well. When selecting a sealant, focus on its ability to block stains, odors, and moisture. Proper sealant selection helps prevent future paint or spray issues and enhances the durability of your finish. Apply the primer or sealant evenly using a roller or sprayer, making sure to cover all surface areas thoroughly. Allow it to dry completely before proceeding. This step creates a smooth, properly sealed surface, ensuring a professional-looking and long-lasting popcorn ceiling finish.
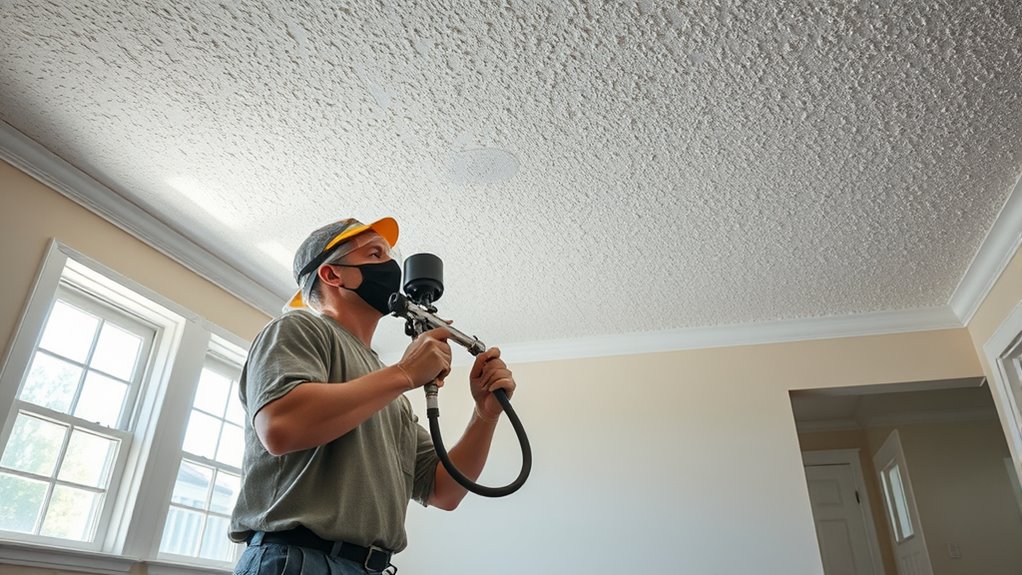
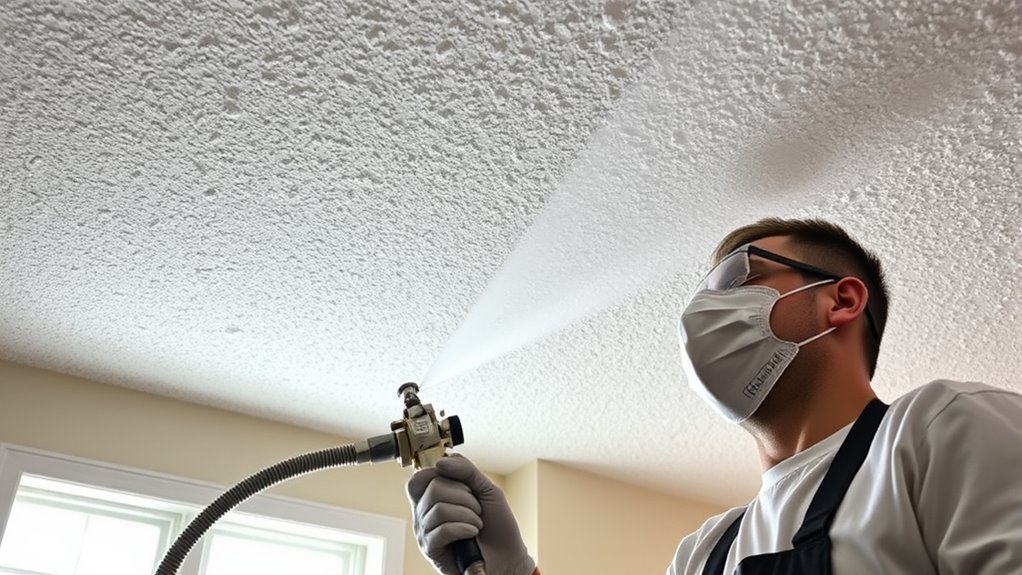
Techniques for Using the Airless Sprayer Effectively
To get the best results, start by properly setting up your sprayer, ensuring the pressure and nozzle are correct. Use controlled, steady strokes to apply the coating evenly without overspraying. Paying attention to your technique will help you achieve a smooth, professional finish on your popcorn ceiling.
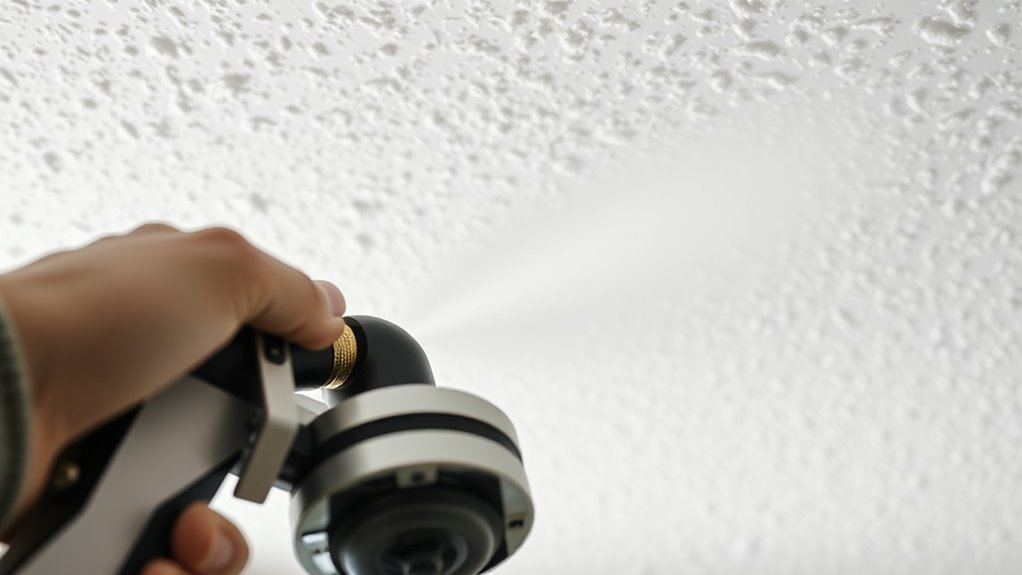
Proper Sprayer Setup
Setting up your airless sprayer correctly is essential to achieving a smooth, even popcorn ceiling finish. Start by checking your sprayer’s components, ensuring the tip size matches your material and cleaning it thoroughly to prevent clogs. Adjust the pressure settings for consistent spray flow, which helps avoid drips and uneven coverage. Regular sprayer maintenance is vital—clean parts after each use and inspect hoses for leaks. If you encounter issues, troubleshoot sprayer problems promptly to stay on schedule. Remember, proper setup boosts efficiency and minimizes messes.
- Feel confident in your setup, knowing your equipment is optimized for the task
- Avoid frustrating breakdowns by maintaining your sprayer regularly
- Achieve professional results with minimal troubleshooting, saving time and effort
Controlled Application Techniques
Once your sprayer is properly set up, focusing on your technique helps guarantee a smooth, even popcorn ceiling finish. Keep a consistent distance from the ceiling to maintain uniform texture patterns. Use slow, steady strokes to avoid drips or uneven coverage. Overlap each pass slightly to ensure seamless texture. Pay attention to the spray pattern, adjusting it as needed for different sections or desired effects. If you’re removing popcorn texture, controlled application prevents damaging the ceiling or creating messes. Practice your technique on a small section first to refine your approach. Maintain steady pressure and keep your movements smooth. Proper technique minimizes overspray and ensures a professional-looking finish, whether you’re applying new texture or implementing removal techniques for existing popcorn ceilings.
Managing Drips, Overspray, and Cleanup

Managing drips, overspray, and cleanup is essential to achieving a professional-looking finish when using an airless sprayer on popcorn ceilings. To prevent messes, regularly check your airless sprayer maintenance to avoid uneven spray patterns. Be mindful of ceiling texture types, as rougher textures can trap overspray more easily. Use drop cloths and painter’s tape to protect walls and fixtures from unwanted splatters. Keep a damp rag handy to quickly wipe up drips before they set. Remember, controlling overspray minimizes waste and reduces cleanup time, making your project smoother.
- Feel confident knowing you’re preventing costly mistakes.
- Experience the satisfaction of a clean, flawless ceiling.
- Save time and effort with efficient cleanup.
Tips for Achieving a Smooth, Even Finish
To achieve a smooth, even finish on your popcorn ceiling with an airless sprayer, focus on proper technique and equipment adjustments. Start by thinning your paint to ensure a consistent spray and prevent uneven texture. Proper paint mixing is vital; mix thoroughly to avoid lumps or separation that can disrupt the ceiling texture. Maintain a steady, overlapping spray pattern to avoid streaks or missed spots. Keep your sprayer at a consistent distance—usually about 12 inches from the ceiling—so the spray is even. Adjust the pressure settings to prevent splattering or uneven coverage. Take your time, and don’t rush the process. With attention to paint consistency and technique, you’ll achieve a smooth, professional-looking finish that enhances your ceiling’s appearance.
Frequently Asked Questions
How Long Does It Typically Take to Spray a Popcorn Ceiling?
Spraying a popcorn ceiling usually takes about 1 to 3 hours, depending on the area size. You should aim for consistent spray consistency to avoid drips or uneven texture. Keep your equipment well-maintained, cleaning the sprayer regularly to guarantee smooth operation. If you work steadily and maintain proper spray consistency, you’ll finish faster and achieve a professional-looking finish without unnecessary delays.
Can I Use an Airless Sprayer on Textured Ceilings Other Than Popcorn?
Back in the day, we’d never think of this, but yes, you can use an airless sprayer on other textured ceilings. Just consider alternative textures like knockdown or skip trowel, and check sprayer compatibility first. Different textures need different spray settings and techniques, so adjust accordingly. Always test a small area first to prevent damage, ensuring you get a smooth, even finish without mess or hassle.
What Safety Precautions Should I Follow During Spraying?
When spraying, you should prioritize safety by wearing protective gear like goggles, a mask, and gloves to prevent inhaling fumes or getting paint on your skin. Make certain there is good ventilation by opening windows and using fans to disperse fumes. Always follow the sprayer manufacturer’s instructions, keep the workspace clear, and work in a well-lit area. These precautions help keep you safe and make the job easier.
How Do I Prevent the Sprayer From Clogging?
To prevent your sprayer from clogging, focus on proper sprayer maintenance and nozzle selection. Regularly clean the nozzle and filters to avoid buildup. Choose the right nozzle size for your material—smaller nozzles can clog more easily, so use a larger one if you’re spraying thicker coatings. Always strain your paint or texture to remove debris, and test the sprayer on a scrap surface before starting your project.
Is Special Training Needed to Operate an Airless Sprayer Effectively?
You might wonder if special training is needed to operate an airless sprayer effectively. While basic skill development can be achieved through practice, training requirements vary depending on the sprayer’s complexity. It’s advisable to take a short course or watch tutorials to understand safety protocols and proper techniques. This guarantees you gain the necessary skills, reduce the risk of issues like clogging, and achieve professional results efficiently.
Conclusion
Using an airless sprayer on popcorn ceilings can save you time and effort, but it’s essential to prep properly and use the right techniques. Did you know that DIY ceiling refinishing can boost your home’s value by up to 10%? With patience and attention to detail, you’ll achieve a smooth, professional-looking finish. Just remember to wear protective gear and clean your tools thoroughly—your ceiling will look great, and your home will feel refreshed.