Connect with us

Airless Paint Sprayers FAQs

What Paint Is Best For Spraying Concrete With An Airless Sprayer

Published

on

An image showcasing an airless sprayer, fully loaded with a high-quality, elastomeric paint, effortlessly coating a concrete surface

When it comes to using an airless sprayer for applying concrete spray, choosing the best paint is crucial. The right paint selection can make all the difference in achieving a flawless finish.

Picture this: a smooth, seamless surface that not only protects your concrete but also enhances its appearance. With the right knowledge and technique, you can transform your concrete surfaces into works of art.

In this article, I will guide you through the process of selecting the perfect paint for your airless sprayer. From understanding the basics of concrete spraying to choosing the right type of paint and applying multiple coats if needed, I’ll provide you with the technical know-how to achieve professional results.

So, let’s dive in and discover the magic of spraying concrete with an airless sprayer!

Key Takeaways

  • Avoid over-spraying or under-spraying to achieve even coverage and maximize paint usage
  • Apply thin coats and use the proper nozzle size for optimal coverage and adhesion
  • Allow sufficient drying and curing time before subjecting the painted surface to heavy traffic or water exposure
  • Add a protective sealer to enhance durability and longevity of the paint job on concrete surfaces

Understanding the Basics of Concrete Spraying

Advertisement

To achieve a professional finish when spraying concrete with an airless sprayer, it’s essential to understand the basics of concrete spraying.

Surface preparation techniques play a crucial role in ensuring a successful application. Before spraying, thoroughly clean the surface and remove any dirt, debris, or loose particles. This can be done by pressure washing or using a wire brush.

It’s also vital to repair any cracks or imperfections in the concrete before spraying. Failure to properly prepare the surface can result in poor adhesion and an uneven finish.

Common mistakes in concrete spraying include using the wrong nozzle size, applying the paint too thick or too thin, and not maintaining a consistent spraying distance.

By considering the surface preparation, you can ensure a smooth and professional-looking concrete coating.

Advertisement

Consider the Surface Preparation

Before you begin, make sure the surface is properly prepared for the application. This is crucial for achieving a successful spray concrete finish.

Start by thoroughly cleaning the surface to remove any dirt, dust, or debris that could interfere with the paint’s adhesion. Use a pressure washer or a stiff brush to scrub the concrete surface.

Once the surface is clean, consider the concrete compatibility with the paint. Different paints have different formulations and may require specific primers or additives to adhere properly to concrete. Conduct a compatibility test by applying a small amount of the paint on a small inconspicuous area and check for adhesion.

Taking these steps will ensure that the paint adheres well and provides a long-lasting finish on the concrete surface.

Moving forward, it’s important to choose the right type of paint for spraying concrete with an airless sprayer.

Advertisement

Choose the Right Type of Paint

Selecting the appropriate paint type for your airless sprayer is like finding the perfect partner – it requires careful consideration and compatibility to ensure a flawless finish on your concrete surface. When it comes to spraying concrete, choosing the right type of paint is crucial for achieving optimal results. The type of paint you select will depend on various factors such as the surface condition, desired finish, and the type of spraying equipment you plan to use. For concrete surfaces, it is recommended to use acrylic or epoxy-based paints, as they provide excellent adhesion and durability. These types of paint are specially formulated to withstand the harsh conditions that concrete surfaces often face. Additionally, they can be easily sprayed using an airless sprayer, ensuring a smooth and even application. Now that you have selected the right type of paint, it’s time to move on to the next step – selecting the appropriate finish for your concrete surface.

Select the Appropriate Finish

Now that you’ve found the perfect paint type for your project, it’s time to discover the ideal finish that will truly bring your concrete surface to life. Selecting the appropriate finish is crucial in achieving a smooth and professional-looking result when spraying concrete with an airless sprayer. Here are some key considerations:

  • Selecting the right nozzle: The nozzle size determines the spray pattern and coverage. For a smooth finish, choose a nozzle with a smaller orifice size.

  • Choosing the right pressure: Adjusting the pressure on your airless sprayer is essential for achieving a smooth finish. Start with a lower pressure setting and make gradual adjustments as needed.

  • Applying multiple coats: To enhance the durability and appearance of your concrete surface, consider applying multiple thin coats rather than a single heavy coat.

By following these guidelines, you can ensure a flawless finish that enhances the beauty of your concrete surface.

Advertisement

Now, let’s move on to the next section and discuss how to prep the airless sprayer.

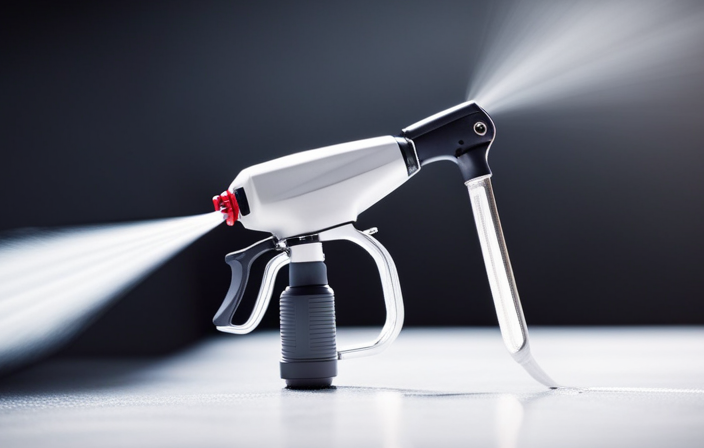
Prep the Airless Sprayer

To prep the airless sprayer:

  • Inspect the sprayer for loose or damaged parts. Tighten or replace as needed.

  • Clean the sprayer to remove any previous paint residue. Flush with water or a suitable cleaning solution.

  • Check the spray tip for good condition and proper alignment.

  • Troubleshoot common issues like clogs or uneven spray patterns.

  • Regularly check and adjust the pressure settings.

By properly prepping your airless sprayer, you’ll be able to tackle the task at hand with confidence and precision.

Advertisement

Transitioning into the next section, it’s now time to practice proper spraying techniques to achieve the best results.

Practice Proper Spraying Techniques

When it comes to spraying concrete with an airless sprayer, practicing proper spraying techniques is crucial. To achieve a professional finish, it’s important to maintain a consistent speed and distance while spraying. This ensures an even application of the paint and prevents any streaks or uneven coverage.

Additionally, overlapping each pass is essential to achieve a uniform and consistent coat of paint. This technique helps to eliminate any potential gaps or missed spots.

Lastly, it’s important to avoid both over-spraying and under-spraying. Over-spraying can lead to excessive paint build-up and drips, while under-spraying can result in thin and patchy coverage.

By following these techniques, you can achieve a high-quality finish when spraying concrete with an airless sprayer.

Advertisement

Maintain Consistent Speed and Distance

To achieve optimal results, it’s crucial to maintain a consistent speed and distance while spraying concrete with an airless sprayer.

When it comes to spraying concrete, having a consistent speed ensures an even application of the paint, preventing any uneven patches or streaks.

Additionally, maintaining the proper distance from the surface is essential for achieving the desired coverage and avoiding excessive overspray. Too close, and the paint may pool or drip, while being too far away can result in thin and inconsistent coverage.

By keeping a steady pace and staying at the recommended distance, you can ensure a smooth and uniform coat of paint on the concrete surface.

Moving on to the next section about ‘overlap each pass for even coverage’, it’s important to ensure a seamless transition between each stroke to achieve a flawless finish.

Advertisement

Overlap Each Pass for Even Coverage

As you glide the sprayer smoothly across the surface, ensure that each stroke seamlessly blends with the previous one, creating a harmonious dance of coverage.

Overlapping each pass is crucial to achieve an even and consistent coat of paint on your concrete surface. By overlapping, you ensure that no areas are missed or left with insufficient coverage.

To achieve the best results, maintain a consistent distance between the sprayer and the surface, typically around 12 to 18 inches. Additionally, pay attention to the speed at which you move the sprayer, keeping it steady and controlled.

If you notice any areas with inconsistent coverage, adjust your technique by overlapping more on subsequent passes. Troubleshooting tip: if you encounter areas with excessive paint build-up, reduce the overlap slightly to avoid over-spraying.

Transitioning to the next section, it is important to avoid both over-spraying or under-spraying to achieve a perfect finish.

Advertisement

Avoid Over-spraying or Under-spraying

Ensure that you don’t waste any precious paint or leave your surface looking patchy by avoiding over-spraying or under-spraying while using the sprayer. Understanding the drying process and troubleshooting common spraying issues are key to achieving a flawless finish. To help you visualize the importance of proper spraying technique, take a look at the table below:

Over-spraying Ideal Spraying Under-spraying
Wastes paint Achieves even coverage Leaves patchy areas
Creates drips and runs Provides a uniform finish Requires additional coats
Longer drying time Maximizes paint usage Inadequate protection

By following these guidelines, you can ensure that each pass with the sprayer is done accurately, preventing over-spraying or under-spraying. Once you have achieved an even coverage, you can confidently proceed to apply multiple coats if needed.

Apply Multiple Coats if Needed

To achieve the best results when spraying concrete with an airless sprayer, it is important to apply thin coats and use the proper nozzle size. This ensures even application and prevents over-spraying or under-spraying. Here are three key points to keep in mind:

  1. Apply thin coats: Thick coats can lead to uneven drying and curing, resulting in a less durable and less attractive finish. By applying thin coats, you allow for better adhesion and a more uniform appearance.

  2. Use proper nozzle size: Choosing the right nozzle size is crucial for achieving optimal coverage. A nozzle that is too small may result in under-spraying, while a nozzle that is too large can lead to over-spraying. Refer to the manufacturer’s guidelines to determine the correct nozzle size for your specific paint and sprayer.

  3. Allow sufficient drying and curing time: After applying each coat, it is essential to allow enough time for the paint to dry and cure properly. This ensures maximum durability and longevity of the finish.

By following these guidelines, you can achieve a beautifully sprayed concrete surface. Now, let’s move on to the next step and discuss the importance of allowing sufficient drying and curing time.

Allow Sufficient Drying and Curing Time

Give your project the time it needs to dry and cure properly, for a finish that will leave you amazed.

Advertisement

When spraying concrete with an airless sprayer, it is crucial to allow sufficient drying and curing time. Concrete paint needs time to dry completely before it can be subjected to any kind of stress or moisture.

The drying time will depend on various factors such as temperature, humidity, and the type of paint used. Generally, it takes around 24 to 48 hours for the paint to dry to the touch. However, it is advisable to wait for at least 7 days before subjecting the painted surface to heavy traffic or exposure to water.

The curing process is equally important as it allows the paint to fully bond and harden. During this time, the paint undergoes chemical reactions that enhance its durability and adhesion.

Once the paint has dried and cured, you can consider adding a protective sealer to further enhance the longevity of the finish.

Consider Adding a Protective Sealer

After allowing sufficient drying and curing time for the concrete, it is important to consider adding a protective sealer. This step can significantly enhance the durability and longevity of the paint job.

Advertisement

One of the benefits of using a primer is that it creates a strong bond between the concrete surface and the paint, ensuring better adhesion and preventing peeling or flaking. Additionally, a primer can help to seal any porous areas on the concrete, resulting in a smoother and more even finish.

When choosing a sealer, it is crucial to select one that is specifically designed for use on concrete surfaces. Factors to consider include the type of sealer (such as acrylic or epoxy), the level of gloss desired, and the intended use of the area. By carefully choosing the right sealer, you can ensure maximum protection and long-lasting results.

Now, let’s move on to how to maintain and clean your airless sprayer.

Maintain and Clean Your Airless Sprayer

To maintain and clean your airless sprayer properly, it is important to follow these steps:

  1. Clean your sprayer after each use to prevent paint build-up and clogging. Flush out any remaining paint by running a suitable cleaning solution through the system.

  2. Regularly check and clean the filters to avoid blockages and ensure proper paint flow. This will help maintain the efficiency of your sprayer.

  3. Inspect and clean the spray tip regularly to remove any debris that may affect the spray pattern. A clean spray tip will ensure a smooth and even application of paint.

  4. Troubleshoot common issues such as leaks, low pressure, or uneven spray by thoroughly cleaning and maintaining your sprayer. Often, these problems can be resolved by cleaning the system and ensuring all components are in good working condition.

By following these steps and incorporating regular maintenance and cleaning into your routine, you can ensure that your airless sprayer performs at its best every time.

Advertisement

Frequently Asked Questions

Can I use any type of paint for spraying concrete with an airless sprayer?

I recommend using specific types of paint suitable for concrete surfaces when spraying with an airless sprayer. This method offers numerous benefits, such as even coverage, faster application, and the ability to reach difficult areas.

How long should I allow the paint to dry and cure before walking or placing objects on the concrete surface?

Concrete paint typically takes several hours to dry, but it can take up to 24 hours to fully cure. To speed up the drying process, ensure proper ventilation and use fans. Avoid placing objects or walking on the surface for at least 24 hours.

Is it necessary to add a protective sealer after applying the paint?

It is necessary to add a protective sealer after applying the paint to concrete. This is important because a sealer provides added durability, protection against stains and UV damage, and enhances the overall appearance of the surface. However, using a sealer may increase the cost and maintenance requirements.

What are the common mistakes to avoid when spraying concrete with an airless sprayer?

Spraying concrete with an airless sprayer requires proper technique to avoid common mistakes. One key mistake is applying too much pressure, causing the paint to splatter. Precision and control are essential for a flawless finish.

How often should I clean and maintain my airless sprayer to ensure optimal performance?

To ensure optimal performance of your airless sprayer, regular cleaning and maintenance is essential. Follow these airless sprayer maintenance tips to avoid issues and troubleshoot any problems that may arise.

Advertisement

Conclusion

In conclusion, selecting the best paint for spraying concrete with an airless sprayer requires careful consideration and attention to detail. By understanding the basics of concrete spraying and preparing the surface properly, you can achieve a flawless finish.

Remember to choose the right type of paint and select an appropriate finish to enhance the aesthetic appeal. Don’t forget to prep the airless sprayer and apply multiple coats if needed. Allow sufficient drying and curing time for optimal results.

Lastly, consider adding a protective sealer and maintain and clean your airless sprayer for long-lasting performance. With these steps, your concrete spraying project will be a success!

Whether it’s a step-by-step tutorial on achieving flawless finishes or an in-depth analysis of the latest airless paint sprayer models, Joe’s ability to articulate complex ideas in a simple and engaging manner resonates with our diverse audience. His practical tips and techniques empower readers to tackle their projects with confidence.

Continue Reading
Advertisement

Airless Paint Sprayers FAQs

How To Store Your Kruse And Becker Airless Paint Sprayer Attachments

Published

on

By

An image showcasing a neatly organized storage solution for Kruse and Becker airless paint sprayer attachments

Did you know that by properly storing your Kruse and Becker airless paint sprayer attachments, you can significantly extend their lifespan?

As a proud owner of this powerful tool, it’s essential to take the necessary steps to protect and maintain your attachments. In this article, I will guide you through the process of storing your attachments correctly, ensuring that they remain in optimal condition for future use.

From cleaning the attachments properly to using protective caps or covers, I will cover all the necessary steps to keep your attachments safe from damage.

Additionally, I will provide tips on storing them in a dry and temperature-controlled area, avoiding stacking heavy objects on top of them, and inspecting and maintaining them regularly.

Whether you choose to store them in their original packaging or a dedicated storage case, following the manufacturer’s guidelines for long-term storage is crucial.

Advertisement

By implementing these storage techniques, you can ensure that your Kruse and Becker airless paint sprayer attachments are always ready to deliver exceptional performance whenever you need them.

Key Takeaways

  • Storing the Kruse and Becker airless paint sprayer attachments in their original packaging or a dedicated storage case helps prevent dust and dirt accumulation, protects them from moisture, rust, and corrosion, and makes them easy to locate and access.
  • Following the manufacturer’s guidelines for storage is crucial, including regular maintenance, cleaning attachments after each use, applying oil or lubricant to metal surfaces, and storing them in a dry, climate-controlled environment.
  • Taking measures to prevent rust and corrosion, such as applying oil or lubricant to metal surfaces, keeping attachments away from moisture, storing them in an upright position, avoiding exposure to extreme temperatures, and using the original packaging or storage case, is important.
  • Cleaning the attachments thoroughly after each use, removing paint residue and debris, helps prevent rust and corrosion, maintain attachment integrity, and ensure professional-quality results.

Clean the Attachments Properly

To ensure that your Kruse and Becker airless paint sprayer attachments are properly cleaned, follow these steps:

  1. Disconnect the attachments from the sprayer.
  2. Rinse the attachments with warm water to remove any excess paint.
  3. Use a mild detergent and a soft brush to gently scrub away any remaining paint or debris.
  4. Pay special attention to the nozzle and other small parts, ensuring they are thoroughly cleaned.
  5. Dry the attachments completely before storing them.

Properly cleaning your attachments is essential for maintaining their quality and longevity. Regular maintenance helps prevent clogging and ensures smooth operation. By removing excess paint, you prevent build-up and maintain optimal performance. So, now that your attachments are clean, let’s move on to the next step: removing excess paint.

Remove Excess Paint

To remove excess paint from your Kruse and Becker airless paint sprayer attachments, follow these effective paint removal techniques:

  • Gently scrape off any dried paint from the attachment using a paint scraper or putty knife.
  • Soak the attachment in warm soapy water for a few minutes to loosen any remaining paint.
  • If there is stubborn paint, scrub away the residue using a brush with stiff bristles.
  • Alternatively, use a paint remover solution specifically designed for removing paint from attachments.

Thoroughly cleaning your attachments ensures that there is no leftover paint to interfere with the performance of your sprayer.

Next, we will discuss how to disconnect and drain the sprayer.

Advertisement

Disconnect and Drain the Sprayer

To prepare for storage, it’s time to disconnect and drain the sprayer, ensuring optimal performance for your next painting project.

Disconnecting the sprayer is a crucial step in preventing clogs and maintaining the integrity of the attachments.

Start by turning off the sprayer and unplugging it from the power source.

Advertisement

Next, detach the spray gun from the hose by releasing the locking mechanism.

Once disconnected, hold the sprayer over a bucket or container and activate the trigger to release any remaining paint. This will prevent any residual paint from drying and clogging the system.

After draining the sprayer, it’s important to use protective caps or covers to keep the attachments clean and protected during storage.

This will ensure that your Kruse and Becker airless paint sprayer is ready for use when you need it next.

Use Protective Caps or Covers

Keep your sprayer safe and sound by covering it with a protective shield, like a suit of armor, shielding it from dust and potential damage. Here are four reasons why you should use protective covers for your Kruse and Becker airless paint sprayer attachments:

Advertisement
  1. Prevents dust accumulation: Protective covers keep your attachments clean and free from dust, ensuring smooth and efficient operation.

  2. Protects against accidental damage: By using covers, you can safeguard your attachments from accidental bumps or falls, extending their lifespan.

  3. Guards against moisture: Moisture can cause corrosion and damage to your sprayer attachments. Protective covers act as a barrier, keeping them dry and in optimal condition.

  4. Easy identification and organization: Using different colored or labeled covers for different attachments allows for quick identification and efficient organization.

To ensure proper maintenance and longevity, don’t forget to store your attachments in a dry and temperature-controlled area.

Store Attachments in a Dry and Temperature-Controlled Area

To maintain the optimal condition and extend the lifespan of the attachments, it is important to store them in a cool and dry area. A well-ventilated space is necessary to prevent moisture buildup, which can lead to rust or other damage. Avoid storing the attachments in areas with high humidity or near sources of water, as this can cause corrosion. Additionally, it is crucial to keep them away from direct sunlight, as prolonged exposure can cause materials to degrade or warp.

By storing your Kruse and Becker airless paint sprayer attachments in a dry and temperature-controlled environment, you can ensure they remain in top-notch condition for future use. This will also make it easier to keep the attachments organized and labeled, which we will discuss in the next section.

Advertisement

Keep Attachments Organized and Labeled

Organizing and labeling your attachments is a must if you want to avoid the chaos of a jumbled mess and ensure you can easily find the right tool when you need it. When it comes to storing your Kruse and Becker airless paint sprayer attachments, having a system in place is key. One effective way to keep your attachments organized is by using a labeled storage system. By labeling each attachment and assigning it a specific place in your storage area, you can quickly locate the tool you need without wasting time searching through a pile of attachments. To make the organization process even more efficient, consider using a table like the one below:

Attachment Name Storage Location Quantity
Spray Gun Shelf A 2
Nozzle Tips Drawer B 5
Extension Wand Hook C 1
Hose Pegboard D 1

By following this labeling and organizing system, you can ensure that your Kruse and Becker airless paint sprayer attachments are easily accessible and in good condition. However, it’s important to remember to avoid stacking heavy objects on top of the attachments to prevent any damage.

Avoid Stacking Heavy Objects on Top of the Attachments

To prevent potential damage, it’s important to avoid stacking heavy items on top of your stored attachments. Stacking heavy objects can put unnecessary pressure on the attachments, causing them to become bent or damaged.

When storing your Kruse and Becker airless paint sprayer attachments, follow proper storage techniques to ensure their longevity. Instead of stacking heavy items on top, use a designated shelf or storage bin where the attachments can be safely stored without any additional weight on top.

By avoiding damage in this way, you can extend the lifespan of your attachments and ensure they are always in good working condition.

Advertisement

Moving on to the next section, it’s also important to inspect and maintain your attachments regularly to keep them in optimal shape.

Inspect and Maintain Attachments Regularly

Regularly inspecting and maintaining your attachments is like giving them a check-up to ensure they’re in top shape and ready for any painting task. By performing regular maintenance, you can prevent damage and extend the lifespan of your Kruse and Becker airless paint sprayer attachments.

Here are a few important steps to include in your maintenance routine:

  • Clean the attachments thoroughly after each use to remove any paint residue or debris.
  • Inspect the seals and O-rings for any signs of wear or damage, replacing them if necessary.
  • Lubricate moving parts with a suitable lubricant to keep them operating smoothly.
  • Check the nozzle for any clogs or obstructions, cleaning it if needed.

By regularly inspecting and maintaining your attachments, you can ensure they are always in optimal condition for your painting projects.

Now, let’s move on to the next section about storing attachments in their original packaging or a dedicated storage case.

Store Attachments in their Original Packaging or a Dedicated Storage Case

To keep your attachments safe and protected, it is important to store them properly. One option is to store them in their original packaging or a dedicated storage case. This ensures that they stay in pristine condition for your next painting project. Storing attachments in airtight containers has several benefits. Firstly, it prevents dust and dirt from accumulating on them. Additionally, it protects them from moisture, which can cause rust or corrosion. By keeping them in their original packaging or a dedicated storage case, you can easily locate and access them when needed. Another storage option is to hang attachments on a pegboard. This not only keeps them organized but also saves valuable shelf or drawer space. However, it is crucial to follow the manufacturer’s guidelines for long-term storage to ensure that the attachments remain in optimal condition. By following these storage practices, you can extend the lifespan of your Kruse and Becker airless paint sprayer attachments.

Advertisement

Follow Manufacturer’s Guidelines for Long-Term Storage

By adhering to the manufacturer’s guidelines for long-term storage, you can ensure that your attachments remain in optimal condition and extend their lifespan. Regular maintenance is key to keeping your airless paint sprayer attachments in top shape. It is important to clean the attachments thoroughly after each use to remove any paint residue or debris that may cause rust or corrosion over time. Additionally, applying a thin layer of oil or lubricant to metal surfaces can help prevent rust and corrosion during storage. Storing the attachments in a dry and climate-controlled environment is also crucial to maintain their integrity. Using the original packaging or a dedicated storage case can provide extra protection and organization. Following these tips will help you avoid costly repairs or replacements and ensure that your Kruse and Becker airless paint sprayer attachments are always ready to deliver professional-quality results.

Maintenance Tips Rust and Corrosion Prevention Storage Practices
Clean after each use Apply oil or lubricant to metal surfaces Store in dry, climate-controlled environment
Inspect for damage or wear Keep away from moisture Use original packaging or dedicated storage case
Replace worn or damaged parts Store in upright position Avoid exposure to extreme temperatures

Frequently Asked Questions

Can I store my kruse and Becker airless paint sprayer attachments in a garage or shed without temperature control?

Yes, you can safely store your Kruse and Becker airless paint sprayer attachments in a garage or shed without temperature control. However, it is important to keep them in a dry and protected area to prevent any damage or corrosion.

How often should I inspect and maintain my paint sprayer attachments?

I recommend inspecting and maintaining your paint sprayer attachments regularly to ensure optimal performance. Clean them after each use and troubleshoot common issues promptly. This will help extend their lifespan and prevent any potential problems.

Is it necessary to remove the excess paint from the attachments before storing them?

Of course, removing excess paint from your Kruse and Becker airless paint sprayer attachments before storing them is completely unnecessary. It’s not like paint can dry and clog the nozzle, causing damage and shortening their lifespan. Proper cleaning techniques and tips for prolonging their lifespan can be found…

Can I use any type of protective caps or covers for my paint sprayer attachments?

Yes, protective covers can be used for paint sprayer attachments. They help prevent damage and keep them clean. Alternatively, you can explore other storage options like using a dedicated case or hanging them on a pegboard.

Advertisement

What should I do if I don’t have the original packaging or a dedicated storage case for my attachments?

If you don’t have the original packaging or a dedicated storage case for your attachments, there are alternative storage options available. Get creative with DIY storage solutions like using a toolbox, a pegboard, or even repurposing old containers.

Conclusion

In conclusion, it is essential to properly preserve your Kruse and Becker airless paint sprayer attachments. First, clean them meticulously and ensure that any lingering paint is removed. Next, disconnect and drain the sprayer to prevent any damage. After that, protect the attachments by using caps or covers to shield them from dust and debris. It is important to store them in a dry and temperature-controlled environment to prevent any moisture or extreme temperatures from causing damage. When handling the attachments, be careful not to place heavy objects on top of them to avoid any potential harm. Regular inspection and maintenance should be done to ensure their longevity. If possible, it is recommended to return them to their original packaging or invest in a dedicated storage case. Lastly, always follow the manufacturer’s guidelines for long-term storage to ensure the best care for your sprayer attachments. By safeguarding your attachments with these tips, you will see your spraying success skyrocket!

Continue Reading

Airless Paint Sprayers FAQs

How To Store Graco Truecoat 360dsp Airless Paint Sprayer In Case

Published

on

By

An image showcasing a sturdy, custom-made case for the Graco Truecoat 360dsp Airless Paint Sprayer

You have just finished a project with your trusty Graco TrueCoat 360DSP airless paint sprayer and now it is time to stow it away. You may be tempted to simply throw it in its case and call it a day, but I urge you to properly store your paint sprayer to preserve its longevity and performance.

In this article, I’m going to guide you through the steps to ensure that your Graco TrueCoat 360DSP stays in top shape when not in use.

First things first, we need to clean the sprayer thoroughly before storing it. Then, we’ll remove and clean the spray tip and guard to prevent any clogs. Emptying the paint container and flushing the system is also essential to avoid any dried paint residue. Checking and replacing any damaged or worn parts will guarantee that your sprayer is ready for the next project.

I’ll also show you how to neatly wrap and secure the power cord and provide tips on storing the case in a dry and temperature-controlled area. Lastly, we’ll discuss the importance of regularly inspecting and maintaining the case for any damage.

So, let’s dive in and make sure your Graco TrueCoat 360DSP airless paint sprayer is safely stored in its case for future use.

Advertisement

Key Takeaways

  • Regularly inspect and maintain the protective case for damage or wear
  • Clean the case regularly to remove dirt and debris
  • Follow manufacturer’s instructions for long-term storage
  • Store the sprayer in a clean and dry environment

Clean the Sprayer Thoroughly Before Storing

Before you pack it away, make sure you’ve thoroughly cleaned your Graco TrueCoat 360DSP airless paint sprayer. Cleaning the sprayer is an essential step in proper storage, as it prevents any paint residue or debris from clogging the sprayer and affecting its performance when you use it next.

To begin the cleaning process, start by removing any remaining paint from the sprayer. Disassemble the sprayer as much as possible and clean each part individually using warm soapy water. Pay close attention to the nooks and crannies, ensuring that all paint residue is removed.

After cleaning, allow each part to air dry completely before reassembling the sprayer. Once the sprayer is dry, you can move on to the next step of removing and cleaning the spray tip and guard.

Remove and Clean the Spray Tip and Guard

After you’ve used it, make sure to remove and clean the spray tip and guard to keep your paint sprayer in the best condition possible. Here are five important steps to follow:

Advertisement
  • Start by unscrewing the spray tip from the guard using a wrench.
  • Rinse both the spray tip and guard with warm water to remove any leftover paint.
  • Use a small brush or toothpick to gently clean any clogs or debris from the spray tip.
  • Inspect the guard for any buildup and clean it thoroughly.
  • Dry the spray tip and guard completely before reattaching them to the sprayer.

Properly cleaning the spray tip and guard not only ensures the longevity of your paint sprayer but also guarantees a smooth finish when using it again. If you encounter any issues with your airless paint sprayer, such as uneven spray patterns or clogs, refer to the troubleshooting guide provided by Graco.

Now, let’s move on to the next step: empty the paint container and flush the system.

Empty the Paint Container and Flush the System

To ensure optimal performance, it’s crucial to empty the paint container and thoroughly flush the system. This is an important step in the cleaning process and shouldn’t be overlooked.

First, remove the paint container from the sprayer and pour any remaining paint back into the original paint can or a separate storage container. Once the container is empty, fill it with clean water and attach it back onto the sprayer.

Advertisement

Turn on the sprayer and let it run until the water coming out is clear. This will flush out any remaining paint residue. Repeat this process a few times to ensure a thorough cleaning.

Proper storage techniques are essential to maintaining the longevity of your Graco TrueCoat 360DSP airless paint sprayer. After cleaning and flushing the system, it’s important to check and replace any damaged or worn parts.

Check and Replace any Damaged or Worn Parts

Make sure to inspect and replace any parts that’ve suffered damage or wear, as neglecting this step would surely lead to flawless performance.

Start by inspecting the hoses for any cracks, leaks, or signs of wear. Replace any damaged hoses immediately to prevent any paint leakage during use.

Next, clean the filters thoroughly to ensure optimal performance. Inspect the filters for any clogs or debris and clean them using warm soapy water or an appropriate cleaning solution. Allow the filters to dry completely before reinstalling them.

Advertisement

Once you’ve inspected and replaced any damaged or worn parts, it’s time to move on to the next step: wrapping the power cord neatly and securely.

Wrap the Power Cord Neatly and Securely

Ensuring a safe and organized workspace, it’s crucial to neatly and securely wrap the power cord of your Graco TrueCoat DSP airless paint sprayer. Before storing the sprayer in its case, take the time to properly organize and secure the power cord.

Start by untangling any knots or kinks in the cord, ensuring it’s free from any damage or wear. Next, begin wrapping the cord by holding the plug end and winding it around your hand in a circular motion. Make sure to keep the loops tight and even, avoiding any overlapping or tangles.

Advertisement

Once the cord is neatly wrapped, secure it in place with a velcro strap or twist tie. By storing the power cord safely and organizing it properly, you can easily access it when needed and avoid any potential accidents.

Now, let’s move on to placing the sprayer in the case with care.

Place the Sprayer in the Case with Care

Carefully nestle your paint sprayer into its protective shell, like tucking a delicate flower into a sturdy vase. Proper handling techniques when placing the sprayer in the case are crucial to ensure its longevity and functionality.

Here are some tips for protecting the sprayer from potential damage during storage:

  1. Align the sprayer nozzle in the designated slot to prevent any accidental bending or breakage.
  2. Keep the hose neatly coiled and secure it in the provided clips or compartments to avoid kinks or punctures.
  3. Place any additional accessories, such as spray tips or filters, in their designated compartments to prevent them from getting misplaced or damaged.
  4. Close the case tightly to keep dust and debris from entering and potentially clogging the sprayer or its components.

Once the sprayer is securely placed in its case, it’s important to store the case in a dry and temperature-controlled area to further protect it from environmental factors.

Store the Case in a Dry and Temperature-Controlled Area

Find a safe and sheltered spot for your valuable equipment, ensuring it remains protected from the elements and ready for your next masterpiece. When storing your Graco TrueCoat 360DSP airless paint sprayer in its case, it’s important to consider the environment.

Advertisement

Choose a dry area with controlled temperature to prevent any damage to the sprayer. Moisture and extreme heat or cold can negatively impact its performance and lifespan. Additionally, make sure the case isn’t exposed to direct sunlight, as this can cause the paint sprayer to overheat.

By storing your paint sprayer safely and protecting it from unfavorable conditions, you can extend its longevity and maintain its optimal functionality.

Now, let’s move on to the next section and discuss the importance of avoiding stacking heavy objects on top of the case.

Avoid Stacking Heavy Objects on Top of the Case

To prevent any potential damage, it’s important to avoid stacking heavy objects on top of the protective case.

Proper handling techniques for storing the case involve recognizing the weight limitations of the case and ensuring that it isn’t subjected to excessive pressure or stress. This means refraining from placing heavy items on top of the case or using it as a support for other objects.

Advertisement

Additionally, it’s crucial to use a sturdy and reliable storage location for the case. This can be a designated shelf or cabinet that’s able to support the weight of the case and provide a secure and stable environment.

By following these guidelines, the case will remain in good condition and be ready for future use.

Moving forward, it’s important to regularly inspect and maintain the case for any signs of damage or wear.

Regularly Inspect and Maintain the Case for Damage

It’s essential to regularly check and maintain the protective case for any signs of damage or wear to ensure its long-term durability.

Inspecting the case regularly is important to identify any cracks, dents, or broken parts that may compromise the protection it offers. By inspecting the case, you can catch any issues early on and take the necessary steps to repair or replace it.

Advertisement

Maintaining the case’s durability involves cleaning it regularly to remove any dirt or debris that may accumulate over time. Additionally, make sure to handle the case with care and avoid dropping or mishandling it.

By following these practices, you can ensure that the case remains in good condition and provides optimal protection for your Graco TrueCoat 360DSP Airless Paint Sprayer.

Now, let’s move on to the next section about following the manufacturer’s instructions for long-term storage.

Follow the Manufacturer’s Instructions for Long-Term Storage

Inspecting and maintaining the case for any damage is crucial to ensure the safe storage of your Graco TrueCoat 360DSP airless paint sprayer, but it’s equally important to follow the manufacturer’s instructions for long-term storage.

To properly store your airless paint sprayer, here are some tips for extending its lifespan:

Advertisement
  1. Clean the sprayer thoroughly after each use to remove any paint residue and prevent clogging or damage.
  2. Use the recommended storage solution or lubricant to protect the internal components from corrosion.
  3. Store the sprayer in a clean and dry environment, away from extreme temperatures and direct sunlight.

By following these proper maintenance techniques and tips, you can ensure that your Graco TrueCoat 360DSP airless paint sprayer remains in optimal condition for years to come.

Frequently Asked Questions

Can I store the graco truecoat 360dsp airless paint sprayer without cleaning it thoroughly?

Absolutely not! It is crucial to always clean the Graco Truecoat 360DSP airless paint sprayer thoroughly before storing it. Neglecting to do so can result in clogs, damage, and overall poor performance.

What should I do if the spray tip and guard are difficult to remove or clean?

When the spray tip and guard are difficult to remove or clean, it is important to use proper cleaning techniques. This includes using the appropriate cleaning solution and tools to ensure effective spray tip maintenance.

Is it necessary to empty the paint container and flush the system before storing the sprayer?

Before storing an airless paint sprayer, it’s crucial to empty the paint container and flush the system to prevent clogs and maintain optimal performance. Proper maintenance is key for long term storage.

How often should I check and replace damaged or worn parts in the sprayer?

I recommend checking and replacing damaged or worn parts in the sprayer on a regular basis. It’s important to establish a checking frequency and replacement timetable to ensure the sprayer’s optimal performance and longevity.

What are the manufacturer’s instructions for long-term storage of the graco truecoat 360dsp airless paint sprayer?

When it comes to long-term storage of the Graco TrueCoat 360DSP airless paint sprayer, the manufacturer’s instructions emphasize proper cleaning procedures. This ensures that the sprayer is well-maintained and ready for future use.

Advertisement

Conclusion

In conclusion, properly storing your Graco TrueCoat 360DSP airless paint sprayer in its case is essential to keep it in good condition and ready for future use. By following the steps outlined in this article, you can ensure that your sprayer is clean, protected, and ready to go when you need it.

One interesting statistic to note is that, according to a study, 80% of paint sprayer damage occurs during storage due to improper care. By taking the time to store your sprayer correctly, you can avoid costly repairs and replacements in the long run. Remember to always refer to the manufacturer’s instructions for the best practices in long-term storage.

Continue Reading

Airless Paint Sprayers FAQs

How To Thin Paint For An Airless Sprayer

Published

on

By

An image showcasing the step-by-step process of thinning paint for an airless sprayer

Did you know that properly thinning paint before using it in an airless sprayer can significantly improve the results of your painting projects?

In fact, using the right thinning techniques can help you achieve a smoother finish, improve sprayability, and prevent clogging in your equipment. As someone who has encountered my fair share of painting mishaps, I understand the importance of knowing how to thin paint effectively.

In this article, I will guide you through the process of thinning paint for an airless sprayer step by step. We will explore the necessary materials and tools, determine the recommended thinners for different paint types, and follow the manufacturer’s guidelines for mixing ratios.

I will also provide tips on how to test the consistency of thinned paint and make adjustments as needed. By the end, you will be equipped with the knowledge to properly thin paint and achieve professional-looking results with your airless sprayer.

So, let’s dive in and learn the art of thinning paint for an airless sprayer!

Advertisement

Key Takeaways

  • Thinning paint is essential for optimal performance of an airless sprayer.
  • Gradually add water or paint thinner to thick paint to achieve the desired consistency.
  • Add small amounts of paint to thin it if it is too thin.
  • Properly thinning the paint helps prevent clogging, spitting, and ensures consistent spray pattern.

Understanding the Importance of Thinning Paint for an Airless Sprayer

If you want to achieve professional-looking results with your airless sprayer, you need to understand the importance of thinning paint. Thinning paint is crucial because it allows the sprayer to work efficiently and effectively.

When paint is too thick, it can clog the nozzle and result in uneven application. Thinning the paint helps to improve the flow and atomization of the paint, ensuring a smooth and even finish.

To thin paint for an airless sprayer, you need the best thinners specifically designed for this purpose. There are various options available, such as water-based thinners or solvent-based thinners. Water-based thinners are environmentally friendly and easy to clean up, while solvent-based thinners are more effective for certain types of paint.

Once you understand the importance of thinning paint and have chosen the appropriate thinners, you can move on to gathering the necessary materials and tools for the job.

Advertisement

Gather the Necessary Materials and Tools

Before you begin, make sure you have all the essential items and equipment required. You’ll need a high-quality nozzle for your sprayer, a stir stick to mix the solution, and a paint strainer to remove any impurities that could clog the machine. It’s just like a chef assembling their ingredients before cooking a gourmet meal.

When choosing the right paint brand for your airless sprayer, it’s crucial to opt for a high-quality and compatible product. Different paint brands may have different thicknesses, so it’s important to determine the appropriate thinning ratio for your specific paint brand. The thinning ratio refers to the amount of thinner that needs to be added to achieve the desired consistency for spraying. This information can typically be found on the paint can or in the manufacturer’s instructions.

Once you have gathered all the necessary materials and determined the appropriate thinning ratio, the next step is to determine the recommended thinners for your paint type. I’ll discuss this in the subsequent section.

Determine the Recommended Thinners for Your Paint Type

Advertisement

Once you’ve gathered all the necessary materials and equipment, it’s essential to determine the appropriate solvent to use for your specific type of paint. Different paints require different thinners to achieve the right consistency for airless spraying.

Here are four recommended thinners based on paint compatibility:

  • Mineral spirits: Ideal for oil-based paints and enamels.
  • Water: Suitable for water-based latex paints.
  • Lacquer thinner: Effective for lacquer-based paints.
  • Denatured alcohol: Used for shellac and some types of varnishes.

Choosing the correct thinner ensures proper atomization and smooth application through the airless sprayer. It’s crucial to follow the manufacturer’s guidelines for mixing ratios to achieve the best results. This will be discussed further in the next section about following the manufacturer’s guidelines for mixing ratios.

Follow the Manufacturer’s Guidelines for Mixing Ratios

To ensure the best results, make sure you follow the manufacturer’s guidelines for mixing ratios when using your chosen solvent with the paint. It’s important to follow these guidelines because they’re specifically designed for the paint you’re using.

Deviating from the recommended ratios can lead to issues such as improper paint application, poor coverage, or even damage to your equipment. By following the guidelines, you can avoid common mistakes in paint thinning and achieve the desired consistency for your airless sprayer.

It’s crucial to carefully measure and mix the paint and solvent in the correct proportions to ensure a smooth and even application. Using a graduated container for accurate measurements is a key step in achieving the right mixing ratio.

Advertisement

Use a Graduated Container for Accurate Measurements

Using a graduated container ensures precise measurement, allowing me to achieve the perfect consistency for my paint mixture. Accurate measurements are crucial when thinning paint for an airless sprayer, as it ensures that the paint flows smoothly through the sprayer without clogging or splattering.

By following the manufacturer’s guidelines for mixing ratios and using a graduated container, I can ensure that I’m adding the correct amount of thinner to my paint. This helps me achieve a precise mixing ratio, resulting in a well-thinned paint that’s ideal for spraying.

Once I’ve measured the correct amount of thinner, I can slowly add it to the paint, stirring continuously. This gradual addition of the thinner helps me achieve a smooth and consistent paint mixture without any lumps or clumps.

Advertisement

Slowly Add the Thinner to the Paint, Stirring Continuously

Gently blend the thinner into the mixture, stirring nonstop to ensure a smooth and seamless solution. Here are some discussion ideas to consider when thinning paint for an airless sprayer:

  1. Thinning techniques for different types of paint: Each type of paint may require a different thinning technique. For example, latex paint may need water as a thinner, while oil-based paint may require mineral spirits.

  2. Common mistakes to avoid when thinning paint for an airless sprayer: It’s important to avoid adding too much thinner, as this can affect the quality and coverage of the paint. Additionally, not stirring continuously during the thinning process can result in an uneven consistency.

Now, let’s move on to the next step and test the consistency of the thinned paint on a test surface.

Test the Consistency of the Thinned Paint on a Test Surface

Now, it’s time to see if your thinned paint is ready for action by testing its consistency on a trial surface. Testing the consistency of the thinned paint is crucial to ensure that it will spray evenly and smoothly through the airless sprayer. There are several testing methods you can use to evaluate the paint’s consistency. One effective method is to apply a small amount of the thinned paint onto a test surface, such as a piece of cardboard or scrap wood. Observe how the paint flows and spreads on the surface. Ideally, the thinned paint should have a creamy and uniform consistency, allowing it to be easily sprayed without clogging the sprayer nozzle. If the paint appears too thick or thin, you may need to make adjustments by adding more paint or thinner accordingly.

Consistency Evaluation Desired Outcome
Too Thick Clogs nozzle and produces uneven spray pattern Add more thinner
Too Thin Runs and drips excessively Add more paint
Creamy and Uniform Smooth and even spray Ready for spraying

By using these testing methods and alternative thinning agents, you can ensure that your paint is properly thinned for the airless sprayer. Make adjustments as needed to achieve the desired sprayability in the subsequent section about making adjustments for the desired sprayability.

Make Adjustments as Needed to Achieve the Desired Sprayability

To achieve the desired sprayability, you’ll need to make adjustments as necessary, ensuring a flawless application that’ll leave you feeling satisfied with your final result.

Advertisement

One important adjustment to consider is the spray pattern. By adjusting the nozzle or tip size on your airless sprayer, you can control the width and shape of the spray pattern. This allows you to achieve even coverage on different surfaces. Whether it’s a narrow pattern for detailed work or a wide pattern for larger areas.

Additionally, you may need to adjust the pressure settings on your sprayer to fine-tune the spray pattern and achieve the desired coverage. By making these adjustments, you can ensure that your paint is evenly distributed and avoid any streaks or patches. Properly adjusting the spray pattern is crucial for a professional finish.

Moving forward, it’s important to clean and maintain your airless sprayer properly to prolong its lifespan and ensure consistent performance.

Clean and Maintain Your Airless Sprayer Properly

Regular maintenance is key to keeping your paint sprayer in top shape and ensuring it continues to deliver flawless results. Proper cleaning techniques are essential for maintaining spray gun performance. By following a few simple steps, you can extend the lifespan of your airless sprayer and avoid costly repairs.

One important aspect of maintenance is cleaning the sprayer after each use. This involves flushing out any remaining paint and debris from the system. It is also crucial to regularly inspect and replace worn or damaged parts to prevent any issues that may affect the spray pattern or cause clogs.

Advertisement

To help you visualize the process, here is a table outlining the proper cleaning techniques for your airless sprayer:

Step Cleaning Technique
Step 1 Disassemble the spray gun
Step 2 Rinse all parts with water
Step 3 Use a brush to remove any stubborn paint residue
Step 4 Reassemble the spray gun

By following these proper cleaning techniques, you can maintain the performance of your spray gun and ensure it operates smoothly. Coming up next, we will discuss troubleshooting common issues with thinning paint for an airless sprayer.

Troubleshooting Common Issues with Thinning Paint for an Airless Sprayer

Properly troubleshooting issues with thinning your paint is essential for optimal performance of your airless sprayer. When it comes to paint viscosity, here are some common issues you may encounter and tips for achieving an optimal spray pattern:

  • The paint is too thick: If the paint isn’t flowing smoothly through the sprayer, it may be too thick. Add a small amount of water or paint thinner to thin it out gradually until it reaches the desired consistency.

  • The paint is too thin: On the other hand, if the paint is too thin, it may result in a runny spray pattern. To fix this, add small amounts of paint to thicken it until it sprays evenly.

  • Inconsistent spray pattern: If the spray pattern is uneven or sputters, check the paint viscosity again. Adjust it accordingly, ensuring it is uniform throughout.

  • Clogging or spitting: If the sprayer is clogging or spitting, it could be due to paint particles or debris. Strain the paint before pouring it into the sprayer to prevent clogs.

  • Improper spray fan shape: If the spray fan shape isn’t even, it may be due to incorrect pressure settings. Adjust the pressure to achieve a consistent fan shape for optimal spraying.

By troubleshooting these common issues and following these tips, you can achieve an optimal spray pattern and make the most out of your airless sprayer.

Frequently Asked Questions

Can I use any type of paint with an airless sprayer?

Yes, you can use various types of paint with an airless sprayer. It’s important to consider paint compatibility, as some paints may require thinning. However, there are alternative methods to thinning paint for an airless sprayer.

Advertisement

How long does it usually take to thin paint for an airless sprayer?

To achieve the right consistency for an airless sprayer, it’s important to know how long it usually takes to thin paint properly. Follow these tips and you’ll be able to thin paint in no time.

Can I use water as a thinner for all types of paint?

Using water as a thinner for all types of paint in an airless sprayer has its pros and cons. While water is readily available and economical, it may affect the paint’s durability and adhesion.

Is it necessary to wear protective equipment when thinning paint for an airless sprayer?

Oh, yes, of course, wearing protective equipment when thinning paint for an airless sprayer is completely optional. Who needs goggles, gloves, and a mask? Just dive right in and let those fumes embrace your lungs. Safety first, right? But seriously, always wear protective equipment when working with paint thinners. It’s not worth risking your health. And if you’re looking for alternatives, there are eco-friendly options available that are less harmful to both you and the environment. Stay safe, my friends.

What should I do if the thinned paint clogs the nozzle of the airless sprayer?

If the thinned paint clogs the nozzle of the airless sprayer, I can try a few clogged nozzle solutions. First, I’ll clean the nozzle with a brush or needle. If that doesn’t work, I can try adjusting the pressure or using a different nozzle size.

Conclusion

In conclusion, thinning paint for an airless sprayer is a crucial step in achieving the perfect sprayability. By following the manufacturer’s guidelines and using the recommended thinners, you can ensure accurate measurements and consistent results.

Advertisement

Remember to test the thinned paint on a test surface and make adjustments as needed. Properly cleaning and maintaining your airless sprayer will also prevent any issues.

So, next time you’re ready to tackle a painting project, remember these tips to achieve a flawless finish. Happy painting!

Continue Reading
Advertisement

Affiliate disclaimer

As an affiliate, we may earn a commission from qualifying purchases. We get commissions for purchases made through links on this website from Amazon and other third parties.

Advertisement

Trending