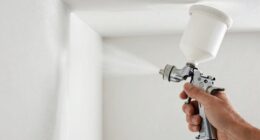
Did you know that airless sprayers have become a popular choice for painting projects because of their efficiency in quickly and effectively applying paint?
However, if you’ve ever used one, you know that cleaning the sprayer can be a daunting task, especially when the paint has dried. But fear not! In this article, I will guide you through the process of cleaning dry paint from your airless sprayer.
First, we will gather the necessary supplies and remove any excess paint from the sprayer. Then, we’ll soak the sprayer parts in warm soapy water and use a brush or sponge to scrub off the dried paint.
After rinsing the parts thoroughly, we’ll focus on cleaning the sprayer nozzle and filters. Once everything is clean, we’ll reassemble the sprayer and test it for proper functionality.
By following these steps, you’ll be able to maintain the lifespan of your airless sprayer and ensure that it performs at its best for future painting projects.
Let’s get started!
Key Takeaways
- Scrub and rinse filters and screens thoroughly to remove dry paint buildup
- Properly disassemble and store the sprayer parts in a clean, dry space to prevent paint accumulation
- Regular cleaning and maintenance of the sprayer extends its lifespan and ensures optimal functionality
- Use protective caps or covers to shield the sprayer from dust and debris during storage.
Gather the necessary supplies
Now, it’s time for you to gather all the supplies you’ll need to clean that pesky dry paint from your airless sprayer. Here’s a supplies checklist to ensure you have everything you need:
- a bucket
- warm soapy water
- a cleaning brush
- a small wire brush
- a toothbrush
- a wrench
- safety gloves
These items will help you effectively remove the dry paint from your sprayer. Once you have gathered all the necessary supplies, it’s important to know the best cleaning techniques. Start by disassembling the sprayer and removing any detachable parts. Soak these parts in warm soapy water for about 15-20 minutes to loosen the paint. Use the cleaning brush and toothbrush to scrub away any remaining paint.
Now, let’s move on to the next section where we will learn how to remove any excess paint from the sprayer.
Remove any excess paint from the sprayer
First, make sure you get rid of any extra color that might be lingering on your device. To remove dried paint from your airless sprayer, there are several cleaning techniques you can use. Refer to the table below for a quick overview of these methods:
| Cleaning Technique | Description |
|---|---|
| Warm Water Soak | Soak the sprayer parts in warm soapy water to loosen the dried paint. |
| Vinegar Solution | Create a mixture of vinegar and water to dissolve the stubborn paint. |
| Paint Remover | Apply a paint remover specifically designed for dried paint and follow the instructions on the label. |
| Wire Brush | Use a wire brush to scrub off the remaining dried paint from the sprayer parts. |
| Solvent Flush | Flush the sprayer with a solvent like mineral spirits to dissolve the dried paint residue. |
Once you have removed any excess paint from the sprayer, you can proceed to the next step of soaking the sprayer parts in warm soapy water.
Soak the sprayer parts in warm soapy water
After removing any excess paint, the next step involves immersing the components of the sprayer in a solution of warm water and soap to effectively clean and prepare them for further use. To ensure a thorough cleaning, follow these steps:
-
Use a cleaning solution made specifically for removing paint residue. These solutions are designed to break down dried paint and make it easier to remove.
-
If you don’t have a cleaning solution, you can try using alternative methods such as vinegar or rubbing alcohol. These substances can also help dissolve the dried paint.
-
Let the sprayer parts soak in the warm soapy water for at least 30 minutes to loosen the dried paint.
Once the components have soaked, they can be easily cleaned by using a brush or sponge to scrub off the dried paint. This will ensure that the sprayer is ready for its next use.
Use a brush or sponge to scrub off the dried paint
To effectively remove any remaining residue, you can easily scrub off the dried paint using a brush or sponge. Both options have their advantages.
A brush provides more control and is ideal for tackling stubborn paint spots. Its bristles can penetrate into crevices and remove dried paint effectively.
On the other hand, a sponge is gentle and can be used on delicate surfaces. It absorbs the paint residue and prevents it from spreading.
If you prefer alternative cleaning methods, you can consider using a nylon scrub pad or even a toothbrush for smaller parts.
Once you’ve thoroughly scrubbed off the dried paint, you can proceed to the next step of rinsing the parts thoroughly with clean water, ensuring all traces of paint are removed.
Rinse the parts thoroughly with clean water
Now, you’re going to want to give those parts a good rinse with some fresh water. Cleaning techniques for removing dry paint from airless sprayer parts can vary, but rinsing with clean water is a crucial step. Here are three important reasons why rinsing is necessary:
- Dilution: Water helps dilute the paint residue, making it easier to remove.
- Dislodging: The force of water can dislodge any loose paint particles that may still be clinging to the parts.
- Preventing clogs: Rinsing ensures that all paint remnants are removed, preventing any potential clogs or blockages in the sprayer.
After a thorough rinse, you can move on to the next step of removing stubborn paint stains, which involves using a solvent or paint thinner. This will effectively tackle any remaining dried paint that may be resistant to water.
Use a solvent or paint thinner for stubborn paint stains
Using a solvent or paint thinner is an effective way to tackle stubborn stains that may resist water. When dealing with dry paint on an airless sprayer, these stains can be particularly challenging to remove. By applying a solvent or paint thinner to the affected parts, you can break down the dried paint and make it easier to clean. It’s important to choose a solvent or paint thinner that’s compatible with the type of paint used in the sprayer. Also, make sure to follow the manufacturer’s instructions and safety guidelines when working with these chemicals.
Discussion ideas:
-
Alternative methods for removing stubborn paint stains from airless sprayers: Some alternatives to using a solvent or paint thinner include using a cleaning agent specifically designed for paint removal or using a pressure washer to blast off the dried paint.
-
Tips for preventing paint buildup in airless sprayers: Regularly cleaning the sprayer after each use, using a filter or strainer to catch any debris, and storing the sprayer properly can help prevent paint buildup and make cleaning easier in the future.
To further clean the airless sprayer, the next step is to scrub the sprayer nozzle with a small brush.
Scrub the sprayer nozzle with a small brush
Take a moment to gently scrub the tiny nozzle of your sprayer with a small brush, ensuring that every nook and cranny is free from any lingering residue. This step is crucial for maintaining the performance and longevity of your airless sprayer.
Using a small brush allows you to reach the intricate parts of the nozzle that may be difficult to clean otherwise. Be thorough in your scrubbing, paying attention to any stubborn paint stains that may have dried on the nozzle. If the dry paint proves to be stubborn, you can consider using a solvent or paint thinner to aid in the cleaning process. However, be cautious and follow the manufacturer’s instructions when using these chemicals.
Alternatively, there are specialized cleaning solutions available in the market specifically designed for sprayer maintenance.
With the nozzle cleaned, we can now move on to the next step of cleaning the sprayer filters and screens.
Clean the sprayer filters and screens
Ensure that your sprayer is in optimal condition by giving the filters and screens a thorough cleaning. Cleaning techniques and maintenance tips are essential to keep your sprayer running smoothly. Start by disassembling the sprayer and removing the filters and screens. Rinse them with warm water to remove any loose paint or debris. For stubborn residue, use a mild detergent and a soft brush to gently scrub the filters and screens. Be careful not to damage them. Once clean, rinse them thoroughly and allow them to dry completely before reassembling the sprayer. This regular maintenance will prevent clogs and ensure proper functionality. Now that the filters and screens are clean, it’s time to reassemble the sprayer and test for proper functionality.
Reassemble the sprayer and test for proper functionality
After thoroughly cleaning the filters and screens, carefully reassemble the sprayer and conduct a functionality test to ensure it’s operating correctly.
Here are some reassembling tips and troubleshooting common issues to keep in mind:
- Make sure to reattach all the components securely, including the nozzle, tip guard, and spray gun.
- Double-check that the seals and O-rings are in good condition and properly seated.
Test the sprayer by running water through it to check for any leaks or blockages. Adjust the pressure settings as needed to achieve the desired spray pattern and flow rate.
Once you’ve reassembled the airless sprayer, it’s important to store it properly to prevent future paint buildup. This’ll help maintain its functionality and prolong its lifespan.
Store the sprayer properly to prevent future paint buildup
Properly storing your sprayer can significantly extend its lifespan, preventing unnecessary maintenance and costly repairs. Did you know that by implementing the right storage techniques, you can reduce the risk of paint buildup by up to 80%?
To prevent future paint buildup in your airless sprayer, it’s essential to store it properly. First, make sure to thoroughly clean the sprayer after each use, removing all traces of paint from the system. Then, disassemble the sprayer and store the individual parts in a clean, dry, and well-ventilated space.
It’s important to protect the sprayer from extreme temperatures and humidity, as these conditions can contribute to paint drying and clogging the system. Additionally, consider using storage solutions like protective caps or covers to prevent dust and debris from entering the sprayer.
By following these proper storage techniques, you can effectively prevent paint buildup and ensure the optimal functionality of your airless sprayer.
Frequently Asked Questions
How long should the sprayer parts be soaked in warm soapy water?
I usually soak the sprayer parts in warm soapy water for about 30 minutes. This helps to loosen and dissolve any dry paint residue, making it easier to clean and maintain the sprayer.
What type of brush or sponge is best for scrubbing off dried paint?
The best brush or sponge options for cleaning dried paint from an airless sprayer are nylon brushes or abrasive sponges. Alternatively, you can use a wire brush or a paint scraper to remove the dried paint effectively.
Should the sprayer nozzle be disassembled before scrubbing?
No, it’s like trying to clean a clogged drain with your eyes closed. You need to disassemble the sprayer nozzle for effective paint removal. Follow these techniques for sprayer nozzle cleaning.
How often should the sprayer filters and screens be cleaned?
I clean the sprayer filters and screens regularly to ensure proper functioning. Cleaning frequency depends on usage, but a general guideline is to clean them after every 20-30 gallons of paint. Regular maintenance tips help prolong the sprayer’s lifespan.
What is the recommended method for storing the sprayer to prevent future paint buildup?
To prevent future paint buildup, it is recommended to store the airless sprayer in a clean and dry place. Ensure that all paint is thoroughly cleaned from the sprayer and its components before storage.
Conclusion
After following these steps, cleaning the dry paint from my airless sprayer was a breeze. With the right supplies and a little elbow grease, I was able to remove every trace of paint and restore the sprayer to its original condition.
It’s amazing how a simple cleaning routine can make such a difference in the functionality and longevity of a tool. Now, I can confidently store my sprayer knowing that it’s ready for my next painting project.