Connect with us

Airless Paint Sprayers FAQs

How To Use Airless Paint Sprayer With 1 Gallon Can

Published

on

An image showcasing an individual holding a 1-gallon can of paint, effortlessly operating an airless paint sprayer

I recall my initial experience with an airless paint sprayer equipped with a 1-gallon can. It transformed the way I approached painting. The level of efficiency and ease it provided was unparalleled in my previous experiences. Gone were the days of laborious brush strokes and unsightly roller marks. Using the airless paint sprayer allowed me to obtain a sleek, expert-grade finish much quicker. It felt like I had entered an entirely new realm of painting possibilities.

In this article, I will guide you through the process of using an airless paint sprayer with a 1-gallon can. From gathering the necessary materials to troubleshooting common issues, I will provide you with all the information you need to successfully use this tool.

So, let’s dive in and discover the wonders of the airless paint sprayer together.

Key Takeaways

  • Properly clean and maintain the airless paint sprayer after each use to prevent clogs and ensure optimal performance.
  • Store the sprayer in a clean and dry environment to prolong its lifespan.
  • Follow a regular maintenance schedule, checking for worn or damaged parts and lubricating necessary components.
  • Clean the sprayer thoroughly after use using warm soapy water and a brush, paying attention to all parts and drying it completely to prevent moisture damage.

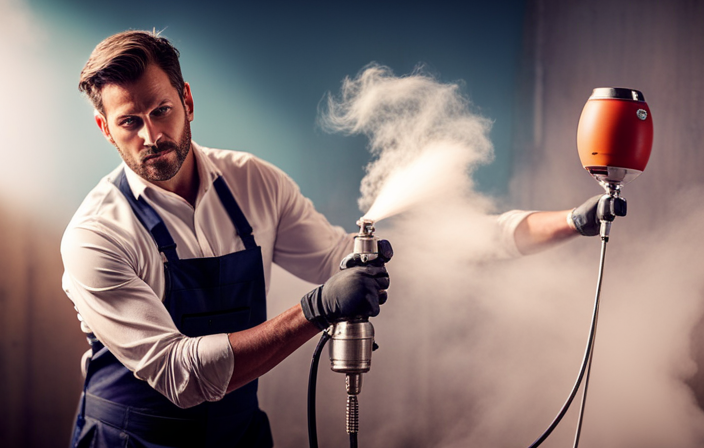
Introduction to Airless Paint Sprayers

Now let’s dive into the nitty-gritty of airless paint sprayers and how they can revolutionize your painting projects!

Advertisement

Airless paint sprayers are powerful tools that can make your painting tasks much more efficient and effective.

One of the biggest benefits of using airless paint sprayers is their ability to provide a smooth and even finish, without any brush marks or roller lines. They also offer a faster application time, allowing you to complete your projects in a fraction of the time compared to traditional methods.

However, it’s important to consider the pros and cons of airless paint sprayers before diving in. They can be more expensive than other painting tools and require proper maintenance.

With that in mind, let’s move on to the next section and discuss how to gather your materials.

Gather Your Materials

First, grab all the necessary items you’ll need like the 1-gallon can and the airless paint sprayer. To ensure a smooth painting process, it’s important to gather the right materials for the job. Here is a handy table detailing the materials needed:

Advertisement
Materials Purpose
1-gallon can Holds the paint
Airless paint sprayer Applies the paint
Safety goggles Protects your eyes
Respirator mask Guards against fumes

Before starting, it’s crucial to take safety precautions. Wear safety goggles to shield your eyes from any potential splatters, and use a respirator mask to protect yourself from harmful fumes. Once you have gathered all the materials and taken necessary precautions, you can move on to the next step: preparing the surface.

Prepare the Surface

Before I begin using my airless paint sprayer with a 1 gallon can, I need to prepare the surface properly.

This involves cleaning and sanding the area to ensure a smooth and even finish.

Advertisement

I will also need to apply a primer to the surface before painting to help the paint adhere better and provide a more durable finish.

Cleaning and Sanding

To start cleaning and sanding, you’ll want to gather your supplies and make sure you have a clean workspace. Here’s what you’ll need:

  1. Cleaning tools: Grab a bucket of soapy water, a sponge, and some clean rags. This will help remove any dirt, grease, or debris from the surface before sanding.

  2. Sanding techniques: Begin by using a coarse sandpaper to roughen up the surface. This will help the paint adhere better. Then, switch to a finer grit sandpaper to smooth out any imperfections and create a clean, even surface.

  3. Dust removal: After sanding, use a tack cloth or a vacuum with a brush attachment to remove any dust particles from the surface. This will ensure a smooth finish.

  4. Final wipe down: Before priming, give the surface a final wipe down with a clean, damp cloth to remove any remaining dust or residue.

Now that the surface is clean and smooth, we can move on to priming it.

Priming the Surface

Once the surface has been cleaned and sanded to perfection, it’s time to give it a fresh coat of primer. This primer acts as a shield of armor, preparing the surface for the transformative power of color.

Surface preparation is crucial for achieving a flawless finish, and primer plays a key role in this process. It not only helps create a smooth surface by filling in imperfections but also improves the adhesion of the paint.

Advertisement

When applying primer, it’s important to use proper painting techniques. Start with a thin and even coat, allowing it to dry completely before applying additional coats. This ensures optimal coverage and durability of the final paint job.

Now that the surface is primed and ready, let’s move on to setting up the airless paint sprayer for a professional finish.

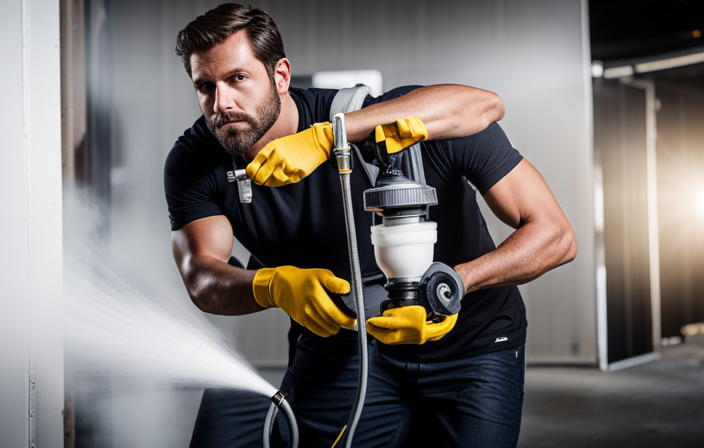
Set Up the Airless Paint Sprayer

To set up the airless paint sprayer, follow these steps:

  1. Grab the airless paint sprayer and position it next to the 1-gallon can of paint.
  2. Attach the spray gun to the hose, ensuring a secure connection.
  3. Adjust the pressure control knob according to the manufacturer’s instructions, considering the type of paint being used.
  4. Prepare the paint can by removing any lids or seals.
  5. Pour the paint into the sprayer, ensuring a smooth and clog-free process.

Now that the airless paint sprayer is set up and the paint can is ready, we can move on to the next section: filling the 1-gallon can with vibrant paint.

Fill the 1-Gallon Can

To fill the 1-gallon can, I pour the paint directly into the can, making sure not to spill any.

If the paint needs to be mixed, I use a stir stick to thoroughly combine the different components until they are well-blended.

Advertisement

It is important to ensure that the paint is properly mixed before using the airless paint sprayer to achieve a smooth and even finish.

Pouring the Paint into the Can

Alright, now that you’ve got your trusty airless paint sprayer and a gallon can of paint, let’s dive into the art of pouring that colorful goodness into the can without making a mess that would make Jackson Pollock proud.

To master the art of pouring paint into a 1-gallon can, here are a few paint pouring techniques to keep in mind, while avoiding any potential paint spills:

  • Hold the can steady and at a slight angle to prevent splashing.
  • Pour the paint slowly and steadily to ensure an even flow.
  • Keep a steady hand and pour from a low height to minimize any splattering.
  • If the paint level gets too high, pour a small amount back into the original paint container.

By following these techniques, you can efficiently pour paint into the 1-gallon can without any messy mishaps.

Now, let’s move on to the next step of mixing the paint if necessary.

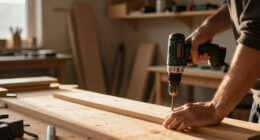
Mixing the Paint if Necessary

Once you’ve successfully poured the paint into the can, you might need to mix it thoroughly before you can start painting. Mixing the paint is crucial to ensure an even consistency and optimal results.

Advertisement

There are a few techniques you can use to mix the paint effectively. One method is to use a stirring stick or a paint mixing attachment on a drill. Insert the stick or attachment into the can and mix the paint in a circular motion, making sure to reach the bottom and sides of the can.

Another technique is to gently roll the can back and forth on a flat surface, allowing the paint to blend evenly.

Whichever method you choose, be sure to mix the paint until it reaches a smooth and uniform consistency.

Once the paint is mixed to your satisfaction, you can proceed to the next section and start painting with your airless paint sprayer.

Start Painting

Now that you’ve got your airless paint sprayer ready to go, it’s time to dive in and let the colors dance upon your canvas. Before you start painting, it’s important to consider some painting techniques and color selection. By understanding different techniques such as cross-hatching, stippling, or blending, you can create beautiful textures and effects on your surface. Additionally, selecting the right colors can enhance the mood and ambiance of your artwork.

Advertisement

To help you visualize the impact of color selection, here’s a table showcasing the emotions commonly associated with different colors:

Color Emotion
Red Passion
Blue Calmness
Yellow Happiness
Green Tranquility

By utilizing these painting techniques and carefully selecting colors, you can truly bring your artwork to life. Now, let’s transition into the next section about maintaining the sprayer.

Maintain the Sprayer

When it comes to maintaining an airless paint sprayer, there are three key points to keep in mind:

  1. Cleaning the sprayer after use: It is crucial to thoroughly clean the sprayer after each use to prevent clogs and ensure optimal performance.

  2. Proper storage: Storing the sprayer correctly is important for prolonging its lifespan. It should be kept in a clean and dry environment to prevent any damage.

  3. Regular maintenance: Regular maintenance is essential for keeping the sprayer running smoothly. This includes checking for any worn or damaged parts and lubricating the necessary components.

Taking these steps will help you maintain your airless paint sprayer and ensure its longevity and efficiency.

Cleaning the Sprayer After Use

To properly maintain the airless paint sprayer, it is imperative to clean it thoroughly after each use. Cleaning techniques for the sprayer include:

Advertisement
  • Using warm soapy water and a brush to remove any paint residue.
  • Paying attention to all the nooks and crannies of the sprayer, ensuring that every part is clean.

After cleaning, it is essential to dry the sprayer completely to prevent any moisture from causing damage. One method is to:

  • Use compressed air to blow out any excess water.
  • Followed by air drying or using a cloth to remove any remaining moisture.

Proper storage and maintenance of the sprayer is crucial for its longevity and optimal performance. This includes:

  • Storing it in a clean and dry area.
  • Checking the filters regularly.
  • Performing routine maintenance tasks.

Proper Storage and Maintenance

To ensure your sprayer stays in top shape and performs well for a long time, it’s important to store and maintain it properly. Here are some tips for storage and a maintenance schedule to follow:

  1. Clean the sprayer thoroughly after each use to remove any paint residue and prevent clogging. Use warm water and a mild detergent to clean the nozzle, gun, and other parts.

  2. Store the sprayer in a clean and dry area, away from extreme temperatures and direct sunlight. Protect it from dust, dirt, and moisture by covering it with a cloth or plastic bag.

  3. Follow a regular maintenance schedule, which includes checking and replacing worn-out parts, lubricating moving components, and inspecting the sprayer for any signs of damage or leaks.

Proper storage and maintenance will extend the lifespan of your sprayer and minimize the risk of malfunctions.

In the next section, we will discuss troubleshooting common issues to help you resolve any problems that may arise.

Troubleshooting Common Issues

If you’re experiencing any issues while using the airless paint sprayer with a 1 gallon can, there are a few common problems you might encounter.

One potential issue could be clogging in the spray tip. To resolve this, you should clean the tip thoroughly and ensure it is clear of any dried paint or debris.

Another common problem is an uneven spray pattern. This could be due to an incorrect spray tip size or improper pressure settings. Make sure to choose the appropriate tip and adjust the pressure accordingly.

Advertisement

Lastly, if the paint is dripping or splattering, it could be due to a worn-out or damaged pump diaphragm. In this case, you should replace the diaphragm to fix the issue.

Now, let’s move on to the next section about safety tips and precautions for using the airless paint sprayer.

Safety Tips and Precautions

To ensure your safety and take necessary precautions when operating the airless paint sprayer with a 1-gallon can, follow these tips:

  • Properly maintain your paint sprayer by regularly cleaning it after each use to prevent clogs and ensure optimal performance.
  • Inspect the sprayer for any damage or wear before each use and replace any faulty parts.

When using an airless paint sprayer, remember to:

  • Wear safety goggles to protect your eyes from paint splatter.
  • Use a respirator mask to prevent inhalation of paint fumes.
  • Wear protective clothing, such as coveralls or a long-sleeved shirt and pants, to shield your skin from any potential paint spray.

In summary, proper paint sprayer maintenance and the use of safety equipment are essential for a safe and successful painting experience. Taking these precautions will help prevent accidents and ensure a smooth painting process.

Now, let’s move on to the conclusion and final tips for using your airless paint sprayer effectively.

Conclusion and Final Tips

Now that we’ve covered the necessary safety precautions and maintenance tips, let’s wrap up with some final pointers to help you effectively operate your airless paint sprayer with a 1 gallon can. When using an airless paint sprayer, it’s important to keep a few additional considerations in mind. First, make sure to properly thin your paint if necessary, as thicker paints may cause clogs in the sprayer. Second, always test the spray pattern and adjust the pressure accordingly to achieve the desired coverage. Third, maintain a consistent distance between the sprayer and the surface being painted to avoid uneven application. Lastly, clean the sprayer thoroughly after each use to prevent any leftover paint from drying and clogging the system. By following these final thoughts and considerations, you’ll be able to achieve professional-looking results with your airless paint sprayer.

Advertisement
Final Thoughts Additional Considerations
Thinning the paint Testing spray pattern
Adjusting the pressure Maintaining distance
Cleaning the sprayer Professional results

Frequently Asked Questions

Can I use an airless paint sprayer with a different size can other than 1 gallon?

Yes, you can use an airless paint sprayer with cans of different sizes. The size of the can doesn’t affect the functioning of the sprayer. Just make sure the can is compatible with the sprayer nozzle.

What type of paint is best suited for use with an airless paint sprayer?

The best type of paint for use with an airless paint sprayer depends on the specific project and desired finish. Factors such as paint viscosity and the type of spray gun being used should be considered when choosing the paint.

How do I clean the airless paint sprayer after use?

Cleaning an airless paint sprayer after use is a breeze! With a simple and efficient cleaning process, maintenance is a piece of cake. Follow these maintenance tips to keep your sprayer in top shape for your next painting project.

Can I use an airless paint sprayer indoors?

Yes, you can use an indoor airless paint sprayer. However, it’s important to follow airless paint sprayer safety precautions. Make sure the area is well-ventilated, wear protective gear, and cover nearby objects to prevent overspray.

Are there any safety precautions specific to using an airless paint sprayer with a 1-gallon can?

When using an airless paint sprayer with a 1-gallon can, there are a few safety tips to keep in mind. First, always wear protective goggles and a mask. Second, make sure to use the proper technique for spraying to avoid accidents or injuries.

Advertisement

Conclusion

In conclusion, using an airless paint sprayer with a 1-gallon can is a convenient and efficient way to tackle your painting projects. With the right materials and proper setup, you can achieve a professional finish in no time.

Remember to maintain the sprayer regularly to ensure its optimal performance. If you encounter any issues, refer to the troubleshooting section for solutions.

Lastly, prioritize safety by following the recommended precautions.

So why wait? Grab your airless paint sprayer and let your creativity flow like vibrant strokes on a canvas.

Happy painting!

Advertisement

Jule’s attention to detail, editorial prowess, and commitment to delivering high-quality content ensure that every article and review on our website is polished and reader-friendly. Jule’s vision for the website as a one-stop destination for paint sprayer enthusiasts has been instrumental in shaping the platform into what it is today.

Continue Reading
Advertisement

Airless Paint Sprayers FAQs

How Do You Rebuild A Inlet Valve On A Wagner 770 Airless Paint Sprayer

Published

on

By

An image capturing the step-by-step process of rebuilding an inlet valve on a Wagner 770 Airless Paint Sprayer

Standing in front of my trusty Wagner 770 airless paint sprayer, I noticed the worn-out inlet valve. This part was essential in guiding the flow of paint and was in desperate need of repair.

With determination in my eyes and tools in hand, I embarked on a mission to restore my sprayer to its former glory. In this article, I will guide you through the step-by-step process of rebuilding an inlet valve on a Wagner 770 airless paint sprayer.

From gathering the necessary tools to testing the sprayer for proper functioning, I’ll share my technical expertise and knowledge to help you successfully complete this repair.

So, if you’re ready to roll up your sleeves and bring your paint sprayer back to life, let’s dive in and get started on this rewarding journey of restoration.

Key Takeaways

  • Proper alignment and secure installation of the valve assembly is crucial for the functioning of the Wagner 770 airless paint sprayer.
  • Regular inspection of the valve assembly for debris or damage is necessary to maintain optimal condition and prevent clogging or malfunctioning.
  • Ensuring tight and secure connections, as well as checking for leaks or loose parts, is important for the proper functioning of the paint sprayer.
  • Priming the sprayer with water and flushing out debris before filling the container with paint helps to maintain the performance and longevity of the sprayer.

Gather the necessary tools and materials

Advertisement

You’ll need to gather all the tools and materials necessary to rebuild the inlet valve on your Wagner 770 airless paint sprayer, ensuring that you’re prepared to restore its functionality and unleash your creative potential once again.

Choosing the right paint for your project is crucial, as it’ll determine the final outcome of your work. Take into consideration factors such as the surface you’ll be painting and the desired finish.

Understanding the different types of paint sprayers is also essential. Airless paint sprayers, like the Wagner 770, offer efficient and precise coverage, making them ideal for larger projects.

Once you have gathered all the necessary tools and materials, it’s time to turn off and disconnect the sprayer, ensuring safety during the rebuilding process.

Turn off and disconnect the sprayer

First, make sure to switch off the power and detach the hose from the machine, severing the connection between the sprayer and its life force, creating a sense of detachment and isolation. This important step ensures your safety and prevents any accidental paint spray. Additionally, it allows you to work on the sprayer without any interference.

Advertisement

Once the sprayer is disconnected, you can proceed with proper storage and maintenance. Store the sprayer in a clean, dry place, away from extreme temperatures and direct sunlight. Regularly clean the sprayer to remove any paint residue and debris that may affect its performance. Lubricate the moving parts to ensure smooth operation.

With the sprayer turned off and disconnected, we can now move on to removing the inlet valve assembly, which is the next crucial step in rebuilding the sprayer.

Remove the inlet valve assembly

Now, it’s time to take out the assembly that controls the flow of paint into the sprayer. The inlet valve assembly is a vital component of the Wagner 770 airless paint sprayer, and regular maintenance is crucial to ensure its proper functioning. Neglecting this maintenance can lead to issues such as clogging, reduced performance, and even damage to the sprayer.

Advertisement

One common issue with inlet valves is a stuck or blocked valve, which can cause a loss of pressure or uneven spray patterns. To troubleshoot this, you can try cleaning the valve with a solvent or replacing it if necessary. Another issue is a worn or damaged valve seat, which can result in leaks. In such cases, replacing the valve seat is recommended.

Next, we’ll disassemble the inlet valve, which will allow us to access and inspect its individual components.

Disassemble the inlet valve

To disassemble the inlet valve, start by removing the screws that hold the valve cover in place, revealing the inner components. It’s important to use the appropriate screwdriver to avoid damaging the screws.

Once the cover is off, carefully lift out the spring and valve assembly. Take note of the position and orientation of each component for easy reassembly later on.

Inspect the valve for any signs of wear or damage, such as cracks or debris buildup.

Advertisement

Reassembly tips include ensuring the valve is properly aligned and the spring is correctly seated.

Common inlet valve issues may include sticking or clogging, which can lead to poor spray patterns. To address these issues, the next step is to clean the inlet valve components.

Clean the inlet valve components

Once you’ve removed the valve cover and carefully lifted out the spring and valve assembly, it’s crucial that you thoroughly clean all the components to ensure optimal performance. To properly maintain the inlet valve and troubleshoot any issues, here are five key steps to follow:

Advertisement
  • Use a mild detergent and warm water to clean the valve cover, spring, and valve assembly.
  • Gently scrub the components with a soft brush to remove any paint residue or debris.
  • Rinse the parts thoroughly to remove any remaining detergent.

Inspect the components for any signs of damage, such as cracks or wear. Dry all parts completely before reassembling the inlet valve.

By following these steps, you can effectively clean the inlet valve components and ensure they’re in good working condition.

Now, let’s move on to inspecting for any damage or wear in the next section.

Inspect for any damage or wear

After thoroughly cleaning the components, it’s time to carefully inspect for any damage or wear.

To ensure optimal performance of the Wagner 770 airless paint sprayer, it is crucial to conduct a thorough inspection. Begin by visually examining the inlet valve for any signs of cracks, chips, or other visible damage. Pay close attention to the valve seat and the valve itself.

Additionally, inspect the valve spring for any signs of wear or deformation. To further assess the condition of the inlet valve, perform a functional test by operating the sprayer and observing the valve’s response. If there are any irregularities such as leaks or inconsistent pressure, it may indicate a problem with the inlet valve.

Advertisement

Troubleshooting tips include checking for clogs or blockages in the valve assembly.

Once the inspection is complete, we can move on to the next step of replacing any damaged or worn parts.

Replace any damaged or worn parts

Inspect the components for any signs of damage or wear, and if you find any, replace them to ensure optimal performance. When replacing worn parts on the inlet valve of a Wagner 770 airless paint sprayer, it’s important to troubleshoot common issues that may arise.

Firstly, check the gasket for any tears or cracks, as a damaged gasket can cause leaks and decrease the spray pattern.

Secondly, examine the valve seat for any signs of wear, such as pitting or erosion, which can affect the seal and lead to inconsistent spray.

Advertisement

By replacing these worn parts, you can improve the overall efficiency and functionality of the inlet valve.

Once all necessary components have been replaced, you can proceed to the next step of reassembling the inlet valve.

Reassemble the inlet valve

Now that you’ve replaced any damaged or worn parts, it’s time to put the inlet valve back together. Reassembling the inlet valve requires careful attention to detail to ensure proper functioning of the Wagner 770 airless paint sprayer. Here are some reassembling techniques and troubleshooting tips to guide you through the process.

First, refer to the manufacturer’s manual for specific instructions on reassembling the inlet valve. Make sure to clean all parts thoroughly before starting. Begin by placing the valve seat onto the valve body, ensuring a snug fit. Then, insert the ball into the valve body, followed by the spring. Apply a small amount of lubricant to the threads of the valve body before screwing it back into the sprayer.

By following these reassembling techniques and troubleshooting tips, you can ensure that the inlet valve is correctly put back together. Once the inlet valve assembly is complete, you can proceed to install it back into the sprayer.

Advertisement

Install the inlet valve assembly back into the sprayer

To successfully complete the reassembly process, it’s time for you to confidently reinstall the inlet valve assembly into your powerful painting machine. Here are three important steps to follow when reinstalling the inlet valve:

  • Carefully align the inlet valve assembly with the corresponding slots in the sprayer body.
  • Gently press the assembly into place, making sure it’s securely seated.
  • Tighten the retaining nut using a wrench or pliers, ensuring it’s snug but not overly tightened.

By following these steps, you can ensure that the inlet valve is properly installed and ready for use. Troubleshooting common issues during this process may include checking for any debris or damage on the valve assembly, as well as ensuring that all connections are tight and secure.

Once the inlet valve assembly is reinstalled, it’s time to test the sprayer to ensure proper functioning.

Test the sprayer to ensure proper functioning

Once the inlet valve assembly is securely in place, it’s time to put your sprayer to the test and see if it’s ready to unleash its powerful painting abilities.

To ensure proper functioning, there are a few sprayer troubleshooting and maintenance tips you should follow. First, check all the connections and fittings for any leaks or loose parts. Tighten or replace as necessary.

Next, prime the sprayer by filling the paint container with water and running the sprayer for a few minutes to flush out any debris. Once the water runs clear, drain it and fill the container with the desired paint.

Advertisement

Finally, test the sprayer on a scrap piece of material to check for consistent spray patterns and smooth operation. Make any necessary adjustments before starting your paint job.

By following these steps, you can ensure that your Wagner 770 airless paint sprayer is in optimal condition for your painting needs.

Frequently Asked Questions

What are the necessary tools and materials needed to rebuild an inlet valve on a Wagner 770 airless paint sprayer?

To rebuild the inlet valve on a Wagner 770 airless paint sprayer, the necessary tools include a screwdriver, pliers, and a small brush. Required materials consist of replacement inlet valve parts, such as seals and springs.

How do you turn off and disconnect the sprayer before starting the inlet valve rebuild process?

To turn off and disconnect the sprayer, first, locate the power switch and turn it off. Then, unplug the power cord from the outlet. Finally, detach any hoses or connections from the sprayer to ensure a safe and isolated workspace.

Are there any specific instructions or precautions for removing the inlet valve assembly from the sprayer?

When removing the inlet valve assembly from the sprayer, it is important to follow specific instructions. Start by disconnecting the sprayer from the power source and removing any paint or debris. Then, carefully unscrew and remove the inlet valve assembly. Clean the inlet valve components thoroughly before proceeding with the rebuild process.

Advertisement

How do you clean the inlet valve components once they have been removed?

To clean the inlet valve components, it’s crucial to use proper cleaning techniques and follow best practices. This ensures thorough removal of any dirt or debris, maintaining the valve’s functionality.

What should I look for when inspecting the inlet valve components for damage or wear?

When inspecting the inlet valve components for damage or wear, I carefully examine the valve seat for cracks or chips. I also check the valve stem for any signs of bending or corrosion.

Conclusion

In conclusion, rebuilding the inlet valve on a Wagner 770 airless paint sprayer is a detailed and technical process that requires the right tools and materials. By following the steps outlined in this article, you can successfully disassemble, clean, and replace any damaged parts of the inlet valve.

Remember to reassemble the valve correctly and test the sprayer to ensure proper functioning. Just like a well-oiled machine, a properly rebuilt inlet valve will keep your paint sprayer running smoothly and efficiently, allowing you to achieve professional-looking results.

Advertisement
Continue Reading

Airless Paint Sprayers FAQs

How And Where Wash An Airless Paint Sprayer

Published

on

By

An image showcasing the step-by-step process of cleaning an airless paint sprayer: disassembling the nozzle, rinsing the filters under running water, scrubbing the spray gun, flushing the hose, and reassembling the components

Have you ever thought that cleaning an airless paint sprayer was as daunting as climbing a mountain? Fear not! In this guide, I will take you through the step-by-step process of cleaning your airless paint sprayer, making it as easy as a walk in the park.

First, gather all the necessary cleaning supplies, such as water or a cleaning solution.

Then, disconnect and empty the paint sprayer, ensuring there is no leftover paint.

Next, flush the sprayer with water or the cleaning solution to remove any residue.

Don’t forget to disassemble and clean the spray gun and nozzle, as well as remove and clean the filters.

Advertisement

Rinse and dry all components thoroughly, and finally, store the cleaned sprayer in a safe and dry location.

By following this knowledgeable and detailed cleaning process, along with a regular maintenance schedule, you can keep your airless paint sprayer in top condition for all your future painting projects.

So, let’s jump right in and make cleaning your sprayer a breeze!

Key Takeaways

  • Choose a well-ventilated location for cleaning the airless paint sprayer
  • Regular cleaning and maintenance is important for optimal performance and durability
  • Clean and inspect filters regularly to prevent clogging and ensure proper paint flow
  • Flush the system with a cleaning solution after each use to remove paint residue and prevent buildup in the pump

Gather the necessary cleaning supplies

To get started, you’ll need to gather all the cleaning supplies you’ll need for washing your airless paint sprayer.

Advertisement

Proper organization of your cleaning supplies is crucial to ensure a smooth and efficient cleaning process. Make sure to have:

  • A bucket or container to hold the cleaning solution
  • A cleaning brush with stiff bristles
  • A small wire brush for unclogging the spray tip
  • A set of wrenches for disassembling the sprayer

Additionally, it’s essential to have safety gear such as gloves and goggles to protect yourself from any potential hazards.

When gathering your supplies, be mindful of some common mistakes to avoid, such as using the wrong cleaning solution or failing to properly clean the spray tip.

Now that you have all your cleaning supplies ready, let’s move on to the next step of disconnecting and emptying the paint sprayer.

Disconnect and empty the paint sprayer

To begin, you’ll need to disconnect and empty out the handy device. Follow these steps:

  1. Turn off the airless paint sprayer and unplug it from the power source. This ensures your safety and prevents accidental paint discharge.

  2. Remove the paint container or bucket from the sprayer. Carefully pour any remaining paint back into its original container or dispose of it properly.

  3. Detach the spray gun from the sprayer by unscrewing it counterclockwise. Be cautious not to spill any excess paint during this process.

Proper maintenance is crucial for the longevity of your airless paint sprayer. By disconnecting and emptying it correctly, you can avoid potential issues and ensure its smooth operation.

Advertisement

Now, let’s move on to the next step: flushing the sprayer with water or cleaning solution.

Flush the sprayer with water or cleaning solution

Now let’s give your handy device a refreshing cleanse by flushing it with water or a cleaning solution. Cleaning your airless paint sprayer is an essential step in maintaining its performance and longevity. Properly flushing the sprayer removes any leftover paint residue and prevents clogs or blockages. To ensure a thorough cleaning, consider using a cleaning solution specifically designed for airless sprayers. This will help break down and remove stubborn paint buildup more effectively. Here’s a helpful table summarizing the best cleaning techniques for your airless paint sprayer:

Cleaning Technique Advantages
Flushing with water Easily accessible
Using cleaning solution Removes stubborn paint buildup
Disassembling and cleaning spray gun and nozzle Deep cleaning for optimal performance

Next, we’ll move on to the next step of disassembling and cleaning the spray gun and nozzle, ensuring every component is spotless.

Advertisement

Disassemble and clean the spray gun and nozzle

After flushing, it’s time to take apart the spray gun and nozzle for a thorough cleaning. Disassembling the spray gun is essential to remove any paint residue or debris that may have accumulated during use.

To begin, make sure the gun is disconnected from the power source and relieve any pressure that may still be in the system. Start by removing the nozzle and needle, being careful not to damage them. Use a wrench to unscrew the air cap and fluid tip, and then separate the gun body from the handle.

Clean each component individually with warm water or a cleaning solution, making sure to remove any clogs or build-up. Additionally, inspect the O-rings and seals for any signs of wear or damage.

These disassembly tips will ensure a thorough cleaning and troubleshoot common issues.

Now, let’s move on to the next step of removing and cleaning the filters.

Advertisement

Remove and clean the filters

To ensure optimal performance and prevent clogs, it is crucial to address the maintenance of the filters in your spray gun. Proper filtration is of utmost importance when it comes to airless paint sprayers. Cleaning the filters regularly will help remove any debris or particles that may hinder the flow of paint and affect the quality of your work. There are various cleaning techniques you can employ, such as using a soft brush to remove larger particles and rinsing the filters with water. It is essential to follow the manufacturer’s instructions for cleaning and replacing the filters to ensure they function effectively. The table below provides a visual guide on how to clean the filters properly:

Filter Type Cleaning Method
Mesh Filters Rinse with water and gently brush
Paper Filters Replace with new filters
Coalescing Filters Rinse with water and air dry

Now that the filters have been cleaned, let’s move on to the next step: cleaning the pump and hoses.

Clean the pump and hoses

To ensure optimal performance and prevent clogs, it is crucial to thoroughly clean the pump and hoses. This step is essential for achieving flawless results and a professional finish.

Advertisement

To clean the pump, start by disconnecting the hoses and unscrewing the pump housing. Use a brush to remove any dried paint or debris, paying extra attention to the intake and outlet valves.

For the hoses, flush them with water to remove any leftover paint. If there are stubborn clogs, you can use a pipe cleaner or a small brush to dislodge the blockage.

Cleaning the pump and hoses is also a helpful troubleshooting step for common issues such as low pressure or inconsistent spray patterns.

Once the cleaning is complete, rinse and dry all components thoroughly, preparing them for the next step of the painting process.

Rinse and dry all components thoroughly

After thoroughly cleaning the pump and hoses of the airless paint sprayer, it is crucial to rinse and dry all components thoroughly. This step ensures that no residual paint or cleaning solution is left behind, which could potentially cause clogs or damage to the sprayer in the future.

Advertisement

To dry the components, I recommend using a clean cloth or towel to wipe away any excess moisture. It is important to pay special attention to areas that are prone to collecting water, such as crevices and connectors.

Additionally, allow the components to air dry for a sufficient amount of time to ensure that they are completely dry before storing.

Common mistakes to avoid during this process include using excessive force when drying, as this may damage delicate parts, and rushing through the drying process, which may leave moisture behind.

With the components thoroughly rinsed and dried, we can now move on to the next step of storing the cleaned sprayer in a safe and dry location.

Store the cleaned sprayer in a safe and dry location

Now that the components are thoroughly rinsed and dried, it’s time to find a secure and dry spot to store your freshly cleaned sprayer.

Advertisement

Safe storage is crucial to protect the sprayer from damage and ensure its longevity. Choose a location that is free from excessive moisture, as this can lead to rust and corrosion. Additionally, it is important to prevent mold growth, as it can not only damage the sprayer but also pose health risks.

Look for a spot that is well-ventilated and away from any potential sources of water or humidity. A cool, dry area, such as a garage or storage room, is ideal for storing your airless paint sprayer.

Now, let’s move on to some tips for choosing the best location to clean your sprayer.

Tips for choosing the best location to clean your sprayer

When choosing the best location to clean your airless paint sprayer, there are a few key factors to consider. Firstly, it’s crucial to select the right cleaning solution. Opt for a solution specifically formulated for airless sprayers, as it will effectively remove paint residues and debris without damaging the components.

Proper ventilation is also important. Choose a location with good airflow to prevent the accumulation of fumes and aid in the drying process. This will help maintain the sprayer’s performance and prolong its lifespan.

Advertisement

By carefully considering these factors, you can create an ideal space for cleaning your sprayer and ensure it remains in top condition.

Maintenance and regular cleaning schedule to keep your sprayer in top condition

To maintain peak performance, it’s crucial to regularly clean and perform maintenance on your sprayer. By following a regular cleaning schedule, you can ensure that your airless paint sprayer stays in top condition and continues to deliver flawless results. Here are some maintenance tips to keep in mind:

Maintenance Tips Troubleshooting Common Issues
Clean the filters regularly to prevent clogging and ensure proper paint flow. If you notice uneven spray patterns or reduced pressure, check for clogged filters.
Flush the system with a cleaning solution after each use to remove any paint residue. If the sprayer won’t prime or has a weak spray, check for paint buildup in the pump.
Inspect and replace worn or damaged parts to prevent leaks and maintain optimal performance. If you experience excessive overspray or dripping, inspect the seals and replace if necessary.

By following these maintenance tips and troubleshooting common issues, you can keep your airless paint sprayer running smoothly and extend its lifespan. Remember to always refer to the manufacturer’s instructions for specific maintenance guidelines.

Frequently Asked Questions

How often should I clean my airless paint sprayer?

How often should I clean my airless paint sprayer? Regular maintenance is crucial for optimal performance. Cleaning after each use and deep cleaning every 3-6 months using recommended cleaning solutions ensures longevity and efficient operation.

Can I use regular water to clean my sprayer, or do I need a specific cleaning solution?

Regular water can be used to clean an airless paint sprayer, but using a specific cleaning solution is recommended. These solutions are designed to effectively remove paint residue and ensure proper maintenance. Cleaning techniques and supplies should be followed as per the manufacturer’s guidelines.

Advertisement

How do I know if the filters in my paint sprayer need to be replaced?

When the spray pattern becomes uneven or the pressure drops, it could indicate clogged filters in the airless paint sprayer. Regular filter maintenance is essential to ensure optimal performance and prevent damage to the equipment.

What should I do if there is stubborn paint residue in the spray gun or nozzle?

To remove stubborn paint residue from the spray gun or nozzle, I recommend using cleaning techniques such as soaking the parts in a solvent, using a brush or toothpick to scrub off the residue, and rinsing thoroughly with water.

Are there any specific safety precautions I should take when cleaning my airless paint sprayer?

When cleaning an airless paint sprayer, it is important to follow specific safety precautions. Wear protective goggles, gloves, and clothing. Properly dispose of cleaning solutions used, as they may contain hazardous materials.

Conclusion

In conclusion, properly cleaning and maintaining your airless paint sprayer is crucial for its longevity and optimal performance. By following the outlined steps and using the appropriate cleaning supplies, you can ensure that your sprayer remains in top condition.

Remember, a well-maintained sprayer is like a well-oiled machine, ready to tackle any painting project with ease. So, don’t neglect the cleaning process and find a safe and dry location to store your sprayer.

Advertisement

Remember, a clean sprayer is a happy sprayer!

Continue Reading

Airless Paint Sprayers FAQs

How Do You Prime An Airless Paint Sprayer

Published

on

By

An image showcasing a step-by-step guide on priming an airless paint sprayer: a hand pouring paint into the designated container, connecting the sprayer to a power source, and adjusting pressure settings

It’s time to buckle down and get ready for a painting project! But before diving into a world of vibrant colors to freshen up my space, there’s an important task at hand: getting my airless paint sprayer ready for use. This crucial step ensures that the paint is evenly and smoothly distributed, resulting in a flawless finish.

So, how do you prime an airless paint sprayer? Well, let me guide you through it step by step.

First, let’s gather the necessary supplies and make sure we have everything we need.

Then, we’ll prepare the paint sprayer, getting it ready for action.

Once that’s done, it’s time to prime the pump and ensure that it’s working at its best.

Advertisement

Of course, we’ll also want to test the spray pattern before we start painting.

With these essential steps taken care of, we’ll be well on our way to creating a masterpiece.

So, let’s dive in and get that paint flowing!

Key Takeaways

  • Priming an airless paint sprayer involves turning on the sprayer, adjusting the pressure, releasing air, and filling the pump with paint.
  • It is important to consult the manufacturer’s recommendations and start with low pressure to ensure optimal paint application.
  • Testing the spray pattern on a test surface and making necessary adjustments is crucial for achieving the desired coverage and finish.
  • Properly cleaning the sprayer before and after use, including disassembling and rinsing the parts, helps maintain its performance and prevent clogs or inconsistent patterns.

Gather the Necessary Supplies

Before you can begin using an airless paint sprayer, make sure you’ve gathered all the necessary supplies.

Advertisement

First, prepare the workspace by covering any furniture or items you don’t want to get paint on. Lay down drop cloths or plastic sheeting to protect the floor and walls.

Next, choose the right paint color for your project. Consider the room’s lighting, decor, and personal preference.

Once you have everything you need, you can move on to preparing the paint sprayer.

Prepare the Paint Sprayer

Before using an airless paint sprayer, it’s crucial to properly prepare the equipment. To start, I clean the sprayer thoroughly, making sure there’s no residue from previous use.

Then, I attach the appropriate spray tip for the desired paint application.

Advertisement

Finally, I fill the paint container with the necessary amount of paint, ensuring it’s the right consistency for optimal spraying.

By following these steps, I ensure that my paint sprayer is clean, ready, and properly equipped for a smooth and efficient painting process.

Clean the Sprayer

To properly clean the sprayer, make sure you give it a thorough rinse after each use. This is a crucial step in maintaining the longevity and efficiency of your airless paint sprayer. Proper cleaning techniques involve using the best cleaning products specifically designed for paint sprayers. These products effectively remove any remaining paint residue, preventing clogs and ensuring smooth operation for future use.

It’s important to carefully follow the manufacturer’s instructions for cleaning, as different models may have specific requirements. After rinsing, disassemble the sprayer and clean each component individually. Pay close attention to the spray tip, as that’s where paint buildup often occurs.

Once you’ve completed the cleaning process, you can seamlessly transition into the next section and proceed to attach the spray tip.

Advertisement

Attach the Spray Tip

Once you’ve completed the thorough cleaning process, it’s time to effortlessly attach the spray tip to your sprayer. Here’s a step-by-step guide to help you in this process:

  1. Hold the nozzle: Ensure that you’ve got a firm grip on the nozzle of the airless paint sprayer.

  2. Locate the spray tip: Find the spray tip that matches the desired spray pattern for your project.

  3. Align and secure: Align the spray tip with the nozzle and firmly push it into place until it locks securely.

  4. Adjust the spray pattern: Depending on your needs, you can adjust the spray pattern by turning the spray tip to the desired position.

With the spray tip securely attached, you’re now ready to move on to the next section about filling the paint container. This’ll ensure a smooth and efficient painting process.

Fill the Paint Container

Now that the spray tip’s securely attached, it’s time to fill up your paint container and get ready to start painting.

Before pouring the paint into the container, it’s important to ensure that the consistency of the paint’s appropriate for use with an airless paint sprayer. If the paint’s too thick, it may clog the sprayer and cause uneven application. On the other hand, if the paint’s too thin, it may result in excessive overspray.

To achieve the desired consistency, you can use paint mixing techniques such as stirring the paint thoroughly or adding a paint thinner if needed.

Advertisement

Once the paint’s at the right consistency, carefully pour it into the paint container.

With the paint container filled, we can now move on to the next step: priming the pump.

Prime the Pump

Before I begin painting, I make sure to turn on the sprayer and adjust the pressure to the appropriate setting. This ensures that the paint will be applied evenly and smoothly.

Once the sprayer is on and the pressure is adjusted, I prime the pump by releasing the air and filling it with paint. This step is crucial for the paint to flow properly through the sprayer and achieve the desired results.

Turn on the Sprayer

To get started with your airless paint sprayer, simply flip the switch on the side and watch as the machine hums to life, eagerly awaiting your command.

Advertisement

The sprayer maintenance is crucial to ensure optimal performance. Regularly clean the filters and nozzles to prevent clogs.

Troubleshooting techniques can help identify and fix any issues that may arise during operation. Check for leaks, ensure proper connections, and inspect the paint flow.

Familiarize yourself with the sprayer’s controls and settings to adjust the pressure. This will allow you to achieve the desired paint application.

Always start with a low pressure setting and gradually increase it until you reach the desired coverage.

Keep in mind that different materials may require different pressure settings, so it’s important to consult the manufacturer’s recommendations or conduct tests to find the ideal pressure for your specific project.

Advertisement

Now, let’s move on to the next step and learn how to adjust the pressure for optimal paint spraying.

Adjust the Pressure

Maximize the efficiency and precision of your painting by adjusting the pressure on your sprayer to achieve the perfect balance of coverage and control. To do this, start by adjusting the nozzle on your airless paint sprayer. Depending on the type of project and the desired outcome, you may need a wider or narrower spray pattern. Simply twist the nozzle to adjust it accordingly.

Additionally, it’s important to check the paint viscosity before spraying. Thicker paints may require higher pressure settings, while thinner paints may need lower pressure settings. By adjusting the pressure and nozzle, you can ensure that the paint flows smoothly and evenly from the sprayer, resulting in a flawless finish.

Now that you’ve adjusted the pressure, it’s time to prime the pump and prepare the sprayer for use.

Prime the Pump

To ensure optimal results with your airless paint sprayer, it’s crucial to properly prime the pump. Now that we’ve adjusted the pressure, let’s dive into the next step.

Advertisement

Priming the pump is essential for achieving the best paint spraying outcomes. Here are a few discussion ideas for this subtopic that aren’t covered in the previous sections:

  • Troubleshooting common pump priming issues
  • Importance of proper pump priming technique for optimal paint spraying results

By understanding these concepts, you can avoid potential problems and achieve a flawless finish.

Now that we’ve covered the importance of priming the pump, let’s move on to the next section and explore how to test the spray pattern.

Test the Spray Pattern

First, make sure you’ve got the hang of the airless paint sprayer by testing the spray pattern. To do this, check nozzle compatibility with the paint you’re using. Different paints require different nozzle sizes, so it’s important to ensure they match. Once you’ve confirmed compatibility, adjust the spray pattern to achieve the desired coverage and finish. You can do this by turning the spray pattern adjustment knob on the sprayer. Start by spraying onto a test surface, such as a piece of cardboard or scrap wood, and observe the pattern and coverage. Make any necessary adjustments until you’re satisfied with the results. Once you’ve tested the spray pattern and are confident with the settings, you’re ready to move on to the next step of starting the painting process.

Start Painting

When starting to paint with an airless paint sprayer, it’s crucial to hold the sprayer properly to ensure maximum control and accuracy.

Maintaining a consistent distance from the surface being painted is key in achieving an even and smooth finish.

Advertisement

Moving in a smooth motion helps to prevent any overlapping or streaking, resulting in a professional-looking paint job.

Hold the Sprayer Properly

Properly holding the sprayer adds a level of control and precision to your paint application. To achieve this, start with proper hand position. Hold the sprayer firmly with your dominant hand, ensuring that your fingers are positioned comfortably around the handle. This will allow you to maintain a steady grip throughout the painting process.

Additionally, make sure to keep your wrist straight and avoid any unnecessary movement that may affect the stability of the sprayer. By holding the sprayer correctly, you can ensure a smoother and more consistent paint application.

Now that you’ve mastered the proper hand position, let’s move on to the next section about maintaining a consistent distance between the sprayer and the surface you’re painting.

Maintain a Consistent Distance

To ensure a flawless finish, it’s crucial to consistently maintain the distance between the sprayer and the surface you’re painting. This is an important aspect of maintaining proper technique and achieving professional results.

Advertisement

When using an airless paint sprayer, it’s essential to maintain a consistent distance of around 12 inches from the surface. This distance allows for proper atomization of the paint and prevents overspraying. Overspraying can lead to uneven coverage and wasted paint.

By maintaining a consistent distance, you can ensure an even and smooth application of the paint. Moving in a smooth motion while maintaining the proper distance will help you achieve a professional-looking finish.

Move in a Smooth Motion

As you effortlessly glide the sprayer across the surface, a seamless and polished finish is achieved. To ensure a smooth application and avoid streaks, it’s crucial to move in a smooth motion. This means maintaining a consistent speed and keeping the sprayer at a consistent distance from the surface.

By doing so, you can evenly distribute the paint and prevent any build-up or uneven coverage. Additionally, it’s important to overlap each stroke slightly to blend the paint and create a cohesive finish.

Remember to move the sprayer in a fluid motion without stopping or hesitating, as this can result in uneven application and visible streaks. Once you’ve mastered the art of smooth application, it’s time to move on to the next step: clean up.

Advertisement

Clean Up

After using an airless paint sprayer, it’s essential to give it a thorough cleaning to maintain its performance and longevity. Cleaning the sprayer involves removing any remaining paint and ensuring that all parts are free from residue. To clean the sprayer, start by emptying any remaining paint from the container and disposing of it properly. Next, disassemble the sprayer and rinse all parts with a cleaning solution. Use a brush or cloth to remove any stubborn paint or debris. Once all parts are clean, reassemble the sprayer and test it to ensure it’s working properly. Proper cleaning and maintenance of your airless paint sprayer will help prevent clogs and extend its lifespan. Now, let’s move on to troubleshooting tips for common issues that may arise during the painting process.

Troubleshooting Tips

If your airless paint sprayer isn’t working properly, troubleshooting tips can help you identify and resolve common issues. Before reaching out for professional help, try these troubleshooting techniques to save time and money.

One common issue is clogged spray tips, which can be resolved by removing and cleaning them thoroughly. Another issue is inconsistent spray patterns, which may be caused by improper pressure settings or worn-out seals. Adjusting the pressure and replacing worn seals can often solve this problem.

Additionally, if the sprayer isn’t priming properly, check the suction tube for any blockages or debris. By following these troubleshooting tips, you can quickly address common issues with your airless paint sprayer and ensure smooth operation.

Moving on to the next section about safety precautions, it’s essential to take necessary measures to protect yourself and others during the painting process.

Advertisement

Safety Precautions

When using an airless paint sprayer, it’s important to prioritize safety precautions.

First and foremost, wear the appropriate protective gear, including goggles, gloves, and a respirator, to prevent any potential harm from the paint or fumes.

Secondly, make sure to properly ventilate the area by opening windows or using fans to ensure fresh air circulation.

Lastly, always follow the manufacturer’s instructions for operating the paint sprayer to ensure optimal safety and performance.

Wear Protective Gear

To ensure your safety while using an airless paint sprayer, don’t forget to gear up with protective equipment. Here are some key items to consider when it comes to protective gear:

Advertisement
  • Proper fitting: Make sure your protective gear fits well and is snug to provide maximum protection. Loose-fitting gear can be hazardous and may not effectively shield you from potential risks.

  • Eye protection: Invest in safety goggles or a face shield to safeguard your eyes from paint particles and any potential splashes. Your vision is precious, and protecting it is essential.

  • Respiratory protection: Wear a respirator or a mask designed specifically for paint spraying to prevent inhalation of harmful fumes and particles.

  • Protective clothing: Choose clothing that covers your entire body, such as coveralls or a paint suit, to shield your skin from paint overspray and potential spills.

  • Gloves: Use gloves made of chemical-resistant materials to protect your hands from paint chemicals and solvents.

Remember, it’s crucial to ventilate the area properly to ensure a safe working environment.

Ventilate the Area

Ensure a safe working environment by properly ventilating the area while using an airless paint sprayer. Proper ventilation is crucial to minimize the risk of inhaling harmful fumes and chemicals. It is important to have good airflow in the workspace to prevent the accumulation of paint particles and solvent vapors that can be detrimental to your health. Opening windows and doors, using fans, or wearing a respirator are effective ways to improve ventilation. To emphasize the importance of ventilation, let’s consider the following table:

Lack of Proper Ventilation Adequate Ventilation
Headaches and dizziness Fresh air and safety
Nausea and respiratory issues Improved well-being
Irritated eyes and throat Comfort and peace of mind
Increased health risks Reduced health concerns

By ensuring proper ventilation, you can protect yourself from potential health hazards and create a safe and comfortable environment for your painting project. Following manufacturer’s instructions is the next crucial step in using an airless paint sprayer effectively.

Follow Manufacturer’s Instructions

Maximize your safety and achieve optimal results by carefully following the instructions provided by the manufacturer of your airless paint sprayer. Properly priming your airless paint sprayer is crucial for its efficient operation. The manufacturer’s instructions will guide you through the specific steps required for priming your particular model. These instructions will typically involve connecting the sprayer to a power source, ensuring the paint container is securely attached, and adjusting the pressure settings.

It is essential to adhere to these instructions to avoid any potential damage to the sprayer or improper paint application. Additionally, the manufacturer’s instructions may also provide troubleshooting tips for common issues that may arise during the priming process, such as clogs or inconsistent spray patterns. By following these guidelines, you can ensure a smooth and successful priming process.

Advertisement

Moving forward to the next section on maintenance and storage, it’s important to properly care for your airless paint sprayer to prolong its lifespan and maintain its performance.

Maintenance and Storage

When it comes to maintaining and storing an airless paint sprayer, there are three key points to keep in mind.

First, it’s crucial to properly store the sprayer in a clean and dry area to prevent any damage or deterioration.

Second, regularly cleaning and maintaining the sprayer ensures optimal performance and longevity.

Lastly, it’s important to check for any signs of damage or wear, such as leaks or worn-out parts, and address them promptly to avoid any safety hazards or inefficiencies.

Advertisement

Properly Store the Sprayer

Safely stash the sprayer in a secure and sealed space to preserve its performance. Properly clean and maintain the airless paint sprayer for its longevity. After each use, make sure to clean the sprayer thoroughly by flushing it with water or the recommended cleaning solution. Remove any excess paint and debris from the sprayer components, such as the nozzle and filters.

Once cleaned, store the sprayer in a cool and dry place to prevent any damage from humidity or extreme temperatures. Regularly clean and maintain the sprayer to ensure optimal performance and prevent any clogs or malfunctions. It’s important to keep the sprayer in top condition to achieve professional results.

Transitioning into the next section, regularly cleaning and maintaining the sprayer will help prolong its lifespan and effectiveness.

Regularly Clean and Maintain

To keep your sprayer in top shape, it’s vital to regularly clean and maintain it. Regular maintenance and proper cleaning techniques will not only extend the lifespan of your airless paint sprayer but also ensure optimal performance. Here are some key steps to follow:

Cleaning Technique Frequency Benefits
Flushing with Water After each use Removes leftover paint and prevents clogging
Disassembling and Cleaning Monthly Removes accumulated debris and ensures smooth operation
Lubricating Moving Parts Every 6 months Prevents friction and enhances durability

By incorporating these cleaning practices into your routine, you can prevent paint buildup and maintain the efficiency of your sprayer. Once you have completed the regular cleaning and maintenance, it’s important to check for any damage or wear to ensure that your sprayer is in optimal condition for future use.

Advertisement

Check for Any Damage or Wear

It’s absolutely crucial to give your sprayer a thorough inspection for any signs of damage or wear and tear. Before you begin using your airless paint sprayer, take the time to check for any potential issues that could affect its performance.

Here are a few things to look out for:

  • Inspect the hose for any cracks or leaks, as these can lead to paint wastage or uneven spray patterns.
  • Check the spray gun for any loose or damaged parts, such as a worn-out trigger or a clogged nozzle.
  • Examine the motor for any unusual noises or vibrations, which could indicate internal damage.
  • Look for any signs of wear or damage on the pump, such as worn seals or a leaking manifold.

By thoroughly inspecting your airless paint sprayer, you can ensure that it’s in optimal condition for your painting projects.

Now, let’s move on to some final tips and tricks to help you make the most out of your sprayer.

Final Tips and Tricks

For best results, remember to always clean the nozzle thoroughly before beginning to paint with your airless sprayer. This is a crucial step in ensuring a smooth finish.

As you prepare to use your paint sprayer, there are a few tips and techniques that I’d recommend to achieve the best results. First, make sure to hold the sprayer at a consistent distance from the surface you’re painting, typically around 12 inches. This’ll help to ensure an even application of paint.

Advertisement

Additionally, it’s important to move the sprayer in a steady, overlapping motion to avoid any streaks or lines.

Finally, take your time and apply multiple thin coats rather than one thick coat. This’ll help to prevent any drips or uneven coverage.

By following these recommended paint sprayer techniques, you can achieve a professional-looking finish with your airless sprayer.

Frequently Asked Questions

Can I use an airless paint sprayer for all types of paint?

Yes, you can use an airless paint sprayer for all types of paint. However, it’s important to choose the right type of paint suitable for an airless sprayer and follow tips for achieving a smooth finish.

How often should I clean the paint sprayer’s filters?

I recommend cleaning the paint sprayer’s filters after every use and replacing them when they become clogged or damaged. Signs that the filters need cleaning or replacing include decreased spray pressure and uneven paint application.

Advertisement

What should I do if the paint sprayer is not priming properly?

If the paint sprayer is not priming properly, there could be several potential causes. To troubleshoot, check the intake tube for clogs, ensure the inlet valve is functioning correctly, and verify that the pump is properly lubricated.

Can I use a different type of primer with an airless paint sprayer?

Yes, you can use a different type of primer with an airless paint sprayer. Using primer alternatives offers various benefits, such as improved adhesion, better coverage, and faster drying times. Choose a primer that is compatible with your paint and project requirements.

How long do I need to wait between coats when using an airless paint sprayer?

You should wait for the first coat of paint to dry completely before applying the second coat using an airless paint sprayer. The drying time between coats can vary depending on factors such as temperature and humidity.

Conclusion

In conclusion, priming an airless paint sprayer is a crucial step to ensure smooth and efficient painting. By following the steps outlined in this article, such as gathering the necessary supplies, preparing the sprayer, and testing the spray pattern, you can achieve professional-looking results.

For example, let’s imagine a homeowner who wants to repaint their old fence. By properly priming the sprayer and testing the spray pattern beforehand, they can effortlessly transform the worn-out fence into a fresh and vibrant statement piece in their backyard.

Advertisement

Remember to always prioritize safety precautions, perform regular maintenance, and store the sprayer properly for optimal performance and longevity.

Continue Reading
Advertisement

Affiliate disclaimer

As an affiliate, we may earn a commission from qualifying purchases. We get commissions for purchases made through links on this website from Amazon and other third parties.

Advertisement

Trending