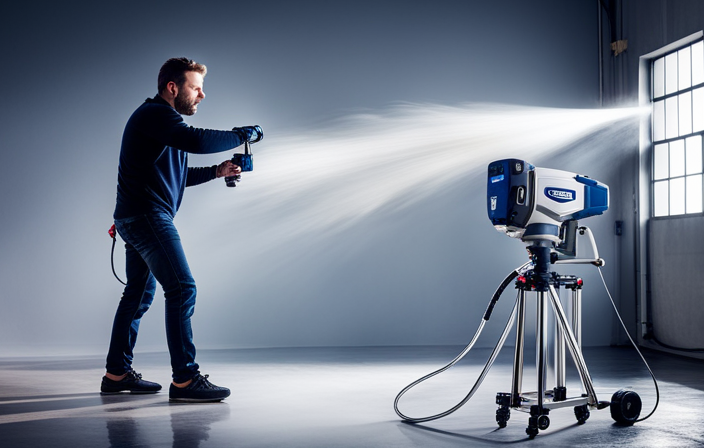
Imagine transforming a dull, uninspiring space into a vibrant and inviting area with just a few strokes of a paintbrush. Now, picture achieving that same transformation but faster, easier, and with flawless results. This is where the Wagner Airless Paint Sprayer comes in handy.
As a professional painter, I have witnessed the power of this remarkable tool firsthand. Its cutting-edge technology and precision allow for effortless application and impeccable results. In this article, I will guide you through the ins and outs of using the Wagner Airless Paint Sprayer, sharing my expertise and insider tips along the way.
From preparing your painting area to troubleshooting common issues, I will provide you with step-by-step instructions that will help you achieve professional-quality results.
So, get ready to unleash your creativity and embark on a painting journey like no other with the Wagner Airless Paint Sprayer.
Key Takeaways
- Proper setup and maintenance is crucial for optimal performance.
- Choosing and preparing the right paint is important for achieving desired results.
- Testing and sampling paint before committing to a color can help avoid mistakes.
- Cleaning and maintenance after each use is essential to prevent clogging and ensure longevity of the sprayer.
Graco Magnum 262805 X7 Cart Airless Paint Sprayer, Gray
CONTROL PAINT FLOW: Fully adjustable pressure to give you ultimate control of paint flow for any project size;...
As an affiliate, we earn on qualifying purchases.
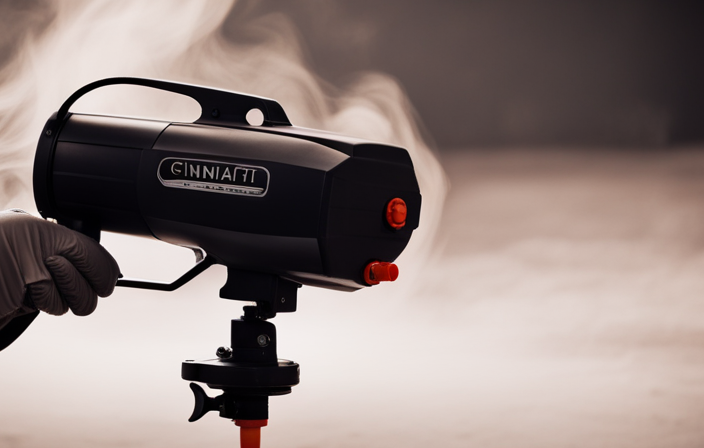
Familiarize Yourself with the Wagner Airless Paint Sprayer
Before you begin using the Wagner Airless Paint Sprayer, it’s important to familiarize yourself with its various components and functions. The Wagner Airless Paint Sprayer offers several advantages over traditional paintbrushes and rollers. It allows for a faster and more efficient application of paint, covering large surfaces in a shorter amount of time. Additionally, it provides a smooth and even finish, reducing the need for touch-ups.
However, there are also some disadvantages to consider. The sprayer requires proper setup and maintenance to ensure optimal performance. It can be noisy and may produce overspray, requiring careful masking and protection of surrounding areas.
To prepare your painting area, start by clearing the space of any furniture or objects that may obstruct your work.
Transitioning into the next section, now that you’re familiar with the sprayer and have prepared your painting area, let’s move on to the next step.

Wagner Spraytech 2435698 Control Pro 130 Paint Sprayer with T2 Gun, High Efficiency Airless Sprayer with Low Overspray, Yellow
WAGNER AIRLESS PAINT SPRAYER: The Control Pro 130 Power Tank applies coatings 3X faster than a roller with...
As an affiliate, we earn on qualifying purchases.
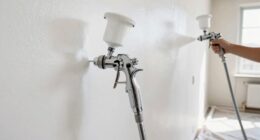
Prepare Your Painting Area
When preparing your painting area, it’s crucial to clean and prep the surfaces to be painted. This ensures proper adhesion and a smooth finish. Use a degreaser or mild detergent to remove any dirt, grime, or grease from the surfaces.
Next, protect the surrounding area with drop cloths or plastic sheets to prevent any paint overspray or spills. Finally, remove or cover furniture and fixtures to avoid any accidental damage or paint splatters.
By following these steps, you can ensure a professional and efficient painting process with your Wagner airless paint sprayer.
Clean and Prep the Surfaces to Be Painted
To ensure a flawless finish, it’s crucial to give the surfaces a thorough cleaning and preparation before operating the Wagner airless paint sprayer. Start by using appropriate cleaning techniques to remove any dirt, grease, or loose paint from the surfaces. This can be done using a pressure washer, scrub brush, or sandpaper, depending on the condition of the surfaces.
Pay close attention to areas with mildew or mold, as they should be treated with a mildew remover before painting. Once the surfaces are clean, it’s important to properly prepare them for paint application. This includes filling any cracks or holes with spackling compound and sanding them smooth. Additionally, it’s recommended to apply a coat of primer to ensure proper adhesion of the paint.
By following these cleaning and surface preparation steps, you will create a solid foundation for a professional-looking paint job.
Now, let’s move on to the next step of protecting the surrounding area with drop cloths or plastic sheets.
Protect the Surrounding Area with Drop Cloths or Plastic Sheets
In order to prevent any accidental paint splatters or spills, it’s essential to protect the surrounding area by laying down drop cloths or plastic sheets. This step is crucial to ensure a clean and professional finish. By using drop cloths or plastic sheeting, you can safeguard furniture, floors, and fixtures from any paint overspray or drips.
To effectively protect the surrounding area, I recommend using a combination of drop cloths and plastic sheets. Drop cloths are made of heavy-duty canvas and are ideal for covering large areas such as floors. Plastic sheets, on the other hand, are lightweight and can be easily taped to walls, windows, or furniture to provide additional protection.
When laying down drop cloths or plastic sheets, make sure to overlap them to create a seamless barrier. This will prevent any paint from seeping through the gaps. Also, secure the edges with tape or weights to keep them in place throughout the painting process.
By taking the time to properly protect the surrounding area, you’ll save yourself from the hassle of cleaning up paint splatters and ensure a neat and professional outcome. Once the drop cloths or plastic sheets are in place, you can proceed to the next step of removing or covering furniture and fixtures.
[REMOVE OR COVER FURNITURE AND FIXTURES]Remove or Cover Furniture and Fixtures
Make sure you protect your valuable furniture and fixtures by either removing them from the area or covering them with protective materials. Before using a Wagner airless paint sprayer, it’s crucial to take the necessary precautions to prevent any accidental paint overspray or damage to your furniture and fixtures.
Start by removing any small or delicate pieces of furniture that can easily be taken out of the room. For larger items that can’t be moved, such as heavy furniture or fixtures attached to the wall, cover them with drop cloths or plastic sheets. Ensure that the protective materials are securely fastened and don’t leave any gaps or openings where paint could seep through. This will safeguard your furniture and fixtures from any potential paint splatters or stains.
By properly protecting your furniture and fixtures, you can confidently proceed with using the Wagner airless paint sprayer without worrying about any accidental damage.
Moving on to the next step, which is choosing the right paint and thinning it if necessary…

VEVOR 750W Stand Airless Paint Sprayer, 3000PSI High Efficiency Electric Airless Sprayer, Fine and Even Painting Effect, Handheld Paint Sprayers for Home Interior and Exterior Furniture and Fences
Efficient Painting: Our stand airless paint sprayer is equipped with a powerful 750W motor, capable of delivering up...
As an affiliate, we earn on qualifying purchases.
Choose the Right Paint and Thin It if Necessary
Select the appropriate paint and, if needed, dilute it to achieve the desired consistency for optimal results with your Wagner airless paint sprayer. When choosing a paint color, consider the type of surface you will be painting and the desired finish. For a smooth finish, it is important to use a high-quality paint that is specifically formulated for airless sprayers. Look for paints labeled as "airless sprayer compatible" or "suitable for spray application." These paints are typically formulated to flow smoothly through the sprayer without clogging or splattering. If the paint is too thick, it may need to be thinned with water or a paint thinning agent. Consult the paint manufacturer’s instructions for the recommended thinning ratio. Remember to mix the paint thoroughly after thinning to ensure an even consistency. Achieving the right paint consistency is crucial for achieving a professional-looking finish with your Wagner airless paint sprayer.
To grab your audience’s attention, here is a table that provides some useful tips for choosing the right paint and achieving a smooth finish:
| Tips for Choosing Paint Color |
|---|
| Consider the room’s lighting and color scheme |
| Test paint samples on the wall before committing |
| Take into account the mood and atmosphere you want to create |
| Consult color charts and online resources for inspiration |
| Don’t be afraid to seek professional advice |
To achieve a smooth finish, make sure to follow these additional tips:
| Tips for Achieving a Smooth Finish |
|---|
| Use a high-quality paint specifically formulated for airless sprayers |
| Thoroughly mix the paint to ensure an even consistency |
| Strain the paint before pouring it into the sprayer to remove any impurities |
| Adjust the sprayer’s pressure settings for optimal atomization |
| Apply thin coats of paint, building up the coverage gradually |
Now that you have selected the right paint and have a clear understanding of how to achieve a smooth finish, it’s time to practice your skills on a test surface.

VEVOR Stand Airless Paint Sprayer, 650W, 3000PSI High Pressure Airless Sprayer with Cart, Cleaning Brush, Hose, Extension Rod, Nozzles, Electric Spray Paint Machine for House Exterior and Interior
Efficient Coating: The 650W motor, 0.31 GPM flow, and 3000 PSI pressure deliver spraying speeds 5x faster than...
As an affiliate, we earn on qualifying purchases.
Practice on a Test Surface
Get ready to hone your skills by practicing on a test surface and perfecting your technique. Before you start painting, it’s crucial to become familiar with your Wagner airless paint sprayer.
Begin by adjusting the pressure according to the manufacturer’s recommendations and the thickness of your paint. Then, hold the sprayer approximately 12 inches away from the test surface and begin spraying using smooth, overlapping strokes. Remember to maintain a consistent distance and speed to achieve an even finish.
As you practice, pay attention to the spray pattern and adjust the nozzle accordingly for a desired width. Additionally, keep the sprayer perpendicular to the surface to prevent uneven coverage. It’s also helpful to experiment with different spray angles and patterns to find what works best for your project.
With diligent test surface practice and these spray technique tips, you’ll be well-prepared to start painting like a pro.
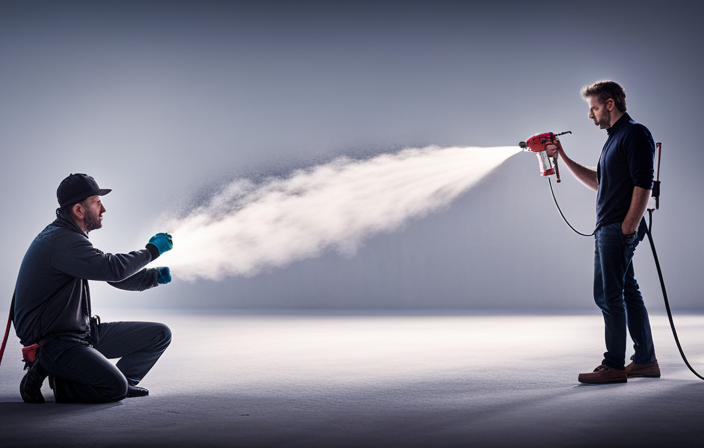
Start Painting
Now it’s time to grab your trusty tool and start unleashing your creative prowess with a fresh coat of color. Before you begin, make sure your Wagner airless paint sprayer is properly set up and loaded with the desired paint.
To achieve a smooth finish, hold the sprayer at a consistent distance of 12-14 inches from the surface, moving your hand in a steady back-and-forth motion. Start painting from the top and work your way down, overlapping each stroke by about 50% to ensure even coverage.
Avoid spraying too quickly or too close to the surface, as this can result in drips or uneven application. Additionally, be mindful of any potential overspray and take necessary precautions to protect surrounding surfaces.
Remember, practice makes perfect, so take your time and focus on maintaining a steady hand and consistent speed. By following these tips and avoiding common mistakes, you’ll achieve professional-looking results with your Wagner airless paint sprayer.
Now, let’s move on to the next step: applying multiple coats if necessary.
Apply Multiple Coats if Necessary
When applying multiple coats of paint, it’s crucial to allow sufficient drying time between each coat. This ensures that the paint adheres properly and prevents any smudging or streaking.
Additionally, it’s important to follow the paint manufacturer’s recommendations for optimal coverage. These guidelines provide valuable information on the ideal number of coats and the appropriate thickness of each layer.
Lastly, after applying the final coat, it’s essential to check for uniformity and touch up any imperfections. This meticulous attention to detail guarantees a flawless finish that’ll enhance the overall aesthetic of your project.
Allow Sufficient Drying Time Between Coats
Make sure to give your paint sufficient drying time between coats when using a Wagner airless paint sprayer. This step is crucial for achieving a flawless finish and maximizing the durability of your paint job. Patience is key when it comes to drying techniques.
Here are three important reasons why you should allow enough drying time between coats:
-
Enhances Adhesion: Allowing each coat to dry thoroughly ensures proper bonding between layers, resulting in a stronger and more long-lasting finish.
-
Prevents Blurring: Rushing the drying process can cause the fresh coat to mix with the previous one, leading to blurred edges and an uneven appearance.
-
Minimizes Surface Imperfections: Giving each coat ample drying time allows the paint to settle and self-level, reducing the visibility of brush marks or roller lines.
Remember, following the paint manufacturer’s recommendations for optimal coverage is essential. This ensures that you achieve the best possible results with your Wagner airless paint sprayer.
Follow the Paint Manufacturer’s Recommendations for Optimal Coverage
To achieve the best results and ensure a flawless finish, it’s crucial to follow the paint manufacturer’s recommendations for optimal coverage. Different paints have varying coverage capabilities, and it’s important to understand the specific requirements of the paint you’re using with your Wagner airless paint sprayer.
One key tip for achieving optimal coverage is to apply the paint in thin, even coats. This’ll help prevent drips and ensure a smooth finish. Additionally, consider the nozzle size and pressure settings on your sprayer. Adjusting these settings can help you achieve the desired coverage and prevent overspray.
It’s also important to maintain a consistent distance between the sprayer and the surface being painted. This’ll help ensure uniform coverage and prevent uneven application. By following these coverage tips and paint application techniques, you can achieve professional-looking results with your Wagner airless paint sprayer.
Now, let’s move on to the next step: checking for uniformity and touching up any imperfections.
Check for Uniformity and Touch Up Any Imperfections
Now, imagine you’re standing back and admiring your freshly painted surface, like a curator examining a masterpiece.
As a painting specialist, I can assure you that achieving uniformity is crucial for a flawless finish. After allowing the paint to dry, carefully assess the surface for any areas that may require touch-ups or corrections. Look for uneven coverage, drips, or any imperfections that may have occurred during the painting process.
Use a small brush or roller to correct these blemishes, ensuring that the paint is evenly distributed and matches the surrounding areas. Take your time and be meticulous in your corrections to achieve a seamless appearance.
Once you’ve addressed any imperfections, you can proceed to the next step of cleaning and maintaining your Wagner airless paint sprayer.
Clean and Maintain the Wagner Airless Paint Sprayer
Regular maintenance is essential for keeping your Wagner Airless Paint Sprayer in optimal condition. To ensure proper functioning and longevity of the sprayer, it’s important to follow these cleaning tips and maintenance techniques.
After each use, clean the paint sprayer thoroughly by flushing it with water or an appropriate cleaning solution. Pay special attention to the nozzle, filters, and other intricate components. Remove any clogs or debris that may affect the sprayer’s performance.
Regularly inspect and replace worn-out parts to prevent any potential issues. Lubricate the moving parts as recommended by the manufacturer to ensure smooth operation.
Additionally, store the sprayer in a clean and dry environment to avoid any damage. By following these maintenance practices, you can prolong the lifespan of your Wagner Airless Paint Sprayer and enjoy consistent, high-quality results.
Transitioning into troubleshooting common issues, let’s address some common problems that may arise while using the sprayer.
Troubleshoot Common Issues
Having trouble with your Wagner Airless Paint Sprayer? Let’s dive into troubleshooting common issues that may arise.
As a painting specialist with extensive experience using Wagner airless paint sprayers, I can provide you with expert guidance on how to resolve these problems.
One common issue is clogging, which can occur if the paint is too thick or if there is debris in the paint. To fix this, you can try thinning the paint or using a filter to remove any particles.
Another issue is uneven spray patterns, which can be caused by a worn nozzle or incorrect pressure settings. Make sure to check and replace the nozzle if necessary, and adjust the pressure to achieve a smooth and even spray.
By following these troubleshooting techniques, you can overcome common issues and achieve flawless painting results.
Now, let’s move on to the next section about safety tips and precautions.
Safety Tips and Precautions
To ensure a safe and enjoyable painting experience, it’s important to keep in mind some helpful tips and precautions.
- Safety Precautions:
- Before starting any painting project, make sure to wear appropriate safety gear such as goggles, gloves, and a respirator mask to protect yourself from paint fumes and potential splatters.
- Ensure that the area you’re working in is well-ventilated by opening windows or using fans. Proper ventilation helps to reduce the concentration of paint fumes and promotes better air quality.
- Always read and follow the manufacturer’s instructions and safety guidelines for your Wagner airless paint sprayer. This includes properly maintaining and cleaning the sprayer to prevent clogs and malfunctions.
Remember, safety should always be a top priority when using a paint sprayer. By following these precautions and guidelines, you can create a safe environment for yourself and others while achieving professional-looking results.
Now, let’s move on to the next section and learn how to enjoy your newly painted space.
Enjoy Your Newly Painted Space
After all the hard work and effort put into painting your space with the Wagner Airless Paint Sprayer, it’s time to step back and admire the professional-looking finish.
The smooth and even application achieved with this paint sprayer gives your walls a flawless appearance that’s sure to impress.
Don’t forget to share your experience and results with others, showcasing the stunning transformation you achieved using the Wagner Airless Paint Sprayer.
And as you bask in the satisfaction of a job well done, consider using this reliable and efficient sprayer for future projects, knowing that it’ll deliver the same high-quality results every time.
Admire the Professional-Looking Finish
Wow! You won’t believe the flawless, magazine-worthy finish you can achieve with the Wagner airless paint sprayer!
As a professional painter, I can attest to the exceptional quality and precision that this paint sprayer offers. When it comes to achieving a professional finish, the Wagner airless paint sprayer is a game-changer. Its advanced technology ensures an even and consistent application that leaves no streaks or brush marks behind.
To achieve the best results, start by preparing the surface properly, ensuring it’s clean and smooth. Adjust the spray settings according to the type of paint and desired coverage. Hold the sprayer at a consistent distance from the surface, moving in smooth, overlapping strokes. Take your time and be mindful of any corners or edges that require extra attention.
Trust me, the results will be worth it! Share your experience and results with others, and let them see the professional-looking finish for themselves.
Share Your Experience and Results with Others
Immerse others in the world of flawless finishes by sharing your own experience and results achieved with the remarkable Wagner airless paint sprayer. As a professional painter, I’ve had the privilege of using the Wagner airless paint sprayer on numerous projects, and I must say, the results have been outstanding.
Here are some tips to ensure you get the same professional-looking finish:
-
Prepping is key: Clean the surface thoroughly and make any necessary repairs before starting.
-
Choose the right nozzle: Different nozzles provide different spray patterns, so select the one that suits your project best.
-
Maintain a consistent distance: Keep the sprayer about 12 inches away from the surface for even coverage.
Troubleshooting techniques:
-
Clogging prevention: Strain the paint before pouring it into the sprayer to remove any lumps or debris.
-
Dealing with uneven spray: Adjust the pressure settings and check for any obstructions in the nozzle.
By sharing these tips, you can help others achieve flawless finishes with their Wagner airless paint sprayer. Consider using this incredible tool for future projects and continue to elevate your painting skills.
Consider Using the Wagner Airless Paint Sprayer for Future Projects
Enhance the quality of your future projects with the remarkable Wagner airless paint sprayer, a tool that guarantees flawless finishes every time. When compared to traditional paintbrushes, using a Wagner airless paint sprayer provides numerous benefits. The airless technology ensures an even and consistent application, eliminating brush strokes and allowing for a smooth and professional-looking finish. Additionally, the high-pressure capability of the sprayer allows for fast and efficient coverage, saving you valuable time on your projects. With its adjustable settings, you have full control over the spray pattern and flow rate, allowing you to customize your painting experience to suit your specific needs. The Wagner airless paint sprayer is a reliable and versatile tool that every painting specialist or professional painter should consider using for their future projects.
| Benefits of Using a Wagner Airless Paint Sprayer | Using Wagner Airless Paint Sprayer vs. Traditional Paintbrushes |
|---|---|
| Flawless finishes every time | Eliminates brush strokes |
| Even and consistent application | Saves time on projects |
| Adjustable settings for full control | Professional-looking finish |
| Reliable and versatile tool | Customizable painting experience |
Frequently Asked Questions
Can the Wagner Airless Paint Sprayer be used for other types of paint, such as stain or varnish?
Yes, the Wagner airless paint sprayer can be used for different types of paint such as stain or varnish. It offers versatile application techniques, allowing for precise and efficient coverage on various surfaces.
How do I properly clean the Wagner Airless Paint Sprayer after use?
To properly clean the Wagner airless paint sprayer after use, follow these maintenance tips. Start by disconnecting the sprayer from the power source and removing the paint container. Flush the system with water or appropriate cleaning solution, disassemble and clean the nozzle, filters, and other components.
Is it necessary to wear protective clothing and a mask when using the Wagner Airless Paint Sprayer?
When using the Wagner airless paint sprayer, it is absolutely necessary to wear protective clothing such as coveralls, gloves, and goggles, as well as a mask to protect against inhaling paint particles and fumes. Safety should always be a top priority.
What is the maximum coverage area the Wagner Airless Paint Sprayer can handle?
The maximum coverage area of the Wagner airless paint sprayer is determined by various factors such as the tip size, pressure settings, and paint viscosity. Proper application techniques ensure efficient coverage and include maintaining a consistent distance, overlapping strokes, and adjusting pressure as needed.
Can the Wagner Airless Paint Sprayer be used on textured surfaces?
When using the Wagner airless paint sprayer on textured surfaces, it is important to employ the best techniques for painting textured walls. This includes adjusting the spray pattern, using multiple coats, and ensuring even coverage for a professional finish.
Conclusion
In conclusion, using a Wagner Airless Paint Sprayer can greatly enhance your painting experience. With its efficient and effective design, you can achieve professional-looking results with ease. By following the step-by-step instructions and tips provided, you’ll be able to navigate through the process smoothly and efficiently.
Remember to choose the right paint, practice on a test surface, and properly maintain the sprayer for optimal performance. Safety should always be a priority, so be sure to follow the recommended precautions.
With the expertise, precision, and professionalism of a painting specialist, you can confidently transform any space into a beautifully painted masterpiece. So go ahead, unleash your creativity, and enjoy the satisfaction of a job well done.