
TL;DR
Moving your rig into a closet with strategic dampening and sealing can drastically reduce noise and reflections. It’s about placement, materials, and ventilation—knowing when a closet is enough or when you need real soundproofing.
Ever wish your noisy PC or AI rig didn’t drown out your work or recordings? Simply stuffing foam panels around your closet won’t cut it. The real secret? moving the heat and noise away—literally. Think of your closet as a dedicated, quiet hideout for your rig, where soundproofing and placement make all the difference.
This article unpacks how to turn a cramped closet into a lean, mean, acoustically treated machine room. You’ll learn the best materials, placement tricks, and when a closet setup is enough—saving you time, money, and frustration.
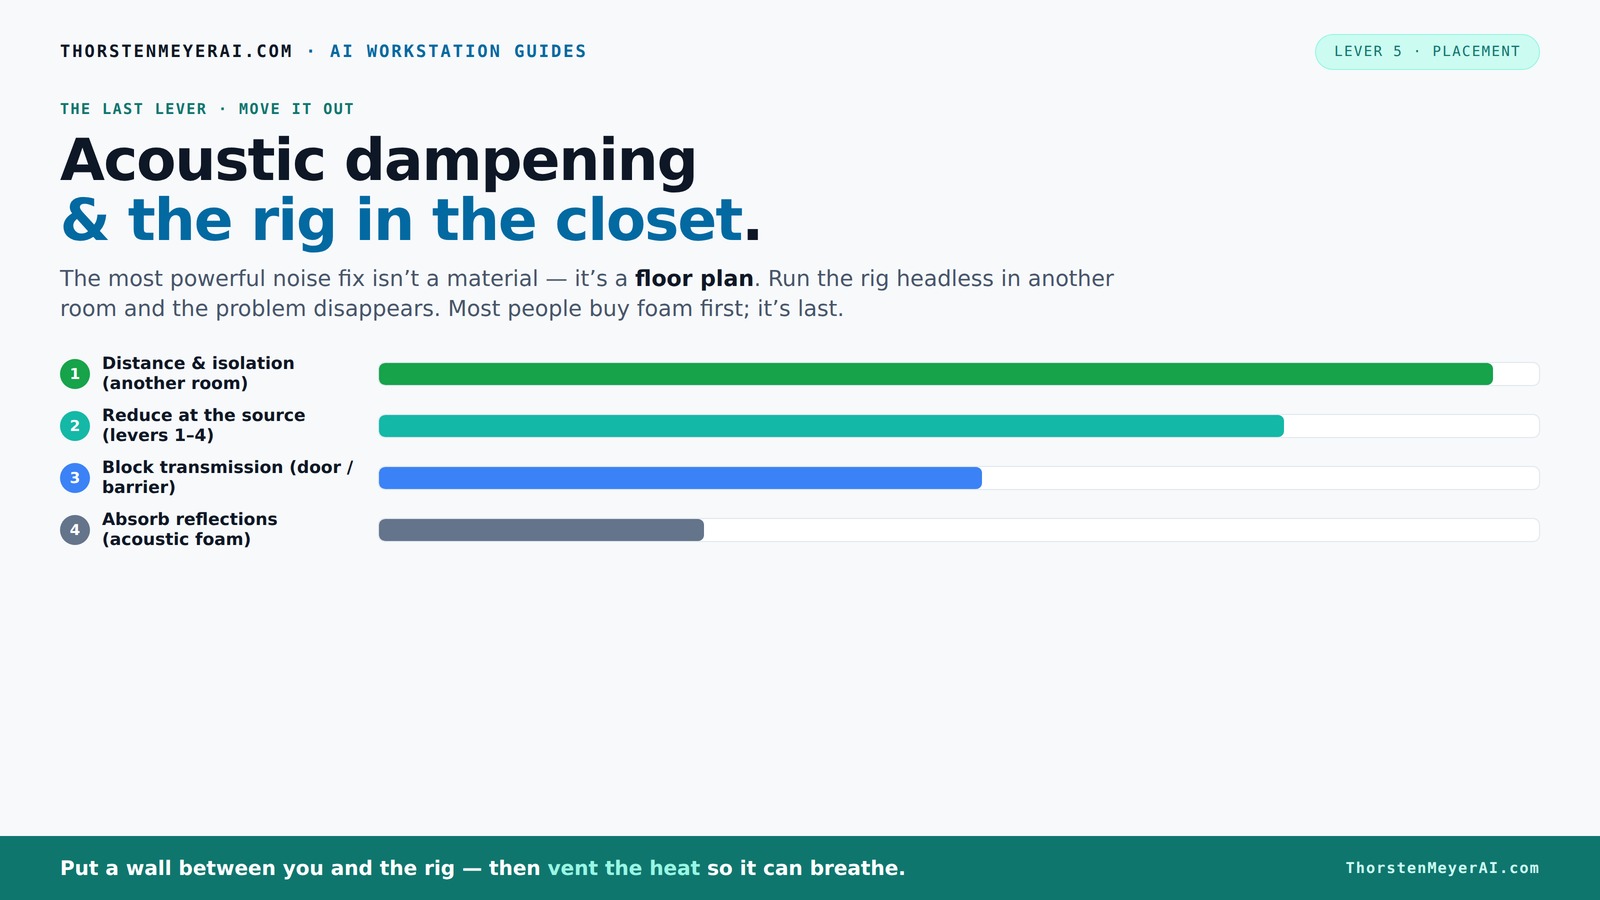
Acoustic dampening
& the rig in the closet.
The most powerful noise fix isn’t a material — it’s a floor plan. A rig you can’t hear because it’s in another room beats any amount of foam. Tap the approaches in Part 1 to see what actually works.
(another room)
(levers 1–4)
(door / barrier)
(acoustic foam)
Contain the noise, not the heat
Key Takeaways
- Prioritize sealing gaps around the door and outlets before adding absorption panels.
- Treat first-reflection points—walls, ceiling, and door—to significantly improve sound quality.
- Moving your rig into a closet can eliminate noise issues if ventilation and heat management are addressed.
- Use dense materials like wool or mineral wool for broad-spectrum absorption, especially at low frequencies.
- A well-sealed, ventilated closet can be a practical, cost-effective solution for quiet, high-quality recordings or AI workloads.

24 Pack Black 12 x 12 x 2 Inches Pyramid Designed Acoustic Foam Panels, Sound Proof Foam Panels for Walls, High Density and Flame-Retardant Acoustic Panels, Sound Panels for Recording and Home Studio
- Effective Sound Absorption: Reduces echo and reverberation
- High-Quality Material: Durable, flame-retardant acoustic foam
- Stylish Pyramid Design: Enhances sound diffusion and decor
As an affiliate, we earn on qualifying purchases.
As an affiliate, we earn on qualifying purchases.
What Does 'Rig in the Closet' Actually Mean?
Putting your rig in a closet means moving the entire machine—GPU, CPU, fans—into an enclosed space where noise and heat are contained. It’s a practical solution for keeping the noise out of your workspace while still running high-power workloads. Think of it like a soundproof bunker for your machine, but with ventilation.
For example, many AI researchers do their heavy lifting in a closet or basement, accessing the rig remotely. The goal? Keep the noise away from your ears, while still maintaining airflow and cooling.
Why Closets Can Make or Break Your Sound Quality
Closets can be goldmines for sound control—if you treat them right. They naturally dampen echoes because of clothes and soft materials. But they also have pitfalls. Hard surfaces, gaps, and the door leak sound, turning the closet into a tiny echo chamber or a leak tunnel.
Imagine recording vocals in a closet lined with clothes—sound bounces less, making your voice clearer. But a squeaky door or gaps around the frame can turn your space into a noisy nightmare. The trick is knowing how to treat both the inside and the door.
Understanding these dual effects is crucial. If you ignore the leaks, no amount of foam will improve your sound quality because external noise will seep in and reflections will bounce around. Conversely, if you only focus on sealing leaks but neglect internal damping, you'll still face echoes and muddiness. The balance between absorption and sealing determines whether your closet becomes a sonic haven or a noisy echo chamber.
Best Materials for Dampening Inside Your Closet
To tame reflections and low-frequency booms, you need dense, broad-spectrum materials. Thick wool panels, mineral wool, or fiberglass are better than thin foam at absorbing bass and reducing echo. Also, layering materials—like hanging blankets and dense panels—creates a more effective barrier.
For example, a DIY setup might include hanging a wool blanket in front of the door, lining the walls with acoustic panels, and placing a thick rug on the floor. These materials soak up sound waves, making your recordings clearer.
Choosing the right materials involves understanding their properties. Dense materials like mineral wool have larger internal friction, which makes them more effective at absorbing low frequencies that typically cause boomy sounds. Thinner foam tends to focus on higher frequencies and may leave bass issues unaddressed. Layering multiple types of materials can help you target a broader frequency range, but be aware that increasing density and thickness may also add to the overall weight and cost. The key is to balance effectiveness with practicality, ensuring your setup isn't overly cumbersome or expensive while still achieving the desired sound quality.
Where to Place Absorption Panels for Maximum Effect
Placement is king. The most important spots are the first-reflection points—the wall directly in front of you and your mic, the ceiling overhead, and the side walls near your position. These are the surfaces your sound hits first, shaping the quality of your recordings.
For example, if you record vocals in the closet, treat the wall behind the mic and the ceiling first. Use a mirror trick: sit in your recording position and reflect the mic’s view onto the wall. Wherever you see your reflection, that’s where to put absorption panels.
Proper placement ensures that the sound waves are absorbed at critical points, preventing early reflections from bouncing around and muddying your recordings. Ignoring these points often results in a boxy or echoey sound that’s hard to fix later. Remember, the goal is to control the sound before it hits your ears or microphone, shaping a clear, natural tone from the start.
How to Seal Gaps and Treat the Closet Door
The closet door is a major leak point—gaps around hinges, handles, or cracks can let sound escape or enter. Sealing these gaps with weatherstripping, acoustic sealant, or hanging a dense blanket can cut down leaks significantly.
For example, adding weatherstripping around the door frame and covering the door with a moving blanket creates a much tighter seal. This reduces both sound escaping and external noise intruding.
Effective sealing not only prevents sound leaks but also improves the overall acoustic environment by maintaining consistent internal conditions. Gaps act like open windows for sound, so sealing them is often the most cost-effective way to boost your setup’s performance without extensive construction. Be mindful that sealing too tightly may restrict airflow, so combine sealing with proper ventilation solutions to prevent heat buildup.
Common Mistakes That Undermine Your Closet Setup
Many folks focus only on foam panels, ignoring leaks and low-frequency issues. Over-sealing without airflow can cause heat buildup. Also, ignoring first-reflection points or neglecting the door leaks diminishes effectiveness.
For example, sealing every crack but ignoring ventilation leads to overheating. Or, treating only the walls and leaving the door untreated results in sound leaks. These mistakes can turn an otherwise effective setup into a noisy or overheated environment. Balancing soundproofing with proper ventilation and comprehensive treatment is essential. Failing to address these aspects can compromise both the sound quality and the safety of your equipment.
When a Closet Is Enough—and When You Need Real Soundproofing
A closet with basic treatment can be enough for voice recordings, podcasts, or light editing. It controls reflections and reduces echo. But if you need total sound isolation—like blocking out street noise or loud neighbors—you’ll need heavier solutions.
For example, adding dense drywall, damping compounds, and specialized soundproof doors makes a big difference. These are more involved but necessary for complete soundproofing. The decision depends on your noise environment and quality needs. If your goal is professional-grade silence, investing in proper mass and decoupling techniques is essential. For casual use, a well-treated closet with sealing and absorption may suffice, but always consider your specific noise sources and desired isolation level.
Frequently Asked Questions
Does acoustic foam soundproof a closet?
Acoustic foam mainly reduces echo and reflections inside the closet. It does not fully block sound transmission through walls or gaps. For true soundproofing, sealing leaks and adding mass are necessary.[1][7]Where should I place panels in a closet rig?
Prioritize first-reflection points: the wall directly in front of your mic, the ceiling above, and side walls near your head. These spots shape your sound quality most effectively.[2][4]Do corners matter most?
Corners help with low-frequency buildup, but in a small closet, treating the surfaces near the mic and listener position often yields quicker results. Use bass traps if low-end issues persist.[4][2]How can I make a closet less boxy?
Add broad absorption like wool or mineral wool, hang blankets or clothes, and treat reflective surfaces near your mic. These steps soften the sound and reduce the 'boxy' effect.[2][4][7]What is the cheapest effective setup?
Use clothes, blankets, and a few dense panels placed at key reflection points. This DIY approach offers significant improvements without breaking the bank.[1][4][7]Conclusion
Placing your rig in a closet isn’t just a quick fix—it's a smart strategy if you treat it right. Seal gaps, treat reflection points, and ensure proper airflow. With these steps, your closet becomes a mini studio or server room that keeps noise out and heat in check.
Imagine a quiet corner where your machine hums in peace while you focus on your work or recordings. That’s the power of smart placement and thoughtful dampening. Your closet isn’t just storage; it’s your new secret weapon.