Connect with us

Airless Paint Sprayers

Airless Paint Sprayer Tips for Painting Vaulted Ceilings

Keep your vaulted ceilings looking flawless with expert airless paint sprayer tips that will transform your painting experience—discover the secrets to a perfect finish!

Published

on

vaulted ceiling painting tips

Using an airless paint sprayer is your best choice for achieving a smooth finish on vaulted ceilings. Start by preparing your workspace; move furniture and lay down drop cloths. Make sure to choose the right spray tip for even coverage and practice your technique on cardboard. Maintain a distance of about 12 inches from the surface and use a crosshatch pattern to avoid drips. Allow each coat to dry completely before applying another, and thoroughly clean your sprayer after use. By following these essential tips, you'll set yourself up for a successful painting project and discover more helpful insights along the way.

Key Takeaways

  • Choose the right spray tip and adjust pressure for optimal coverage on vaulted ceilings.
  • Practice spraying techniques to maintain a consistent distance and avoid drips.
  • Work in manageable sections and overlap strokes by 50% for uniform coverage.
  • Ensure proper workspace preparation and surface protection to avoid damage during painting.
  • Clean equipment thoroughly after use to maintain performance and longevity.

Project Overview

When tackling the challenge of painting vaulted ceilings, using an airless paint sprayer can make a world of difference. Unlike rollers, which often lead to flaking and uneven texture, an airless paint sprayer provides uniform coverage that enhances the aesthetic of your ceiling. This method not only saves you time but also guarantees a professional finish that you'll appreciate for years to come.

To achieve ideal results, it's important to take into account airless paint sprayer basics such as nozzle sizes and pressure settings. Before diving into your project, proper preparation is vital. Move furniture out of the way and mask any surfaces you don't want to paint. This prevents overspray and helps you achieve clean lines.

Choosing the right spray tip is significant, too. It should match the surface size and paint consistency to guarantee ideal results.

Don't forget about safety precautions. Wear protective gear and make sure the area is well-ventilated. This minimizes health risks associated with fumes and overspray.

Essential Tools and Equipment

necessary gear and supplies

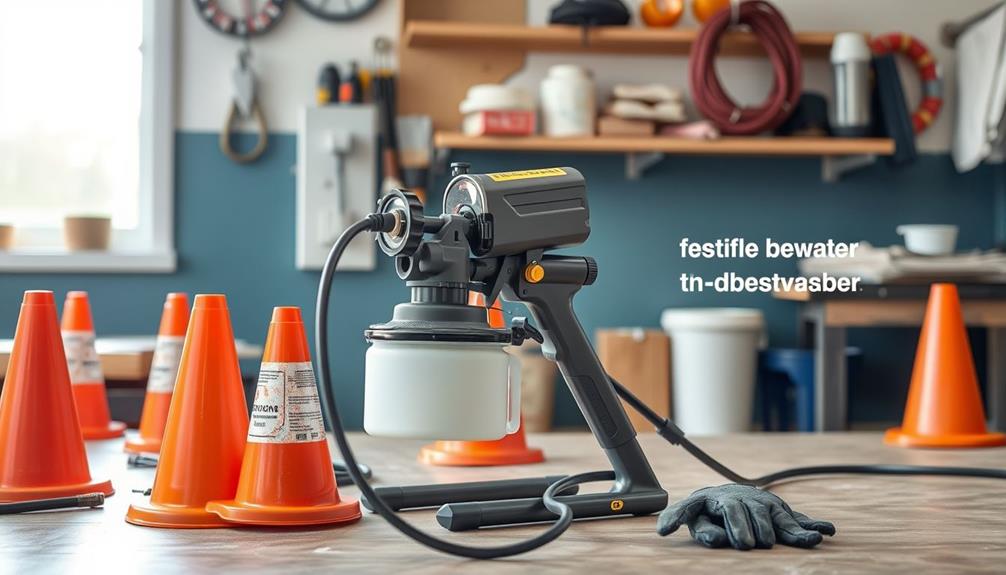
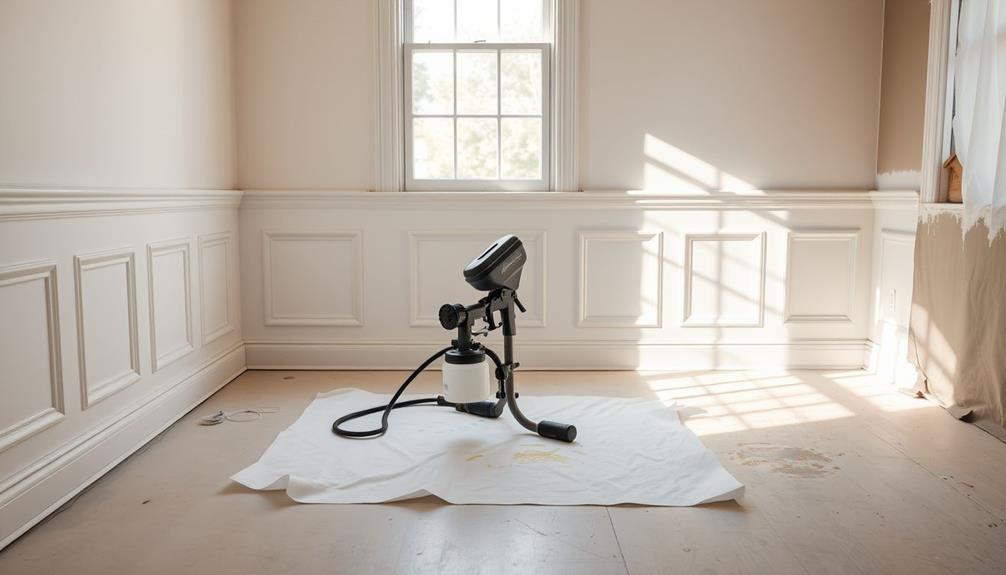
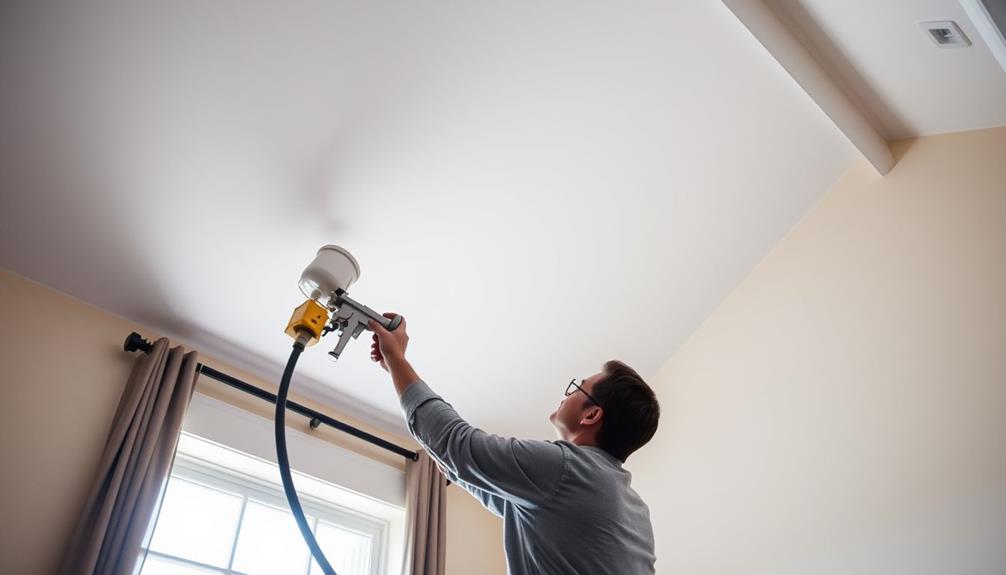
To tackle vaulted ceilings effectively, you'll need the right tools and equipment. Start with a recommended sprayer model, like the Magnum by Graco, which offers efficient coverage and ease of use for high surfaces.

Additionally, consider using flushing issues that may arise from improper disposal practices, as keeping your workspace clean is essential for maintaining your tools.

Advertisement

Don't forget essential safety gear to protect yourself.

Recommended Sprayer Models

Choosing the right airless paint sprayer is essential for achieving a flawless finish on vaulted ceilings. One highly recommended sprayer model is the Magnum by Graco, known for its efficiency and ability to deliver uniform coverage.

When selecting a sprayer, consider these key features:

  1. Adjustable Pressure: Look for models that allow you to control the pressure for different surfaces. This aspect can greatly impact the final result, guaranteeing even application similar to how sound systems enhance audio immersion in home theater setups.
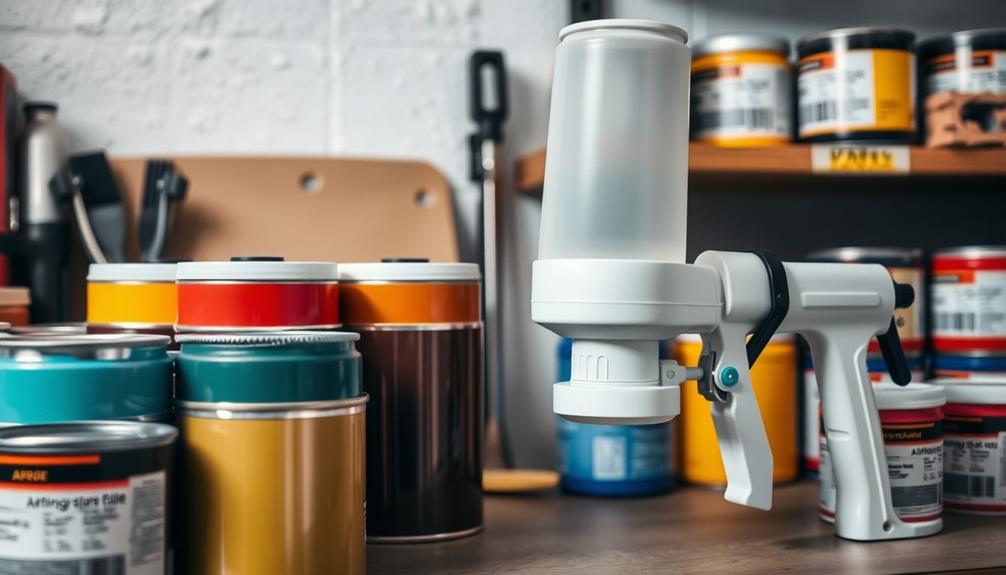
  2. Variety of Spray Tips: Confirm the sprayer comes with multiple spray tips for versatility in covering different surface sizes and types.
  3. Capacity: Choose a sprayer with an adequate paint capacity to minimize refills during your project.
  4. Ease of Cleanup: Opt for models designed for quick and easy cleanup, saving you time after painting.

Before you start, always refer to the specific operation manual for your chosen sprayer model. This guarantees you understand the detailed instructions and safety procedures tailored to that equipment.

Necessary Safety Gear

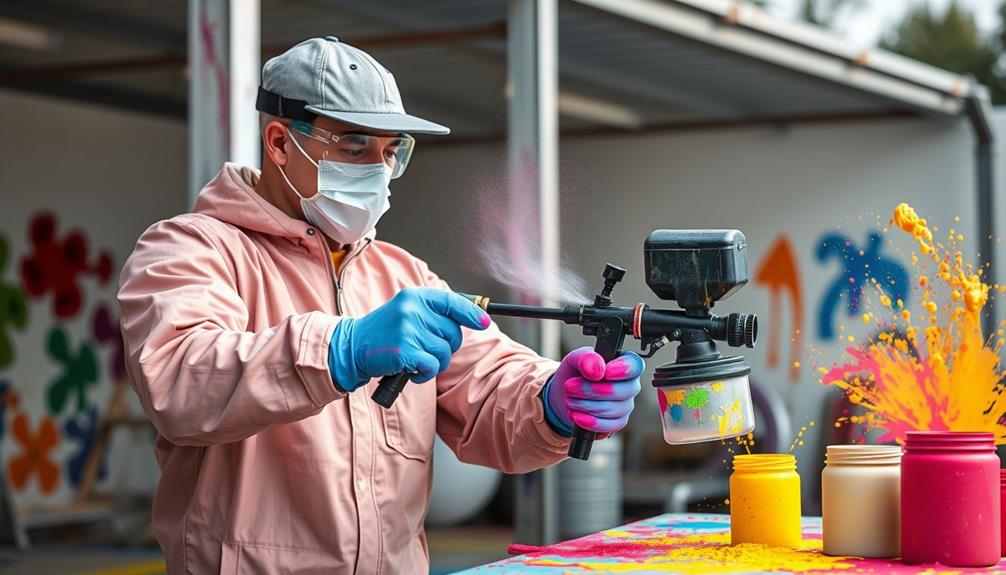
Safety gear is essential when using an airless paint sprayer, especially for projects involving vaulted ceilings. You can't compromise on your safety while tackling high and tricky areas.

Start with a good pair of safety glasses to shield your eyes from paint splatter and airborne particles. A dust mask or respirator is also necessary safety gear; it'll help you avoid inhaling harmful fumes and particles during the spraying process.

Advertisement

Additionally, maintaining good air quality in your workspace is vital, as indoor air can be highly polluted during such projects.

To protect your hair and neck from paint exposure, consider using spray socks or protective headgear. Your hands are vulnerable too, so wear sturdy gloves, preferably latex, to guard against paint and chemicals during both preparation and application.

Don't forget about ventilation! Verify your workspace is well-ventilated by opening windows and using fans to promote airflow. This step reduces the buildup of fumes, making the environment safer for you.

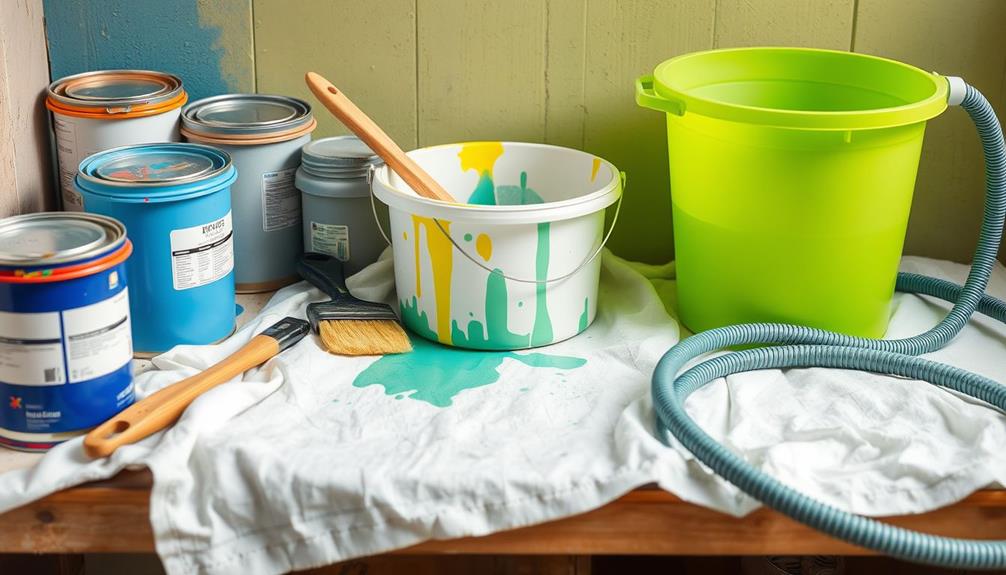
Essential Cleanup Supplies

After finishing your painting project, gathering essential cleanup supplies is important for maintaining a tidy workspace and ensuring your equipment lasts.

Proper care of your tools can be likened to the attention required for maintaining a dog's health and nutrition, especially when considering the significance of regular vet check-ups.

Advertisement

Here's a quick checklist to help you get started:

  1. Stiff nylon brushes: Use these to remove paint from surfaces and clean your sprayer effectively.
  2. Cleaning rags: Keep some on hand for wiping down tools and equipment after use.
  3. Empty bucket: This is necessary for collecting used paint and cleaning your airless sprayer during and after the project.
  4. Drop cloths: Having these ready protects your floors and surfaces, making it easier to dispose of paint drips and debris.

Don't forget to wear protective gear, such as safety glasses, dust masks, and spray socks, while you clean up.

A thorough cleaning of your airless paint sprayer is essential, so always follow the manufacturer's instructions based on the paint type you used.
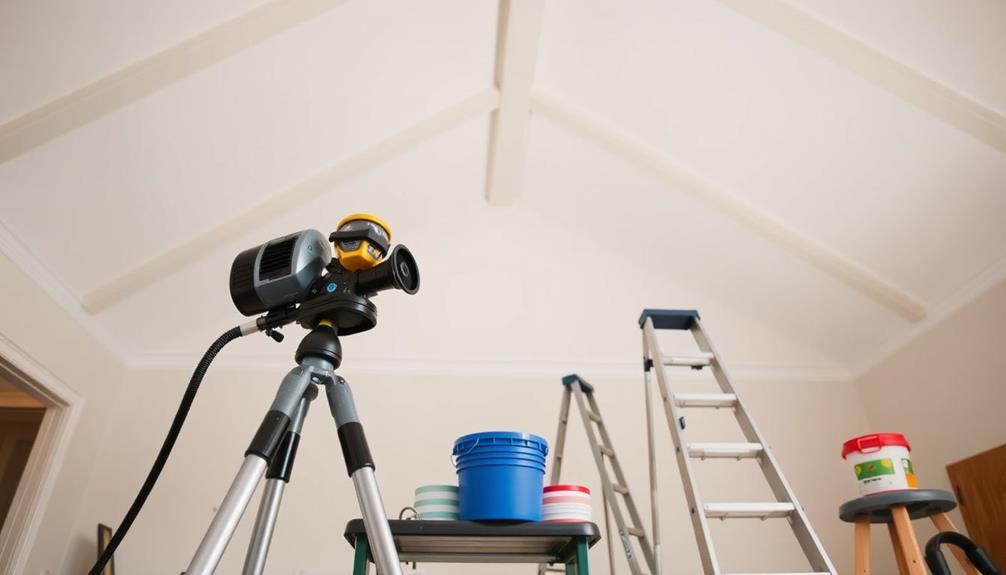
Preparation Steps

detailed planning process

Before you start painting, make sure to remove all furniture from the room to create a clear workspace and avoid any damage.

Cover the floor with drop cloths to protect it from paint drips, and don't forget to shut off the power and manage your light fixtures to keep everything safe.

For enhanced safety, consider wearing safety glasses to protect your eyes from any splatters.

With surfaces wiped down and areas masked off, you'll set yourself up for a smooth painting process.

Advertisement

Furniture Removal Process

To guarantee a smooth painting experience for your vaulted ceilings, start by emptying the room of all furniture. This furniture removal process is essential for creating a clear workspace, allowing you to focus on your painting tasks without distractions.

Additionally, consider the importance of having a clean environment, much like the key factors in choosing a home cleaning service, to ascertain that you can work efficiently.

Here's how to tackle it efficiently:

  1. Disassemble Larger Items: Break down larger pieces, like beds or bookshelves, into manageable parts for easier transport.
  2. Cover Remaining Furniture: If some items can't be moved, protect them with drop cloths or plastic sheeting to avoid paint splatter and dust.
  3. Remove Wall Decorations: Take down pictures, mirrors, or any wall decor to prevent accidental damage during your painting project.
  4. Cover the Floor: After all furniture is out, lay down drop cloths on the floor to catch any drips or spills.

Following these steps will ascertain that your workspace is ready for painting vaulted ceilings. Not only will it protect your belongings, but it'll also make your painting process much smoother and more efficient.

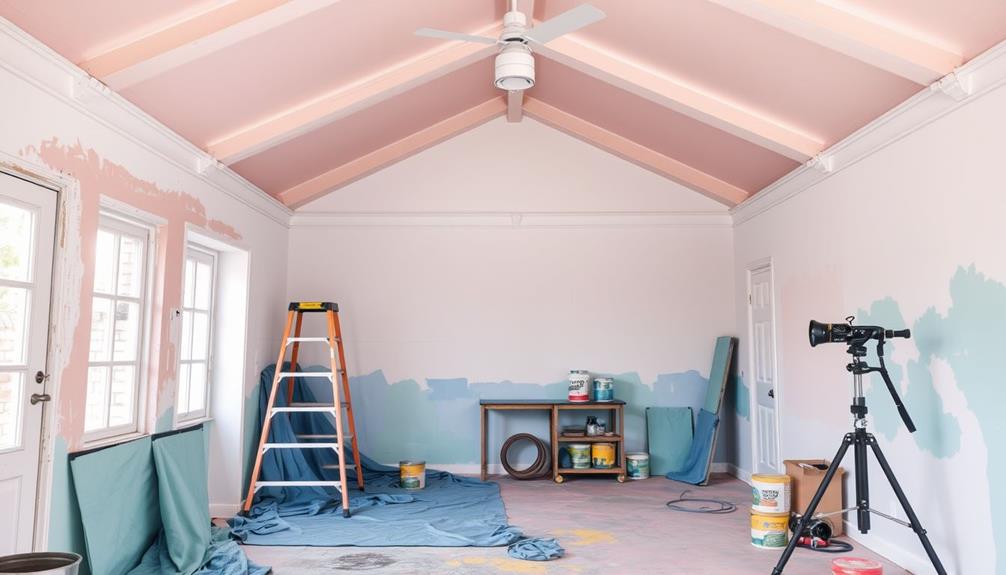
Surface Protection Techniques

Creating a safe painting environment involves several essential surface protection techniques that guarantee your vaulted ceilings get the attention they deserve. Start by moving all furniture out of the room to confirm you have a spacious workspace. Next, cover the floor with drop cloths to protect it from any paint splatters or spills that might occur during the spraying process.

Before you begin, shut off power to the room and either remove or cover light fixtures to prevent damage from paint overspray. Lightly wipe down surfaces, including the ceiling, to remove dust and debris that could affect paint adhesion. Finally, use masking tape to carefully mask windows, trim, and any areas you don't want to paint, confirming clean lines and preventing overspray.

Advertisement
Step Action Purpose
Move Furniture Remove all items from the room Create a safe and spacious workspace
Cover Floor Lay down drop cloths Protect floor from paint splatters
Masking Tape Cover areas not to paint Confirm clean lines and prevent overspray

Following these techniques will help you achieve a professional-looking finish on your vaulted ceilings.

Lighting Fixture Management

After guaranteeing your workspace is ready and surfaces are protected, it's time to focus on managing your lighting fixtures. Proper preparation here is essential to avoid any mishaps during your painting project. Follow these steps:

1. Shut Off Power: Turn off the electricity to the room to prevent any electrical hazards while you handle the fixtures.

It's also wise to verify your home is secure during this process, as home security systems can deter potential intruders.

2. Remove or Cover Fixtures: If possible, take down the light fixtures completely. If that's not an option, cover them thoroughly with plastic sheeting to shield against paint splatter.

Advertisement

3. Apply Masking Tape: Use masking tape around the edges of the fixture mounts. This creates a protective barrier against paint and helps you achieve clean lines for easy removal later.

4. Have Tools Ready: Keep necessary tools, like screwdrivers and pliers, within arm's reach. This will allow for quick removal and reinstallation of fixtures.

Once you've completed your painting, remember to let the ceiling dry completely before reinstalling the light fixtures. This prevents smudging or damaging your fresh paint, guaranteeing a professional finish.

Paint Preparation

surface cleaning and priming

Before diving into painting vaulted ceilings, it's crucial to prepare your paint properly for the best results. Start by straining your paint through a fine mesh to remove any dried sediment, as this can greatly impact your paint thickness and overall finish quality.

This step guarantees a smooth application when using your airless sprayer, allowing the paint to dry evenly without imperfections.

Always wear latex gloves during this process to protect your hands from paint and chemicals. After straining, squeeze out any excess paint from the strainer and discard both the strainer and gloves to maintain a clean workspace.

Advertisement

Next, make certain the ceiling surface is clean and dust-free. A clean surface helps the paint adhere better, leading to a more even finish and reducing the chances of peeling later on.

Don't forget to gather and wear all necessary safety equipment, including a mask or respirator and safety glasses. This protects you from harmful fumes and guarantees a safer painting experience.

With your paint prepared and safety gear on, you're ready to tackle those vaulted ceilings effectively. Remember, proper preparation is key to achieving a professional-looking finish!
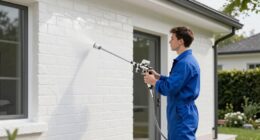
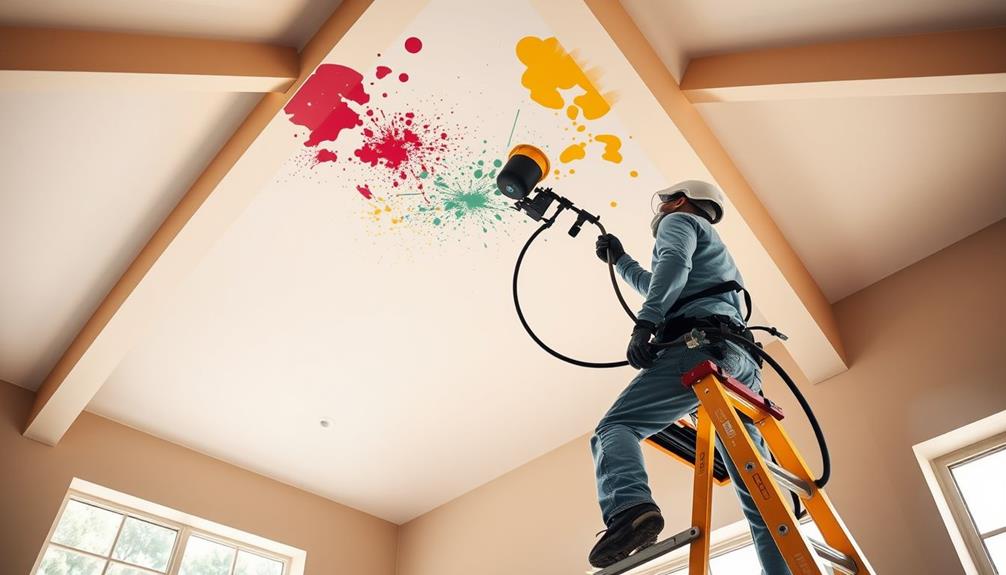
Spraying Techniques

effective application methods

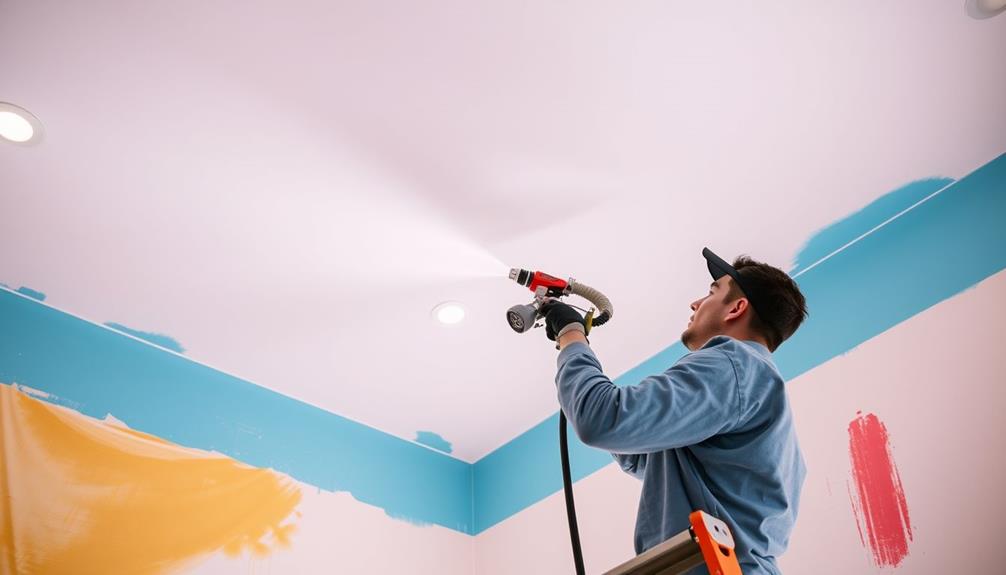
With your paint prepped and safety gear in place, it's time to focus on the spraying techniques that will help you achieve a flawless finish on your vaulted ceilings.

Mastering the right spray pattern is vital for a smooth application, similar to how budget-friendly vacuum cleaners can help maintain cleanliness effortlessly. Here are some essential tips:

  1. Practice First: Always practice spraying on a piece of cardboard. This helps you get a feel for the sprayer and guarantees you achieve a consistent spray pattern before tackling the actual surface.
  2. Maintain Distance: Keep the sprayer about 12 inches from the surface. This distance prevents drips and promotes even application.
  3. Use a Crosshatch Pattern: Spray horizontally and then vertically to guarantee complete and uniform coverage, especially on textured ceilings.
  4. Overlap Strokes: Overlap each spray stroke by 50% to avoid streaks and guarantee no areas are left unpainted.

Start and stop the spray before and after each hand movement to maintain precision and minimize overspray.

Coverage and Coats

insurance policies and protection

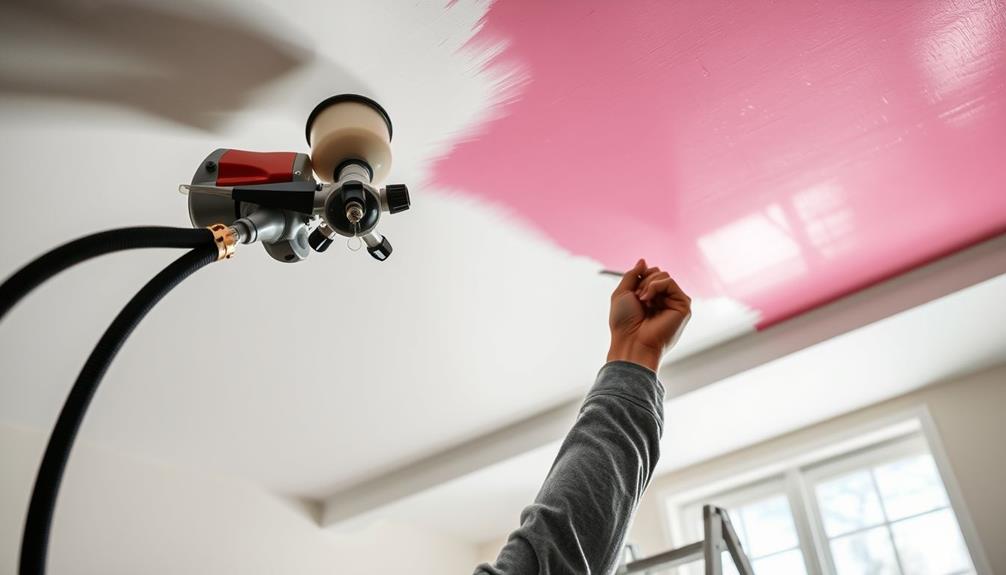
Achieving ideal coverage and the right number of coats is essential when painting vaulted ceilings. To maintain control and prevent drips, work in manageable 3 to 4-foot sections. Use a crosshatch spraying pattern to guarantee complete coverage, distributing paint evenly across the textured surface. This technique not only enhances the appearance but also helps in spotting any missed areas.

When evaluating the need for additional coats, always wait for the first coat to dry completely. After it dries, check for any missed spots or uneven areas. If you find any inconsistencies, it's a sign you might need another coat.

Advertisement

Keep a consistent overlapping technique of 50% between passes to avoid streaks. This will help you maintain uniformity in your finish.

For the best results, don't rush the drying process. Allow sufficient drying time between coats; this enhances adhesion and improves the overall look of the painted ceiling.

Clean-up Procedures

sanitation and maintenance guidelines

Clean-up after painting vaulted ceilings is an essential step to confirm a polished finish and maintain your tools. Following proper clean-up procedures helps ascertain your spray equipment remains functional for future projects. Here are the steps you should take:

  1. Remove Masking Tape: Wait until the paint is completely dry before carefully removing the masking tape. This prevents peeling and confirms clean lines.
  2. Take Off Protective Coverings: Gently remove any drop cloths or protective coverings from furniture and surfaces to avoid accidental damage or paint transfer.
  3. Reinstall Light Fixtures: If you took down any light fixtures, make sure to securely reattach them and restore power to the room only after confirming everything is in place.
  4. Clean Spray Equipment: Thoroughly clean your airless paint sprayer by following the user manual's specific instructions. Make sure all paint residues are removed to keep your sprayer in top shape.

Final Steps

concluding necessary actions

After the paint has dried completely, it's time to wrap up the project by taking a few final steps to verify everything looks perfect. Start by carefully removing any masking tape or protective coverings. You'll want to peel the tape off at a 45-degree angle to avoid pulling up any dried paint from the ceiling.

Next, reattach your light fixtures, verifying they're securely fitted and functional. After that, dispose of drop cloths and other protective materials properly; this keeps your workspace clean and organized.

Finally, wait until the paint has fully cured before moving furniture back into the room. This helps prevent any damage to your freshly painted ceilings.

Here's a quick summary of these final steps:

Advertisement
Step Action Purpose
Remove masking tape Peel at a 45-degree angle To verify clean edges
Reattach light fixtures Securely fit them back To restore functionality
Dispose of protective materials Clean up the workspace To maintain a tidy environment
Move furniture Wait until paint is cured To avoid damaging the paint

Frequently Asked Questions

How Do Painters Paint Vaulted Ceilings?

To paint vaulted ceilings, you'll need a sturdy ladder and a roller or sprayer. Start from one corner, work in sections, and maintain a consistent distance for an even finish. Safety gear's essential too!

How to Spray Paint a Tall Ceiling?

To spray paint a tall ceiling, you'll want to use an airless sprayer for even coverage. Start at the highest point, maintain a 12-inch distance, and work in sections, overlapping each stroke for consistency.

What Spray Tip Should I Use for Ceilings?

You should use a spray tip sized between 515 and 619 for ceilings. This range offers a wider spray pattern, helping you achieve even coverage and a smooth finish while minimizing drips during your painting project.

Do You Paint the Ceiling or Walls First With an Airless Sprayer?

Did you know that 70% of DIY painters prefer tackling ceilings first? You should paint the ceiling first with an airless sprayer. This method minimizes drips and overspray, making touch-ups on walls much easier.

Conclusion

As you step back to admire your freshly painted vaulted ceiling, it's clear that with the right tools and techniques, you've transformed your space into a masterpiece. Just like an artist painting a canvas, you've embraced the challenge and created a stunning focal point. Remember, preparation is your best friend, and patience is your brushstroke. So, celebrate your achievement, and let your newly spruced ceiling soar like a bird in the open sky!

Advertisement

Whether it’s a step-by-step tutorial on achieving flawless finishes or an in-depth analysis of the latest airless paint sprayer models, Joe’s ability to articulate complex ideas in a simple and engaging manner resonates with our diverse audience. His practical tips and techniques empower readers to tackle their projects with confidence.

Continue Reading
Advertisement

Airless Paint Sprayers

How to Achieve a Smooth Finish on Doors With an Airless Paint Sprayer

Find out how to achieve a flawless finish on your doors with an airless paint sprayer and discover essential tips that will elevate your painting game.

Published

on

By

smooth finish airless spraying

To achieve a smooth finish on doors with an airless paint sprayer, start by preparing your workspace: remove the doors and hardware, and cover surrounding areas. Elevate the doors for easy access, then fill cracks and sand rough spots. Use a Wagner model 9170 sprayer and a 415 spray tip for an even pattern. Thin the paint with 15-20% Floetrol for ideal consistency. Maintain a distance of 12 inches and make overlapping passes for better coverage. Allow drying time between coats to prevent smudging. Stick around, and you'll uncover more tips for achieving that perfect finish.

Key Takeaways

  • Ensure proper surface preparation by filling cracks and sanding rough areas for enhanced paint adhesion and a smoother finish.
  • Thin latex paint with 15-20% Floetrol to improve sprayability and achieve an even coat.
  • Use a 415 spray tip for a narrow, sharp spray pattern to ensure consistent coverage and avoid runs.
  • Maintain a consistent distance of 12 inches from the surface when spraying to prevent drips and achieve a smooth application.
  • Allow 15 minutes of drying time between coats to prevent smudging and promote a flawless final finish.

Project Preparation

Before diving into your painting project, it's vital to set the stage for success. Start your project preparation by removing the doors from their frames, including all hardware like hinges. This step creates a clean workspace, fundamental for achieving a smooth finish.

Elevate the doors using sawhorses or a 1×2 board setup, allowing easy access to every surface while keeping them off the ground. Additionally, consider the best practices for airless sprayers to guarantee ideal usage and results.

Next, confirm your workspace is thoroughly cleaned and protected from dust contamination. Cover surrounding areas with contractor paper or plastic sheeting to catch any overspray from your airless sprayer.

Take the time to fill any cracks or imperfections in the doors and sand rough areas. This promotes better paint adhesion and a smoother finish, which is key for a professional look.

Don't forget to test your spray technique on scrap material or cardboard before you start on the doors. This will help you verify ideal paint flow and coverage.

Advertisement

Selecting the Right Equipment

choosing appropriate gear wisely

Choosing the right equipment is vital for achieving that smooth finish on your doors. For this task, consider the Wagner model 9170 airless sprayer. It's specifically designed to deliver a reliable spray pattern and has adjustable pressure settings that let you control the flow of paint effectively.

Additionally, using safety glasses is essential during this process to protect your eyes from any overspray or particles.

When you're ready to spray, select a 415 spray tip. This tip provides a narrow, sharp spray pattern, perfect for detailing while guaranteeing even coverage across the door surfaces.

Don't hesitate to experiment with different nozzle sizes to find the best spray pattern for the type of airless paint you're using.

To achieve the finest results, maintain a low pressure setting. This allows for finer control over the paint application, reducing the chances of unsightly runs and drips.

Additionally, a viscosity gauge is important. It helps confirm your paint is thinned to the right consistency. For instance, when spraying latex, aim to thin it with 15-20% Flotrol to improve sprayability.

Advertisement

With the right equipment and settings, you'll be on your way to a flawless finish on your doors.

Surface Preparation Steps

essential surface prep steps

Once you've gathered your equipment, surface preparation becomes the next vital step in achieving that smooth finish on your doors.

Start by removing the doors from their jambs and hinges. This creates a clean workspace and helps prevent overspray on surrounding areas. Additionally, if you notice any signs of water damage or leaks, it's wise to address these issues before proceeding, as they can affect the integrity of your door's surface.

Next, fill any cracks or imperfections with a suitable filler, then sand rough spots to guarantee a smooth surface for painting.

Now, it's time to clean the door thoroughly. Use a damp cloth or sponge to eliminate dust and debris, as these can interfere with paint adhesion and lead to an uneven finish.

Once the door is clean and dry, apply a high-quality primer, especially on bare wood or unprimed surfaces. This step is essential for achieving a durable and smooth finish.

Advertisement

For best results, consider the importance of proper disposal practices to maintain a clean workspace throughout your project.

Recommended Spraying Techniques

effective application methods suggested

Achieving a smooth finish on your doors relies heavily on the right spraying techniques. Start by using a 415 spray tip, which provides a narrow and sharp spray pattern for better control. This will help guarantee an even coat across the surface.

Additionally, consider the importance of reputation and reviews from past clients when selecting a professional service to assist with painting projects. Keep your pressure setting low to minimize overspray and allow for finer detail during the spraying process.

Begin by spraying the inner carved areas of the doors first, then move on to the outer surfaces. This method prevents runs and helps achieve a uniform look. Make quick, even passes with the sprayer, and wait about 15 minutes before over-brushing to smooth out any imperfections while keeping a wet edge.

Don't hesitate to experiment with different nozzle sizes to find what works best for your project. Additionally, thinning the latex paint with 15-20% Floetrol can greatly improve sprayability, giving you a much smoother finish.

Achieving Optimal Paint Consistency

perfecting paint texture balance

To get that smooth finish you want, it's important to focus on the paint consistency before you start spraying. Begin by thinning latex paint with 15-20% Floetrol. This can considerably improve sprayability and help achieve a consistent application.

Utilizing a viscosity gauge is vital for checking that your paint is at the ideal thickness for spraying. This prevents clogs in your airless sprayer and guarantees a smoother finish on your doors. Additionally, using the right tip size can greatly enhance the finish quality, making it easier to achieve the desired results for intricate details Graco FFLP Fine Finish Low Pressure Reversible Tip.

Advertisement

Before you start, always filter paint to eliminate any debris that could lead to splatters and imperfections. This step enhances the overall quality of your application.

Additionally, it's wise to combine paint from multiple containers into a 5-gallon bucket. This practice assures color consistency throughout the spraying process, which is vital for a professional look.

Lastly, make sure to follow the manufacturer's technical data sheets regarding specific paint thinning requirements and preparation guidelines. Adhering to these recommendations will help you achieve the best results and a flawless finish on your doors.

Common Challenges and Solutions

overcoming obstacles effectively

When it comes to achieving a smooth finish on doors, you'll likely encounter a few common challenges. One major hurdle is getting an even finish without runs or drips. To tackle this, maintain a consistent distance of about 12 inches from the surface and use long, even strokes. This technique helps you avoid uneven spots and can be similarly beneficial when using ozone air purifiers to create a clean workspace, free from allergens that might affect your finish.

Another challenge is dealing with clogs, especially when using smaller spray tips. To prevent this, thin your paint by 15-20% and strain it before application. This guarantees a smoother spray and reduces the risk of interruptions during your work.

It's also essential to perform overlapping spray passes by 50%. This technique provides consistent coverage, particularly on detailed areas of the door where uneven application can be more noticeable.

Advertisement

Additionally, allow adequate drying time between coats—about 15 minutes after over-brushing—to prevent smudging and achieve that perfect final finish.

Lastly, always test your spray pattern on cardboard before you start on the doors. Doing this lets you identify any adjustments needed for peak performance and finish quality, setting you up for success.

Clean-Up and Maintenance

maintenance and clean up tasks

After you've tackled the challenges of getting a smooth finish on your doors, the next step is clean-up and maintenance. It's vital to clean your airless paint sprayer immediately after use. Follow the manufacturer's instructions to prevent paint from drying inside, which can cause clogs and damage.

For water-based paints, flush the sprayer with water; for oil-based paints, use mineral spirits to thoroughly clean the system and remove any residual paint from the pump and hose. Implementing regular maintenance checks on your equipment is imperative for peak performance, much like the routine checks recommended for home security systems to guarantee they operate effectively.

Don't forget to disassemble and clean the spray tip and filter regularly. Buildup can seriously impact performance, so soaking these parts in a suitable solvent will help remove any dried paint.

Store your airless sprayer in a dry place, protecting it from extreme temperatures to promote longevity and maintain functionality. Additionally, maintain a clean workspace during painting to minimize dust and debris contamination.

Advertisement

Tips for a Flawless Finish

achieve perfect makeup application

Achieving a flawless finish on your doors starts with the right tools and techniques. Use a 415 spray tip with your Wagner model 9170 airless sprayer; it provides a narrow spray pattern perfect for detailed work. Set the sprayer to the lowest pressure setting, giving you finer control and a more even application. This reduces the chances of runs or drips.

Here are some quick tips to keep in mind:

Tip Description Benefit
Spray Inner Areas First Start with the carved sections before the outer surfaces. Guarantees even coverage without missed spots.
Thin Your Paint Add 15-20% Flotrol to your water-based paint. Enhances sprayability for a smooth finish.
Zig-Zag Technique Use quick, zig-zag passes while spraying. Promotes even distribution, minimizing over-application.

Frequently Asked Questions

How to Get Smooth Finish With Airless Sprayer?

To get a smooth finish with an airless sprayer, use a fine tip and maintain a consistent distance. Overlap your strokes, thin your paint, and consider quick passes with a follow-up brush for perfection.

How to Get Smooth Finish When Painting Doors?

You might worry about uneven paint, but don't stress. To get a smooth finish when painting doors, use thin coats, spray consistently, and prep surfaces well. Your effort will make a noticeable difference!

Why Is My Paint Sprayer Not Spraying Smooth?

If your paint sprayer isn't spraying smooth, check for clogged tips, inconsistent pressure, or improperly thinned paint. Also, consider the spray tip size and environmental conditions to guarantee ideal performance during your project.

How Do You Spray a Door With an Airless Sprayer?

Spraying a door with an airless sprayer's like dancing with precision. You'll want to prep the surface, adjust your sprayer's pressure, and maintain a steady distance while moving in smooth, even strokes for the best results.

Advertisement

Conclusion

By following these steps, you'll be well on your way to achieving that smooth finish on your doors with an airless paint sprayer. Remember, practice makes perfect—so don't be afraid to experiment a bit! With the right techniques and a little patience, you'll have your doors looking as good as new in no time. So roll up your sleeves, get to work, and soon you'll be reaping the rewards of your hard labor!

Continue Reading

Airless Paint Sprayers

Airless Paint Sprayer Maintenance: Winterizing Your Sprayer

Understand the essential steps to winterize your airless paint sprayer and ensure it remains in top condition for your next project—don’t miss these crucial tips!

Published

on

By

winterizing airless paint sprayer

Winterizing your airless paint sprayer is essential to prevent damage from freezing temperatures. Start by cleaning it thoroughly to remove any paint and debris, then inspect hoses and connections for wear. Drain all fluids, add RV antifreeze to the pump and spray lines, and lubricate moving parts to keep everything intact. Store the sprayer in a dry, temperature-controlled space to protect it from moisture. After winter, flush the antifreeze and check for any hidden damage. By following these steps, you'll guarantee your sprayer remains in peak condition for the next painting season. Discover more tips to keep your equipment running smoothly.

Key Takeaways

  • Thoroughly clean the sprayer to remove paint and debris before winter storage to prevent residue buildup.
  • Drain all paint and fluids, then add RV antifreeze to protect the pump and lines from freezing.
  • Lubricate moving parts with Graco Throat Seal Liquid to maintain moisture and prevent drying during storage.
  • Inspect hoses and connections for wear or damage, replacing any compromised parts to ensure optimal performance.
  • Store the sprayer in a dry, temperature-controlled environment to protect it from harsh winter conditions.

Importance of Winterizing

Winterizing your airless paint sprayer is fundamental if you want to avoid costly repairs and guarantee smooth operation when the season kicks off again. When temperatures drop, failing to properly winterize can lead to serious internal damage. Freezing temperatures can cause trapped moisture to expand, leading to cracked hoses and damaged components.

If you neglect winterizing your airless, you'll likely face expensive repairs or even the need for a replacement. Proper maintenance and cleaning tips, like winterization, are essential for ensuring the durability of your sprayer, as outlined in our maintenance and cleaning tips.

By taking the time to winterize, you're not just protecting your investment; you're also ensuring your sprayer maintains peak performance for future use. Following manufacturer guidelines for winterizing your airless helps extend its lifespan and often keeps your warranty valid.

It's a straightforward process that saves you time and money in the long run. Moreover, winterizing reduces the risk of internal corrosion caused by moisture buildup, which can be detrimental to your equipment's longevity.

Preliminary Steps

initial action requirements

Before you winterize your airless paint sprayer, start by cleaning it thoroughly to remove any leftover paint or debris.

It's also wise to check for any potential issues that could arise due to power surges that may affect your tools, as appliance surge protection is essential for maintaining their functionality.

Advertisement

Next, inspect the hoses and connections for any signs of wear or damage, as this will help prevent issues when you use it again.

Taking these preliminary steps guarantees your sprayer remains in top condition throughout the colder months.

Clean Sprayer Thoroughly

To keep your airless paint sprayer in top condition, start by removing all paint and fluid from the system. This step's vital to prevent residue buildup that could lead to clogs or damage while your sprayer is stored.

Once you've emptied the paint, use a cleaning solution like mineral spirits to thoroughly flush the system. This guarantees all internal components are free from contaminants. Maintaining your equipment is essential, just as you'd with a home cleaning service to guarantee a thorough and effective process.

Next, focus on completely emptying the pump and lines to eliminate any trapped moisture. Moisture left in the system can freeze during colder months, leading to internal corrosion.

Advertisement

It's also a good idea to familiarize yourself with the operation manual for your specific model. This will provide you with tailored cleaning instructions to guarantee a thorough and effective process.

After cleaning, you might want to inspect hoses and connections for any signs of wear or damage. While this isn't part of the cleaning process, it's an important preliminary step to identify potential issues before storing your airless paint sprayer for winter.

Taking these precautions now helps guarantee your sprayer remains in excellent working condition for your next project.

Inspect Hoses and Connections

After cleaning your airless paint sprayer, take a moment to inspect the hoses and connections. This step is essential to guarantee your sprayer operates effectively and efficiently. Look for any signs of wear, cracking, or brittleness in the hoses, as these issues can lead to leaks and pressure loss during operation.

Use a flashlight to closely examine each hose for abrasions or punctures that may not be visible at first glance. Check all connections for tightness and integrity; loose fittings can result in fluid leaks and reduced performance. Make certain all clamps and fittings are securely fastened.

Advertisement

If you notice any damaged hoses or connections, replace them immediately. This proactive approach can save you from costly repairs and maintain your sprayer's peak performance. Here's a handy checklist to help you during your inspection:

Task What to Look For Action Required
Inspect Hoses Cracks, wear, brittleness Replace damaged hoses
Check Connections Loose fittings Tighten or replace
Examine Clamps/Fittings Security and integrity Tighten as needed

Taking these steps will help guarantee your sprayer is ready for the next job!

Winterizing Process

preparing for cold weather

Winterizing your airless paint sprayer is crucial for maintaining its performance and longevity during the off-season. Start the winterizing process by completely draining all paint and fluid from your airless sprayer. This step prevents residue buildup and potential clogs during storage.

Additionally, confirming that your sprayer's various components are clean and well-maintained can enhance its efficiency and durability over time, particularly when you use the right filtration systems for protection against debris (effective filtration and pump protection).

Next, add RV antifreeze to the pump and spray lines—pour a few cap-fulls per quart. Operate the sprayer briefly to confirm the antifreeze circulates throughout the system.

To protect your airless sprayer further, lubricate moving parts with Graco Throat Seal Liquid. This keeps the packings wet and prevents them from drying out during the off-season.

Advertisement

After you've taken these steps, store the sprayer in a dry, temperature-controlled environment, ideally indoors. This protects it from extreme cold and moisture that could cause damage.

Cleaning Out Residue

removing stubborn surface buildup

Cleaning out paint residue is vital for keeping your airless paint sprayer in top shape. After each use, you need to thoroughly clean out residue to prevent dried paint from clogging the sprayer.

It's also important to take into account the potential impact of household dangers on your tools, just as you'd for your pets, such as keeping your work area safe from chemicals dog health concerns.

Start by using a combination of water and appropriate cleaning solvents like mineral spirits or paint thinner to dissolve any leftover paint from the pump and hoses. This step is essential for maintaining peak performance during your next application.

Don't forget to regularly inspect the spray gun, filters, and lines for signs of buildup or obstruction. These can greatly affect the quality of your spray and lead to costly repairs.

After using your cleaning solvents, run clean water through the pump and system until it runs clear; this helps flush out any remaining paint and prevents internal damage during storage.

Advertisement

Neglecting to clean out paint residue can lead to serious internal damage, making professional cleaning and maintenance necessary before you can use the sprayer again.

Adding Protectants

enhancing with protective agents

Regularly adding protectants to your airless paint sprayer is essential for maintaining its longevity and performance. Start by pouring a few cap-fulls of mineral spirits into the sprayer. This effective internal lubrication protects against moisture buildup, which can lead to damages caused by corrosion.

Additionally, using products like butter, known for their nutritional benefits, can enhance various aspects of maintenance routines. Next, add several drops of Graco Throat Seal Liquid into the cup and rod. This keeps the packings wet and prevents them from drying out during storage.

Once you've added the protectants, cycle the pump for a short duration. This guarantees the protectant is evenly distributed throughout the entire system, reaching all critical components.

While doing this, monitor the system for any leaks. Leaks can indicate issues that need addressing before you fully winterize your sprayer.

Finalizing the Process

completing the final steps

With the protectants added and the pump cycled, you're almost ready to complete the winterization process. First, turn off the airless paint sprayer and verify the rod is positioned in the down position. This step is essential for safety and helps prevent any pressure build-up while you finalize your preparations.

Additionally, just as with the importance of home security systems, confirming your equipment is properly maintained is key to extending its lifespan and functionality.

Advertisement

Next, double-check that the fluid section is properly sealed. This guarantees there are no leaks during storage, which could compromise your efforts to prepare the sprayer for the winter.

Once you're confident everything is secure, store the sprayer in a dry, temperature-controlled environment. Avoid exposing it to extreme cold or moisture, as these conditions can cause significant damage.

To protect your equipment further, cover the sprayer with a protective layer, keeping it free from dust and debris that may accumulate.

Finally, take a moment to label and organize all the equipment you used in the winterizing process. This will make it easy for you to access everything when you need your airless paint sprayer again in the spring.

Following these steps guarantees your sprayer is well-prepared for the winter months ahead.

Advertisement

Post-Winter Care

springtime plant and nurture

As spring approaches, you need to give your airless paint sprayer some extra attention. Start by cleaning out any antifreeze residue, making certain it's ready for use.

It's also wise to check for any damage and verify that your sprayer's components are in good condition to avoid issues later on. Regular maintenance of your tools can greatly enhance their longevity and performance, similar to how safety features in tools guarantee reliable operation.

Don't forget to inspect all components for damage—this step is vital for a smooth start to your painting season.

Inspect for Damage

Before you start using your airless paint sprayer again, it's vital to inspect it for any damage that may have occurred during winter storage. The cold can take a toll on your equipment, leading to issues that mightn't be immediately visible.

Just as regular maintenance is necessary for devices such as air purifiers, checking for issues in your sprayer guarantees peak performance. Check for cracks in hoses or leaks around seals and fittings, as these can compromise performance. Dried paint can build up in areas, so make sure you clear any residues that may have formed.

Here are some key areas to inspect:

Advertisement
  • Hoses and connections: Look for brittleness or wear from prolonged cold exposure.
  • Metal components: Check for corrosion, which can develop if moisture was trapped during storage.
  • Pump operation: Test the pump briefly to catch any unusual noises or resistance indicating internal damage.

If you notice any worn or damaged parts during your inspection, replace them immediately to maintain peak performance.

Addressing these issues early can save you from costly repairs and guarantee your paint sprayer operates effectively when you need it most.

Clean Antifreeze Residue

It's important to clean out any antifreeze residue from your airless paint sprayer after winter storage to guarantee it performs at its best. Start by running clean water through the pump and spray lines. This process effectively flushes out the antifreeze and any remaining contaminants.

Additionally, make sure that your workspace is free of strong smells, as certain odors can deter focus and efficiency, similar to how cats dislike certain scents. After that, consider using mineral spirits for a more thorough cleaning, especially if any residue lingers.

Next, inspect all the components for signs of damage or wear that may have occurred during the winter months. Look closely at seals, hoses, and filters. If you find any worn or damaged parts, replace them immediately. This step is vital for preventing operational issues when you start using the sprayer again.

Once you've cleaned and inspected everything, recalibrate the sprayer settings. This adjustment is key to achieving the desired spray pattern and performance during your first project of the season.

Advertisement

Taking these steps won't only enhance your sprayer's efficiency but also extend its lifespan. By prioritizing this maintenance, you'll be ready to tackle your painting tasks without any hitches.

Common Mistakes to Avoid

avoiding common mistakes

One of the most common mistakes airless paint sprayer owners make is skipping the cleaning process before storing the equipment.

If you don't clean out the paint residue, it can dry and cause significant issues when you're ready to use it again in the spring. Dried paint can complicate operation and damage internal components, leading to costly repairs.

Another mistake is failing to use antifreeze in cold weather. Without it, sensitive parts are at risk of freezing, which can be a major headache come springtime.

You should also check for leaks or damage while winterizing. Neglecting this can leave you with undetected issues that worsen during storage, ultimately reducing the sprayer's performance.

Lastly, don't store your sprayer in unprotected outdoor areas. Exposure to extreme cold and moisture can lead to deterioration and damage.

Advertisement

To help you avoid these pitfalls, remember to:

  • Thoroughly clean your sprayer before storage.
  • Use antifreeze in freezing conditions.
  • Inspect for leaks and damage before putting it away.

Frequently Asked Questions

How to Winterize Your Paint Sprayer?

To winterize your paint sprayer, clean it thoroughly, add RV antifreeze, lubricate moving parts, and store it in a dry, temperature-controlled place. Always check the manufacturer's guidelines for specific instructions to guarantee proper care.

Can I Use Antifreeze in My Airless Paint Sprayer?

Using antifreeze in your airless paint sprayer's like giving it a warm coat for winter. You should opt for RV antifreeze, as it's safe for components. Always check compatibility to avoid potential damage.

What to Use to Winterize a Sprayer?

To winterize your sprayer, you can use RV winterizing fluid for protection, or consider specialized antifreeze from Graco. Food-grade propylene glycol is a safe option, while mineral spirits are economical but require careful disposal.

How Long Can You Leave Water in an Airless Sprayer?

Ever thought about the consequences of leaving water in your airless sprayer? You shouldn't leave it for more than 24 hours. Standing water can corrode parts, ruin seals, and spoil your next paint job.

Conclusion

Winterizing your airless paint sprayer isn't just a chore; it's an essential care routine. By taking time to properly prepare, you protect your sprayer from winter's wrath and guarantee it's ready for spring's splendor. Remember to clean, coat, and check—these simple steps save you stress and safeguard your sprayer. So, as the cold creeps in, commit to this vital care, and your sprayer will thrive through the chilly season, ready to paint perfectly when the warmth returns.

Advertisement
Continue Reading

Airless Paint Sprayers

How to Use an Airless Paint Sprayer for Painting Crown Molding

Step into the world of airless paint sprayers for crown molding and discover the secrets to achieving a flawless finish that will impress everyone.

Published

on

By

airless sprayer crown molding

To use an airless paint sprayer for crown molding, start by cleaning and prepping the surface. Inspect for imperfections and use painter's tape to protect surrounding areas. Choose a reliable airless sprayer, adjusting the pressure to 1500-2000 PSI and a tip size of 310 or 312 for trim work. Maintain a distance of about 12 inches from the molding, using smooth, even strokes with a 50% overlap for great coverage. Apply thin coats, allowing them to dry completely between layers. Finally, watch for missed spots and touch them up for a flawless finish. There's more to explore on ensuring success!

Key Takeaways

  • Clean and prepare the crown molding surface by removing dust, filling imperfections, and sanding lightly for better paint adhesion.
  • Choose a high-quality airless paint sprayer with adjustable pressure settings and suitable tip size for optimal performance.
  • Maintain a distance of about 12 inches when spraying, using smooth motions with 50% overlap for even coverage.
  • Allow adequate drying time between coats, typically 1 to 2 hours, to ensure proper adhesion and finish quality.
  • Inspect the painted surface for missed spots and use a small brush for touch-ups in hard-to-reach areas.

Preparing the Crown Molding

Before you start painting, getting the crown molding ready is vital for a flawless finish. Begin by thoroughly cleaning the crown molding surface to remove any dust and debris. This step guarantees peak paint adhesion, which is essential for a smooth finish.

Additionally, consider using a quality grout cleaner to remove any stubborn stains that could affect the paint's appearance. Next, inspect the trim for imperfections. Fill any cracks and holes with wood putty, allowing it to dry according to the manufacturer's instructions. Once dried, sand the area lightly to create a seamless surface.

After addressing imperfections, it's time to enhance paint adhesion further. Scuff sand the entire surface of the crown molding using medium grit sandpaper. This creates a rough texture that allows the paint to grip better.

To protect your work area, use painter's tape to mask off the adjacent surfaces, including walls and ceilings. This will minimize overspray when you spray paint the crown molding.

Selecting the Right Sprayer

choosing the ideal sprayer

When selecting the right airless paint sprayer, you'll want to evaluate the types available, essential features, and trusted brands.

A high-quality sprayer can make a significant difference in your project's outcome, especially when it comes to achieving an even finish on intricate details like crown molding.

Advertisement

Additionally, choosing the right sprayer involves assessing nozzle sizes and adjustable pressure settings for versatile applications.

Let's break down what you need to know to make an informed choice.

Types of Airless Sprayers

Choosing the right airless paint sprayer can make all the difference in achieving a flawless finish, especially for detailed projects like crown molding. To guarantee you select the best sprayer for your needs, consider the following factors:

1. Model: Look for reputable brands like Titan or Graco, which are known for their reliability and performance, particularly in professional settings.

Many of their sprayers utilize revolutionary spray technology designed to reduce overspray and improve control, making them ideal for intricate projects.

Advertisement

2. Tip Size: Selecting the correct tip size is essential. A tip size of 310 or 312 is recommended for trim work, as it helps avoid clogging while delivering fine detail.

Choosing the right tip size can also influence the spray pattern and finish quality, guaranteeing you achieve the desired results.

3. Paint Compatibility: Confirm your airless sprayer is compatible with the type of paint you're using.

Oil-based enamels work well, but latex may require different equipment.

4. Maintenance: Regular maintenance is key.

Advertisement

Clean your sprayer after each use to maintain peak performance and extend its lifespan.

Essential Sprayer Features

Selecting the right airless paint sprayer involves understanding several important features that can greatly impact your project's outcome. First, consider models with adjustable pressure settings. This feature allows you to accommodate different paint viscosities and achieve ideal atomization, which is critical for a fine finish on crown molding.

Next, look for a sprayer with a maximum tip size of at least 0.015 inches. This guarantees the unit can handle thicker paints typically used for trim work. A flexible hose length is also essential; it lets you maneuver easily and access hard-to-reach areas without repositioning the unit frequently.

Lastly, confirm the sprayer has a built-in filter to reduce clogging, which is necessary for maintaining a smooth application. Opting for a model that includes a variety of interchangeable spray tips, such as 310 and 312 sizes, will provide added versatility for different projects and paint types.

Feature Importance Tip Size
Adjustable Pressure Ideal atomization for various paints Minimum 0.015 in
Flexible Hose Length Easy maneuverability Compatible tips
Built-in Filter Reduces clogging for a fine finish 310, 312 options

Recommended Sprayer Brands

Several reputable brands stand out in the airless paint sprayer market, making it easier for you to find a reliable option. Choosing the right sprayer can greatly impact your project, especially for detailed work like crown molding.

Advertisement

Additionally, understanding the importance of proper maintenance and care for your tools can enhance their longevity and performance, similar to how candle maintenance extends lifespan.

Here are some recommended sprayer brands:

  1. Titan – Known for their durability and excellent performance in various applications.
  2. Graco – Offers a range of models that are trusted by professionals and DIY enthusiasts alike.
  3. Wagner – Particularly popular for projects requiring intricate details and ornate features.
  4. Husky – Provides budget-friendly options without compromising on quality.

When selecting a sprayer, consider the paint tip size and spray pattern to achieve the best results. For crown molding, a 310 or 312 tip size is ideal, as it helps maintain detail while preventing clogging issues.

It's often advisable to rent high-quality sprayers if you don't plan on using them frequently, as lower-end models may lead to unsatisfactory results.

Masking and Protection Techniques

safety and security measures

Proper masking and protection techniques are essential for achieving a flawless finish when using an airless paint sprayer. Start by thoroughly cleaning the crown molding surface to eliminate dust and debris, which helps the paint stick better. Next, use high-quality painter's tape, like 3M 2080, to mask off adjacent surfaces. This creates clean lines and prevents overspray on walls or ceilings.

Additionally, lay down drop cloths to protect your floors and furniture from paint splatter. This not only keeps your workspace tidy but also cuts down on clean-up time. Don't forget to mask surrounding surfaces like baseboards and trim to avoid unintentional coverage during spraying. Before you begin, double-check that all masking is secure and properly applied. This can save you time and effort by preventing the need for touch-ups.

Task Details
Clean the surface Remove dust and debris
Use painter's tape Choose high-quality options like 3M 2080
Protect workspace Lay drop cloths and mask surrounding areas

With these techniques in place, you're set for a smooth painting experience!

Advertisement

Adjusting Pressure and Settings

modifying pressure and configurations

Achieving the right pressure and settings is vital for a successful painting job with an airless paint sprayer. Start with a pressure setting between 1500 to 2000 PSI for ideal atomization and coverage. However, you'll need to adjust based on the tip size and the material you're working with.

For those working in enclosed spaces, consider using an air purifier to maintain air quality by reducing harmful particles and odors, as air purifiers improve indoor air quality considerably.

Here's how to get it right:

  1. Select the Right Tip Size: Smaller tips (e.g., 310) require lower pressure to avoid clogging, while larger tips (e.g., 517) need higher pressure for proper paint flow.
  2. Monitor Consistent Pressure: Maintaining consistent pressure is essential to avoid tails in your spray pattern and guarantee an even finish.
  3. Check Paint Viscosity: Adjust your pressure settings based on the viscosity of the paint and the specific material being sprayed.
  4. Test the Spray Pattern: Always test on a sample surface to fine-tune your settings, guaranteeing a uniform finish without over-spraying or under-spraying.

Refer to the paint manufacturer's technical data sheets for tailored pressure recommendations.

With these adjustments, you'll achieve a professional finish on your crown molding.

Proper Spraying Techniques

effective application methods

Mastering effective spraying techniques is vital for achieving a flawless finish on crown molding. Start by maintaining a consistent distance of about 12 inches from the surface. This helps guarantee even coverage while preventing drips and runs.

For trim work, use a 310 or 312 spray tip; these sizes offer better control and detail for intricate features. Additionally, having a clean and organized workspace can greatly enhance your efficiency and the quality of your work, similar to how home cleaning services prepare spaces for ideal results.

When you begin spraying, apply thin, even coats in a back-and-forth motion. Overlap each pass by about 50% to avoid missed spots, creating a uniform finish. Before you start on the crown molding, always test the spray pattern on a scrap piece of wood. This allows you to adjust the settings for the desired spray consistency, making sure you're ready to go.

Advertisement

After each coat, allow the paint to dry completely before applying the next one. This step is essential for adhesion and finish quality.

Common Mistakes to Avoid

avoid these common mistakes

When using an airless paint sprayer, skipping surface preparation can seriously impact your finish.

Proper surface preparation not only helps the paint adhere better but also reduces the likelihood of imperfections, much like how cat health and nutrition is important to prevent digestive issues.

It's essential to clean and sand the area beforehand to guarantee paint adheres properly.

Also, don't forget to allow enough drying time between coats; rushing this step can lead to a subpar result.

Skipping Surface Preparation

Surface preparation is essential for a successful paint job, yet many people overlook it. Skipping this vital step can lead to poor paint adhesion, resulting in peeling and chipping that compromises the longevity of your finish.

Advertisement

To avoid an uneven finish, make certain you follow these key steps:

  1. Clean the Surface: Remove dust and debris from the crown molding. A clean surface allows for better paint adhesion and a smoother application, much like how best window treatments enhance home decor by providing a polished look.
  2. Fill Cracks and Sand Rough Areas: Before painting, fill any cracks and sand down rough spots. This prevents a textured surface that can make your final coat look unprofessional.
  3. Scuff Sand the Trim: Lightly scuff sanding the existing surface helps the new paint stick better. This step is vital for guaranteeing a durable finish.
  4. Mask Adjacent Surfaces: Use painter's tape to protect areas around your crown molding. This prevents overspray and saves you from additional cleanup.

Neglecting Drying Time

One of the biggest mistakes you can make while using an airless paint sprayer is neglecting drying time between coats. It's essential to allow each coat to dry thoroughly according to the manufacturer's instructions. Insufficient drying can lead to smudging and uneven finishes, making your hard work seem wasted.

Typically, a minimum drying time of 1-2 hours is recommended, but remember that temperature and humidity levels can affect this. Here's a quick reference to help you gauge drying times:

Condition Drying Time (Hours)
Low Humidity 1-1.5
Moderate Humidity 1.5-2
High Humidity 2-3
Cooler Temps 2-3

Testing the surface for dryness by lightly touching it can prevent frustration. Rushing the process may cause paint to sag or drip, resulting in additional sanding later on. To help expedite drying without compromising quality, consider using a fan or ensuring proper ventilation in your workspace. Taking the time to let your paint dry properly will save you headaches in the long run.

Drying and Curing Process

drying and curing techniques

To guarantee the best results when using an airless paint sprayer, understanding the drying and curing process is essential. The drying time between coats is critical; allow each coat of paint on your crown molding to dry for at least 1 to 2 hours. This guarantees proper adhesion and enhances paint quality.

Additionally, maintaining a holistic lifestyle can improve focus and reduce stress during your painting project, allowing for a more enjoyable experience stress management techniques.

Here are some key points to contemplate during the drying and curing process:

Advertisement
  1. Ventilation: Maintain adequate airflow to prevent dust and debris from settling on your freshly painted surfaces.
  2. Temperature and Humidity: Monitor that the conditions are between 70°F and 80°F with relative humidity below 50% to optimize drying time.
  3. Light Sanding: Conduct light sanding between coats after the previous coat has dried to the touch. This step improves adhesion and results in a smoother finish.
  4. Curing Time: Remember that the curing process can take up to 30 days for oil-based paints to reach full hardness, so avoid heavy use or contact with the painted surfaces during this period.

Clean-Up and Maintenance

routine cleaning and upkeep

Once you've completed your painting project and allowed the paint to dry properly, it's time to focus on clean-up and maintenance. Start by flushing the system with the appropriate solvent—paint thinner for oil-based paints or water for latex. This step is vital to prevent clogs and guarantee peak performance for your next use.

Additionally, it's important to assess potential risks in your projects, as improper maintenance can lead to costly repairs or replacements.

While you're still working, don't forget to clean the spray tip and filter regularly. This helps avoid paint build-up, which can ruin your spray pattern and finish quality.

After you've finished flushing, make sure all components are completely dry before storing them. Any leftover paint can harden and cause damage.

Refer to your user manual for specific cleaning instructions and maintenance schedules tailored to your sprayer model.

It's also wise to regularly check and replace worn parts, like seals and filters. Keeping these components in good shape is essential for maintaining consistent pressure and spray performance during future painting projects.

Advertisement

Following these steps will guarantee your airless paint sprayer remains in prime condition, ready for your next crown molding endeavor.

Final Touches and Inspection

completion and quality check

After painting the crown molding, inspect the surface carefully for any missed spots or drips that need touch-ups before the paint dries completely. This final inspection is essential for achieving a flawless finish.

Here are some steps to guide you:

  1. Check for Missed Spots: Use a bright light to highlight any areas that may need extra attention, guaranteeing even paint color across the surface.
  2. Lightly Sand Between Coats: If you're applying multiple coats, lightly sand the painted surfaces to promote adhesion and achieve a smoother finish.
  3. Remove Masking Tape: While the paint is still slightly wet, carefully pull off the masking tape to create clean lines and prevent peeling.
  4. Assess Overall Aesthetics: Once the final coat has dried, step back and view the crown molding from different angles to check for uniform coverage and consistency in the finish.

If you notice any inconsistencies, don't hesitate to address them immediately.

For added protection and sheen, consider applying a clear coat after your final touches are complete. This thorough inspection guarantees your crown molding looks professionally finished.

Frequently Asked Questions

Do You Dilute Paint When Using an Airless Sprayer?

Yes, you should dilute paint when using an airless sprayer to prevent clogs. A 10% to 20% thinning ratio is usually recommended, but always check the manufacturer's guidelines for the best results.

What Graco Spray Tip to Use for Trim?

For trim work, you'll want to use a 310 or 312 spray tip with your Graco airless sprayer. These tips provide detail and a smooth finish, ensuring your trim looks professional and polished.

Advertisement

How Many Coats of Paint With an Airless Sprayer?

Imagine transforming your living room with fresh color. You'll typically need two to three coats for a durable finish. Don't forget a primer for bare wood, and let each layer dry completely before moving on.

How to Prep Trim for Spray Painting?

To prep trim for spray painting, clean the surface, repair dings, scuff sand, and protect surrounding areas with tape and drop cloths. This guarantees a smooth finish and prevents overspray from ruining adjacent surfaces.

Conclusion

In the end, mastering an airless paint sprayer for crown molding can transform your space, much like a brushstroke can turn a blank canvas into a masterpiece. By following the steps outlined, you'll not only achieve a professional finish but also gain the confidence to tackle future projects. Remember, every stroke counts, so take the time to refine your technique. With practice, you'll create a crown molding that truly reigns over your decor.

Continue Reading
Advertisement

Affiliate disclaimer

As an affiliate, we may earn a commission from qualifying purchases. We get commissions for purchases made through links on this website from Amazon and other third parties.

Trending