Connect with us

Airless Paint Sprayers

Airless Paint Sprayer Vs. Traditional Paint Brushes: Which Is Better?

Just how do airless paint sprayers compare to traditional brushes? Discover the crucial differences that could change your painting approach forever.

Published

on

airless sprayer vs brushes

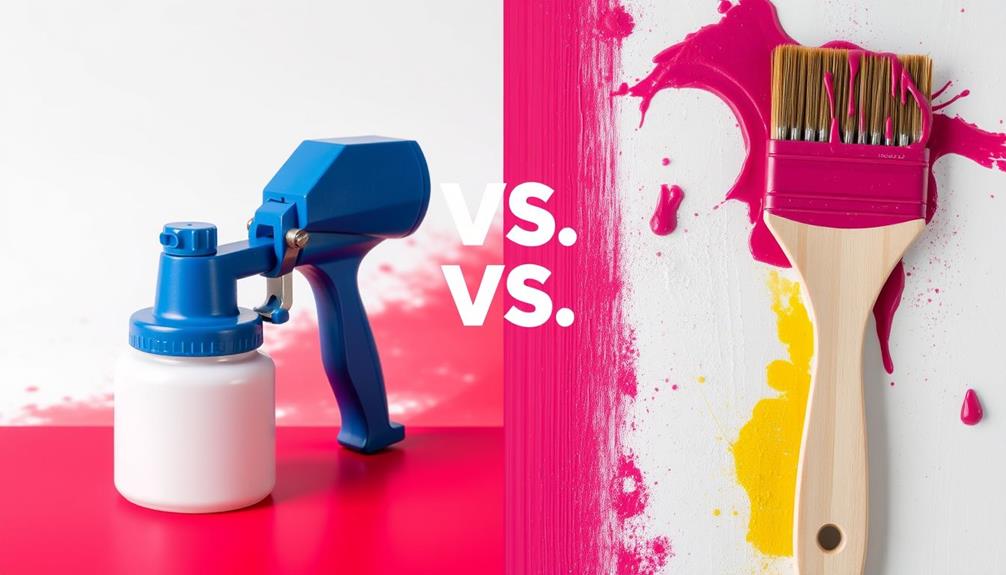
When choosing between an airless paint sprayer and traditional paint brushes, it really depends on your project. Sprayers excel in covering large areas quickly, providing a smooth finish without brush marks. However, they can waste more paint and require extensive prep work. On the other hand, brushes offer precision and control, perfect for detailed work, but they're time-consuming and can leave marks. If you need efficiency for big jobs, go with a sprayer. For small, intricate tasks, brushes might be your best bet. Discover more insights to narrow down your choice effectively!

Key Takeaways

  • Airless sprayers apply paint significantly faster than traditional brushes, completing jobs in half the time but consuming about 33% more paint.
  • Traditional brushes offer precise control for detailed work, making them ideal for intricate areas and minimizing overspray.
  • Airless sprayers achieve a smoother finish, enhancing aesthetics, while brushes may leave visible marks if not used carefully.
  • Extensive preparation and cleanup are required for airless sprayers, while brushes demand minimal prep and simpler cleanup.
  • Cost considerations vary, as sprayers have higher initial costs but can reduce labor expenses, making them more cost-effective for larger projects.

Overview of Painting Methods

When it comes to painting, you've got a choice between airless paint sprayers and traditional paint brushes, each with their own strengths.

Airless paint sprayers excel in efficiency, allowing you to cover large areas quickly, making them perfect for bigger projects. They deliver a smooth, even finish without the visible brush marks that often come with brush painting. This modern aesthetic is appealing, especially if you're after a sleek look.

Additionally, airless sprayers are ideal for both interior and exterior projects, providing versatility for various painting needs. For best use, specific techniques are essential to master with sprayers.

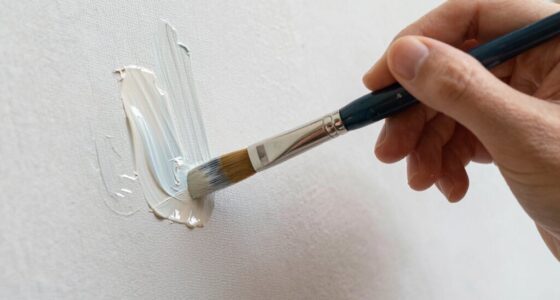
On the flip side, brush painting offers greater precision and control, which is essential for detailed work and intricate areas.

While sprayers may use about 33% more paint due to the atomization process, brushes are generally more economical regarding paint consumption for smaller jobs.

Advertisement

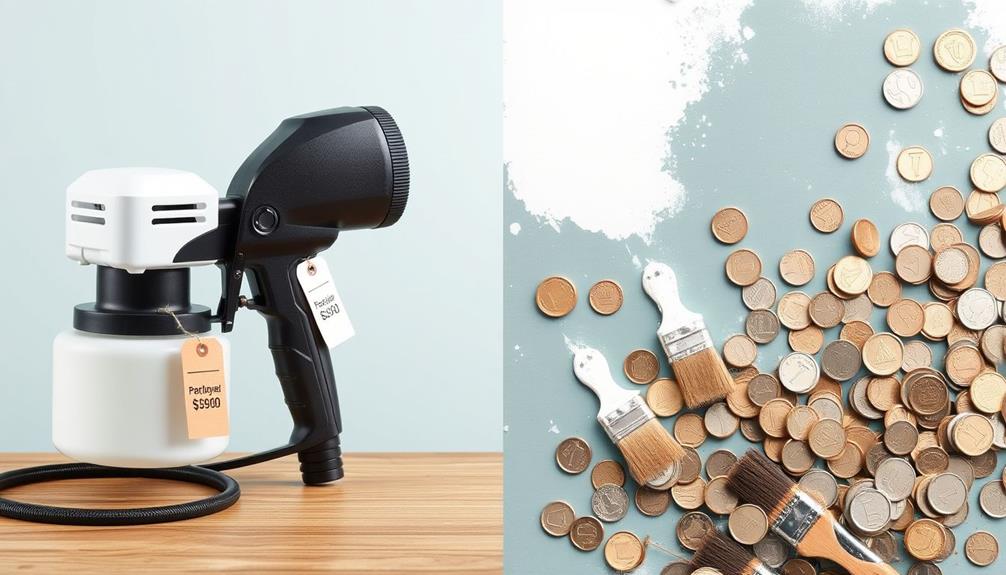
It's worth noting that quality airless sprayers might require a higher initial investment, starting around $200, compared to the lower upfront costs of brushes and rollers.

Advantages of Airless Sprayers

efficient smooth versatile application

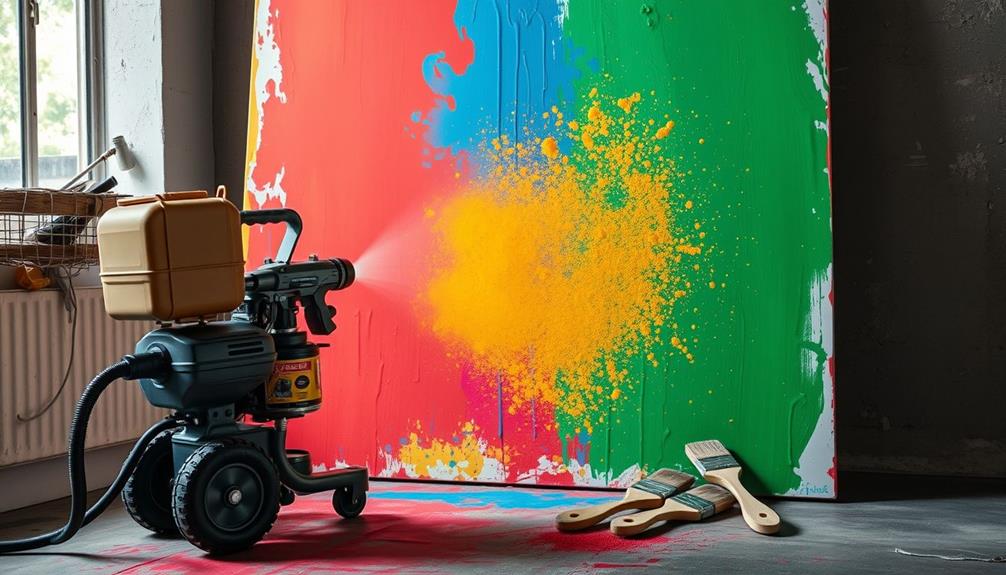
Airless paint sprayers offer several advantages that make them a compelling choice for many painting projects. One of the biggest benefits is the significant reduction in application time. You can cover large areas up to 10 times faster than with traditional brushes, making them ideal for extensive projects. This efficiency means you can complete tasks in a fraction of the time, allowing you to tackle more jobs or enjoy your finished space sooner.

Additionally, they're particularly useful for achieving a smooth finish, similar to the benefits seen with garage door openers that enhance home security and aesthetics.

Moreover, airless sprayers provide a smooth finish without brush marks, enhancing modern aesthetics and textures. They excel at reaching hard-to-access areas, ensuring thorough coverage even in corners and intricate designs, which can be a challenge with traditional brushes.

While you'll use about 33% more paint due to atomization, the efficiency in application often balances out the increased paint costs, especially in larger projects. With proper technique, you can achieve full coverage in fewer coats, saving both time and labor compared to applying multiple layers with brushes.

Disadvantages of Airless Sprayers

limitations of airless sprayers

While airless sprayers can speed up the painting process, they come with significant downsides.

You'll need to invest time in extensive prep work to manage overspray and guarantee proper cleanup, which can be quite a hassle.

Advertisement

Additionally, using tools like the Graco FFLP Fine Finish Low Pressure Reversible Tip can enhance control but still requires meticulous preparation.

Plus, these sprayers often consume more paint, leading to increased costs and waste.

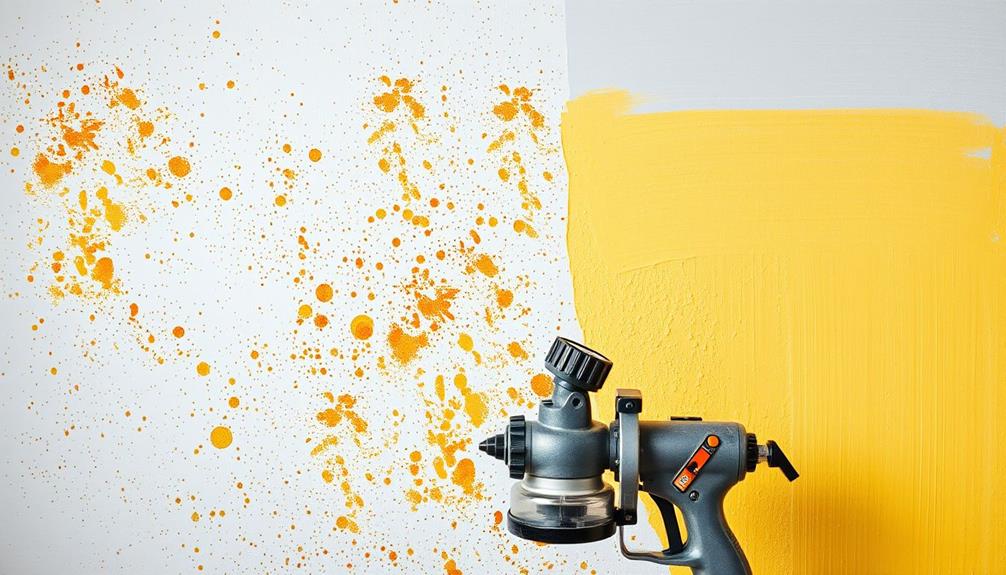
Overspray and Cleanup Challenges

Using an airless paint sprayer can lead to significant overspray, which often lands on unintended surfaces, creating a cleanup headache. The fine mist produced by these sprayers can result in paint particles drifting away, especially in windy conditions, complicating your cleanup efforts.

Challenge Airless Paint Sprayer Traditional Paint Brushes
Overspray High, often widespread Minimal, controlled application
Cleanup Time Time-consuming, requires disassembly Quick and straightforward
Respirators Needed Yes, for health safety No, generally safe
Paint Consumption Up to 33% more due to waste Efficient, minimal loss

Moreover, the cleanup process is often more involved than with traditional paint brushes. You'll need to disassemble and clean the sprayer to prevent clogs, which can be quite tedious. The increased paint consumption not only raises costs but also contributes to waste. So, if you're considering an airless sprayer, be sure to factor in the potential challenges of overspray and cleanup, and don't forget your respirators and protective gear for safety!

Higher Paint Consumption Rate

When it comes to paint consumption, airless paint sprayers can be a costly choice for your project. These sprayers typically use about 33% more paint than traditional brush applications because the atomization process disperses more paint into the air.

Advertisement

This can be particularly relevant when pondering the aesthetics of your space, as simple changes can elevate overall aesthetics in your home. This means that while you might save time and labor, your project costs could increase considerably due to the higher paint consumption.

With airless sprayers, you'll find that approximately 1 gallon of paint only covers 150-200 square feet, compared to 400 square feet with a brush. This disparity highlights the potential for paint waste, especially with the overspray generated by sprayers.

Wind can exacerbate this issue, leading to a paint loss of up to 25%. As you weigh your options, it's essential to reflect on how this excess paint disperses into the environment rather than landing on your intended surface.

Ultimately, while airless sprayers offer speed and efficiency, the higher paint consumption and associated project costs may not make them the best choice for every job.

Extensive Preparation Required

Preparing for a painting project with an airless sprayer means you'll face extensive setup tasks before you even start. Unlike traditional brushes, which require minimal prep, airless sprayers demand thorough surface preparation.

Advertisement

You'll need to mask and cover surrounding areas to prevent overspray, which can greatly increase your setup time. This extra effort is vital; inadequate preparation can lead to uneven adhesion and poor paint performance. Additionally, it's important to verify that the space is clean and free of dust, similar to how one would prepare for a home cleaning service to guarantee ideal results.

You'll have to lay down drop cloths and protective coverings for furniture and floors, adding to the overall time and effort you invest in the project.

If you're working outdoors, be aware that windy conditions can complicate things further, as paint drift can occur and ruin nearby surfaces. These extensive preparation steps can deter many DIY enthusiasts who might prefer quicker, less labor-intensive methods.

Ultimately, while airless sprayers offer benefits like a smooth finish, the extensive preparation required can make them less appealing when compared to the straightforward approach of traditional brushes. Be ready to commit time to setup if you choose to go this route.

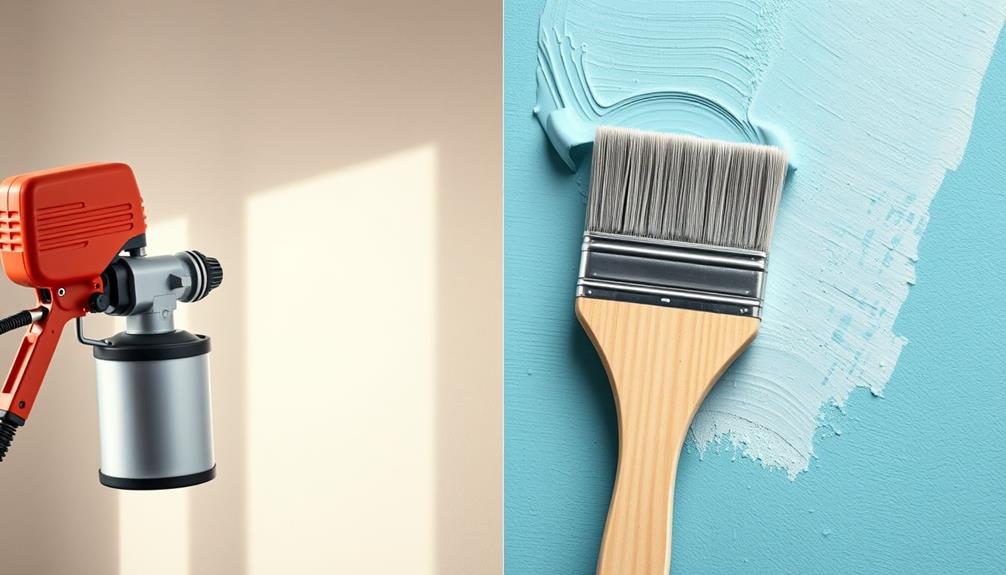
Benefits of Traditional Brushes

traditional brushes advantages explained

Traditional paint brushes offer unmatched control during application, making them perfect for tackling intricate details and hard-to-reach areas. When you use a brush, you can achieve precise work that allows for careful manipulation of paint, ensuring that every stroke counts. This level of control is particularly beneficial when dealing with complex patterns or textures.

Additionally, using traditional tools can create an emotional connection to your work, similar to how pets show affection to their owners, as both require a thoughtful approach and personal touch emotional attachment in cats.

Advertisement

Another advantage is that brushes typically allow for a thicker paint application. This can enhance durability and result in better adhesion to surfaces compared to spray methods. You'll find that brush strokes can create a more textured finish, adding character to your project, especially on uneven surfaces.

Additionally, traditional brushes are a cost-effective choice. The initial investment in brushes is generally lower than that of airless paint sprayers, making it easier on your wallet.

Plus, using brushes minimizes the risk of overspray, which not only reduces cleanup time but also protects surrounding surfaces from unintended paint application.

Drawbacks of Traditional Brushes

limitations of conventional brushes

While traditional brushes have their merits, they come with significant drawbacks.

You'll find the application process can be time-consuming, often requiring multiple coats to achieve full coverage. This can be particularly frustrating when trying to maintain a cohesive look, as seen in popular farmhouse decor trends that emphasize clean, even finishes.

Plus, without careful technique, you risk brush marks that can ruin your finish, especially on textured surfaces.

Advertisement

Time-Consuming Application Process

When you pick up a paintbrush, you mightn't realize just how time-consuming the application process can be. Unlike airless sprayers, which can greatly speed up your project, traditional brush painting often draws out project durations.

Consider these factors:

1. Multiple Coats: For ideal coverage, you typically need to apply at least two coats of paint. This not only doubles your time but also requires a drying period in between, stretching your project over several days.

The same principle applies in heating systems, where heat pump failures can lead to prolonged project timelines for heating or cooling.

2. Attention to Detail: Traditional painting methods demand careful attention to avoid imperfections, which can lead to further touch-ups and corrections. This meticulousness is necessary to achieve a satisfactory finish, but it adds to the overall time commitment.

Advertisement

3. Labor-Intensive: The manual labor involved in brush painting is substantial. You'll find yourself investing hours, if not days, into what could be accomplished in a fraction of the time with airless sprayers.

Risk of Brush Marks

Brush marks can be a frustrating reality when using traditional paint brushes, especially if precision isn't your strong suit. When you're trying to achieve a smooth finish, the risk of brush marks increases, particularly on textured surfaces. Achieving consistent coverage on these surfaces requires not just skill but also careful technique, which can be a challenge for many.

Additionally, just as a vacuum with a self-cleaning mechanism can enhance performance by reducing hair wrap, employing the right painting tools and techniques can minimize the chances of brush marks.

Over-brushing can further complicate things, thinning out the paint and reducing the durability of your finish, while also increasing the likelihood of those pesky brush marks. Plus, since brush painting is generally a slower process, you might find that the paint begins to dry before you've had a chance to apply it evenly, leading to an uneven application.

Using high-quality brushes can help mitigate some of these issues, but even seasoned painters often struggle to achieve the flawless results that spray painting provides. In contrast to the efficiency of spray painting, traditional paint brushes can leave you grappling with the imperfections of brush marks, making it harder to achieve that perfect, smooth finish you desire.

Advertisement

Limited Coverage Efficiency

Achieving a smooth finish with traditional paint brushes often comes at the cost of limited coverage efficiency. When you opt for traditional brushes, you might find yourself covering around 400 sq ft per gallon on prepared surfaces.

In contrast, airless paint sprayers can cover 150-200 sq ft more effectively, which can considerably impact your labor time on larger projects. This efficiency can be likened to the design thinking approach, as it emphasizes user-centered solutions and can streamline your painting process.

Here are three key drawbacks of traditional brushes regarding coverage:

  1. Time-Consuming Application: You may need multiple coats to achieve full coverage, especially on textured surfaces, increasing overall labor time.
  2. Visible Brush Strokes: If you don't apply the paint carefully, you risk ending up with visible brush strokes, which diminishes the finish quality compared to the smooth coat from a sprayer.
  3. Physical Fatigue: The labor-intensive nature of using brushes can lead to exhaustion, particularly on larger surfaces or ceilings. Airless paint sprayers offer a more ergonomic solution, allowing you to paint efficiently without straining.

Ultimately, if you value efficiency and quality, the paint sprayer vs traditional brushes debate leans heavily in favor of airless paint sprayers.

Comparing Efficiency and Quality

evaluating performance and standards

Efficiency and quality are essential factors in any painting project, and choosing between an airless paint sprayer and traditional paint brushes can greatly impact both.

An airless paint sprayer allows you to cover large areas much faster, often completing a paint job in half the time compared to brushes. This rapid application boosts efficiency, making it a go-to for those looking to finish quickly.

However, it's crucial to recognize that sprayers typically use about 33% more paint due to the atomization process, which can affect your material costs.

Advertisement

On the quality side, airless sprayers deliver a smooth finish without the brush marks often left by traditional paint brushes. This feature is especially appealing for modern aesthetics.

Professional painters often recommend a combination of both methods: using the sprayer for quick coverage and reserving brushes for detailed work. This approach maximizes efficiency while ensuring high-quality results.

Cost Analysis and Considerations

financial evaluation and insights

When you're weighing the costs of an airless paint sprayer versus traditional paint brushes, it's important to contemplate both initial investments and potential long-term savings.

While airless sprayers typically demand a higher initial investment, often starting around $200, brush painting requires much lower upfront costs. However, your choice can affect your overall budget in the long run.

Consider these key factors in your cost analysis:

  1. Labor Costs: Spray painting can markedly reduce the time spent on a project, which may lead to lower labor costs if you're hiring professionals.
  2. Price Advantage: Average quotes for exterior painting show that spray painting can cost around $2700, compared to approximately $3500 for brush and roller methods.
  3. Paint Usage: Although sprayers can use up to 33% more paint due to atomization, controlled brush application may minimize waste, impacting your total expenditure.

Ultimately, while the initial investment for sprayers is higher, their efficiency and potential price advantage may yield substantial savings over time.

Weigh these considerations carefully to make the best decision for your painting project.

Advertisement

Impact on Paint Consumption

influence on paint usage

The impact on paint consumption varies greatly between airless paint sprayers and traditional brushes. Airless paint sprayers typically use about 33% more paint than traditional brushes due to the atomization process, which can lead to overspray and paint loss.

While sprayers cover approximately 150-200 square feet per gallon, you'll find that traditional brushes can cover around 400 square feet on well-prepared surfaces. This means brushes are often more efficient regarding paint consumption.

Additionally, windy conditions can exacerbate paint loss from sprayers by up to 25%, further affecting your overall paint consumption. Sprayers may also require extra paint to account for uneven coverage or streaking, often necessitating multiple coats for best results.

On the other hand, using traditional brushes allows for a more controlled application, greatly reducing waste. This is especially beneficial when working in detailed areas or on textured surfaces, where precision is key.

Tips for Choosing the Right Method

selecting optimal choice approach

Choosing the right painting method can greatly impact your project's outcome. When deciding between an airless paint sprayer and traditional brushes, consider these key factors:

1. Project Size: If you're tackling large areas, a paint sprayer can drastically reduce application time.

For smaller projects, a brush or roller gives you better precision and control.

Advertisement

2. Surface Texture: Smooth surfaces benefit from the even coverage of sprayers, whereas textured surfaces often require brushes to guarantee you don't miss any crevices during prep work.

3. Budget Considerations: While airless sprayers might set you back around $200 initially, they can save you time and labor costs on extensive projects.

However, remember that spraying generally consumes about 33% more paint due to atomization, which can affect your overall budget.

Don't forget about the learning curve! Mastering a paint sprayer takes practice to prevent drips and uneven application.

For those less experienced in painting, traditional brushes might be the easier option.

Advertisement

Frequently Asked Questions

Is It Better to Spray or Brush Interior Paint?

When deciding between spraying or brushing interior paint, consider your project's size and detail. Spraying's faster and smoother for large areas, while brushing offers precision for intricate spots. Choose based on your specific needs and preferences.

What Are the Disadvantages of Airless Paint Sprayer?

When using an airless paint sprayer, you'll face overspray issues, higher paint consumption, and the need for extensive surface preparation. Plus, mastering the technique takes practice to avoid uneven coverage and streaks.

Is It Better to Use Airless Paint Sprayer?

When you consider using an airless paint sprayer, you'll save time, enjoy a smoother finish, and tackle larger areas efficiently. However, you'll face higher paint usage and more extensive cleanup. Weigh your project's needs carefully.

What Are the Benefits of Airless Paint Sprayer Over Brushing and Rolling?

Using an airless paint sprayer saves you time, covering large areas quickly and providing a smooth finish. It reaches tight spaces easily, ensuring extensive coverage, even if it uses a bit more paint initially.

Conclusion

When it comes to choosing between airless paint sprayers and traditional brushes, it's like deciding between a race car and a bicycle. Each method has its own strengths and weaknesses, so it really boils down to your specific needs. If speed and efficiency are your priorities, airless sprayers might be the way to go. However, if precision and control matter more, traditional brushes could be your best bet. Ultimately, pick the one that best suits your painting project.

Advertisement

Whether it’s a step-by-step tutorial on achieving flawless finishes or an in-depth analysis of the latest airless paint sprayer models, Joe’s ability to articulate complex ideas in a simple and engaging manner resonates with our diverse audience. His practical tips and techniques empower readers to tackle their projects with confidence.

Advertisement

Airless Paint Sprayers

How to Use an Airless Paint Sprayer for Painting Shaker Doors

Jump into the world of airless paint sprayers and discover the secrets to achieving a flawless finish on your Shaker doors that will amaze you.

Published

on

By

airless sprayer shaker doors

Using an airless paint sprayer for Shaker doors lets you achieve a smooth finish quickly. Start by disassembling your doors and cleaning the surfaces thoroughly. Set up your workspace by covering furniture and using masking tape to protect edges. Choose a fine finish tip and maintain a 12-inch distance while spraying, overlapping each pass by 50% for even coverage. Practice on cardboard until you're comfortable. Finally, clean your sprayer according to the manufacturer's instructions after use. With the right techniques, you can master the process and create stunning results that you'll love. There's more to explore, so keep going!

Key Takeaways

  • Disassemble and label Shaker doors, ensuring proper organization for easy reassembly after painting.
  • Clean surfaces with a degreaser and sand lightly for optimal paint adhesion.
  • Maintain a 12-inch distance from the surface and overlap passes by 50% while spraying.
  • Use a fine finish tip and practice on scrap material to master spraying techniques.
  • Regularly clean the sprayer and follow disposal regulations for leftover paint to maintain equipment performance.

Project Overview

When you're ready to tackle your Shaker door project, using an airless paint sprayer can make all the difference in achieving that sleek, professional finish. This method allows for faster application and better coverage than traditional brushes or rollers, ensuring your doors look flawless.

Additionally, understanding airless paint sprayer basics will help you navigate the painting process more effectively. Before diving in, remember to take proper safety precautions. Wear a mask and goggles to protect yourself from fumes and overspray.

Selecting the right spray tip is essential; a fine finish tip works best for detailed work on Shaker doors, minimizing overspray while ensuring an even application.

During the painting process, maintain a distance of about 12 inches from the surface and overlap each pass by 50% to achieve a smooth finish. You'll likely need to apply multiple coats of primer before you get that perfect look.

Once you've completed your project, don't skip on clean-up and maintenance of your airless paint sprayer. Flushing the system with the appropriate solvents will help maintain its performance and longevity, ensuring it's ready for your next project.

Advertisement

Follow these steps, and you'll be thrilled with the results!

Preparation Steps

organizing effective action plan

Before you start painting, it's vital to disassemble the doors and label each piece for easy reassembly later.

Cleaning the surfaces thoroughly with a degreaser is essential to guarantee the paint adheres properly, similar to how regular servicing can improve the efficiency of HVAC systems HVAC maintenance importance.

Don't forget to lightly sand the doors and tape off any areas that need protection from overspray.

Door Disassembly Process

Disassembling your cabinet doors is an important step in preparing for a successful paint job. Start by removing the cabinet doors from their hinges using a drill. Keep the screws organized in labeled bags to prevent loss during the door disassembly process. Mark your doors and corresponding frames with a numbering system for easy reassembly after painting.

Next, detach any drawer fronts and hardware from the doors. If you plan to replace the hardware later, fill any existing hardware holes with wood filler. This will create a smooth surface for painting.

Advertisement

Once you've completed these steps, it's vital to clean surfaces thoroughly. Here's a quick reference table for your disassembly process:

Step Action Tools Needed
Remove Doors Unscrew hinges and label screws Drill, labeled bags
Detach Hardware Remove drawer fronts and hardware Screwdriver
Prepare for Painting Fill holes with wood filler Wood filler, putty knife

After filling the holes, use a soft cloth to clean the surfaces, and lightly sand them with 220-grit sandpaper to guarantee proper paint adhesion.

Surface Cleaning Techniques

Proper surface cleaning is essential for achieving a flawless paint finish. Start by using a degreaser like TSP (trisodium phosphate) to thoroughly clean the surfaces of your shaker doors. This step will help eliminate dirt, grease, and residues, guaranteeing better adhesion for your primer and paint.

After cleaning, rinse the surfaces with clean water to remove any chemical residues that could interfere with the paint application. Additionally, using a product designed for effective cleaning solutions can further enhance your results.

Next, lightly sand the surfaces with 220-grit sandpaper to de-gloss the finish, promoting a good spray pattern for the ensuing layers. Inspect the doors for any damage, filling cracks or holes with wood filler, like Bondo, to create a smooth, even surface for painting.

Advertisement

To further enhance your working environment, create a dust-free area by covering furniture and surrounding spaces with plastic sheeting. This minimizes the risk of particles settling on your freshly cleaned surfaces.

Workspace Setup

organized workspace configuration

Creating an effective workspace for your airless paint sprayer is vital for achieving a professional finish. Start by clearing the area; move furniture out of the way or cover it with protective materials to prevent paint splatter and damage.

Use masking tape and protective paper to shield trim edges, floor surfaces, and any areas that shouldn't receive paint. This will help guarantee clean lines and a neat outcome. Additionally, make sure that your workspace is free from any plumbing issues that could arise from improper disposal practices, such as flushing improper items, which can lead to costly repairs.

If possible, set up a temporary spray booth in an unfinished area of your home. Use plastic sheeting to contain overspray, creating a controlled environment for your project. This setup not only protects your surroundings but also simplifies cleanup.

Elevate your cabinet doors on sawhorses for comfortable spraying; this height gives you better control and access during the painting process.

Don't forget about ventilation! Open windows or use fans to improve air circulation and minimize the buildup of paint fumes. A well-ventilated workspace is vital for your safety and comfort.

Advertisement

Airless Sprayer Selection

choosing airless sprayers wisely

Selecting the right airless paint sprayer can greatly impact the quality of your finish on shaker doors. For this task, consider models like the Graco GX-19 Finish Pro, which is specifically designed to deliver smooth finishes on cabinet projects.

Additionally, just as advancements in robotic pool cleaners have improved efficiency in pool maintenance, a quality sprayer can enhance your painting experience and results. It's vital to choose a sprayer that features siphoning capabilities, allowing you to draw paint directly from the cans. This not only enhances efficiency but also minimizes the need for frequent refills.

When it comes to tip size, you'll want to opt for a 311 or fine finish tip. These sizes are typically recommended for achieving that flawless application on shaker doors.

Additionally, verify your sprayer can operate at a pressure of around 2,000 PSI. This level is essential for peak performance and coverage on your cabinet surfaces.

Lastly, do your research and select high-quality, reliable brands. Investing in a dependable airless sprayer will help reduce the learning curve and potential frustrations often associated with using these tools.

Spraying Techniques

efficient application methods

Mastering spraying techniques is essential for achieving a flawless finish on your shaker doors. Start by maintaining a consistent distance of about 12 inches from the surface while spraying. This guarantees an even application and minimizes the risk of drips or uneven coverage.

Additionally, consider improving your workspace acoustics by using a sound system configuration that enhances the overall environment. Use long, even strokes and overlap each pass by roughly 50%. This overlap assures thorough coverage and contributes to a smooth finish.

Advertisement

Keep your spray gun perpendicular to the surface to maintain an ideal spray pattern. This positioning helps avoid streaks or missed spots, which can detract from the overall look.

Don't hesitate to experiment with the sprayer's pressure settings; typically, around 2,000 PSI works well for various paint types, allowing you to find the perfect balance for your desired finish.

Before diving into the actual painting, practice your spraying technique on cardboard or scrap wood. This practice lets you become familiar with the sprayer's operation, leading to better results when you tackle the shaker doors.

Color and Product Choices

product color selection options

Achieving a great finish on your shaker doors isn't just about technique; the right color and product choices play a significant role, too.

Start by selecting high-quality enamel paints, like Benjamin Moore Advance, which are known for their durability and smooth finish. Pair your paint with an appropriate primer. Opt for solvent-based primers such as Zinsser BIN or oil-based primers like Pro Block, as they provide excellent adhesion for bare wood.

For a polished look, consider experimenting with different brewing techniques to achieve the best results, just like you'd with coffee to enhance flavor.

Advertisement

When it comes to color, be aware of color variations like Decorator White and Decor White. Make sure to confirm the correct color formula from your paint retailer to verify consistency across your project.

It's wise to shop around, as local Sherwin Williams stores may have different stock and formulations, giving you the chance to find the best pricing and color matches.

Lastly, always test compatibility between your chosen primer and topcoat, especially if they're from different brands. This step is essential to avoid issues with adhesion or finish quality.

Clean-Up Process

organized waste removal procedure

Once you finish your painting project, it's crucial to clean up properly to maintain your equipment and the environment.

Start by disposing of any leftover paint responsibly, then follow the sprayer cleaning steps outlined in your user manual. This guarantees your airless paint sprayer stays in top shape for your next project.

Additionally, just like regular maintenance for air purifiers, proper upkeep of your painting equipment can enhance its longevity and performance.

Advertisement

For more tips on maintaining equipment, consider general air purifier usage.

Paint Disposal Methods

Proper paint disposal is vital for both safety and environmental protection. When you finish your project, you need to take into account paint disposal methods that comply with local regulations. Many areas require you to take leftover paint to a hazardous waste facility or participate in community paint recycling events.

Understanding the importance of reputation and reviews when selecting a service is key, just as making sure proper disposal is essential for a clean workspace. If you have leftover paint, you can mix it with cat litter or sawdust in a sealed container, allowing it to dry out before discarding it in the regular trash. This guarantees you're following waste disposal guidelines.

You should also clean your brushes, rollers, and sprayer components using the right solvents. For oil-based paints, use mineral spirits, and for latex, soapy water works best. Make certain to dispose of these cleaning materials responsibly, as improper disposal can lead to environmental contamination.

After using paint cans, rinse them thoroughly and check with local waste management about recycling options. Many municipalities accept empty paint cans as part of their recycling programs.

Advertisement

Always refer to the paint manufacturer's instructions for specific disposal recommendations and proper safety precautions, making sure you do your part to protect the environment while keeping your workspace safe.

Sprayer Cleaning Steps

After taking the necessary steps for paint disposal, it's important to focus on cleaning your airless paint sprayer. Proper sprayer cleaning guarantees that your equipment lasts longer and performs better in future projects.

Start by flushing the sprayer with soapy water to remove any paint residue from the suction and spray hoses. Make certain to follow the user manual instructions for a thorough clean. Additionally, using a budget-friendly vacuum cleaner can help maintain a clean workspace, preventing paint splatters and debris from accumulating.

Here's a quick checklist for effective cleaning:

  • Flush with soapy water to eliminate paint residue.
  • Rinse thoroughly with clean water to remove any cleaning agents.
  • Regularly clean the spray tip and filter to prevent clogs.

After you've flushed and rinsed, always perform a final rinse using clean water to verify that no soapy residue remains in the system. This step is essential for maintaining the sprayer's performance.

Troubleshooting Tips

effective problem solving strategies

When using an airless paint sprayer, you might encounter a few common issues that can disrupt your painting project. If you notice paint not spraying at all, start by checking the suction hose for kinks or blockages. Also, verify the pump is primed correctly before you begin.

If you experience inconsistent spray patterns, consider the tip size; you might need a finer tip for thicker materials like primer. To prevent clogs, it's essential to clean the spray tip regularly. Make it a habit to flush the sprayer with solvent between different coatings.

Advertisement

If you find yourself dealing with overspray or drips, maintain a consistent distance of about 12 inches from the surface. Adjusting the pressure setting can also help optimize your spray pattern.

If your sprayer is making excessive noise or vibrating more than usual, check all connections for security and look for any wear or damage in the hose or pump components. By following these troubleshooting tips, you can minimize disruptions and keep your project on track.

Consumer Insights

understanding customer behavior trends

Understanding consumer insights is essential for anyone considering an airless paint sprayer. Many DIYers feel overwhelmed by the complexity of choosing the right model, often leading to confusion about the various capabilities available.

It's vital to research and compare options to find a sprayer that meets your needs. Here are some insights to keep in mind:

  • DIYers prefer multi-functional sprayers to handle various projects, which reduces storage needs and simplifies the learning curve.
  • Many users report negative experiences due to improper setup or a lack of understanding of the equipment, highlighting the importance of following proper safety precautions.
  • Online forums are invaluable resources where you can learn from others' experiences, helping you navigate potential issues with airless sprayers.

Additionally, price discrepancies among retailers emphasize the need for thorough research.

Community Support

local assistance and resources

When you join online forums or community groups, you'll find a wealth of tips and tricks from fellow DIYers who've tackled similar projects.

Sharing experiences can help you navigate the complexities of airless paint sprayers and improve your painting techniques.

Plus, you can gain confidence from the positive reinforcement and support offered by others in the community.

Advertisement

Sharing Tips and Tricks

Throughout your journey with airless paint sprayers, engaging with online forums can be a game-changer. These platforms offer valuable insights and shared experiences from DIYers who've successfully tackled painting shaker doors. By connecting with others, you can exchange tips and tricks that help you achieve that smoother finish you're aiming for.

Here are some key takeaways from the community:

  • Optimal sprayer settings: Learn the best pressure and nozzle size for your specific project.
  • Practice makes perfect: Always try using an airless sprayer on cardboard or scrap wood first to refine your technique.
  • Stay safe: Remember to follow proper safety precautions, especially when painting in the vicinity of others.

Don't hesitate to seek advice from experienced users when you face common issues like overspray or uneven coverage.

Sharing your own experiences can also enhance your confidence and contribute to a supportive community. As you learn and improve, you'll find that engaging with fellow DIYers not only enriches your knowledge but also fosters continuous growth in using airless paint sprayers effectively.

Community Experience Exchange

Engaging with a community of fellow DIYers can be incredibly beneficial when using airless paint sprayers. Community forums often provide valuable insights and shared experiences that help you navigate challenges effectively.

Many users recommend practicing on cardboard or scrap materials before tackling your shaker doors. This not only boosts your confidence but also refines your spraying techniques, ultimately leading to a smooth finish.

Advertisement

You'll find that negative experiences with different sprayer options are common. That's why thorough research and peer feedback are essential for choosing the right equipment for your project.

Collaborative discussions among DIYers can lead to the sharing of important tips and tricks that enhance your painting techniques.

Additionally, positive reinforcement from fellow community members can greatly improve your confidence, encouraging you to experiment and learn from mistakes while adhering to proper safety precautions.

Don't hesitate to ask questions or share your progress; the support you receive can help you achieve the best results.

Frequently Asked Questions

Do You Dilute Paint When Using an Airless Sprayer?

You typically don't need to dilute paint for an airless sprayer, especially with quality products. However, if it's too thick, add a small amount of water or solvent as needed, following manufacturer guidelines.

Advertisement

How Do You Get a Smooth Finish With an Airless Sprayer?

To achieve that flawless touch, keep your distance around 12 inches while spraying. Use fine tips, sand between coats, overlap strokes, and adjust pressure. These steps guarantee a smooth, professional finish you'll be proud of.

How Do You Spray a Door With an Airless Sprayer?

To spray a door with an airless sprayer, choose the right tip size, maintain a 12-inch distance, use long strokes, overlap passes, and let each coat dry before applying another for a smooth finish.

Can You Spray Kitchen Cabinets With an Airless Sprayer?

Imagine transforming your kitchen with a flawless finish. Yes, you can spray kitchen cabinets with an airless sprayer! Just make sure to prep properly, choose the right tip, and maintain ventilation for the best results.

Conclusion

In the grand tapestry of home improvement, painting shaker doors with an airless sprayer can transform your space like a brushstroke from a master artist. Once you've prepped, selected the right sprayer, and perfected your technique, you'll see how effortless and rewarding this process can be. So, roll up your sleeves and embrace the art of DIY; your freshly painted doors will soon be the crown jewels of your home, shining with a new lease on life.

Advertisement

Continue Reading

Airless Paint Sprayers

Airless Paint Sprayer Tips for Painting Tray Ceilings

Learn how to achieve a flawless finish on tray ceilings with airless paint sprayers, and discover essential tips that will elevate your painting game.

Published

on

By

airless sprayer tips ceiling painting

Using an airless paint sprayer is your best bet for painting tray ceilings efficiently and achieving a smooth finish. Start by prepping the area—move furniture, cover light fixtures, and mask trim to protect surfaces. Choose the right spray tip, like a 621, and maintain a 12 to 16-inch distance for ideal coverage. Use overlapping passes and a steady speed to guarantee even application. After spraying, consider back rolling for added texture and uniformity. With some attention to detail, you can avoid common mistakes and guarantee quality results. If you want to refine your technique further, there's more to explore.

Key Takeaways

  • Use a Magnum by Graco paint sprayer with a 621 spray tip for optimal coverage on tray ceilings.
  • Maintain a distance of 12 to 16 inches from the surface for even atomization during spraying.
  • Apply overlapping passes of 50% and back roll to enhance finish quality and uniformity.
  • Properly mask trim, light fixtures, and edges to prevent overspray and ensure clean lines.
  • Monitor temperature and humidity levels to avoid uneven drying and finish issues.

Project Overview

When tackling a painting project, using an airless paint sprayer for tray ceilings can streamline the process and deliver impressive results. This method allows you to achieve efficient and uniform coverage, minimizing the risk of flaking that often happens with roller applications.

For large surface areas like tray ceilings, the Magnum by Graco paint sprayer stands out for its ability to maintain a consistent texture throughout your work. Additionally, understanding airless paint sprayer basics can further enhance your technique and outcomes.

Before you start, proper preparation is key. Make certain to move furniture and mask off any trim to protect areas that won't be painted. This guarantees a clean application and saves you time on cleanup later.

As you spray, remember to use techniques like overlapping passes by 50% and maintaining a steady speed. These practices are essential for achieving an even finish without unsightly lap marks.

After spraying, consider back rolling to enhance the finish quality on your tray ceilings. This step helps create a smooth and visually appealing appearance, giving your project that professional touch.

Advertisement

Essential Tools and Equipment

necessary tools and supplies

Essential tools and equipment are crucial for achieving the best results with an airless paint sprayer on tray ceilings. To start, consider using a Magnum by Graco paint sprayer. This model's efficiency provides complete and uniform coverage, making it a top choice for your project.

Additionally, maintaining good air quality while you work is important; using an air purifier can help reduce fumes and allergens in the environment.

You'll need to select the right spray gun along with various spray tips, such as the 621 tip, based on the texture and size of your ceiling. The correct tip guarantees ideal spray patterns, enhancing your overall finish.

Safety shouldn't be overlooked, so gear up with protective equipment like safety glasses, dust masks, and spray socks. These items safeguard you during the spraying process, keeping you safe from overspray and fumes.

For post-project cleanup, stiff nylon brushes and cleaning rags are essential. They help maintain your tools and guarantee a clean workspace.

Additionally, keep empty buckets handy for priming and cleanup tasks; they'll keep your area organized and tidy as you work.

Advertisement

Preparation Steps

initial planning and organization

Before you start painting, it's essential to set up your room properly. Clear out furniture and cover any remaining items to protect them from splatter, while using masking tape to seal off edges for crisp lines.

Additionally, consider the benefits of using a Graco FFLP Fine Finish Low Pressure Reversible Tip for achieving a smooth finish on intricate areas.

With these preparation steps in place, you'll set yourself up for a smooth and successful painting experience.

Room Setup Essentials

Preparing your room for an airless paint sprayer is vital to achieving a professional finish. Start by moving all furniture out of the room or covering it with protective materials. This prevents any paint damage during the spraying process.

Additionally, consider using drop cloths to cover the floors, as this can help with cleanup and protect against paint drips. Next, remove or cover light fixtures and ceiling fans to avoid paint splatter, guaranteeing they remain unblemished.

Before you begin painting, take the time to prepare the ceiling surface. Remove any old popcorn texture or imperfections, and consider skimming it for a smooth finish. A well-prepared surface helps achieve a better spray pattern when you use the airless sprayer.

Advertisement

Remember, having the right essential items for a home cleaning kit can assist in the cleanup process after painting.

To protect areas that shouldn't be painted, use masking tape to carefully shield trim, edges, and other surfaces. This step is vital for maintaining clean lines and preventing overspray, which can mess up your otherwise polished look.

Lastly, maintain proper ventilation in the room. Open windows or use fans to promote air circulation and reduce inhalation of paint fumes.

Following these setup essentials will set you up for a successful painting project, allowing you to focus on achieving that flawless finish.

Masking Techniques Overview

Masking techniques are vital for achieving a clean and professional finish when using an airless paint sprayer. Start by moving all furniture out of the way and covering any remaining items with drop cloths or plastic sheeting to prevent paint splatter during the spraying process. This step protects your belongings from unwanted paint damage.

Advertisement

Furthermore, creating an organized and serene workspace can enhance your focus and efficiency, much like the tranquil atmosphere found in a Modern Farmhouse Bedroom.

Next, use high-quality masking tape to protect the edges of trim, windows, and other surfaces that shouldn't be painted. This guarantees you get a crisp, clean line when you remove the tape.

Don't forget to cover light fixtures and ceiling fans with plastic bags or painter's tape as well; this will shield them from overspray and potential damage during painting.

To achieve that perfect finish, create a clear boundary by masking the ceiling-wall junction with tape. This helps prevent paint from bleeding onto the walls, giving you those sharp lines you desire.

Before you start spraying, double-check that all areas are adequately covered and masked. Taking the time to implement these masking techniques is vital for a professional-looking finish that you'll be proud of.

Advertisement

Spraying Techniques

effective application methods

When you're ready to spray, selecting the right spray tip is essential for achieving the best results.

Understanding keyword clustering can help you optimize your painting process by guaranteeing you cover all areas effectively.

Stick to a consistent spraying technique, overlapping each pass adequately to avoid streaks.

Pay close attention to edges and manage your overlap to secure a smooth finish on your surfaces.

Optimal Spray Tip Selection

Selecting the right spray tip is essential for achieving a flawless finish, especially on surfaces like tray ceilings. For best results, you should use a 621 spray tip, as it provides a fine spray pattern perfect for both ceilings and detailed edges.

Here's a quick reference table to help you choose the right spray tip based on your paint viscosity:

Advertisement
Paint Viscosity Recommended Spray Tip Notes
Thin Paint 511 Ideal for quick coverage
Medium Paint 617 Good balance of coverage
Thick Paint 621 Prevents clogging, smooth flow

Make sure to maintain a consistent distance of 12 to 18 inches from the surface while spraying. This distance helps achieve even coverage and reduces overspray. Additionally, utilize a cross-hatch spraying technique, overlapping passes by about 50% for uniform coverage across the textured surfaces. Don't forget to regularly check and clean your spray tip to avoid blockages and maintain a consistent spray pattern throughout the painting process.

Consistent Spraying Technique

Achieving a professional finish with an airless paint sprayer hinges not just on the right spray tip but also on your spraying technique. To guarantee even coverage and avoid lap marks, maintain a consistent distance of 12 to 16 inches from the surface while you spray. This distance allows for peak atomization and helps you achieve a smooth finish.

Additionally, it's important to take into account the energy consumption of your tools, as many appliances draw power even when not in active use, leading to unnecessary energy waste energy consumption patterns.

It's essential to move at a steady and uniform spraying speed, ideally between 6 to 12 inches per second. This consistency prevents uneven paint application and guarantees wet edges, which are vital for a flawless look.

When you apply paint, keep your strokes in the same direction and use overlapping passes of approximately 50%. This technique helps achieve a uniform finish and avoids streaks.

Advertisement

Lastly, don't forget to regularly check and clean your spray tip. A clean tip maintains a consistent spray pattern and prevents clogging, which can lead to uneven application.

Managing Overlap and Edges

Managing overlap and edges effectively can make all the difference in your painting project. When you're spraying tray ceilings, keep a consistent distance of 12 to 18 inches from the surface. This helps achieve an even spray pattern and minimizes overlap marks. Additionally, using a high-quality garage door opener can enhance home security, allowing you to focus on your painting project without worrying about interruptions.

Use a cross hatch spraying technique: start at the edges and move in overlapping sections to blend your coats seamlessly. Before you spray, cut in around the perimeter with a brush to guarantee a clean shift between the wall and ceiling. This step is essential for managing your edges.

For the best results, adjust your spray tip size; a 621 spray tip is ideal for fine finishes, giving you better control and reducing overspray. As you work, don't forget to back roll after spraying. This technique helps to smooth out any irregularities and further blends the paint.

Regularly check and clean your spray tip to avoid clogs, which can disrupt your spray pattern and lead to unwanted lap marks. By following these tips, you'll end up with a polished and professional-looking tray ceiling.

Advertisement

Application Process

steps for submitting applications

To start the application process, gather your materials and prepare a paint source using a 5-gallon bucket and liner. This setup guarantees easy access to paint while you work on the tray ceiling.

Begin by carefully cutting around the edges and light fixtures with a 3-inch paint brush. This step creates clean lines and helps prevent overspray. Additionally, consider using a quality burr grinder to guarantee consistent paint application, just as you'd for achieving uniform coffee grounds.

Once you've edged the ceiling, load your roller properly for even saturation. Make sure it's fully coated to avoid streaks during the rolling process.

Divide the ceiling into manageable sections, and apply the paint in a consistent direction. Using a back-rolling technique will help you achieve a uniform thickness and finish.

After you've finished applying paint to the ceilings, inspect the area for missed spots. Perform touch-ups as necessary, guaranteeing that you allow adequate drying time before reinstalling any fixtures.

This meticulous approach not only enhances the appearance of your tray ceiling but also guarantees a professional finish. With these steps, you're well on your way to achieving a beautifully painted ceiling that enhances your space.

Advertisement

Finishing Touches

final enhancements completed successfully

The finishing touches on your tray ceiling can make all the difference in achieving a polished look. After completing your paint application, take a moment to inspect the textured ceiling for any missed spots or uneven coverage.

Consider enhancing the overall atmosphere of the room with stylish wall clocks that complement your freshly painted ceiling. Use a small brush for precision touch-ups, guaranteeing you maintain a consistent finish throughout. It's important that all final strokes of paint are applied in one direction to prevent streaks and create a uniform appearance.

Before reattaching any light fixtures or decor, allow adequate drying time. This step helps avoid smudging and guarantees you achieve a clean finish.

To further enhance the look of your ceiling, consider using a higher-quality paint, as it provides better adhesion and contributes to a more uniform finish.

Common Issues and Solutions

challenges and resolutions guide

Airless paint sprayers can create a flawless finish, but common issues often arise during the process. One notable problem you might encounter is lap marks, which occur when wet paint overlaps with dry paint. To avoid this, maintain a consistent spraying speed and technique.

Consider back rolling after spraying, as it enhances the finish quality and guarantees an even texture on your tray ceiling.

Another critical factor to monitor is temperature and humidity, as these conditions greatly affect drying times. If the environment isn't right, you could end up with an uneven finish.

Advertisement

Also, using a high-quality paint can improve uniformity and reduce patchiness in the final coat.

Don't forget to regularly clean and inspect your spray tips. This step is essential for maintaining consistent performance and preventing issues like streaks or uneven application.

Finally, when using a roller cover, choose one that's compatible with your paint type, as this can also impact the overall finish.

Factors Affecting Finish Quality

quality finish influencing factors

Achieving a flawless finish on tray ceilings hinges on several key factors that can greatly influence the outcome.

First, the quality of the paint you choose plays a significant role. Low-quality paints can result in a patchy appearance and uneven sheen, especially on textured surfaces.

Next, maintaining the correct angle of your spray gun is vital. This helps prevent feathering and guarantees a smooth application across the textured areas of the ceiling.

Advertisement

Additionally, make sure you allow sufficient drying time between coats. Rushing this step can lead to lifting or uneven texture, ruining your hard work.

Monitoring your spray pattern is also essential. Adjust your technique as needed to achieve even coverage and minimize lap marks.

Touch-Up Tips and Techniques

enhancing your touch up skills

When it comes to touch-ups on tray ceilings, precision is key. Start by using a small brush to apply paint to the affected areas. Feather the edges for a seamless blend with the surrounding surface. Before you begin, test your touch-up paint on a hidden area to verify it matches the original finish and texture.

If you opt for an airless sprayer, keep the same distance and spraying technique as you did during the initial application. This consistency helps maintain the textured look and sheen of your ceiling. Allow adequate drying time between each application to prevent smudging and guarantee proper adhesion to the existing surface.

Lastly, take the time to clean your spray tips thoroughly after each use. Clogged tips can lead to uneven application, which is especially problematic during touch-ups.

Here's a quick reference table for your touch-up process:

Advertisement
Step Action
1. Test Paint Check color match on hidden area
2. Apply with Brush Use a small brush for precision
3. Drying Time Allow adequate time between coats
4. Clean Spray Tips Prevent clogging for even application

Frequently Asked Questions

What Spray Tip Should I Use for Ceilings?

For ceilings, you should use a 621 spray tip. It minimizes overspray and delivers even coverage. Maintain a distance of 12 to 18 inches for the best results, ensuring a uniform finish throughout your project.

What Is the Best Tip for Airless Paint Sprayer?

The best tip for your airless paint sprayer usually depends on your project. Generally, a 621 spray tip works well for most applications, while a 515 is great for thicker paints and larger areas.

What Is a 517 Spray Tip Used For?

A 517 spray tip's used for efficient coverage on large surfaces. It creates a wide fan pattern, allowing you to apply thicker materials smoothly while minimizing lap marks, making your painting job faster and easier.

What Is a 311 Spray Tip Used For?

You might think a smaller spray tip limits effectiveness, but the 311 spray tip excels in fine finishing. It's perfect for smooth surfaces, ensuring controlled application and minimal overspray, making your projects look professional and polished.

Conclusion

To sum up, using an airless paint sprayer for your tray ceiling can save you time and effort, giving you a professional finish. Did you know that using a sprayer can reduce your painting time by up to 50% compared to traditional methods? With the right techniques and preparation, you'll achieve stunning results that elevate your space. So grab your sprayer, follow the tips provided, and enjoy the transformation of your ceiling into a standout feature of your home!

Advertisement

Continue Reading

Airless Paint Sprayers

How to Achieve a Smooth Finish on Built-Ins With an Airless Paint Sprayer

Perfect your built-ins with an airless paint sprayer by mastering essential techniques—discover the secrets to a flawless finish that will elevate your project.

Published

on

By

smooth finish airless sprayer

To achieve a smooth finish on built-ins with an airless paint sprayer, start by thoroughly preparing the surfaces. Clean them well, fix any imperfections, and sand lightly for uniformity. Remove hardware and cover areas prone to overspray. When spraying, use a 311 tip for fine finishes and practice your technique on cardboard. Apply a quality primer first, then wait for it to dry before sanding lightly again. Make sure to apply multiple thin coats, allowing adequate drying time between them. Pay attention to the details, and you'll craft a flawless look—more tips await to enhance your project even further.

Key Takeaways

  • Properly prepare surfaces by cleaning, sanding, and filling imperfections to ensure maximum paint adhesion and a smooth finish.
  • Use a non-flammable, oil-based primer before applying paint for a strong bond and enhanced smoothness.
  • Select an appropriate spray tip, such as a 311, and adjust the airless sprayer's pressure for an even spray pattern.
  • Lightly sand between coats and after priming to improve adhesion and achieve a flawless final surface.
  • Allow sufficient drying time between coats and inspect for imperfections before reassembling hardware to maintain quality.

Project Overview

When tackling a painting project, especially with built-in cabinets, you can transform a room's look without breaking the bank. By painting or staining these features, you'll greatly enhance the aesthetic appeal and save on costly renovations.

Using a Magnum airless sprayer will enable you to apply paint quickly while achieving a professional finish that's free from unsightly brush strokes. Proper airless paint sprayer techniques can further enhance your results, guaranteeing a flawless application.

To make certain that your final result is first-rate, you'll need to plan on applying multiple coats. This might seem like a hassle, but it's essential for durability and an even look.

Light sanding between applications will help improve adhesion and create a smoother surface.

Preparation Steps

planning and organizing actions

Before you start painting, you need to prepare your surfaces properly. This includes making sure that the area is well-ventilated, which can help improve drying times and the overall finish.

Remove all doors and hardware, then clean everything thoroughly to guarantee the paint sticks.

Advertisement

Don't forget to sand and fill any imperfections for a flawless finish, as this step is vital for achieving a smooth and professional look.

Regular maintenance, similar to caring for your home's features like garage door openers, can greatly enhance the longevity of your paint job.

Surface Cleaning Techniques

To achieve the best results with your airless paint sprayer, start by thoroughly cleaning the surfaces you'll be painting. Use TSP (trisodium phosphate) to remove dirt, grease, and any contaminants that may affect paint adhesion. After cleaning, inspect for damage or imperfections and repair them to guarantee a smooth surface before painting.

Here's a helpful table summarizing the essential surface cleaning techniques:

Step Action Purpose
1. Clean Use TSP to scrub surfaces Remove dirt and grease
2. Inspect Check for damage or imperfections Identify repair needs
3. Sand (150-grit) Lightly sand surfaces with 150-grit paper Create a uniform texture
4. Sand (220-grit) Final pass with 220-grit for fine finish Smooth out any roughness
5. Wipe Use a microfiber cloth to remove dust Prepare for primer/paint

Following these surface cleaning techniques will set you up for success. Proper preparation guarantees maximum paint adhesion and a fine finish when using your airless paint sprayer.

Advertisement

Sanding for Adhesion

After confirming the surfaces are clean and free of imperfections, focus on sanding for ideal adhesion. Start by using a palm sander with 150 grit sandpaper for your initial smoothing. This step helps to create a uniform surface that promotes better paint adhesion, making it easier to achieve a perfect finish with tools like the Graco FFLP Fine Finish Low Pressure Reversible Tip.

Lightly move the sander in even strokes, as this prevents any ripples or uneven surfaces that could compromise the finish.

Once you've completed the first pass, follow up with a final sanding using 220 grit sandpaper. This finer grit guarantees a smooth finish that will enhance the overall look of your built-ins.

After sanding, thoroughly clean the surfaces with a microfiber or tack cloth to remove all dust and debris, which can hinder paint adhesion.

Don't forget to inspect the surfaces for any holes or damage. If you find any, fill them with wood filler to create a smooth, uniform base for painting.

Advertisement

Allow the surfaces to completely dry and cure after cleaning. This guarantees ideal adhesion before you apply primer and paint to the top and bottom of your built-ins.

Taking these steps will greatly enhance the quality of your final finish.

Hardware Removal Process

Removing hardware from your built-in cabinets is an important step in achieving a flawless finish. Start the hardware removal process by carefully unscrewing knobs, handles, and hinges using a screwdriver. This prevents damage to the surfaces. Label each door and drawer with a corresponding number or letter to simplify reassembly after painting.

Here's a quick guide to help you stay organized during the process:

Step Action
1. Unscrew Remove knobs, handles, and hinges.
2. Label Mark each door and drawer for reassembly.
3. Fill nail holes Use wood filler for any existing holes.
4. Sand Smooth filled areas for a seamless finish.
5. Clean Verify surfaces are clean for better adhesion.

If you're replacing the existing hardware, filling any nail holes with wood filler is vital. Sand down these areas to create a smooth surface, which is especially important when using airless sprayers. Finally, keep all removed hardware in labeled containers to avoid misplacement, confirming you have everything needed for reinstallation.

Advertisement

Jobsite Preparation

site readiness for construction

When preparing your jobsite for painting, covering all areas not intended for paint is essential to prevent overspray and maintain a clean workspace.

Start by laying down plastic and canvas tarps to protect floors and any furniture nearby. Use tape and plastic sheeting to shield walls and ceilings from potential paint splatters. This step is vital for keeping your environment tidy and guaranteeing a quality finish.

Additionally, if you're considering hiring professionals, look for reputable cleaning services that can help manage your space during the project.

Next, consider setting up a temporary spray booth in unfinished areas. This will help contain dust and debris, which can adversely affect the final look of your built-ins.

Elevating cabinet doors on sawhorses will also enhance your access and control during the spraying process, making it easier to achieve that smooth finish you're after.

Lastly, confirm you have adequate ventilation in your workspace. Open windows or use fans to promote airflow, which will help the paint dry properly and reduce the risk of inhaling harmful fumes.

Advertisement

Spraying Process

application of spray technique

To start the spraying process effectively, apply a non-flammable, oil-based primer as your foundation. This will guarantee a strong bond for your paint and enhance adhesion on built-ins.

Once the primer is dry, it's vital to prep your airless sprayer. Use a 311 spray tip designed for small surfaces like cabinets, which helps you achieve a fine finish with soft edges. Proper air quality is also important during this process; consider using an air purifier to reduce airborne dust and allergens that can interfere with your project improve indoor air quality.

Before you apply paint to the built-ins, practice your spraying technique on a piece of cardboard. Maintain a distance of about 12 inches from the surface for ideal coverage. This step is significant to mastering the spraying process and avoiding any mishaps.

Next, adjust the pressure on your airless sprayer. Proper pressure is key to achieving a smooth spray pattern; inadequate pressure can lead to an uneven finish or overspray.

After you've primed and practiced, lightly sand the surface to enhance adhesion for the topcoat. This step guarantees your final appearance is flawless.

Finishing Touches

final details completed

Achieving a flawless finish on your built-ins requires a few essential finishing touches after the final coat of paint. To guarantee your built-ins are visually appealing, consider incorporating decorative elements that complement your interior design style, such as cozy teenage girl room colors.

Start by lightly sanding the surface with 220 grit sandpaper. This helps eliminate any imperfections and guarantees a smooth finish. Remember, it's essential to allow each coat of paint to dry fully—typically, you should wait 24 hours before sanding or applying the next coat.

Advertisement

Once you've sanded, take a microfiber cloth and wipe down the surfaces to remove any dust and debris. This step is critical as it affects the final appearance of your satin finish.

For an ultra-smooth texture, consider rubbing down the painted surface with 2k paper after the final coat.

Troubleshooting Common Issues

resolving frequent technical problems

Experiencing issues with your airless paint sprayer can be frustrating, but identifying and troubleshooting common problems will help you achieve that smooth finish you desire.

One major issue is air entrapment, which often leads to bubbles or texture problems in your paint job. If you notice these imperfections, pause and check for air entrapment; it's essential to address this promptly to maintain a consistent finish quality.

Additionally, much like how cats may display affection upon owner's return, your application technique should be consistent to guarantee a smooth result.

Another common problem stems from inconsistent application techniques. You might notice variations in finish quality across the same area, which can happen if you don't maintain a steady distance and pressure while spraying. Aim for a consistent speed of about three seconds for long passes to guarantee even coverage.

Advertisement

Additionally, don't overlook your tip size and pressure settings. Using a finer tip can meaningfully enhance smoothness and reduce roughness in your finish.

Finally, remember that environmental factors like airflow and temperature can impact drying times and the overall finish. Monitoring these conditions during application can help you avoid issues that compromise your project.

Product Recommendations

tailored suggestions for customers

Identifying the right products can greatly impact your painting project and help you achieve that smooth finish you're after.

For your built-ins, consider using Benjamin Moore's Advance paint. It's known for its durability and provides a silky, smooth finish, making it perfect for high-traffic areas.

For a touch of rustic charm in your design, you might also explore island getaways that inspire cozy aesthetics.

If you're working on moldings, Sherwin Williams' Emerald urethane is an excellent choice, offering a gritty texture that complements various design styles.

Advertisement

Before painting, apply two coats of Benjamin Moore's Advanced Primer on any high-contact surfaces. This step enhances adhesion and coverage, ensuring your final result looks professional.

Pair your paint with a reliable airless paint sprayer, like the Graco 390 PC Airless Sprayer. It's designed to handle built-ins while achieving that fine finish you desire.

To further refine your application, experiment with fine finish tips, such as the Graco RAC X 310. This tip allows for low-pressure application, providing smooth coverage in detailed areas.

Community Insights

community engagement and feedback

While steering through the world of painting, you'll find that tapping into community insights can greatly elevate your skills and outcomes. Engaging with a forum community dedicated to painting can provide you with invaluable tips from experienced painters. These members often emphasize the importance of proper surface preparation and dust management to achieve that coveted smooth finish.

Here's a quick overview of valuable community insights:

Insight Description Benefit
Proper Surface Prep Discuss techniques for prepping surfaces effectively Reduces imperfections
Equipment Selection Talk about the impact of sprayer tips and settings Guarantees ideal finish quality
Troubleshooting Techniques Share solutions for common issues like rough finishes Enhances overall results

Collaboration in professional painting forums allows you to exchange techniques and advice, fostering a learning environment for everyone. Networking with peers can lead to shared experiences, with members posting about successful methods and challenges faced. By engaging with experienced professionals, you can gain insights that will help you troubleshoot common issues, ultimately enhancing your painting outcomes.

Advertisement

Frequently Asked Questions

How to Get Smooth Finish With Airless Sprayer?

To get a smooth finish with an airless sprayer, maintain a 12-inch distance, use a fine tip, adjust pressure based on material, practice your technique, and sand lightly between coats for better adhesion.

Why Is My Paint Sprayer Not Spraying Smooth?

If your paint sprayer isn't spraying smooth, check for thick paint, clogged tips, and incorrect air pressure. Adjust these factors, maintain the right distance, and monitor environmental conditions to improve your finish.

What Is the Number One Rule When Using Airless Spray Guns?

When using airless spray guns, you've got to maintain a consistent distance of about 12 inches from the surface. This guarantees even application and minimizes overspray, giving you a smoother finish on your projects.

How to Get a Perfectly Smooth Paint Finish on Cabinets?

Imagine a serene lake, its surface perfectly still. To achieve that smooth paint finish on your cabinets, sand thoroughly, apply quality primer, and use an airless sprayer, keeping layers even and dust-free for a flawless look.

Conclusion

In the end, achieving a smooth finish with an airless paint sprayer isn't just about technique; it's about pride in your work. You're creating built-ins that not only enhance your space but also reflect your personal touch. Remember, each stroke counts, and the effort you put in now will resonate every time you walk into the room. Trust the process, embrace the challenges, and watch your vision come to life—because your home deserves that perfect finish.

Advertisement

Continue Reading

Trending