
TL;DR

Get business pricing on tools and workshop supplies
- Business-only prices and quantity discounts
- Tax-exempt purchasing
- Multiple users, one account, clear invoices
Airless paint sprayers use high pressure to atomize paint and cover large surfaces such as fences, walls, and siding much faster than a brush or roller. For most DIY projects, a consumer-grade model in the $150–$400 range can work well if you match the paint and spray tip to the job, practice first, protect nearby surfaces, and clean the unit thoroughly afterward.
A paint roller can leave your shoulders aching halfway down a long fence; an airless paint sprayer can coat the same boards in a fraction of the application time. That speed comes with a tradeoff: the spray can drift onto windows, plants, cars, and anything else nearby if you skip preparation.
This guide explains how airless paint sprayers work, which DIY jobs suit them, how to choose a model, and what to do before, during, and after spraying. You’ll also get realistic cost and safety guidance, so you can decide whether the smooth finish is worth the masking and cleanup.
The short version: choose a sprayer for large, open surfaces, not every small touch-up. A little practice on scrap wood can save a lot of paint—and prevent a fine colored mist from settling on your patio furniture.
Use an airless sprayer for large areas such as fences, siding, decks, and empty-room walls; choose a brush or roller for small touch-ups.
Expect entry-level DIY models to cost about $150–$400, and check paint compatibility and viscosity limits before buying.
Mask nearby surfaces and test the spray pattern on cardboard before you paint the project.
Wear suitable eye, hand, and respiratory protection, and follow the manual’s pressure-relief steps.
Clean the sprayer immediately using the method specified for the coating; quick-clean features do not replace thorough maintenance.
How an Airless Sprayer Covers a Fence So Quickly
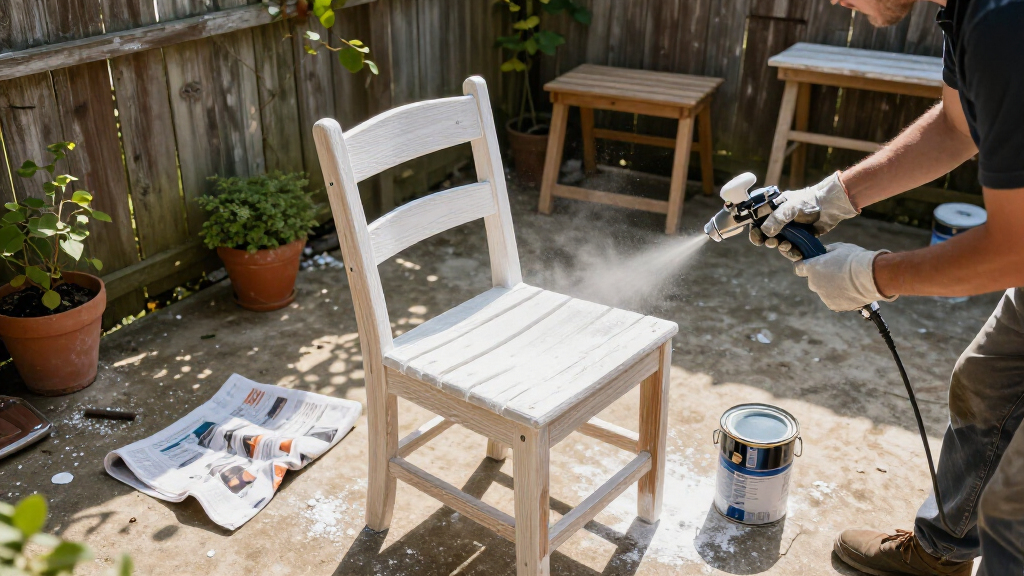
An airless paint sprayer pumps paint at high pressure through a small tip, breaking it into fine droplets that land across a surface. It draws paint directly from the container or a connected supply, so it can cover broad areas without repeatedly loading a brush or roller. On a long fence, that steady flow can turn a tiring afternoon of brushing into a much faster application job.
Airless paint sprayers use high pressure to atomize paint; they do not mix the paint with a stream of compressed air in the way some other sprayer types do. That makes them useful on walls, decks, exterior siding, and other large surfaces. Guidance for DIY users puts possible coverage at several hundred square feet per hour, but that is spraying time, not the whole project. Masking, moving ladders, and coating edges still take time.
For example, imagine painting a 6-foot-high backyard fence with tightly spaced pickets. A roller can struggle to reach the narrow gaps, while a sprayer lays paint across faces and edges quickly. You may still need a brush to work paint into joints or touch up missed spots. A smooth spray finish depends on moving steadily: keep the gun at a consistent distance, overlap each pass, and avoid stopping with the trigger pulled over one spot.
The speed is real, but so is overspray. A gentle breeze can carry droplets onto a neighbor’s white siding or your parked car. That’s why a sprayer works best when you can control the area around the job—and why the next question is whether your project is large enough to make the setup worthwhile.
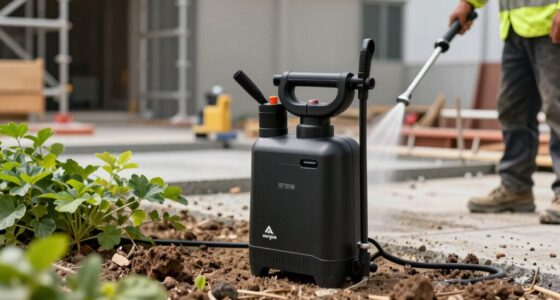
airless paint sprayer for DIY projects
As an affiliate, we earn on qualifying purchases.
As an affiliate, we earn on qualifying purchases.
Which DIY Jobs Are Worth the Setup
Airless paint sprayers make the most sense for large surfaces with few obstructions, such as fences, exterior siding, empty rooms, and broad deck sections. They are less appealing for a single chair, a small trim repair, or a cramped room full of furniture, because masking and cleanup can take longer than brushing. Think about the whole job, not just how fast paint leaves the nozzle.
Here’s a practical comparison. A homeowner repainting a bare spare bedroom may find spraying efficient after removing or covering everything. Someone touching up one doorframe will usually finish sooner with a brush. The best choice depends on surface area, detail, surroundings, and how much preparation the finish requires.
| Project | Sprayer fit | Why |
|---|---|---|
| Long fence or exterior siding | Strong | Large area and many boards benefit from fast, even coverage. |
| Empty room walls | Good | Spraying can be quick if floors, windows, and fixtures are carefully masked. |
| Deck with nearby landscaping | Mixed | Spraying saves application time, but overspray protection takes work. |
| Small trim repair | Weak | A brush often needs less setup and cleanup. |
For instance, spraying an empty garage wall may be a sensible weekend plan; spraying one wall in a furnished living room can mean wrapping sofas, lamps, floors, and electronics in plastic. A roller may win that contest. Ask yourself whether the area you’ll save time on is larger than the area you must protect. If yes, compare consumer and professional models next.
How to Choose a Sprayer Without Overspending
Choose a consumer-grade sprayer for occasional small-to-medium jobs and consider a professional-grade unit for large or frequent work. Entry-level DIY models typically cost $150–$400; professional-grade machines cost more and are built for heavier use. A higher price does not automatically mean a better result on your one-time fence project.
Modern consumer models often include adjustable pressure, ergonomic handles, more compact designs, and simpler cleaning features. Those details matter when you carry the machine around a house or store it between projects. Newer tip designs and pressure controls can also help reduce waste and improve spray control, but no feature can compensate for poor masking or an unsuitable tip.
Before buying, check the manufacturer’s instructions for paint compatibility and viscosity limits. Many models handle latex, oil-based paints, and stains, but a machine’s specifications decide what it can spray and what cleanup products it requires. If a thick latex paint needs thinning, follow the paint and sprayer instructions rather than guessing; excessive thinning can affect coverage and finish.
Picture a DIYer painting a 150-foot fence once every few years. A lighter consumer model may be easier to move and store than a heavy contractor unit. By contrast, someone repainting several rooms and exterior trim each season may value durability and capacity more than compact storage. Compare the included tip, hose length, controls, and cleaning setup—not just the advertised pressure. Then prepare the work area before you test the trigger.
How to Set Up and Spray for a Cleaner Finish
To get a cleaner finish, prepare the surface, protect the surroundings, test the spray pattern, and move the gun steadily at the distance specified by the manufacturer. A few minutes of testing on cardboard or scrap lumber can reveal a poor pattern before it reaches your wall. For example, if the spray forms heavy bands at the edges, adjust pressure or check the tip according to the manual.
- Prepare the surface. Clean away dust, loose paint, and grease, then let the surface dry. Cover nearby floors, plants, windows, and fixtures; use masking materials suited to the surface.
- Set up safely. Read the sprayer manual, connect the hose securely, and use the recommended paint and tip. Wear goggles, gloves, and a suitable mask; provide ventilation when working indoors.
- Test the pattern. Spray onto cardboard before coating the project. Check that the fan looks even, and adjust the pressure only as the instructions allow.
- Spray in steady passes. Hold the gun consistently, keep it moving before and after each pass, and overlap passes slightly. Avoid lingering, which can create drips and heavy spots.
- Inspect as you go. Look for thin areas, runs, or missed edges while the paint is still workable, and brush out details when needed.
A common mistake is waving the sprayer in an arc, like a garden hose. That changes the distance and angle, leaving uneven stripes on a door or fence board. Keep your wrist steady and move your arm across the surface. Always follow the tool’s pressure-relief and operating instructions; high-pressure paint can cause serious injection injuries. Practice helps, but safe handling is not optional.
How to Protect Yourself and Everything Nearby
Protect yourself with the manufacturer-recommended PPE, control access to the work area, and follow the sprayer’s safety instructions. Fine paint droplets can get into your eyes or lungs, and overspray can travel farther than it looks from the gun. Wear eye protection, gloves, and a suitable mask or respirator for the coating and setting; ventilate indoor work according to product directions.
Keep children, pets, and other people out of the spray area, and cover nearby vehicles, windows, plants, and outdoor furniture. A homeowner spraying a garden fence on a breezy afternoon may see the paint drift toward a neighbor’s car even when the gun points away from it. If wind carries spray beyond your control, pause and wait for calmer conditions rather than trying to compensate with a faster hand.
Airless sprayers operate at high pressure, so never point the gun at yourself or another person. A high-pressure injection injury can happen even when the wound looks small; treat a suspected injection as an emergency and seek immediate medical care. Don’t rely on gloves to stop a paint jet. Follow the manufacturer’s instructions for the trigger lock and pressure relief before clearing a blockage or handling the tip.
Some coatings release fumes or require specific handling and cleanup. Read the product label and sprayer manual, and use the specified ventilation and protective equipment. For outdoor work, cover the ground where practical and keep paint out of drains. A tidy setup protects more than the finish—it protects your lungs, your neighbors, and the local water system.
How to Clean the Sprayer Before Paint Dries
Clean an airless sprayer thoroughly as soon as you finish, following the manufacturer’s procedure and the paint label. Dried paint can clog the tip, filter, or passages, turning an easy next project into a frustrating repair. Many newer units offer quick-clean or simplified cleaning features, but those features do not replace a full clean after use.
First, follow the manual’s instructions to relieve pressure safely and identify the correct cleaning fluid for the paint. Water-based latex and oil-based coatings do not necessarily use the same cleaning method, so don’t assume one rinse works for every product. If you have sprayed a water-based paint, for example, you may need to flush the system with the specified water-based cleaning method until the discharge runs clear.
Clean the parts the manufacturer identifies, including the tip and filters when required. Use a soft brush where the instructions permit; a hard wire can damage a tip and distort the spray pattern. A homeowner who leaves the machine in a garage overnight may discover that a tiny plug of dried paint turns the next day’s first pass into a spitting, uneven mess.
When the sprayer is clean, store it as directed and keep paint and cleaning fluids in their proper containers. If your model has a storage fluid or winterizing procedure, follow its manual rather than improvising. Quick cleanup may feel like the boring end of a satisfying paint job, but it’s the step that helps the machine work properly the next time you need it.
What a Sprayer Really Saves—and What It Doesn’t
An airless sprayer saves application time on broad surfaces, but it does not remove the time needed for preparation, safety, or cleanup. DIY guidance estimates coverage of several hundred square feet per hour for spraying, while a brush or roller usually moves more slowly across a large area. The actual rate depends on your experience, the shape of the surface, the paint, and how much masking the location needs.
Imagine painting a long fence with a roller: every board, gap, and edge asks for another pass. A sprayer can cover those faces quickly, but you still need to protect the lawn and plants, refill or monitor the paint supply, inspect for missed spots, and clean the equipment. In a bare, open area, the time saving can feel dramatic. In a furnished bedroom, moving and covering everything may eat into that advantage.
The finish can also look smoother because spraying avoids many visible brush strokes. Still, smooth does not always mean flawless. Runs, uneven overlap, dusty surfaces, and poor technique can leave an ugly finish just as easily as a brush can. Some projects need back-brushing or back-rolling to work coating into rough wood or follow the coating maker’s guidance.
Think of the sprayer as a speed tool for application, not a shortcut around craft. For a broad, open fence, it can save hours. For a single cabinet door with a detailed edge, a careful brush or another finish method may be a better fit. The best purchase is the one that matches the job you actually have—not the one with the biggest pressure number on its box.
Frequently Asked Questions
Are airless paint sprayers suitable for DIY beginners?
Yes. Modern consumer models often offer adjustable pressure and simpler controls, but you still need practice. Test on cardboard or scrap wood, read the manual, and learn the safety steps before spraying a wall or fence.
What projects work best with an airless paint sprayer?
Large, open surfaces such as fences, exterior siding, decks, and empty-room walls usually benefit most. A small trim repair may take less time with a brush because it needs little setup or cleanup.
Can I spray any paint through an airless sprayer?
No. Many models can handle latex, oil-based paints, and stains, but compatibility and viscosity limits vary. Check both the sprayer manual and paint label before spraying, and follow their instructions if thinning is needed.
How much does a DIY airless paint sprayer cost?
Entry-level DIY models typically cost about $150–$400. Professional-grade units cost more and suit larger or more frequent jobs; compare capacity, included tips, controls, and cleaning features as well as price.
How do I avoid overspray on windows or plants?
Cover nearby surfaces and landscaping, keep the spray area controlled, and check wind before outdoor work. Test your pattern on scrap and pause if wind carries paint beyond the area you can protect.
What safety gear should I wear?
Use eye protection, gloves, and a suitable mask or respirator based on the paint label and sprayer instructions. Provide appropriate ventilation indoors, keep people and pets away, and never point a high-pressure spray gun at yourself or anyone else.
Is cleaning an airless sprayer difficult?
It takes care and time, though some newer models simplify the process. Clean the system immediately after use, use the method and fluid specified for your paint, and follow the manual for the tip, filters, and storage.
Conclusion
Choose an airless paint sprayer when your project has enough open surface to repay the masking and cleanup. Start with the right model and compatible paint, practice on scrap, protect yourself and your surroundings, and clean the machine before the last droplets dry.
Do that, and a sprawling fence can become a smooth field of fresh color instead of a weekend of sore shoulders—and the only mist in the air will stay where you planned it.
Halloween Picks
halloween
As an affiliate, we earn on qualifying purchases.