
Coming from a background in journalism and copywriting, I have frequently been asked about the proper maintenance and care of airless sprayers. One common question that comes up is whether it is safe to leave paint in an airless sprayer overnight. I am excited to provide helpful tips and advice in this article to help you make the most out of your airless sprayer investment.
Key Takeaways:
- Leaving paint in your airless sprayer overnight can lead to clogs and reduced performance.
- Understanding the components of an airless sprayer and proper cleaning techniques are crucial to maintaining its longevity and optimal performance.
- Proper paint storage, thinning, and maintenance are essential for optimal airless sprayer performance.
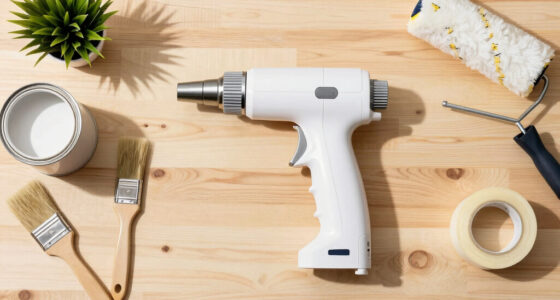
Understanding Airless Sprayers and Their Components
Before diving into the topic of leaving paint in your airless sprayer overnight, it’s important to understand how these sprayers work and the components involved. This knowledge will help you grasp the impact of leaving paint in the sprayer and the precautions that need to be taken.
Airless sprayers are commonly used for painting large surfaces quickly and efficiently. They work by pumping paint from a container through a hose and out of a spray gun at high pressure. This pressure breaks up the paint into small droplets and creates a fine mist that evenly coats surfaces.
The main components of an airless sprayer include:
| Component Name | Description |
|---|---|
| Inlet Tube | Draws paint from the container and into the pump |
| Pump | Creates high pressure required to atomize the paint |
| Hose | Transfers pressurized paint from the pump to the spray gun |
| Spray Gun | Controls the fluid flow, paint fan width, and pattern, as well as the air pressure, if applicable |
| Spray Tip | Determines the size of the paint droplets and the fan width of the spray pattern |
Understanding these components and how they work together is crucial for maintaining your airless sprayer’s performance and preventing issues with leaving paint in the sprayer overnight. In the next section, we will discuss why this can be problematic and the potential consequences.

Spray Gun Cleaning Kit, Universal Paint Gun Cleaner Brushes Set, Paint Sprayer Cleaning Kit
- Universal Compatibility: Fits most spray guns and airbrushes
- Multi-Material Brushes: Nylon, stainless steel, brass brushes in various sizes
- Delicate to Heavy Duty: Soft, medium, stiff bristles for different cleaning needs
As an affiliate, we earn on qualifying purchases.
As an affiliate, we earn on qualifying purchases.
Why Leaving Paint in Your Airless Sprayer Overnight Can Be Problematic
If you’re wondering whether you can leave paint in your airless sprayer overnight, the answer is generally no. Leaving paint in the sprayer can lead to several issues, including clogging and reduced performance.
When paint is left in the sprayer for an extended period, it can begin to dry and harden, causing buildup and clogs in the system. This can result in an uneven spray pattern, reduced pressure, and ultimately damage to the sprayer.
Additionally, when paint is left in the sprayer, it can mix with any residue from previous jobs, which can compromise the color and quality of the new paint. This can result in an undesirable finish and additional work to rectify the issue.
Moreover, leaving paint in the sprayer overnight can cause the paint to settle and separate, which can make it challenging to achieve a consistent color and texture. If the paint is not thoroughly mixed, it can result in an inconsistent finish.
Overall, it is best to avoid leaving paint in your airless sprayer overnight as it can lead to several problems that can affect the quality of your work and your sprayer’s lifespan. In the next section, we will explore how long paint can stay in an airless sprayer before causing problems and provide guidelines for proper paint storage.
How Long Can Paint Stay in an Airless Sprayer?
Leaving paint in your airless sprayer overnight is not ideal, but it’s possible to keep paint in the sprayer for a short period. How long paint can stay in an airless sprayer before causing issues depends on the type of paint and the conditions in which it’s stored.
The general rule of thumb is to keep paint in an airless sprayer for no longer than 24 hours. Water-based paints dry faster and are therefore more likely to cause clogs, whereas oil-based paints take longer to dry and may be less likely to cause problems. However, leaving oil-based paint in your sprayer for too long can still lead to issues.
To prevent paint from drying in your airless sprayer, it’s essential to store it in a cool and dry place, away from direct sunlight and heat. Additionally, make sure to keep the lid of the paint container tightly closed to prevent evaporation.
If you need to keep paint in your airless sprayer for longer than 24 hours, it’s recommended to clean the sprayer thoroughly and store the paint in a separate container. This ensures that the paint doesn’t dry up or cause clogs in your sprayer.
Tips for Cleaning Your Airless Sprayer After Use
Proper cleaning of your airless sprayer after each use is critical to its longevity and performance. Here are step-by-step tips to help you clean your sprayer effectively:
- Flush the sprayer with water: Fill the sprayer with water and flush it through the system until the water runs clear. This removes any excess paint and prevents it from drying in the sprayer.
- Disassemble the sprayer: Take apart the spray gun and remove any remaining paint or debris. This will ensure that all parts are clean and ready for storage.
- Clean the gun filter: Remove the gun filter and clean it thoroughly with water and a soft brush. A clogged filter can affect spray quality and cause issues with the sprayer.
- Soak the gun tip: Soak the gun tip in water or a cleaning solution for at least 30 minutes. This softens any remaining paint and makes it easier to remove.
- Clean the gun tip: Use a soft brush or toothbrush to remove any remaining paint from the gun tip. Rinse it with water and dry it thoroughly.
- Reassemble the sprayer: Once all parts are clean and dry, reassemble the sprayer and store it in a cool, dry place.
By following these cleaning tips, you can help extend the life of your airless sprayer and avoid any issues caused by dried paint residue.
Avoiding Paint Drying in Your Sprayer
Keeping paint from drying inside your airless sprayer is crucial for its performance and longevity. Here are some practical tips that can help you avoid this issue:
- Thinning your paint appropriately: Thick paint can easily dry out inside your sprayer, so it’s essential to thin it to the right consistency. Always follow the manufacturer’s recommendations when it comes to thinning your paint.
- Using the right filters: The filters in your sprayer are crucial for keeping the paint flowing smoothly while preventing debris from clogging the nozzle. Make sure to use the correct filter for the type of paint you’re using.
- Cleaning your sprayer regularly: Properly cleaning your airless sprayer after each use is essential to avoid paint residue buildup that can lead to clogs and other issues. Follow our step-by-step guide in section 5 to properly clean your sprayer.
- Storing your paint correctly: Keeping your paint in a cool, dry place can help prevent drying out. Always store your paint according to the manufacturer’s recommendations, and avoid leaving it open for too long.
- Using the right nozzle: The size of the nozzle you use can affect the spray pattern and the amount of paint that comes out. Using a nozzle that is too small can cause the paint to dry out, while using one that is too large can lead to overspray.
- Using a spray gun conditioner: Spray gun conditioners are products that can help clean and lubricate your airless sprayer’s internal components, preventing paint from drying out and extending the life of your sprayer. Follow the manufacturer’s instructions for use.
By following these tips, you can avoid or minimize paint drying inside your airless sprayer, ensuring that it operates smoothly and efficiently.
Proper Paint Storage Tips for Airless Sprayers
Storing your paint correctly is essential to keep it fresh and prevent clogs or other issues in your airless sprayer. Follow these guidelines to ensure proper paint storage:
- Store paint in a cool, dry place away from direct sunlight.
- Keep the containers tightly sealed to prevent air from entering.
- Store paint containers in an upright position to prevent leaks or spills.
- Avoid storing paint in humid environments, as this can cause the paint to spoil.
- Label each container with the paint type, color, and date of purchase to keep track of inventory and expiration dates.
By following these tips, you can keep your paint fresh and avoid potential issues with your airless sprayer.
Maintaining Your Airless Sprayer’s Performance
As with any tool, regular maintenance is essential to keep your airless sprayer performing to its best ability. By following these simple steps, you can avoid paint-related problems and prolong your sprayer’s lifespan.
Clean Your Sprayer After Use
Proper cleaning after each use is crucial to prevent paint from drying inside your sprayer and causing clogs. To clean your sprayer, first, turn off and unplug it. Next, remove the spray tip and guard and rinse them with warm water. Then, fill the sprayer with water and run it through the system until the water runs clear. Finally, use a cloth or brush to clean the outside of the sprayer and let it dry completely before storing.
Perform Regular Maintenance
Performing regular maintenance is key to ensuring your airless sprayer performs optimally. This includes replacing worn or damaged parts, checking for leaks, and lubricating moving parts. Consult your sprayer’s manual for specific maintenance instructions and recommended schedules.
Use Properly Thinned Paint
Using paint that is properly thinned to the correct consistency is essential for optimal airless sprayer performance. Consult your paint manufacturer’s instructions for recommended thinning ratios and use a viscosity cup to ensure your paint is the right consistency.
Store Your Paint Properly
Storing your paint properly is just as important as maintaining your sprayer. Keep your paint in a cool, dry place, and avoid exposing it to extreme heat or cold. Make sure the lid is tightly sealed to prevent air from entering, which can cause the paint to thicken or skin over.
By following these simple tips for airless sprayer maintenance, you can ensure your sprayer continues to perform optimally and avoid any paint-related issues.
The Importance of Properly Thinning Your Paint
When using an airless sprayer, it’s essential to thin your paint to the correct consistency for optimal performance. Proper thinning ensures that the paint flows smoothly through the sprayer and creates an even finish without clogs or uneven coverage.
The recommended thinning ratio for your paint will depend on several factors, including the type of paint and the sprayer’s specifications. It’s important to follow the manufacturer’s instructions carefully to achieve the best results.
If the paint is too thick, it may cause clogs in the sprayer or produce an uneven finish. On the other hand, if the paint is too thin, it may create drips and splatters and require multiple coats for adequate coverage.
One way to test the paint consistency is to use a viscosity cup, which measures how fast the paint flows through a tiny hole. You can also check the paint for its performance on a test surface.
Tip: When thinning the paint, use the appropriate solvent recommended by the paint manufacturer. Avoid adding too much solvent, as this can negatively affect the paint’s quality and durability.
Troubleshooting Common Airless Sprayer Problems
If your airless sprayer is not performing as expected, there may be several reasons why. Here are some common issues and solutions to help you troubleshoot your sprayer:
- Uneven spray pattern: If your sprayer is producing an uneven spray pattern, it’s likely due to a clogged tip. To fix this, stop spraying and remove the tip using a wrench. Clean the tip with warm water and a stiff brush, then reattach it and test the sprayer.
- Poor spray quality: Poor spray quality can be caused by several factors, including the wrong tip size or worn-out parts. Check that you’re using the correct tip size for the paint you’re using and replace any worn-out parts.
- Excessive overspray: Excessive overspray can be caused by a clogged or damaged inlet valve. Disassemble the inlet valve and clean or replace any damaged parts.
- Lack of pressure: If your sprayer is not producing enough pressure, it may be due to a worn-out pump or a clogged filter. Check the pump for signs of wear and replace any damaged parts. Clean or replace the filter as needed.
- Leaks: Leaks can be caused by loose fittings, worn-out seals, or crack hoses. Tighten any loose fittings and replace any worn-out seals or hoses.
If you’re still experiencing issues, consult your sprayer’s manual or seek professional help. Remember to always perform regular maintenance and cleaning to prevent problems from occurring in the first place.
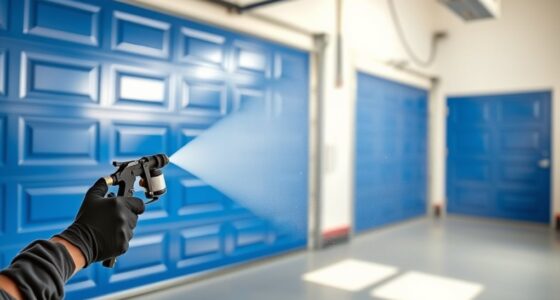
Ensuring Proper Spray Pattern and Quality
When using an airless sprayer, the quality of the output and spray pattern are critical in achieving the desired results. Here are some factors to consider:
Spray Tip Size
The spray tip determines the amount of material output and the spray pattern size. Choosing the correct tip size for your project is crucial in achieving the desired results. Too small of a tip size can result in uneven coverage, while too large of a tip size can overspray and waste material. Consult the manufacturer’s guidelines for the recommended tip size for your specific paint and project.
Paint Consistency
The consistency of the paint also affects the spray pattern and quality. Thin paint will result in overspray and a poorly defined pattern, while thick paint can cause clogs and an uneven spray pattern. Check the manufacturer’s guidelines for the recommended viscosity of the paint and add water or paint thinner as necessary.
Spraying Technique
Your spraying technique also plays a role in achieving a proper spray pattern and quality. Hold the sprayer at a consistent distance from the surface, keep a steady hand, and move in a smooth, even motion. Avoid stopping or starting abruptly, as this can result in drips or uneven coverage.
Sprayer Maintenance
Regular maintenance of your airless sprayer is essential in ensuring optimal performance and spray pattern quality. Clean the sprayer after each use and ensure all components are free of paint residue. Replace any damaged or worn parts as necessary and follow the manufacturer’s maintenance schedule.
By considering these factors and maintaining your airless sprayer, you can achieve a high-quality spray pattern and output for your painting projects.
Tips for Preventing Clogs in Your Airless Sprayer
One of the most common issues that can affect the performance of your airless sprayer is paint clogs. These can occur when paint residue dries up inside the sprayer and clogs the hose or spray tip, leading to reduced pressure and uneven spray patterns.
To prevent paint clogs in your airless sprayer, here are some tips to follow:
- Use the right type of paint: Not all paints are suitable for airless sprayers. Using paint that is too thick or contains particles that are too large can clog your sprayer. Make sure to read the manufacturer’s recommendations and choose paints that are specifically labeled for airless sprayers.
- Properly thin your paint: Thinning your paint to the correct consistency can improve your sprayer’s performance and reduce the risk of clogs. Make sure to follow the manufacturer’s instructions on how to thin your paint, and test it before using it in your sprayer.
- Filter your paint: Filtering your paint before pouring it into your sprayer can help remove any particles or debris that may clog your sprayer. Use a strainer to filter your paint, and make sure to clean it regularly.
- Flush your sprayer regularly: After each use, make sure to flush your sprayer with the appropriate cleaning solution to remove any paint residue. This will prevent any dried paint from clogging your sprayer components.
- Store your sprayer properly: Make sure to store your sprayer in a cool, dry place, away from direct sunlight. This will prevent your paint from drying up inside your sprayer and clogging the components.
By following these tips, you can prevent paint clogs in your airless sprayer and ensure smooth, consistent performance.
The Pros and Cons of Leaving Paint in Your Airless Sprayer Overnight
As I mentioned earlier, leaving paint in your airless sprayer overnight is generally not recommended. However, there may be circumstances where it is unavoidable or necessary. Let’s take a look at the pros and cons of this practice.
Pros:
- It saves time and effort: If you plan to continue painting the next day, leaving paint in your airless sprayer can save time and prevent the need to clean and refill the sprayer.
- It can be convenient: If you have limited storage space or need to transport your sprayer to another location, leaving paint in the sprayer can be a practical solution.
Cons:
- It can cause clogs: Leaving paint in your airless sprayer for an extended period can cause the paint to dry and clog the sprayer, which can be difficult to remove and may require the services of a professional.
- It can damage the sprayer: Paint that is left in the sprayer for too long can corrode and damage the internal components of the sprayer, resulting in reduced performance and potentially costly repairs.
- It can affect the quality of your work: Paint that has been left in the sprayer for an extended period may have changed in consistency or dried out, affecting the quality of your work and potentially requiring rework.
If you decide to leave paint in your airless sprayer overnight, it’s important to take precautions to prevent clogs and damage. Be sure to follow proper storage guidelines, use the appropriate cleaning techniques, and check the consistency of the paint before resuming work.
What to Do If Paint Dries in Your Airless Sprayer
Paint drying in your airless sprayer can be frustrating, but there are steps you can take to address the situation and restore your sprayer’s performance. Here’s what to do:
1. Disassemble the Sprayer
The first step is to disassemble the sprayer and remove any excess paint. Follow the manufacturer’s instructions for proper disassembly and be sure to wear protective gloves and eyewear.
2. Soak the Parts in Solvent
Place the disassembled parts in a container filled with solvent and let them soak. This will help dissolve any dried paint residue and make it easier to remove. Follow the manufacturer’s instructions for the recommended solvent to use.
3. Use a Brush or Scraper
After soaking, use a brush or scraper to remove any remaining paint from the parts. Be gentle to avoid damaging any delicate components.
4. Rinse with Water
Once all the paint has been removed, rinse the parts thoroughly with water to remove any remaining solvent. Dry the parts completely before reassembling the sprayer.
5. Run Water or Solvent through the Sprayer
Before using the sprayer again, run water or solvent through it to flush out any remaining paint residue. This will help prevent clogs and ensure optimal performance.
By following these steps, you can effectively clean and restore your airless sprayer after paint has dried inside it. Remember to always properly clean and maintain your sprayer to prevent paint from drying and ensure its longevity.
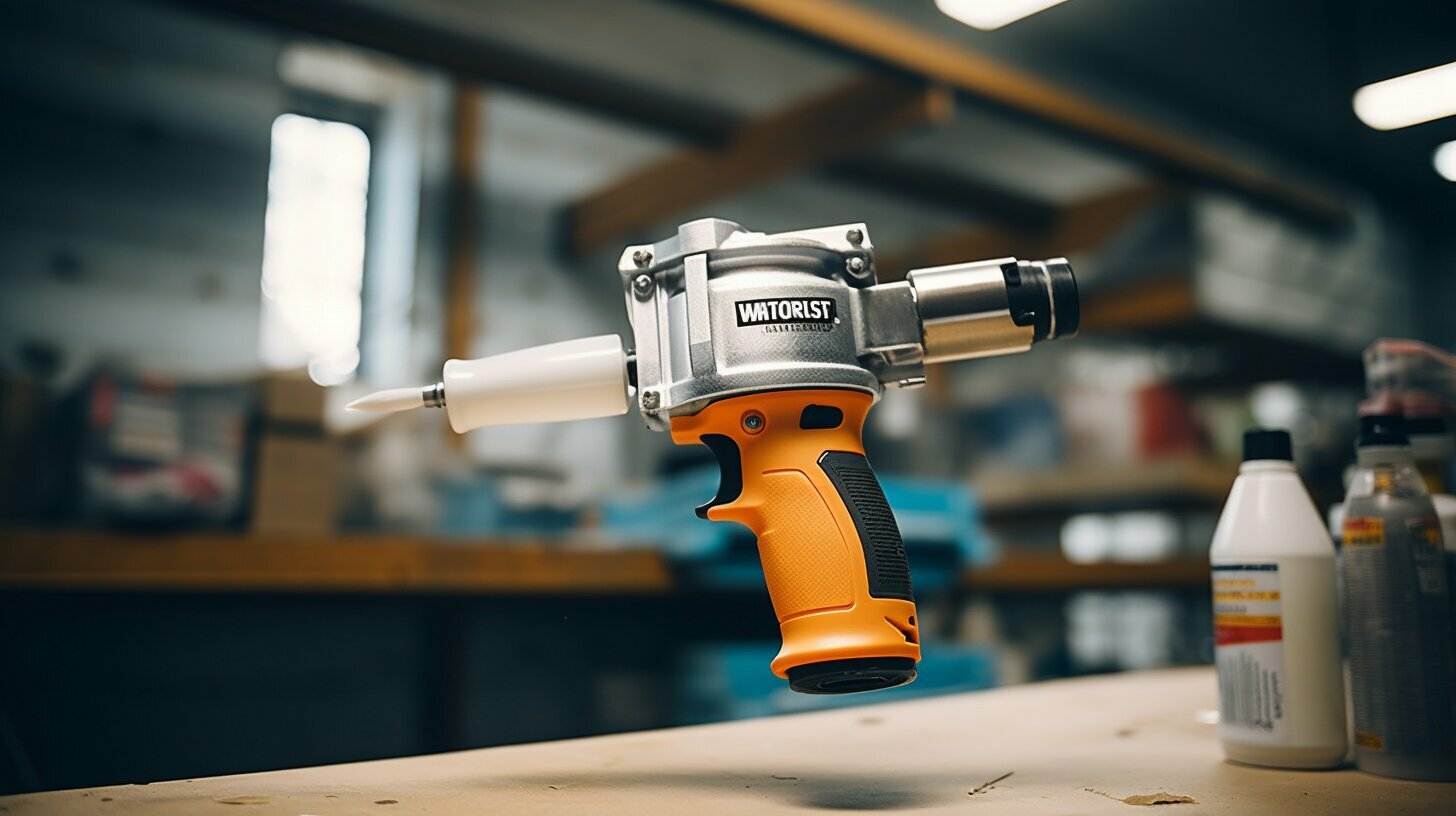
Tips for Extending the Lifespan of Your Airless Sprayer
Investing in an airless sprayer can save you both time and money in the long run, but proper maintenance is key to extending its lifespan and ensuring optimal performance. Here are some tips to help you get the most out of your investment:
- Flush the sprayer after each use: It’s essential to clean your sprayer properly to prevent paint residue from building up and affecting performance. Keep your sprayer in top shape by flushing it with water or appropriate cleaning solution.
- Store the sprayer in a dry, cool place: Protect your sprayer from extreme temperatures and humidity by storing it in a clean, dry spot. Ensure the sprayer is covered to keep dust and debris out.
- Replace worn or damaged parts: Regularly inspect your sprayer’s parts to ensure they’re in good condition. Replace any worn or damaged parts to avoid potential problems.
- Use the right type of paint: Consult the sprayer’s manual to determine which types of paint are compatible. Using the wrong type of paint can lead to clogs and other issues.
- Follow manufacturer’s maintenance guidelines: Each sprayer is unique and requires specific maintenance guidelines. Follow the manufacturer’s instructions to ensure proper care and maintenance of your sprayer.
- Store paint properly: Store paint in a cool, dry area away from direct sunlight. Avoid exposing it to extreme temperatures or humidity to prevent clogs and other issues.
- Regularly clean spray tips: Clogged spray tips can lead to uneven spray patterns and other issues. Clean the tips regularly to ensure optimal performance.
- Properly thin paint: It’s essential to thin paint to the correct consistency for optimal performance. Be sure to follow the manufacturer’s guidelines for thinning paint.
- Practice safe operation: Always wear appropriate protective gear such as goggles and gloves while operating your sprayer. Ensure proper ventilation in the workspace to avoid inhaling fumes.
By following these tips, you can help extend the lifespan of your airless sprayer and ensure continued high performance for years to come.
Conclusion
After delving into the topic of leaving paint in your airless sprayer, it’s clear that proper paint storage, cleaning, and maintenance are crucial for preventing potential issues and ensuring optimal performance. While leaving paint in your sprayer overnight may sometimes be unavoidable, it’s generally not recommended due to the risks of clogs and reduced performance.
By following the tips and guidelines provided in this article, I now feel confident in my ability to use my airless sprayer effectively and maintain its longevity. Regular cleaning and maintenance, proper paint storage, and avoiding paint drying in my sprayer are all essential practices I plan to implement moving forward.
FAQ
Q: Can I Leave Paint in My Airless Sprayer Overnight?
A: Leaving paint in your airless sprayer overnight is generally not recommended. It can lead to clogs and reduced performance. However, there are specific circumstances where it may be acceptable. Proper paint storage, regular cleaning, and maintenance are crucial to prevent potential issues and ensure optimal performance.
Q: Understanding Airless Sprayers and Their Components
A: Before delving into the topic, it’s crucial to understand how airless sprayers work and the components involved. This knowledge will help us grasp the impact of leaving paint in the sprayer overnight and the precautions that need to be taken.
Q: Why Leaving Paint in Your Airless Sprayer Overnight Can Be Problematic
A: Leaving paint in your airless sprayer overnight can lead to various issues, such as clogs and reduced performance. In this section, we will discuss the reasons why this can be problematic and the potential consequences.
Q: How Long Can Paint Stay in an Airless Sprayer?
A: While leaving paint in your airless sprayer overnight is generally not recommended, there are specific timeframes within which it can still be acceptable. We will explore how long paint can stay in an airless sprayer before causing problems and offer guidelines for proper paint storage.
Q: Tips for Cleaning Your Airless Sprayer After Use
A: Proper cleaning of your airless sprayer is crucial to maintain its performance and prevent issues caused by dried paint residue. In this section, we will provide step-by-step tips on how to effectively clean your sprayer after each use.
Q: Avoiding Paint Drying in Your Sprayer
A: Preventing paint from drying inside your sprayer is vital for its longevity and performance. Here, we will share practical tips and techniques to help you avoid paint drying in your airless sprayer.
Q: Proper Paint Storage Tips for Airless Sprayers
A: Storing your paint correctly is essential to keep it fresh and prevent clogs or other issues in your airless sprayer. This section will provide you with valuable tips on how to store your paint properly to maintain its quality and prevent damage to your sprayer.
Q: Maintaining Your Airless Sprayer’s Performance
A: Regular maintenance is key to ensuring your airless sprayer performs optimally. In this section, we will discuss the essential maintenance steps you should take to keep your sprayer in top shape and avoid any paint-related problems.
Q: The Importance of Properly Thinning Your Paint
A: Thinning paint to the correct consistency is crucial for airless sprayer performance. Here, we will explain why proper thinning is essential and provide guidance on how to achieve the right paint consistency for your sprayer.
Q: Troubleshooting Common Airless Sprayer Problems
A: Even with proper maintenance and care, airless sprayers can encounter issues. In this section, we will cover common problems that may arise and provide troubleshooting tips to help you resolve them effectively.
Q: Ensuring Proper Spray Pattern and Quality
A: The spray pattern and overall quality of your airless sprayer’s output are essential for achieving the desired results. This section will discuss factors that can affect spray pattern and quality and offer suggestions to ensure optimal performance.
Q: Tips for Preventing Clogs in Your Airless Sprayer
A: Paint clogs can disrupt the smooth operation of your airless sprayer. In this section, we will provide tips and techniques to help you prevent clogs and maintain your sprayer’s performance.
Q: The Pros and Cons of Leaving Paint in Your Airless Sprayer Overnight
A: Although not recommended, leaving paint in your airless sprayer overnight may sometimes be unavoidable. In this section, we will weigh the pros and cons of this practice and suggest alternative solutions.
Q: What to Do If Paint Dries in Your Airless Sprayer
A: In the unfortunate event that paint dries in your airless sprayer, it’s essential to know how to address the situation. This section will provide steps to follow if you encounter dried paint and offer guidance on how to clean and restore your sprayer.
Q: Tips for Extending the Lifespan of Your Airless Sprayer
A: To make the most of your airless sprayer investment, it’s important to extend its lifespan. In this section, we will share tips and techniques to help you prolong the life of your sprayer and ensure continued high performance.