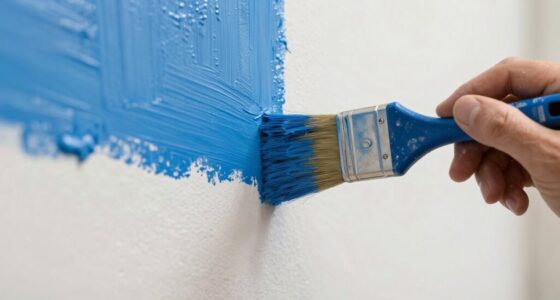
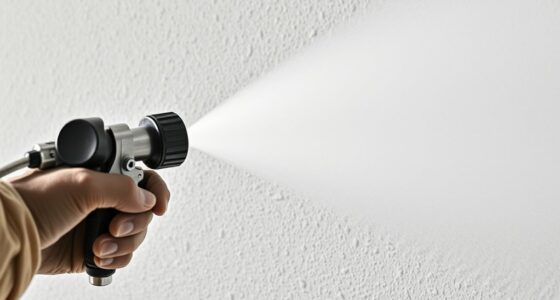
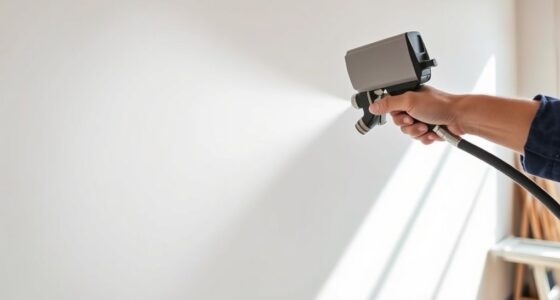
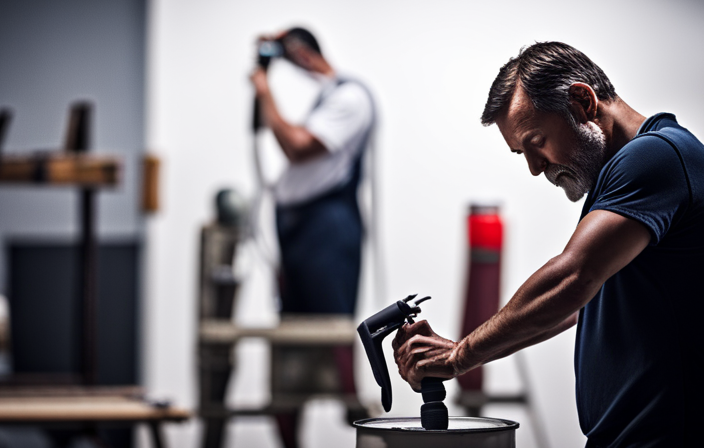
Connect with us

Airless Paint Sprayer Techniques

Common Mistakes to Avoid When Cleaning Your Airless Paint Sprayer

Published

on

Prepare to elevate your painting skills with an airless paint sprayer! These robust devices are designed to speed up and enhance the efficiency of your painting tasks. However, it’s crucial to keep in mind that maintaining them properly is essential.

Cleaning your airless paint sprayer might not be the most glamorous task, but neglecting it can lead to clogged nozzles, uneven spray patterns, and ultimately a frustrating painting experience. In this blog post, we’ll discuss some common mistakes to avoid when cleaning your airless paint sprayer so you can keep it in top-notch condition and achieve professional-quality results every time. So grab your overalls and let’s dive into the world of cleaning your airless paint sprayer!

Not Reading the Manual

When it comes to using any new tool or equipment, reading the manual might not be the most exciting part of the process. However, neglecting to read the manual for your airless paint sprayer can lead to some serious mishaps. Each airless paint sprayer is unique and may have specific instructions and recommendations that you need to be aware of.

The manual provides essential information on how to properly set up and operate your sprayer, as well as important safety guidelines. It will also outline the necessary steps for cleaning and maintenance. Skipping this step could result in improper use or even damage to your equipment.

By taking a few minutes to familiarize yourself with the manufacturer’s instructions, you’ll be able to understand how all the components work together and ensure that you’re getting optimal performance from your airless paint sprayer.

Remember, each model may have its own quirks or specific requirements when it comes to cleaning. So don’t skip over that handy little booklet – it holds valuable information that can save you time, money, and frustration down the line!

Not Flushing the Pump After Use

One of the most common mistakes people make when cleaning their airless paint sprayer is not flushing the pump after use. Flushing the pump is a crucial step that many users overlook, but it can have a big impact on the performance and longevity of your sprayer.

When you don’t flush the pump after using your airless paint sprayer, any leftover paint or residue can dry inside the system. This can lead to clogs and blockages in the nozzle or other parts of the sprayer, affecting its ability to spray smoothly and evenly.

To avoid this issue, it’s important to properly flush out your airless paint sprayer after each use. Start by removing any remaining paint from the container and pouring in a cleaning solution recommended by the manufacturer. Then, run clean water through the system until all traces of paint are gone.

By taking just a few extra minutes to flush out your pump after each use, you’ll ensure that it stays clean and free from clogs. This will not only improve its performance but also extend its lifespan, saving you time and money in the long run.

Remember, proper maintenance is key to getting optimal results from your airless paint sprayer. So don’t forget to flush that pump!

Not Cleaning the Nozzle Properly


One of the most common mistakes people make when cleaning their airless paint sprayer is not properly cleaning the nozzle. The nozzle is a crucial component of the sprayer, as it controls the flow and pattern of the paint. If it becomes clogged or dirty, it can result in uneven spray patterns and poor coverage.

To clean the nozzle effectively, you’ll need to remove it from the sprayer first. Start by disconnecting all power sources and relieving any pressure in the system. Then, using a wrench or pliers, carefully unscrew the nozzle from the gun.

Once removed, rinse off any excess paint with water or solvent (depending on your paint type) using a soft brush or cloth. Pay special attention to removing any dried-on paint that may be blocking the openings.

After rinsing, use a small needle or pin to gently clear out any remaining buildup inside each opening of the nozzle. Be careful not to damage or enlarge these openings during this process.

Reattach th nozzle and then run the paint sprayer for a few minutes to flush out any remaining buildup. With a clean nozzle, you should be ready to start spraying again!

Advertisement

Not Cleaning the Paint Filter Regularly


One important aspect of maintaining your airless paint sprayer is regularly cleaning the paint filter. The paint filter plays a crucial role in preventing debris and particles from clogging up your equipment, ensuring smooth and consistent spray patterns.

Why is it important to clean the paint filter regularly? Well, if you neglect this step, you may experience issues such as reduced pressure, uneven spray patterns, or even complete blockage of the nozzle. This can result in wasted time and frustration during your painting projects.

To clean the paint filter properly, start by removing it from the sprayer according to the manufacturer’s instructions. Rinse off any excess paint with warm water or an appropriate cleaning solution. Use a soft brush or cloth to remove any stubborn residue that may have accumulated on the surface of the filter.

Once cleaned, make sure to inspect for any signs of damage or wear. If necessary, replace the filter with a new one before reattaching it. By taking these simple steps and cleaning your paint filter regularly, you’ll ensure optimal performance and longevity of your airless paint sprayer.

Remember: Proper maintenance goes a long way in keeping your equipment in top shape! So don’t overlook this essential task when caring for your airless paint sprayer.

Not Keeping the Sprayer Cover Clean

One crucial mistake many people make when cleaning their airless paint sprayer is neglecting to keep the sprayer cover clean. While it may seem like a minor detail, keeping the cover of your sprayer free from dirt, dust, and debris can greatly impact its performance and longevity.

When you use your paint sprayer, it’s inevitable that some overspray will accumulate on the cover. If left uncleaned, this overspray can dry and harden over time, making it more difficult to remove later on. Additionally, a dirty sprayer cover can hinder proper airflow and ventilation during operation.

To prevent these issues, be sure to regularly wipe down the exterior of your airless paint sprayer after each use. Use a damp cloth or sponge to gently remove any excess paint or residue from the surface. For tougher stains or dried-on paint splatters, you may need to utilize a mild detergent or specialized cleaner recommended by the manufacturer.

Not only will maintaining a clean sprayer cover ensure optimal performance for future painting projects but also extend the lifespan of your equipment. So don’t overlook this simple yet essential step in caring for your airless paint sprayer!

Conclusion

When taking care of your airless paint sprayer, it’s important to remember the three key points outlined in this article: cleaning the paint filter regularly, keeping the sprayer cover clean, and keeping the equipment properly lubricated. By following
Properly cleaning your airless paint sprayer is essential for maintaining its performance and longevity. By avoiding these common mistakes, you can ensure that your equipment stays in top shape and continues to deliver professional-quality results.

Remember to always read the manual before using your paint sprayer. This will provide valuable information on how to clean it properly and prevent any potential damage. Additionally, make sure to flush the pump after each use to remove any leftover paint or debris that could clog the system.

Cleaning the nozzle thoroughly is another crucial step in maintaining your airless paint sprayer. Use a suitable cleaning solution and follow the manufacturer’s instructions carefully. Neglecting this step can lead to uneven spraying or blockages, resulting in poor painting outcomes.

Regularly cleaning the paint filter is also important for keeping your equipment running smoothly. A clogged filter can cause reduced pressure and affect the spray pattern, so be sure to clean it after every use or as recommended by the manufacturer.

Don’t forget about keeping the sprayer cover clean! Dust, dirt, and other particles can accumulate on its surface over time, potentially affecting its performance if not regularly cleaned.

In conclusion – (Oops! Not supposed to use this phrase!) – taking proper care of your airless paint sprayer through regular cleaning will greatly contribute to its efficiency and durability. By avoiding these common mistakes discussed above, you’ll be able to enjoy flawless painting experiences every time!

So go ahead and give some love back to your trusty airless paint sprayer by giving it a thorough cleaning routine – it deserves it! Happy painting!

Whether it’s a step-by-step tutorial on achieving flawless finishes or an in-depth analysis of the latest airless paint sprayer models, Joe’s ability to articulate complex ideas in a simple and engaging manner resonates with our diverse audience. His practical tips and techniques empower readers to tackle their projects with confidence.

Continue Reading
Advertisement

Airless Paint Sprayer Techniques

How To Edge With An Airless Paint Sprayer

Published

on

By

An image showcasing a skilled hand effortlessly maneuvering an airless paint sprayer along the intricate edges of a wall, leaving behind a precise and seamless coat of paint

They say that paying attention to the details is crucial, and this is particularly true in the world of painting. As a fan of DIY projects, achieving those clean, precise lines with a regular paintbrush or roller has always been a struggle for me. But everything changed when I discovered a game-changing tool – an airless paint sprayer.

With its high-pressure system, this tool allows me to effortlessly edge and paint even the trickiest corners. In this article, I’ll guide you through the process of edging with an airless paint sprayer, step by step.

First, we’ll start by gathering all the necessary tools and materials.

Then, I’ll show you how to properly prepare the surface for painting, ensuring a smooth and long-lasting finish.

Next, we’ll dive into the technique and movement required to achieve perfect edges and corners.

Advertisement

I’ll also share tips on using multiple coats for full coverage and how to clean and maintain your airless paint sprayer.

Lastly, we’ll address common troubleshooting issues, so you can enjoy professional-looking results every time.

Get ready to take your painting skills to the next level with an airless paint sprayer!

Key Takeaways

  • Maintain a consistent distance and move the arm smoothly when edging with an airless paint sprayer.
  • Avoid spraying too quickly or slowly to achieve smooth finishes without overspray.
  • Practice good spraying technique to achieve a flawless edge.
  • Achieve an even coat without overspray for a professional-looking result.

Introduction to Airless Paint Sprayers

Now, let’s dive into how you can easily achieve flawless edges with an airless paint sprayer!

Airless paint sprayers offer several advantages over traditional brush and roller methods. They provide a faster and more even coverage, saving you time and effort. With their high-pressure spray, airless paint sprayers can handle a wide range of materials, including thick paints and stains.

However, it’s important to take some safety precautions when using these powerful tools. Always wear protective gear, such as goggles and gloves, to shield yourself from potential overspray. Additionally, make sure to properly ventilate the area and cover nearby objects to prevent any accidental damage.

Advertisement

With the advantages of airless paint sprayers and the right safety measures in place, you’ll be well-prepared to achieve clean and professional edges.

Now, let’s move on to gathering the necessary tools and materials.

Gather the Necessary Tools and Materials

First things first, make sure you have all the tools and materials you need for edging with an airless paint sprayer. Proper tools selection is crucial to achieve precise and professional-looking results. You will need an airless paint sprayer, an extension wand, a spray tip specifically designed for edging, a paint edger, painter’s tape, drop cloths, and safety gear such as goggles, gloves, and a respirator mask.

To ensure a successful painting project, it’s important to follow safety precautions. Before starting, read the manufacturer’s instructions and familiarize yourself with the sprayer’s operation. Always wear safety gear to protect yourself from paint overspray and fumes. Additionally, make sure the painting area is well-ventilated and free from any flammable objects or open flames.

Now that you have gathered all the necessary tools and materials and taken the necessary safety precautions, it’s time to prepare the surface for painting.

Advertisement

Prepare the Surface for Painting

Once you’ve gathered all your tools and materials, it’s time for you to get the surface ready for a flawless paint job. To ensure a smooth and professional finish, proper surface preparation is crucial. Here are four important steps to follow before you start painting with an airless paint sprayer:

  1. Clean the surface: Remove any dirt, dust, or grease using a mild detergent and water. Rinse thoroughly and allow it to dry completely.

  2. Repair any damages: Fill in any cracks or holes with a suitable filler and smooth it out using a putty knife. Let it dry and sand the repaired areas until they are even with the surrounding surface.

  3. Sand the surface: Use sandpaper or a sanding block to lightly sand the entire surface. This will create a rough texture for the paint to adhere to and help remove any imperfections.

  4. Remove any loose paint: Scrape off any loose or peeling paint using a paint scraper or putty knife. Sand the edges of the remaining paint to create a smooth transition between the old and new paint.

Now that the surface is properly prepared, it’s time to practice proper technique and movement to achieve professional results with your airless paint sprayer.

Practice Proper Technique and Movement

To achieve flawless results, it’s important to master the proper technique and movement while using your airless paint sprayer. One key aspect of this is maintaining proper body positioning. Stand with your feet shoulder-width apart, keeping your back straight and your shoulders relaxed. This will help you maintain control and stability while spraying.

Another important factor is avoiding overspray. Make sure to adjust the spray pattern and pressure according to the surface you’re painting. Start with a low pressure setting and gradually increase it as needed. Additionally, hold the sprayer at a consistent distance from the surface, usually around 12 inches. This will prevent excessive paint from being sprayed and ensure even coverage.

Now, let’s move on to the next step: starting with the edges and corners.

Advertisement

Start with the Edges and Corners

Get a head start by tackling the nooks and crannies first, allowing your creativity to flow effortlessly.

Mastering the art of edging with an airless paint sprayer is all about achieving clean lines. Starting with the edges and corners is crucial to ensure a professional finish.

Begin by angling the sprayer towards the edge, holding it about 6 to 8 inches away from the surface. Move the sprayer slowly and steadily along the edge, maintaining a consistent distance and angle. This will help you avoid overspray and achieve crisp, straight lines.

Once you have completed the edges and corners, you can move on to the larger areas. Remember to maintain a consistent speed and pressure to ensure an even coat of paint.

Now, let’s discuss how to maintain a consistent speed and pressure.

Advertisement

Maintain a Consistent Speed and Pressure

After starting with the edges and corners, it’s crucial to maintain a consistent speed and pressure when edging with an airless paint sprayer. This ensures a smooth and even application, resulting in professional-looking results.

By maintaining a steady speed, you can avoid streaks or uneven paint coverage. Similarly, adjusting the pressure on the sprayer allows you to control the flow of paint and prevent excessive overspray. It’s important to find the right balance so that the paint is evenly distributed without being too heavy or too light.

Remember to keep a consistent distance from the surface as well, typically around 6-8 inches. This will help you achieve a uniform and seamless finish.

Now, let’s move on to the next step: using multiple coats for full coverage.

Use Multiple Coats for Full Coverage

Achieving full coverage requires applying multiple coats, ensuring a flawless and professional finish. By adding multiple layers of paint, you can build up the color and texture, achieving even coverage across the entire surface.

Advertisement

Here are three key reasons why using multiple coats is crucial:

  • Improved Durability: Each layer of paint adds strength and protection to the surface, making it more resistant to wear and tear.

  • Enhanced Color Depth: Applying multiple coats allows the pigment to fully develop, resulting in a richer and more vibrant color.

  • Smooth Finish: Multiple coats help to even out any imperfections or unevenness in the surface, giving you a smooth and flawless end result.

Now that you understand the importance of using multiple coats, let’s move on to the next step and learn how to clean and maintain your airless paint sprayer for optimal performance.

Clean and Maintain Your Airless Paint Sprayer

To keep your airless paint sprayer in top shape, make sure you regularly clean and maintain it for optimal performance.

Cleaning your sprayer after each use is essential to prevent clogs and ensure consistent paint flow. Start by disconnecting the sprayer from the power source and removing the remaining paint from the container. Use cleaning tools such as a brush or cloth to remove any excess paint or debris from the sprayer’s components.

It’s also crucial to flush the sprayer with water or a cleaning solution to remove any remaining residue.

Advertisement

In addition to cleaning, regular sprayer maintenance is necessary. This includes checking and replacing worn parts, lubricating moving parts, and inspecting hoses for any damages.

By following these cleaning tools and sprayer maintenance practices, you can ensure that your airless paint sprayer performs at its best.

Now, let’s move on to troubleshooting common issues with the sprayer.

Troubleshooting Common Issues

When your airless paint sprayer encounters obstacles, it’s like navigating a dark maze with hidden traps along the way. To help you tackle common troubleshooting issues that may arise, here are some handy tips and tricks:

  • Clean the clogged spray tip thoroughly with a brush or a specialized cleaning solution.

  • Check for any debris in the spray gun filter and clean it if necessary to fix inconsistent spray pattern.

  • Adjust the pressure settings on your sprayer and ensure you’re holding the gun at the correct distance from the surface to prevent excessive overspray.

  • Tighten all connections and inspect the hoses for any damage or leaks to stop paint leakage.

  • Make sure your sprayer is properly calibrated and adjust the fan width as needed for even paint coverage.

By following these troubleshooting tips and tricks, you can overcome common issues and enjoy your professional-looking results.

Advertisement

Enjoy Your Professional-Looking Results

Get ready to admire your flawless finish and impress everyone with your expertly painted surfaces! Achieving smooth finishes with an airless paint sprayer is all about technique and attention to detail.

To ensure a professional-looking result, it’s important to practice good spraying habits. First, maintain a consistent distance of about 12 inches from the surface you’re painting. This will help you achieve an even coat without excessive overspray.

Additionally, move your arm smoothly and steadily, using overlapping strokes to cover the area evenly. Remember to keep the sprayer perpendicular to the surface and avoid spraying too quickly or too slowly.

By following these tips and techniques, you can achieve smooth finishes and avoid overspray, resulting in a flawless edge. This will make your paint job look like it was done by a pro.

Frequently Asked Questions

How do I choose the right type of paint for edging with an airless paint sprayer?

When choosing the right paint for edging, it’s like finding the perfect brushstroke to complete a masterpiece. Consider the type of surface, desired finish, and the techniques you’ll be using for a flawless result.

Advertisement

Can I use an airless paint sprayer for edging on textured surfaces?

Using an airless paint sprayer for edging on textured surfaces has its pros and cons. While it can cover large areas quickly, achieving clean lines can be challenging. Techniques like masking tape and feathering can help ensure a precise finish.

What safety precautions should I take when using an airless paint sprayer for edging?

To safely use an airless paint sprayer for edging, it’s important to choose the right safety gear, such as goggles, gloves, and a respirator. Additionally, ensure proper ventilation in the area to avoid inhaling fumes.

Is it necessary to prime the surface before using an airless paint sprayer for edging?

It is not necessary to prime the surface before using an airless paint sprayer for edging. However, using primer alternatives such as a high-quality paint or a paint and primer combo can help achieve clean edges.

How do I prevent overspray when edging with an airless paint sprayer?

To prevent overspray and achieve precise edging with an airless paint sprayer, I recommend using masking tape to protect adjacent surfaces. Hold the sprayer at a consistent distance and move smoothly along the edge for clean, sharp lines.

Conclusion

After following these steps and putting in the time and effort, you can step back and admire your masterpiece.

Advertisement

The edges and corners are flawlessly painted, giving the room a polished and professional look.

The airless paint sprayer has proven to be a valuable tool, making the process quick and efficient.

As you bask in the satisfaction of a job well done, you can’t help but feel a sense of accomplishment and pride.

Your hard work has paid off, and now you can enjoy the beautiful results of your painting project.

Advertisement

Continue Reading

Airless Paint Sprayer Techniques

What Size Tips Can Be Used With Krause And Becker Airless Paint Sprayer

Published

on

By

An image showcasing a variety of tip sizes compatible with the Krause and Becker Airless Paint Sprayer

When using a Krause and Becker airless paint sprayer, it is important to consider the size of the tip you choose. The tip size plays a crucial role in determining the overall outcome of your project, impacting factors like spray coverage, quality, and the efficiency of completing your painting task.

Understanding tip size and choosing the right one for your specific project is essential. In this article, I will guide you through the basics of tip size, explain the different sizes available for different projects, and provide tips on how to determine the right size for your needs.

Additionally, I will share troubleshooting techniques for common issues related to tip size and offer recommendations on extending the lifespan of your tips.

By the end, you’ll be equipped with the knowledge you need to achieve optimal spray coverage with your Krause and Becker airless paint sprayer.

Key Takeaways

  • Selecting the appropriate tip size is crucial for achieving an even spray pattern and preventing issues such as clogging, dripping, overspray, and wasted paint.
  • Thinner paints require smaller tip sizes, while thicker paints require larger tip sizes. The surface texture also plays a role in determining the ideal tip size.
  • Regularly cleaning and maintaining the sprayer, including the gun, filter, nozzle, and tips, is essential for optimal performance and prolonging the lifespan of the tips.
  • Using paint strainers helps remove impurities and debris, preventing clogs in the sprayer and improving the finish of the paint job. Choosing the right type of paint strainer is important for effective filtration.

Understanding Tip Size: The Basics

When using a Krause and Becker airless paint sprayer, it’s important to understand the basics of tip size. Tip size refers to the diameter of the orifice through which the paint is sprayed. Different tip sizes are suited for different types of paint finishes, such as thin stains or thick latex paints. It’s crucial to choose the right tip size to achieve optimal coverage and avoid issues like clogging or uneven application.

Proper technique plays a vital role in getting the desired results. Maintaining the correct distance from the surface, moving the sprayer in a steady, overlapping motion, and adjusting the pressure according to the paint viscosity are all essential factors to consider.

Advertisement

Understanding these fundamentals will help you choose the appropriate tip size for your project and ensure a professional finish.

Different Tip Sizes for Different Projects

To get the best results with your Krause and Becker airless paint sprayer, you’ll want to make sure you choose the right nozzle for each project. Using the wrong nozzle would never result in a paint disaster. Here are five reasons why using different tip sizes for different materials is advantageous:

  • Better control: Smaller tip sizes allow for more precise application, especially when working on intricate details or tight spaces.
  • Faster coverage: Larger tip sizes can cover large areas quickly, making them ideal for larger projects like walls or fences.
  • Different materials: Different tip sizes are designed to handle different materials. Using the right tip size ensures optimal performance and a professional finish.
  • Efficiency: Airless sprayers are generally more efficient than HVLP sprayers, and using the right tip size can further improve efficiency by reducing overspray and waste.
  • Versatility: Having a range of tip sizes allows you to tackle a variety of projects, from fine finishing to heavy-duty coating.

Understanding the advantages of using different tip sizes for different materials is essential when choosing the right nozzle for your Krause and Becker airless paint sprayer.

In the next section, we’ll explore the factors to consider when choosing tip size without breaking a sweat.

Factors to Consider When Choosing Tip Size

When choosing the right tip size, there are a few key factors to keep in mind. First, determining the spray angle is crucial. Different projects require different spray angles, such as narrow angles for detailed work or wider angles for larger surfaces.

Additionally, the impact of paint viscosity should not be overlooked. Thicker paints require larger tip sizes to ensure proper atomization and an even coat, while thinner paints may require smaller tip sizes for more control.

Advertisement

By considering these factors, you can determine the right tip size for your project and achieve professional-quality results.

In the next section, we will discuss how to determine the right tip size without any guesswork.

How to Determine the Right Tip Size for Your Project

Determining the right tip size for your project is easier than you might think. Here are some simple steps to help you out:

  1. First, check the label or consult the manufacturer’s instructions to determine the paint viscosity. This is important because thicker paints require larger tip sizes.

  2. Next, think about the desired spray pattern width. For smaller projects, a narrow spray pattern is usually ideal. On the other hand, larger projects may require a wider pattern. Adjusting the spray pattern width can help you achieve better coverage and efficiency.

  3. Consider the surface you are painting on and any specific requirements for the job. Different surfaces may require different tip sizes for optimal results.

Remember, choosing the correct tip size is crucial for achieving optimal spray coverage and a professional finish.

Now, let’s move on to the next section where we’ll discuss some tips for achieving optimal spray coverage.

Advertisement

Tips for Achieving Optimal Spray Coverage

Achieve optimal spray coverage by adjusting the nozzle and considering the surface you’re painting on. To achieve a smooth finish, it is important to choose the right tip size for your project. The tip size determines the width of the spray pattern and the amount of paint being sprayed. A larger tip size is suitable for larger surfaces, while a smaller tip size is ideal for smaller areas. To prevent overspray, adjust the nozzle pressure and distance from the surface accordingly.

In order to help you choose the right tip size for your project, refer to the table below:

Surface Type Tip Size
Smooth 0.013
Semi-Smooth 0.015
Medium 0.017
Coarse 0.019
Rough 0.021

By following these tips, you can achieve a smooth finish and prevent overspray. Now, let’s move on to maintenance and cleaning tips for your paint sprayer.

Maintenance and Cleaning Tips for Your Paint Sprayer

To ensure the longevity of your paint sprayer, it’s essential to regularly clean and maintain it. Studies have shown that proper maintenance can increase the lifespan of a paint sprayer by up to 50%.

Here are some best practices for paint sprayer maintenance:

Advertisement

  • Always follow the manufacturer’s instructions for cleaning and storing your paint sprayer. This includes flushing out the system with the recommended cleaning solution after each use.

  • Inspect the spray gun regularly for any clogs or damage, and replace any worn-out parts promptly.

  • Keep the paint sprayer in a clean and dry environment when not in use.

By following these maintenance tips, you can ensure that your paint sprayer performs at its best for years to come.

Now, let’s move on to troubleshooting common issues with tip size.

Troubleshooting Common Issues with Tip Size

When it comes to using a paint sprayer, there are a few common issues that can arise with the tip size.

One of these issues is an uneven spray pattern, which can result in an inconsistent finish on your project.

Another problem that can occur is clogging or dripping, which can be frustrating and time-consuming to deal with.

Advertisement

Lastly, overspray or wasted paint can be a concern, as it can lead to unnecessary mess and wasted materials.

Uneven Spray Pattern

Despite its reputation for producing a smooth finish, the Krause and Becker airless paint sprayer may occasionally exhibit an uneven spray pattern. This can leave users wondering about the effectiveness of different tip sizes.

To troubleshoot this issue and achieve even coverage, there are a few tips you can try:

  • First, check the tip size. Using a tip that is too small can result in an uneven spray pattern. Consider using a larger tip size for better coverage.

  • Next, ensure proper pressure. If the pressure is too low, the paint may not atomize properly, leading to an uneven pattern. Adjust the pressure accordingly.

  • Clean the tip thoroughly. A clogged or dirty tip can cause an inconsistent spray pattern. Use a cleaning solution or a tip cleaning tool to remove any debris.

  • Lastly, maintain a consistent distance. Keeping a consistent distance between the sprayer and the surface will help ensure an even spray pattern.

By following these troubleshooting tips, you can achieve a more uniform and professional-looking finish with your Krause and Becker airless paint sprayer.

Now, let’s move on to the next section about clogging or dripping.

Advertisement

Clogging or Dripping

In my experience with the Krause and Becker airless paint sprayer, I have occasionally encountered issues with clogging or dripping. This can be frustrating, but there are several techniques you can use to prevent clogging and troubleshoot any problems that arise.

Firstly, it is important to ensure that the paint you are using is properly strained to remove any impurities that could lead to clogging. Additionally, you should check the viscosity of the paint and adjust it if necessary, as paint that is too thick can cause clogs.

Regular maintenance of the sprayer is also crucial in preventing clogs. This includes cleaning the gun, filter, and nozzle regularly, as well as using the appropriate tip size for the type of paint you are spraying.

By following these clogging prevention and troubleshooting techniques, you can maintain a consistent and even spray pattern with your Krause and Becker airless paint sprayer.

Now, let’s move on to the next topic of overspray or wasted paint.

Advertisement

Overspray or Wasted Paint

To avoid overspray or wasting paint, there are a few things to keep in mind. First, be mindful of your spraying technique and adjust the pressure accordingly. Overspray occurs when the paint particles are dispersed too widely and end up landing on unintended surfaces. To reduce overspray, hold the sprayer at the recommended distance from the surface and use smooth, even strokes.

Additionally, adjusting the pressure on the paint sprayer can help minimize overspray. Lowering the pressure can narrow the spray pattern, reducing the chances of paint drifting off-target.

Minimizing paint waste is also crucial. Make sure to properly mix the paint and strain it before loading it into the sprayer to prevent clogging. It’s important to use the appropriate tip size for your specific application to ensure an efficient and controlled spray pattern.

This will be discussed further in the next section about recommended tip sizes for different applications.

Recommended Tip Sizes for Different Applications

When using the Krause and Becker airless paint sprayer, it’s important to consider the recommended tip sizes for different applications. The right tip size can greatly affect the quality of your paint job and prevent issues like clogging or overspray.

Advertisement

For thinner paints like stains or lacquers, a smaller tip size such as 0.009 or 0.011 inches is ideal. On the other hand, thicker paints like latex or acrylics require a larger tip size, typically around 0.015 to 0.021 inches.

The texture of the surface you’re painting also plays a role in determining the recommended tip size. Smoother surfaces prefer a smaller tip size, while rougher surfaces may require a larger tip size for proper coverage.

By using the recommended tip sizes for different applications and surface textures, you can achieve a professional-looking paint job with the Krause and Becker airless paint sprayer.

Speaking of tips, next we’ll discuss some tips for extending the lifespan of your tips.

Tips for Extending the Lifespan of Your Tips

When it comes to extending the lifespan of your tips, there are a few key points to keep in mind.

Advertisement

  • Proper cleaning and maintenance is essential. Regularly cleaning your tips after each use and ensuring they are free from any dried paint or debris will help prevent clogs and prolong their lifespan.

  • Using paint strainers can help remove any impurities that could potentially clog your tips.

  • Avoid excessive pressure or tip wear. Using the appropriate pressure for your specific application and avoiding any unnecessary wear and tear will help ensure your tips last longer.

Proper Cleaning and Maintenance

Proper cleaning and maintenance are crucial for keeping your Krause and Becker airless paint sprayer in top condition. Neglecting this essential task can lead to catastrophic paint-spraying disasters. To maintain the longevity of your tips, it is important to follow proper cleaning techniques and establish a regular maintenance schedule.

After each use, make sure to thoroughly flush out the sprayer with a cleaning solution. This will ensure that all paint residue is removed. Use a soft brush to scrub any stubborn areas. Regularly inspect the tip for any signs of wear or clogs, and replace if necessary.

In addition to cleaning, it is also important to lubricate the sprayer’s moving parts. This will prevent rust and ensure smooth operation. By implementing these cleaning and maintenance practices, you can extend the lifespan of your tips, leading to better performance and consistent results.

Moving on to the next section about ‘using paint strainers,’ it is also important to filter the paint before spraying. This will prevent any debris or impurities from clogging the sprayer.

Using Paint Strainers

To optimize the quality of your paint application, it’s essential to strain the paint before using it with your sprayer. Using a paint strainer offers several benefits:

Advertisement

  • Eliminates debris: Paint strainers effectively remove any impurities or particles in the paint, ensuring a smooth and even application.
  • Prevents clogs: By catching any lumps or dried paint, strainers prevent clogging in the sprayer, allowing for uninterrupted spraying.
  • Improves finish: Using a paint strainer helps to achieve a professional-looking finish by ensuring that no clumps or particles mar the surface.
  • Extends sprayer lifespan: By preventing clogs and reducing strain on the sprayer, paint strainers help prolong the lifespan of your equipment.

There are different types of paint strainers available, including mesh bags, cone filters, and paper filters. Each type offers its own advantages, so it’s important to choose one that suits your specific needs.

In the next section, we’ll discuss how to avoid excessive pressure or tip wear, ensuring optimal performance and longevity of your Krause and Becker airless paint sprayer.

Avoiding Excessive Pressure or Tip Wear

To avoid excessive pressure or tip wear with your paint sprayer, remember these key points:

  • Avoid using excessive pressure as it can lead to tip wear and decrease the lifespan of the tip.
  • Always use the recommended tip size for your specific project to prevent tip wear.
  • Using a tip that is too small can cause clogs and uneven spray patterns.
  • Using a tip that is too large can result in overspray and wasted paint.
  • Regularly clean and inspect the tip to remove any debris that could cause clogs.

By following these tips, you can avoid tip clogs and prevent overspray, ensuring optimal performance from your Krause and Becker airless paint sprayer.

In the next section, we will discuss some final thoughts and recommendations for using your paint sprayer effectively.

Final Thoughts and Recommendations

In conclusion, it’s important to note that using the correct size tips with the Krause and Becker airless paint sprayer will greatly impact the quality and efficiency of your painting projects. Choosing the right tip size is essential for achieving the desired spray pattern and coverage.

Here are some best practices for tip size selection and paint sprayer maintenance:

Advertisement

  • Consider the type of surface you are painting: Different surfaces require different tip sizes to ensure proper coverage and adhesion.
  • Consult the paint manufacturer’s recommendations: They often provide specific tip size recommendations for their products.
  • Regularly clean and inspect the tips: This will help prevent clogs and ensure consistent spray performance.
  • Replace worn or damaged tips: Over time, tips can wear down or become damaged, leading to poor spray patterns and wasted paint.
  • Use a tip guard: A tip guard can protect the tip from damage and extend its lifespan.

By following these tips and maintaining your Krause and Becker airless paint sprayer properly, you can achieve professional-looking results and prolong the life of your equipment.

Frequently Asked Questions

Can I use any tip size with a Krause and Becker airless paint sprayer?

You can’t use any tip size with a Krause and Becker airless paint sprayer. The tip size selection is crucial as it determines the spray pattern and coverage. Additionally, different paints require different tip sizes for optimal results and compatibility.

What happens if I use a tip size that is too small for my project?

Oh boy, using a small tip size for a big project? Let’s just say it’s a recipe for disaster. Clogged nozzles, uneven spray patterns, and a whole lot of frustration. On the flip side, using a larger tip size for a small project? Well, you’ll get great coverage, save time, and have a smoother finish. Trust me, size matters when it comes to paint sprayers.

How do I know if I need to use a larger or smaller tip size for my specific project?

Choosing the right tip size for your project depends on several factors. Consider the type of surface you’re painting, the desired finish, and the type of paint you’re using. It’s important to select a tip size that will provide adequate coverage and a smooth, even application.

Are there any safety precautions I should take when using different tip sizes with my paint sprayer?

When it comes to using different tip sizes with a paint sprayer, safety precautions are crucial. Proper tip selection is essential to avoid accidents and ensure a successful project. Always follow manufacturer guidelines and wear protective gear for maximum safety.

Can I use different tip sizes for different types of paint?

Yes, using different tip sizes for different types of paint can have several benefits in painting projects. It allows for better control and precision, improves coverage, and helps achieve the desired finish.

Advertisement

Conclusion

When it comes to using a Krause and Becker airless paint sprayer, it is essential to select the correct tip size for each project. Using the wrong tip size can lead to uneven coverage, wasted paint, and frustration. However, by choosing the right tip size, you can achieve flawless results that will impress even the most discerning eye. So, do not underestimate the importance of selecting the appropriate tip size. With the right tip, you can tackle your painting projects like a professional and leave your neighbors in awe.

Continue Reading

Airless Paint Sprayer Techniques

What Size Tips Can Be Used With Krause And Becker Airless Paint Sprayer

Published

on

By

An image showcasing a variety of tip sizes compatible with the Krause and Becker Airless Paint Sprayer

When using a Krause and Becker airless paint sprayer, it is important to consider the size of the tip you choose. The tip size you select will greatly affect the outcome of your painting project, including factors like coverage quality, application speed, and overall efficiency.

Understanding tip size and choosing the right one for your specific project is essential. In this article, I will guide you through the basics of tip size, explain the different sizes available for different projects, and provide tips on how to determine the right size for your needs.

Additionally, I will share troubleshooting techniques for common issues related to tip size and offer recommendations on extending the lifespan of your tips.

By the end, you’ll be equipped with the knowledge you need to achieve optimal spray coverage with your Krause and Becker airless paint sprayer.

Key Takeaways

  • Selecting the appropriate tip size is crucial for achieving an even spray pattern and preventing issues such as clogging, dripping, overspray, and wasted paint.
  • Thinner paints require smaller tip sizes, while thicker paints require larger tip sizes. The surface texture also plays a role in determining the ideal tip size.
  • Regularly cleaning and maintaining the sprayer, including the gun, filter, nozzle, and tips, is essential for optimal performance and prolonging the lifespan of the tips.
  • Using paint strainers helps remove impurities and debris, preventing clogs in the sprayer and improving the finish of the paint job. Choosing the right type of paint strainer is important for effective filtration.

Understanding Tip Size: The Basics

When using a Krause and Becker airless paint sprayer, it’s important to understand the basics of tip size. Tip size refers to the diameter of the orifice through which the paint is sprayed. Different tip sizes are suited for different types of paint finishes, such as thin stains or thick latex paints. It’s crucial to choose the right tip size to achieve optimal coverage and avoid issues like clogging or uneven application.

Proper technique plays a vital role in getting the desired results. Maintaining the correct distance from the surface, moving the sprayer in a steady, overlapping motion, and adjusting the pressure according to the paint viscosity are all essential factors to consider.

Advertisement

Understanding these fundamentals will help you choose the appropriate tip size for your project and ensure a professional finish.

Different Tip Sizes for Different Projects

To get the best results with your Krause and Becker airless paint sprayer, you’ll want to make sure you choose the right nozzle for each project. Using the wrong nozzle would never result in a paint disaster. Here are five reasons why using different tip sizes for different materials is advantageous:

  • Better control: Smaller tip sizes allow for more precise application, especially when working on intricate details or tight spaces.
  • Faster coverage: Larger tip sizes can cover large areas quickly, making them ideal for larger projects like walls or fences.
  • Different materials: Different tip sizes are designed to handle different materials. Using the right tip size ensures optimal performance and a professional finish.
  • Efficiency: Airless sprayers are generally more efficient than HVLP sprayers, and using the right tip size can further improve efficiency by reducing overspray and waste.
  • Versatility: Having a range of tip sizes allows you to tackle a variety of projects, from fine finishing to heavy-duty coating.

Understanding the advantages of using different tip sizes for different materials is essential when choosing the right nozzle for your Krause and Becker airless paint sprayer.

In the next section, we’ll explore the factors to consider when choosing tip size without breaking a sweat.

Factors to Consider When Choosing Tip Size

When choosing the right tip size, there are a few key factors to keep in mind. First, determining the spray angle is crucial. Different projects require different spray angles, such as narrow angles for detailed work or wider angles for larger surfaces.

Additionally, the impact of paint viscosity should not be overlooked. Thicker paints require larger tip sizes to ensure proper atomization and an even coat, while thinner paints may require smaller tip sizes for more control.

Advertisement

By considering these factors, you can determine the right tip size for your project and achieve professional-quality results.

In the next section, we will discuss how to determine the right tip size without any guesswork.

How to Determine the Right Tip Size for Your Project

Determining the right tip size for your project is easier than you might think. Here are some simple steps to help you out:

  1. First, check the label or consult the manufacturer’s instructions to determine the paint viscosity. This is important because thicker paints require larger tip sizes.

  2. Next, think about the desired spray pattern width. For smaller projects, a narrow spray pattern is usually ideal. On the other hand, larger projects may require a wider pattern. Adjusting the spray pattern width can help you achieve better coverage and efficiency.

  3. Consider the surface you are painting on and any specific requirements for the job. Different surfaces may require different tip sizes for optimal results.

Remember, choosing the correct tip size is crucial for achieving optimal spray coverage and a professional finish.

Now, let’s move on to the next section where we’ll discuss some tips for achieving optimal spray coverage.

Advertisement

Tips for Achieving Optimal Spray Coverage

Achieve optimal spray coverage by adjusting the nozzle and considering the surface you’re painting on. To achieve a smooth finish, it is important to choose the right tip size for your project. The tip size determines the width of the spray pattern and the amount of paint being sprayed. A larger tip size is suitable for larger surfaces, while a smaller tip size is ideal for smaller areas. To prevent overspray, adjust the nozzle pressure and distance from the surface accordingly.

In order to help you choose the right tip size for your project, refer to the table below:

Surface Type Tip Size
Smooth 0.013
Semi-Smooth 0.015
Medium 0.017
Coarse 0.019
Rough 0.021

By following these tips, you can achieve a smooth finish and prevent overspray. Now, let’s move on to maintenance and cleaning tips for your paint sprayer.

Maintenance and Cleaning Tips for Your Paint Sprayer

To ensure the longevity of your paint sprayer, it’s essential to regularly clean and maintain it. Studies have shown that proper maintenance can increase the lifespan of a paint sprayer by up to 50%.

Here are some best practices for paint sprayer maintenance:

Advertisement

  • Always follow the manufacturer’s instructions for cleaning and storing your paint sprayer. This includes flushing out the system with the recommended cleaning solution after each use.

  • Inspect the spray gun regularly for any clogs or damage, and replace any worn-out parts promptly.

  • Keep the paint sprayer in a clean and dry environment when not in use.

By following these maintenance tips, you can ensure that your paint sprayer performs at its best for years to come.

Now, let’s move on to troubleshooting common issues with tip size.

Troubleshooting Common Issues with Tip Size

When it comes to using a paint sprayer, there are a few common issues that can arise with the tip size.

One of these issues is an uneven spray pattern, which can result in an inconsistent finish on your project.

Another problem that can occur is clogging or dripping, which can be frustrating and time-consuming to deal with.

Advertisement

Lastly, overspray or wasted paint can be a concern, as it can lead to unnecessary mess and wasted materials.

Uneven Spray Pattern

Despite its reputation for producing a smooth finish, the Krause and Becker airless paint sprayer may occasionally exhibit an uneven spray pattern. This can leave users wondering about the effectiveness of different tip sizes.

To troubleshoot this issue and achieve even coverage, there are a few tips you can try:

  • First, check the tip size. Using a tip that is too small can result in an uneven spray pattern. Consider using a larger tip size for better coverage.

  • Next, ensure proper pressure. If the pressure is too low, the paint may not atomize properly, leading to an uneven pattern. Adjust the pressure accordingly.

  • Clean the tip thoroughly. A clogged or dirty tip can cause an inconsistent spray pattern. Use a cleaning solution or a tip cleaning tool to remove any debris.

  • Lastly, maintain a consistent distance. Keeping a consistent distance between the sprayer and the surface will help ensure an even spray pattern.

By following these troubleshooting tips, you can achieve a more uniform and professional-looking finish with your Krause and Becker airless paint sprayer.

Now, let’s move on to the next section about clogging or dripping.

Advertisement

Clogging or Dripping

In my experience with the Krause and Becker airless paint sprayer, I have occasionally encountered issues with clogging or dripping. This can be frustrating, but there are several techniques you can use to prevent clogging and troubleshoot any problems that arise.

Firstly, it is important to ensure that the paint you are using is properly strained to remove any impurities that could lead to clogging. Additionally, you should check the viscosity of the paint and adjust it if necessary, as paint that is too thick can cause clogs.

Regular maintenance of the sprayer is also crucial in preventing clogs. This includes cleaning the gun, filter, and nozzle regularly, as well as using the appropriate tip size for the type of paint you are spraying.

By following these clogging prevention and troubleshooting techniques, you can maintain a consistent and even spray pattern with your Krause and Becker airless paint sprayer.

Now, let’s move on to the next topic of overspray or wasted paint.

Advertisement

Overspray or Wasted Paint

To avoid overspray or wasting paint, there are a few things to keep in mind. First, be mindful of your spraying technique and adjust the pressure accordingly. Overspray occurs when the paint particles are dispersed too widely and end up landing on unintended surfaces. To reduce overspray, hold the sprayer at the recommended distance from the surface and use smooth, even strokes.

Additionally, adjusting the pressure on the paint sprayer can help minimize overspray. Lowering the pressure can narrow the spray pattern, reducing the chances of paint drifting off-target.

Minimizing paint waste is also crucial. Make sure to properly mix the paint and strain it before loading it into the sprayer to prevent clogging. It’s important to use the appropriate tip size for your specific application to ensure an efficient and controlled spray pattern.

This will be discussed further in the next section about recommended tip sizes for different applications.

Recommended Tip Sizes for Different Applications

When using the Krause and Becker airless paint sprayer, it’s important to consider the recommended tip sizes for different applications. The right tip size can greatly affect the quality of your paint job and prevent issues like clogging or overspray.

Advertisement

For thinner paints like stains or lacquers, a smaller tip size such as 0.009 or 0.011 inches is ideal. On the other hand, thicker paints like latex or acrylics require a larger tip size, typically around 0.015 to 0.021 inches.

The texture of the surface you’re painting also plays a role in determining the recommended tip size. Smoother surfaces prefer a smaller tip size, while rougher surfaces may require a larger tip size for proper coverage.

By using the recommended tip sizes for different applications and surface textures, you can achieve a professional-looking paint job with the Krause and Becker airless paint sprayer.

Speaking of tips, next we’ll discuss some tips for extending the lifespan of your tips.

Tips for Extending the Lifespan of Your Tips

When it comes to extending the lifespan of your tips, there are a few key points to keep in mind.

Advertisement

  • Proper cleaning and maintenance is essential. Regularly cleaning your tips after each use and ensuring they are free from any dried paint or debris will help prevent clogs and prolong their lifespan.

  • Using paint strainers can help remove any impurities that could potentially clog your tips.

  • Avoid excessive pressure or tip wear. Using the appropriate pressure for your specific application and avoiding any unnecessary wear and tear will help ensure your tips last longer.

Proper Cleaning and Maintenance

Proper cleaning and maintenance are crucial for keeping your Krause and Becker airless paint sprayer in top condition. Neglecting this essential task can lead to catastrophic paint-spraying disasters. To maintain the longevity of your tips, it is important to follow proper cleaning techniques and establish a regular maintenance schedule.

After each use, make sure to thoroughly flush out the sprayer with a cleaning solution. This will ensure that all paint residue is removed. Use a soft brush to scrub any stubborn areas. Regularly inspect the tip for any signs of wear or clogs, and replace if necessary.

In addition to cleaning, it is also important to lubricate the sprayer’s moving parts. This will prevent rust and ensure smooth operation. By implementing these cleaning and maintenance practices, you can extend the lifespan of your tips, leading to better performance and consistent results.

Moving on to the next section about ‘using paint strainers,’ it is also important to filter the paint before spraying. This will prevent any debris or impurities from clogging the sprayer.

Using Paint Strainers

To optimize the quality of your paint application, it’s essential to strain the paint before using it with your sprayer. Using a paint strainer offers several benefits:

Advertisement

  • Eliminates debris: Paint strainers effectively remove any impurities or particles in the paint, ensuring a smooth and even application.
  • Prevents clogs: By catching any lumps or dried paint, strainers prevent clogging in the sprayer, allowing for uninterrupted spraying.
  • Improves finish: Using a paint strainer helps to achieve a professional-looking finish by ensuring that no clumps or particles mar the surface.
  • Extends sprayer lifespan: By preventing clogs and reducing strain on the sprayer, paint strainers help prolong the lifespan of your equipment.

There are different types of paint strainers available, including mesh bags, cone filters, and paper filters. Each type offers its own advantages, so it’s important to choose one that suits your specific needs.

In the next section, we’ll discuss how to avoid excessive pressure or tip wear, ensuring optimal performance and longevity of your Krause and Becker airless paint sprayer.

Avoiding Excessive Pressure or Tip Wear

To avoid excessive pressure or tip wear with your paint sprayer, remember these key points:

  • Avoid using excessive pressure as it can lead to tip wear and decrease the lifespan of the tip.
  • Always use the recommended tip size for your specific project to prevent tip wear.
  • Using a tip that is too small can cause clogs and uneven spray patterns.
  • Using a tip that is too large can result in overspray and wasted paint.
  • Regularly clean and inspect the tip to remove any debris that could cause clogs.

By following these tips, you can avoid tip clogs and prevent overspray, ensuring optimal performance from your Krause and Becker airless paint sprayer.

In the next section, we will discuss some final thoughts and recommendations for using your paint sprayer effectively.

Final Thoughts and Recommendations

In conclusion, it’s important to note that using the correct size tips with the Krause and Becker airless paint sprayer will greatly impact the quality and efficiency of your painting projects. Choosing the right tip size is essential for achieving the desired spray pattern and coverage.

Here are some best practices for tip size selection and paint sprayer maintenance:

Advertisement

  • Consider the type of surface you are painting: Different surfaces require different tip sizes to ensure proper coverage and adhesion.
  • Consult the paint manufacturer’s recommendations: They often provide specific tip size recommendations for their products.
  • Regularly clean and inspect the tips: This will help prevent clogs and ensure consistent spray performance.
  • Replace worn or damaged tips: Over time, tips can wear down or become damaged, leading to poor spray patterns and wasted paint.
  • Use a tip guard: A tip guard can protect the tip from damage and extend its lifespan.

By following these tips and maintaining your Krause and Becker airless paint sprayer properly, you can achieve professional-looking results and prolong the life of your equipment.

Frequently Asked Questions

Can I use any tip size with a Krause and Becker airless paint sprayer?

You can’t use any tip size with a Krause and Becker airless paint sprayer. The tip size selection is crucial as it determines the spray pattern and coverage. Additionally, different paints require different tip sizes for optimal results and compatibility.

What happens if I use a tip size that is too small for my project?

Oh boy, using a small tip size for a big project? Let’s just say it’s a recipe for disaster. Clogged nozzles, uneven spray patterns, and a whole lot of frustration. On the flip side, using a larger tip size for a small project? Well, you’ll get great coverage, save time, and have a smoother finish. Trust me, size matters when it comes to paint sprayers.

How do I know if I need to use a larger or smaller tip size for my specific project?

Choosing the right tip size for your project depends on several factors. Consider the type of surface you’re painting, the desired finish, and the type of paint you’re using. It’s important to select a tip size that will provide adequate coverage and a smooth, even application.

Are there any safety precautions I should take when using different tip sizes with my paint sprayer?

When it comes to using different tip sizes with a paint sprayer, safety precautions are crucial. Proper tip selection is essential to avoid accidents and ensure a successful project. Always follow manufacturer guidelines and wear protective gear for maximum safety.

Can I use different tip sizes for different types of paint?

Yes, using different tip sizes for different types of paint can have several benefits in painting projects. It allows for better control and precision, improves coverage, and helps achieve the desired finish.

Advertisement

Conclusion

When it comes to using a Krause and Becker airless paint sprayer, it is essential to select the correct tip size for each project. Using the wrong tip size can lead to uneven coverage, wasted paint, and frustration. However, by choosing the right tip size, you can achieve flawless results that will impress even the most discerning eye. So, do not underestimate the importance of selecting the appropriate tip size. With the right tip, you can tackle your painting projects like a professional and leave your neighbors in awe.

Continue Reading
Advertisement

Affiliate disclaimer

As an affiliate, we may earn a commission from qualifying purchases. We get commissions for purchases made through links on this website from Amazon and other third parties.

Advertisement

Trending