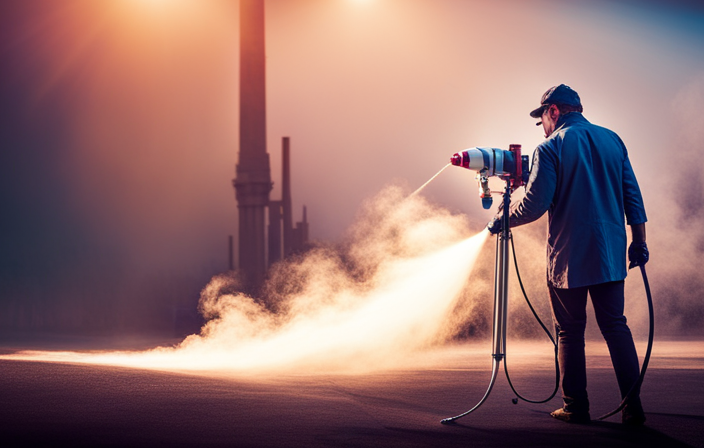
Connect with us

Airless Paint Sprayers FAQs

How Do Airless Paint Sprayer Work

Published

on

An image showcasing an airless paint sprayer in action: vividly depict the pressurized paint flowing from the nozzle, atomizing into a fine mist, and evenly coating a surface, all without the use of air

Have you ever tried to paint a large surface with a brush or roller, only to end up with streaks and an uneven look? I have, and it’s incredibly frustrating. That’s precisely why discovering airless paint sprayers filled me with so much joy.

These powerful machines use high pressure to atomize paint into tiny droplets, creating a smooth and even coat on any surface.

In this article, I will take you through the inner workings of an airless paint sprayer and explain how it achieves such impressive results. We’ll explore the basic components, the pressure creation process, and the advantages of using an airless sprayer.

Additionally, I’ll provide tips on spray pattern and pressure control, proper preparation, safety considerations, maintenance, and troubleshooting.

Whether you’re a professional painter or a DIY enthusiast, understanding how airless paint sprayers work will revolutionize your painting experience. So, let’s dive in and unlock the secrets behind this remarkable tool.

Advertisement

Key Takeaways

  • Airless paint sprayers provide a smooth and even finish.
  • They save time compared to traditional painting methods.
  • They allow for faster coverage of large areas.
  • They reduce paint waste and overspray.

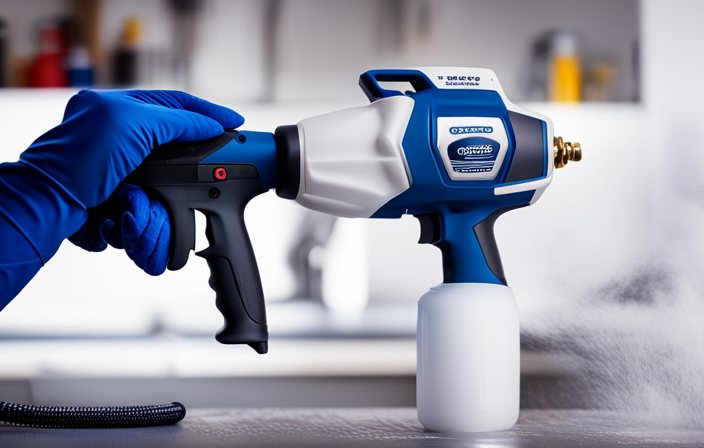
The Basic Components of an Airless Paint Sprayer

An airless paint sprayer consists of several basic components that work together to create pressure and propel paint onto surfaces. These components include:

  1. Motor: The motor is responsible for powering the sprayer and creating the necessary pressure to atomize the paint.

  2. Pump: The pump is the heart of the airless paint sprayer. It draws paint from the container and pressurizes it, allowing it to be sprayed.

  3. Hose: The hose connects the pump to the spray gun and allows the pressurized paint to flow from the pump to the gun.

  4. Spray Gun: The spray gun is where the magic happens. It is equipped with a trigger that controls the flow of paint. When the trigger is pulled, the pressurized paint is released in a fine mist.

  5. Nozzle: The nozzle is the final component in the process. It is responsible for atomizing the paint and delivering it in a fine mist. Different nozzle types are available for different applications, such as spraying latex paint or stains.

By understanding the basic components of an airless paint sprayer, you can make informed decisions about nozzle selection and paint viscosity, ensuring an even spray pattern and a smooth painting experience.

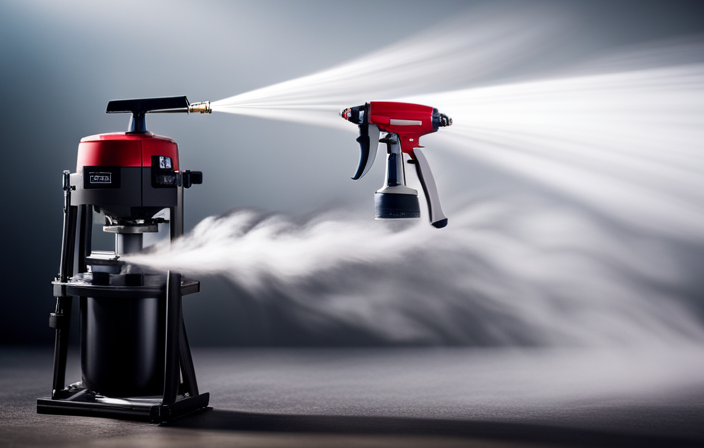
How Airless Paint Sprayers Create Pressure

The incredible pressure generated by the high-powered mechanism inside an airless paint sprayer is created through a combination of hydraulic force and a piston pump. The paint is drawn into the pump through a suction tube and then forced into a small chamber. As the piston moves forward, it compresses the paint, increasing the pressure.

This high-pressure paint is then forced through a hose and out of a small tip at the end of the sprayer. This method of pressure generation allows airless paint sprayers to deliver a consistent and powerful stream of paint, resulting in an even and smooth finish.

Advertisement

The benefits of using airless sprayers include faster application times, better coverage, and reduced overspray. With this understanding of pressure generation, let’s now explore the advantages of airless paint sprayers.

Advantages of Airless Paint Sprayers

When it comes to airless paint sprayers, there are several advantages that make them a superior choice.

Firstly, they allow for faster application as they can cover a larger surface area in less time compared to traditional paint brushes or rollers.

Advertisement

Secondly, airless paint sprayers provide a smooth and even coverage, resulting in a professional finish without any brush or roller marks.

Lastly, the versatility of airless paint sprayers is unmatched, as they can handle a wide range of paint types, including latex, oil-based, and even thicker materials like elastomerics.

Faster Application

By utilizing high-pressure technology, airless paint sprayers significantly speed up the application process, allowing for a more efficient and time-saving painting experience. With airless paint sprayers, you can achieve a faster application of paint compared to traditional methods. Here are three key reasons why airless paint sprayers excel in time efficiency:

  • Increased coverage: The high-pressure mechanism of airless paint sprayers enables the paint to be distributed evenly, covering a larger surface area in a shorter period of time.

  • Reduced overspray: Unlike conventional paint sprayers, airless paint sprayers atomize the paint into fine particles, minimizing overspray and eliminating the need for time-consuming touch-ups.

  • Quick setup and cleanup: Airless paint sprayers are easy to set up and clean, saving you valuable time during preparation and post-painting tasks.

With faster application and improved time efficiency, airless paint sprayers pave the way for the subsequent section on achieving smooth and even coverage.

Smooth and Even Coverage

The airless paint sprayer achieves smooth and even coverage through advanced spraying techniques. It atomizes the paint into tiny particles and propels them at high pressure through a small opening in the spray gun tip. This creates a fine mist of paint that evenly coats the surface. The high pressure also helps to force the paint into crevices and uneven surfaces, ensuring complete coverage.

Advertisement

The airless paint sprayer offers adjustable pressure settings, allowing the user to customize the flow of paint for different surfaces and paint types. This versatility in paint types will be further explored in the subsequent section about its ability to handle various materials.

Versatility in Paint Types

As we discussed earlier, airless paint sprayers are known for providing smooth and even coverage. However, another advantage of these sprayers is their versatility in handling different paint types and finishes. Whether it’s latex, oil-based, or even specialty paints like epoxy, airless paint sprayers can handle them all. This is due to their powerful pumping system that atomizes the paint into a fine mist, ensuring a consistent application. To further illustrate this point, consider the following table:

Paint Type Finish Spraying Technique
Latex Matte Crosshatch
Oil-based Glossy Circular
Epoxy Satin Up and down

By adjusting the spraying technique, you can achieve the desired finish for each paint type. Understanding the spray pattern and pressure control is crucial for achieving optimal results, as we will explore in the subsequent section.

Understanding the Spray Pattern and Pressure Control

Mastering the spray pattern and pressure control of an airless paint sprayer will give you complete control over the final result.

When it comes to spray pattern control, it is essential to understand that the shape, width, and consistency of the spray pattern can be adjusted by altering the nozzle tip size, fan width adjustment, and the distance between the sprayer and the surface. By experimenting with different nozzle tips and fan widths, you can achieve a desired spray pattern, whether it is horizontal, vertical, or circular.

Advertisement

Additionally, pressure adjustment techniques play a crucial role in achieving the desired finish. By adjusting the pressure, you can control the flow rate and atomization of the paint particles, resulting in a smooth and even application.

Understanding the spray pattern and pressure control is vital for achieving professional-looking results.

Transitioning into the subsequent section, proper preparation for using an airless paint sprayer is equally important to ensure a successful painting project.

Proper Preparation for Using an Airless Paint Sprayer

Before using an airless paint sprayer, it’s essential to properly prepare the surface to be painted. This involves thoroughly cleaning and repairing any imperfections. Any dirt or flaws on the surface can affect the final finish, so taking the time to address them is crucial.

In addition to preparing the surface, it’s also important to mask and protect surrounding areas. This helps prevent overspray and ensures a neat and professional-looking paint job. By taking the time to properly mask off areas that should not be painted, I can avoid any unnecessary mess or damage.

Advertisement

By paying attention to these key points, I can ensure that my airless paint sprayer works efficiently and produces a flawless result. Taking the time to properly prepare the surface and protect surrounding areas is well worth the effort for a successful painting project.

Surface Cleaning and Repair

To prepare your surface for painting, follow these steps:

  1. Smooth out any rough spots or imperfections using a sanding block.
  2. Visually inspect the surface for cracks, holes, or peeling paint.
  3. Use a putty knife or scraper to remove any loose or flaking paint.
  4. Clean the surface with a mild detergent and water solution to remove dirt, grease, and grime.
  5. For stubborn stains, consider using a stronger cleaning agent or solvent.
  6. Allow the surface to dry completely before moving on to the next step.
  7. This ensures proper adhesion and longevity of the paint.
  8. Now, let’s move on to the next step of masking and protecting surrounding areas.

Masking and Protecting Surrounding Areas

After thoroughly cleaning and repairing the surface, the next step in preparing for airless paint spraying is masking and protecting the surrounding areas. This crucial step ensures that paint only goes where it is intended and prevents any accidental splatters or overspray. To accomplish this, there are several masking techniques that can be employed.

  1. Tape and paper: Using high-quality painter’s tape, carefully mask off any trim, windows, or other areas that should not be painted. Then, cover the rest of the surrounding surfaces with protective paper or plastic to safeguard against accidental paint drips or overspray.

  2. Drop cloths: Lay down drop cloths to protect the flooring or any large surfaces that cannot be easily covered with tape and paper.

  3. Plastic sheeting: For larger areas or entire rooms, plastic sheeting can be used to create a barrier and protect against paint overspray.

By employing these surface protection and masking techniques, you can ensure a clean and professional paint job. Now, let’s move on to discussing the techniques for using an airless paint sprayer.

Techniques for Using an Airless Paint Sprayer

While using an airless paint sprayer, mastering techniques such as maintaining a consistent spraying distance and controlling stroke speed greatly enhances painting quality and efficiency. Keeping the sprayer at a constant distance from the surface ensures an even distribution of paint, avoiding patches or drips. Controlling stroke speed prevents overspray and allows for better coverage. Properly maintaining the sprayer involves thorough cleaning after each use and promptly addressing clogs or blockages. Troubleshooting techniques like adjusting pressure settings or checking filters can resolve any painting process issues. Now, let’s discuss safety considerations when using an airless paint sprayer…

Safety Considerations When Using an Airless Paint Sprayer

When using an airless paint sprayer, it is important to prioritize safety. Here are some key considerations to keep in mind:

Advertisement
  • Personal protective equipment (PPE): Always wear a respirator mask, safety goggles, gloves, and protective clothing to avoid inhaling paint fumes or getting paint on your skin.

  • Proper ventilation measures: Make sure you are working in a well-ventilated area or use exhaust fans to remove paint fumes from the environment.

  • Maintain a safe distance: Keep a safe distance from the spray tip to avoid accidental contact with the high-pressure stream of paint.

  • Secure your work area: Clear the surrounding area of any obstacles or tripping hazards to prevent accidents.

Following these safety measures ensures a safe working environment when using an airless paint sprayer.

Moving on to the next section, let’s discuss the maintenance and cleaning of an airless paint sprayer.

Maintenance and Cleaning of an Airless Paint Sprayer

To keep your airless paint sprayer in top condition, it’s important to regularly maintain and clean it. Proper maintenance will ensure optimal performance and extend the lifespan of your sprayer. Here are some maintenance tips to follow:

  1. Flush the system after each use: After painting, flush the sprayer with water or a recommended cleaning solution. This will remove any leftover paint and prevent clogs.

  2. Lubricate moving parts: Apply a few drops of lubricant to the piston and packings to keep them functioning smoothly.

  3. Check filters and tips: Clean or replace filters regularly to prevent debris from clogging the system. Inspect the spray tip for wear and replace if necessary.

  4. Store properly: When not in use, store the sprayer in a clean, dry place to prevent rust and damage.

Recommended cleaning solutions for airless paint sprayers include mild detergent solutions or specialized cleaning agents specifically designed for removing paint residue.

By following these maintenance tips and using the recommended cleaning solutions, you can ensure that your airless paint sprayer remains in optimal condition.

Advertisement

In the next section, we will discuss troubleshooting common issues with airless paint sprayers.

Troubleshooting Common Issues with Airless Paint Sprayers

If your trusty paint-spewing contraption decides to throw a temper tantrum, fear not, for we shall now delve into the realm of troubleshooting common issues.

When faced with problems, it is important to employ effective troubleshooting techniques to quickly identify and resolve the issue at hand. Here are four common issues you may encounter with your airless paint sprayer and how to troubleshoot them:

  1. Clogged Nozzle: If the paint is not spraying evenly or not at all, the nozzle may be clogged. Clean the nozzle thoroughly using a nozzle cleaning kit or a small wire brush to remove any debris or dried paint.

  2. Low Pressure: If the sprayer is not producing enough pressure, check the inlet filter for clogs and clean or replace it if necessary. Additionally, ensure that the paint supply is sufficient and not running low.

  3. Excessive Overspray: If the paint is spraying beyond the desired area, adjust the spray tip to a narrower pattern and decrease the pressure to reduce overspray. Additionally, maintain a consistent distance from the surface being painted.

  4. Inconsistent Spray Pattern: If the spray pattern is uneven or splotchy, check the spray tip for wear or damage. Replace the spray tip if necessary. Also, make sure that the paint is properly mixed and strained to avoid any clumps or inconsistencies.

By employing these troubleshooting techniques, you can overcome common issues and ensure optimal performance from your airless paint sprayer.

Now, let’s transition to the subsequent section about choosing the right airless paint sprayer for your needs.

Advertisement

Choosing the Right Airless Paint Sprayer for Your Needs

When it comes to choosing the right airless paint sprayer, it’s important to consider factors such as the size of your project, the type of paint you’ll be using, and your level of experience.

For small projects or occasional use, a portable airless sprayer with a lower pressure rating may be sufficient. However, for larger projects or professional use, a high-pressure airless sprayer with a larger motor and higher flow rate would be more suitable.

Additionally, it’s crucial to consider the maintenance and troubleshooting capabilities of the paint sprayer. Look for models that are easy to clean and maintain, with readily available replacement parts.

Some sprayers may also have built-in features for troubleshooting common issues, such as clogs or pressure fluctuations. By selecting a paint sprayer that meets these criteria, you can ensure efficient and hassle-free operation, saving both time and money in the long run.

Frequently Asked Questions

Can I use an airless paint sprayer for all types of paint?

Yes, an airless paint sprayer can be used for all types of paint. However, it is important to understand the maintenance required and follow tips for efficient usage, such as checking for clogs and adjusting pressure settings.

Advertisement

How do I adjust the spray pattern on an airless paint sprayer?

To adjust the spray pattern on an airless paint sprayer, first locate the pattern adjustment knob. Turn it clockwise to make the pattern narrower, or counterclockwise to make it wider. If troubleshooting spray pattern issues, ensure the nozzle is clean and properly aligned.

Can I use an airless paint sprayer indoors?

Can I use an airless paint sprayer indoors? Airless paint sprayers are safe for indoor use when proper safety precautions are followed. They provide efficient and even coverage, reducing overspray and saving time and effort.

How do I clean the spray gun on an airless paint sprayer?

To clean the spray gun on an airless paint sprayer, first, disconnect the gun from the paint source. Then, remove the nozzle and filter, and clean them with warm soapy water. Finally, reassemble the gun and perform a test spray. Regular cleaning is essential for optimal performance and longevity of the sprayer.

Are airless paint sprayers difficult to use for beginners?

Airless paint sprayers can be challenging for beginners due to their high-pressure operation and potential for overspray. However, the advantages of faster and more even coverage make them worth the learning curve.

Conclusion

In conclusion, airless paint sprayers are a highly efficient and effective tool for achieving professional-quality paint finishes. They work by using powerful pumps to create high pressure, which allows for a consistent and even coat of paint on various surfaces.

Advertisement

One example of their effectiveness is a hypothetical case study where a homeowner successfully paints their entire exterior in half the time it would have taken using traditional brushes and rollers. This showcases the time-saving and superior results that can be achieved with an airless paint sprayer.

With James‘ articles, you can expect comprehensive breakdowns of airless paint sprayer features, performance assessments, and expert insights into the latest industry innovations. His meticulous approach ensures that readers gain a thorough understanding of the equipment they are considering, helping them make well-informed choices.

Continue Reading
Advertisement

Airless Paint Sprayers FAQs

Can I Take A Minute Break When Using An Airless Paint Sprayer

Published

on

By

An image of a weary painter, sweat trickling down their forehead, taking a well-deserved minute break beside an airless paint sprayer

While holding the paint sprayer, I noticed the strain on my muscles and a lingering pain in my back. The never-ending stream of paint made me question if I could take a moment to catch my breath. It made me realize the importance of balancing work and rest, particularly when using an airless paint sprayer.

In any task, whether it’s painting a wall or operating heavy machinery, taking breaks is crucial for our well-being and overall productivity. It allows our bodies and minds to recharge, preventing fatigue and reducing the risk of injuries.

But how can we effectively take a break without compromising the progress of our work? And are there any potential risks involved in not taking breaks?

In this article, we will explore the answers to these questions and provide you with tips on optimizing your breaks while using an airless paint sprayer.

So, let’s delve into the realm of rest and productivity, and find the perfect balance between work and rest.

Advertisement

Key Takeaways

  • Taking regular breaks when using an airless paint sprayer is important to prevent fatigue and reduce the risk of injuries.
  • Engaging in relaxation techniques and deep breathing exercises during breaks helps maintain focus and improve overall productivity.
  • Finding a comfortable resting spot to fully disconnect from work is crucial for recharging and rejuvenating.
  • Prioritizing equipment maintenance during breaks ensures optimal performance of the paint sprayer and helps achieve better results.

The Importance of Taking Breaks

Taking a minute break when using an airless paint sprayer is crucial for maintaining efficiency and preventing fatigue. As a professional painter, I understand the importance of staying focused during long painting sessions. It can be easy to become overwhelmed with the constant movement and concentration required when using an airless paint sprayer.

That’s why incorporating relaxation techniques and taking short breaks is essential. By allowing myself a minute to relax, stretch, and refocus, I can recharge my energy and increase productivity. Tips for staying focused include practicing deep breathing exercises and using visualization techniques to stay in the present moment.

Additionally, taking a break gives me the opportunity to assess my progress and make any necessary adjustments to achieve the best results. Transitioning into the subsequent section about how to effectively take a break, it is important to implement strategies that maximize relaxation and rejuvenation.

How to Effectively Take a Break

When it comes to effectively taking a break, there are two key points to consider: setting a schedule and finding a comfortable resting spot.

Advertisement

Setting a schedule is crucial because it ensures that breaks are taken at regular intervals. This allows for adequate rest and rejuvenation, which is essential for maintaining productivity. By sticking to a predetermined schedule, you are more likely to take breaks when needed, rather than pushing yourself to the point of burnout.

Finding a comfortable resting spot is equally important. When you have a designated area where you can relax and unwind, it promotes relaxation and minimizes distractions. This could be a cozy corner in your office or a comfortable chair in a quiet room. Creating a conducive environment for your break helps you fully disconnect from work and recharge.

By adhering to a schedule and creating a comfortable resting spot, you can effectively take a break and optimize productivity. Remember, breaks are not a waste of time but rather a necessary part of maintaining focus and energy throughout the day. So, make sure to prioritize your well-being and take breaks when needed.

Setting a Schedule

Creating a structured schedule for breaks is essential when operating an airless paint sprayer. Properly managing your time and taking regular breaks not only helps prevent fatigue and burnout but also ensures the quality of your work. Here are three key points to consider when scheduling breaks:

  1. Duration: Determine the optimal length of your breaks based on your personal needs and the intensity of your work. Short breaks of 5-10 minutes every hour can help refresh your mind and body without causing significant interruptions.

  2. Frequency: Plan your breaks at regular intervals to maintain consistency and avoid long stretches of continuous work. Taking short breaks every 60-90 minutes can help sustain your focus and productivity throughout the day.

  3. Activities: During your breaks, engage in activities that promote relaxation and rejuvenation. Stretching, hydrating, and stepping away from the work area can help alleviate physical strain and mental fatigue.

By following a well-structured break schedule, you can optimize your productivity and ensure a more comfortable resting spot for your next break.

Advertisement

Finding a Comfortable Resting Spot

Finding a cozy spot to rest is crucial for recharging during breaks. Research shows that having a comfortable chair can improve productivity by 17%.

When using an airless paint sprayer, it is important to find the right resting position to avoid strain and discomfort. Maintaining a good posture is key, as it helps reduce the risk of muscle fatigue and injury.

A chair with proper lumbar support and adjustable features can facilitate finding the ideal position that suits your body. Additionally, ensuring that your workspace is well-organized and clutter-free can contribute to a more comfortable break environment.

By creating a comfortable workspace and taking breaks in a restful position, you can recharge and return to your painting tasks with renewed energy and focus. Neglecting to take breaks, on the other hand, may lead to potential risks such as decreased productivity and increased muscle strain.

Potential Risks of Not Taking Breaks

Advertisement

When it comes to not taking breaks while using an airless paint sprayer, there are two potential risks that need to be considered.

Firstly, there is an increased risk of injury. Continuous work without breaks can lead to fatigue and decreased focus, which can result in accidents and injuries.

Secondly, not taking breaks can also decrease painting efficiency. Without regular breaks, muscles can become fatigued, leading to a decline in the quality and speed of painting.

It is important to prioritize safety and efficiency by taking regular breaks while using an airless paint sprayer.

Advertisement

Increased Risk of Injury

To reduce the increased risk of injury, it is crucial to prioritize increased safety and maintain a good work-life balance. Refrain from taking a minute break when using an airless paint sprayer. Taking breaks may seem tempting, but it can lead to accidents and potential harm.

When using an airless paint sprayer, you need to maintain focus and concentration to ensure precise application of paint. A minute break may disrupt your workflow and cause you to lose track of important details. By avoiding breaks, you can minimize the chances of accidents and injuries.

Now, let’s move on to the next section, where we will discuss the impact of decreased painting efficiency when using an airless paint sprayer.

Decreased Painting Efficiency

Maintaining focus and concentration while using an airless paint sprayer is essential to ensure efficient and precise application of paint. However, taking a minute break can have a negative impact on painting efficiency. When the sprayer is not in use, the paint may start to dry, leading to clogging and uneven distribution. This can result in a lower quality finish and the need for touch-ups. Additionally, the potential health benefits of taking a break, such as reducing fatigue and preventing muscle strain, should be balanced with the impact on paint quality. To help visualize the importance of continuous spraying, consider the following table:

Time Spent Spraying (minutes) Paint Coverage (%) Quality of Finish
0 0 Poor
5 50 Fair
10 80 Good

By minimizing breaks, you can optimize your painting efficiency and achieve a higher quality finish. Now, let’s explore some tips for optimizing your breaks without compromising the paint application process.

Advertisement

Tips for Optimizing Your Breaks

When it comes to optimizing breaks, there are two key points to keep in mind: stretching and relaxation techniques, and hydrating and snacking.

Stretching and relaxation techniques help to alleviate muscle tension and promote overall relaxation, allowing me to return to work feeling refreshed and rejuvenated.

Hydrating and snacking, on the other hand, ensure that I am properly fueling my body and maintaining optimal hydration levels, which can enhance cognitive function and improve productivity.

Stretching and Relaxation Techniques

Take a moment to incorporate stretching and relaxation techniques into your routine. Studies have shown that regular breaks can increase productivity by up to 20%.

Engaging in stretching exercises not only helps relieve muscle tension but also improves blood circulation. This keeps your body energized for efficient paint spraying.

Advertisement

Start by stretching your arms, shoulders, and back to prevent strain and promote flexibility.

Mindfulness techniques, such as deep breathing and meditation, can help clear your mind and reduce stress.

Remember to take short breaks every hour to perform these techniques and recharge.

Now, let’s transition into the subsequent section about hydrating and snacking, which is equally important for maintaining optimal performance throughout the painting process.

Hydrating and Snacking

As painters, it’s important for us to take care of our bodies while using an airless paint sprayer. While stretching and relaxation techniques are crucial, staying hydrated and snacking on healthy options can also contribute to our overall well-being.

Advertisement

When using an airless paint sprayer, it’s easy to forget about drinking water or eating nutritious snacks. However, staying hydrated is essential for maintaining focus and preventing fatigue. It’s recommended to keep a water bottle nearby and take regular sips throughout the painting process.

Additionally, incorporating healthy snack options can provide us with the necessary energy to sustain our work. Foods like nuts, fruits, and granola bars offer a balanced mix of protein, fiber, and carbohydrates. These snacks can help us stay energized and focused for longer periods.

Now that we’ve discussed the importance of staying hydrated and snacking, let’s explore the factors to consider before taking a break.

Factors to Consider Before Taking a Break

Before you take a break while using an airless paint sprayer, it’s important to consider a few factors. Taking breaks during a painting project can be beneficial for several reasons. Here are four key factors to consider:

  1. Timing: Pause at a logical point in your project, such as after completing a wall or section. This will help you easily resume work without disrupting the overall flow.

  2. Safety: Ensure you turn off the sprayer and release pressure before taking a break. This will prevent accidental spraying and potential injuries.

  3. Cleanup: Use your break to clean the sprayer and remove any clogs or debris. This will maintain the efficiency and effectiveness of the tool.

  4. Hydration and Snacking: Take this opportunity to hydrate and have a quick snack to maintain your energy levels throughout the project.

By carefully considering these factors, you can plan your breaks for maximum efficiency.

Advertisement

Planning Your Breaks for Maximum Efficiency

When planning my breaks for maximum efficiency, I prioritize breaking up the painting process into smaller, manageable tasks. This allows me to maintain focus and accuracy throughout the project.

Additionally, I utilize my breaks for equipment maintenance to ensure that my airless paint sprayer is functioning optimally.

By following these strategies, I am able to work efficiently and effectively, resulting in a high-quality paint job.

Breaking Up the Painting Process

During the painting process, it is important to take short breaks to prevent fatigue and maintain productivity, with studies showing that painters who take regular breaks are 20% more efficient. Breaking up the painting process into manageable sections not only helps in staying focused but also allows for better control over the outcome. One effective strategy is to divide the project into smaller areas or sections, completing them one at a time. This approach helps to prevent overwhelming feelings and ensures a consistent level of quality throughout the entire project. Another strategy is to set specific goals for each break, such as completing a certain number of square feet or applying a specific number of coats. By setting clear goals and taking systematic breaks, painters can optimize their productivity and achieve better results. Transitioning into the subsequent section about utilizing breaks for equipment maintenance, it is crucial to understand the importance of maintaining the airless paint sprayer to ensure its optimal performance.

Utilizing Breaks for Equipment Maintenance

During your breaks, it is important to make use of the time to properly maintain and care for your equipment. This will help ensure optimal performance and prolong the lifespan of your tools. Equipment maintenance plays a crucial role in preventing unexpected breakdowns and costly repairs. To effectively utilize your break time for equipment maintenance, here are some key steps to follow:

Advertisement
  • Inspect the paint sprayer for any signs of wear or damage, such as leaks or clogged nozzles. Address these issues immediately to prevent further damage.

  • Clean the sprayer thoroughly, removing any paint residue or debris that may affect its performance.

  • Lubricate the moving parts of the sprayer, such as the piston and seals, to keep them functioning smoothly.

By incorporating these maintenance tasks into your break time, you can save time in the long run and ensure that your airless paint sprayer operates at its best.

Now, let’s transition into the next section about listening to your body and mind.

Listening to Your Body and Mind

As an expert in efficiency and productivity, I understand the importance of recognizing signs of fatigue and practicing self-care. When our bodies and minds are tired, it becomes difficult to maintain focus and perform at our best.

By paying attention to subtle cues such as decreased concentration, physical exhaustion, and irritability, we can intervene early and take necessary breaks or engage in self-care activities to recharge and optimize our performance.

It is crucial to prioritize our well-being and incorporate self-care practices into our routines to ensure sustained productivity and overall well-being.

Advertisement

Recognizing Signs of Fatigue

Recognizing signs of fatigue is crucial to prevent accidents and maintain productivity. Here are four important signs to watch out for:

  1. Slowed reaction time: When fatigue sets in, the ability to react quickly diminishes, increasing the risk of making mistakes or causing accidents.

  2. Difficulty concentrating: Fatigue impairs cognitive function, making it harder to focus on the task at hand and increasing the likelihood of errors.

  3. Increased irritability: Feeling irritable or moody is a common sign of fatigue, which can negatively impact communication and teamwork.

  4. Muscle weakness and soreness: The body becomes physically tired, leading to muscle weakness and discomfort.

To prevent these signs of fatigue, it’s essential to practice self-care and prioritize rest and relaxation. Taking regular breaks, staying hydrated, and getting enough sleep are effective strategies. By practicing self-care, painters can ensure their well-being and maintain optimal performance.

Practicing Self-Care

Feeling the weight of fatigue dragging you down, it’s almost comical how neglecting self-care can ironically hinder your productivity and well-being.

When using an airless paint sprayer, it’s essential to recognize the signs of fatigue and take a minute break to practice self-care activities. Engaging in self-care not only allows your body and mind to recharge but also enhances your overall performance.

Taking breaks and resting during painting sessions can have numerous benefits. It helps reduce physical and mental strain, prevents burnout, and improves concentration, resulting in more accurate and efficient work.

Advertisement

Incorporating self-care activities, such as stretching, hydrating, and deep breathing, into your painting routine can rejuvenate your energy levels and increase your productivity.

Transitioning into the subsequent section about the productivity benefits of taking breaks, it’s crucial to understand how these short pauses can significantly impact your work.

Productivity Benefits of Taking Breaks

Taking a minute break when using an airless paint sprayer can boost productivity and help you feel rejuvenated. Incorporating mindfulness during breaks can provide numerous benefits.

Firstly, taking a break allows you to clear your mind and focus on the present moment. This reduces stress and increases overall well-being.

Secondly, breaks enhance creativity and problem-solving skills. Giving your brain a chance to rest and recharge can lead to fresh ideas and innovative solutions.

Advertisement

Thirdly, breaks improve concentration and cognitive function. When you return to the task at hand, you’ll be able to work more efficiently and effectively.

Lastly, breaks promote better physical health. They reduce muscle tension and eye strain, helping to prevent discomfort and fatigue.

To manage stress during breaks, try deep breathing exercises, stretching, or engaging in a relaxing activity. These strategies will help you make the most of your break time and optimize your productivity.

Now, let’s transition into common questions about taking breaks and understand the best practices for incorporating them into your work routine.

Common Questions About Taking Breaks

Taking regular breaks while using an airless paint sprayer is not only permissible but also highly recommended. It is essential to prioritize your well-being and productivity by incorporating short breaks into your work routine. Research suggests that taking breaks can actually increase productivity and improve overall performance. By allowing yourself a few minutes to rest and recharge, you give your mind and body the opportunity to recover from the intense focus and physical exertion that painting requires. These short breaks can help prevent burnout and allow you to maintain a higher level of concentration and efficiency throughout your painting tasks. To illustrate the benefits of taking breaks, consider the following table:

Advertisement
Benefits of Short Breaks
Enhanced focus
Increased energy
Improved creativity
Reduced stress
Enhanced problem-solving skills

In conclusion, finding a balance between work and rest is crucial for optimal performance.

Conclusion: The Importance of Balancing Work and Rest

Finding a healthy equilibrium between work and rest is crucial for achieving optimal performance. It allows for enhanced focus, increased energy, improved creativity, reduced stress, and enhanced problem-solving skills.

Balancing work life is not just about putting in the hours, but also taking care of oneself. It is important to recognize the importance of self-care and the role it plays in maintaining productivity and overall well-being.

Taking regular breaks, like a minute break when using an airless paint sprayer, can help prevent burnout and fatigue. It allows for better concentration and efficiency. These short moments of rest provide an opportunity to recharge and rejuvenate, resulting in improved work performance.

By incorporating small breaks into our work routine, we can create a more sustainable and fulfilling work-life balance.

Advertisement

Frequently Asked Questions

Can I take longer breaks instead of shorter, more frequent breaks when using an airless paint sprayer?

Yes, longer breaks instead of shorter, more frequent breaks can be taken when using an airless paint sprayer. However, it is important to consider the impact on productivity and ensure that sufficient rest time is balanced with work time.

How often should I take breaks when using an airless paint sprayer?

To ensure optimal performance and avoid fatigue, breaks should be taken every 1-2 hours while using an airless paint sprayer. Maintaining proper posture and staying hydrated are crucial for safety and efficiency during the task.

Is it necessary to take breaks even if I don’t feel tired when using an airless paint sprayer?

Taking breaks is essential for safety precautions when using an airless paint sprayer, regardless of feeling tired. Regular breaks help prevent fatigue and maintain focus, ensuring optimal performance and reducing the risk of accidents.

Can I multitask during my breaks when using an airless paint sprayer?

Multitasking during breaks is not recommended when using an airless paint sprayer. Studies show that taking uninterrupted breaks improves focus and productivity. It is important to prioritize rest and recharge to prevent accidents and maintain optimal performance.

Are there any specific exercises or stretches I should do during my breaks when using an airless paint sprayer?

During breaks when using an airless paint sprayer, it is advisable to perform exercises and stretches that target the muscles used in the painting process. This helps prevent muscle fatigue and promotes better overall physical health.

Advertisement

Conclusion

In conclusion, it’s crucial to strike a balance between work and rest, especially when using an airless paint sprayer. Taking regular breaks not only rejuvenates the mind and body but also enhances productivity.

Studies have shown that individuals who take short breaks during their work hours are 13% more productive than those who don’t. This statistic highlights the significance of incorporating moments of rest into our daily routine, allowing us to work efficiently and effectively.

Remember, taking breaks is not a sign of weakness but rather a strategic approach to achieving optimal results.

Continue Reading

Airless Paint Sprayers FAQs

Must-Know Information about Airless Paint Sprayer Maintenance: Essential Steps for Proper Care

Published

on

By

It is important to maintain your airless paint sprayer to ensure it continues to perform at its best and last for a long time.

Whether you’re a DIY enthusiast or a professional painter, understanding the proper care and maintenance of your equipment is crucial. In this blog post, we will provide must-know information about airless paint sprayer maintenance, including cleaning tips, regular maintenance steps, and recommended products to keep your sprayer in top shape.

So let’s dive in and discover how to give your airless paint sprayer the TLC it deserves!

How to Maintain a Texture Sprayer

Maintaining a texture sprayer is just as important as using it effectively. By following proper maintenance practices, you can ensure that your texture sprayer remains in optimal condition for years to come. Here are some essential steps to guide you in maintaining your texture sprayer:

1. Clean the machine thoroughly after each use: After completing your project, take the time to clean out any remaining material from the hopper and spray gun. This will prevent any leftover residue from drying up and clogging the system.

2. Inspect and replace worn parts: Regularly inspect your texture sprayer for any signs of wear or damage. Check hoses, gaskets, filters, and nozzles for cracks or leaks. Replace any worn-out parts immediately to avoid potential issues during future projects.

3. Lubricate moving parts: Proper lubrication is crucial for keeping your texture sprayer running smoothly. Apply lubricant to all moving parts such as pistons, seals, and valves according to the manufacturer’s recommendations.

4. Use clean materials: Always use high-quality materials specifically designed for textured finishes with your sprayer. Using low-grade or contaminated materials can lead to clogs in the system and affect overall performance.

5. Store properly when not in use: When you’re finished using your texture sprayer, make sure it is stored correctly to prevent damage or exposure to moisture or extreme temperatures. Follow the manufacturer’s guidelines regarding storage conditions.

6. Protect against freezing temperatures: If you live in an area where freezing temperatures are common, take extra precautions during winter months when storing your texture sprayer outdoors or in unheated spaces. Drain all water from hoses and tanks before storage to prevent freezing and potential damage.

7. Schedule regular professional servicing: While regular maintenance tasks can prolong the life of your texture sprayer significantly, it’s also wise to have a professional service technician inspect it periodically for more extensive cleaning and repairs if necessary.


By following these essential maintenance steps, you can ensure that your texture sprayer remains in top condition for years to come.

Maintenance Guide

Maintenance Guide

Proper maintenance is essential for keeping your airless paint sprayer in top-notch condition. Regular care and attention will not only prolong the lifespan of your equipment but also ensure optimal performance every time you use it. In this maintenance guide, we will walk you through some important steps to help you keep your airless paint sprayer running smoothly.

1. Clean after each use: Cleaning your airless paint sprayer after each use is crucial to prevent dried or hardened paint from clogging the system. Start by flushing out any remaining paint with a cleaning solution recommended by the manufacturer. Then, disassemble the spray gun and remove any residual paint from the nozzle, filter, and other parts using a brush or solvent.

2. Check for wear and tear: Regularly inspect all components of your airless paint sprayer for signs of wear or damage. This includes hoses, fittings, seals, and gaskets. Replace any worn-out parts promptly to avoid leaks or malfunctioning during operation.

3. Lubricate moving parts: Lubricating the moving parts of your airless paint sprayer helps reduce friction and ensures smooth operation. Refer to the user manual for specific lubrication points and recommended lubricants.

4. Maintain proper storage: When not in use, store your airless paint sprayer in a clean and dry area away from extreme temperatures or humidity levels that could damage its delicate components.

5. Carefully handle filters: Filters play an important role in preventing debris from entering the spray gun’s tip and causing blockages. Routinely clean or replace filters as needed to maintain optimal performance.

6. Schedule professional servicing: While regular maintenance can go a long way in keeping your airless paint sprayer functioning well, it’s always beneficial to have it professionally serviced at least once a year for more extensive checks on internal components.

7. Follow manufacturer guidelines: Always follow the manufacturer’s guidelines regarding maintenance procedures and recommended cleaning solutions. Each airless paint sprayer may have specific requirements, and deviating from these can result in damage or faulty operation.

Advertisement

Related Articles

When it comes to airless paint sprayer maintenance, there is always more to learn. It’s important to stay informed and keep up with the latest tips and tricks for proper care. In addition to the detailed guide we provided earlier, here are some related articles that you may find helpful on your quest for maintaining your airless paint sprayer.

1. “Top 5 Tips for Extending the Lifespan of Your Airless Paint Sprayer” – This article offers valuable insights into how you can maximize the longevity of your sprayer. From regular cleaning routines to proper storage techniques, these tips will ensure that your investment lasts for years to come.

2. “Common Mistakes to Avoid When Cleaning Your Airless Paint Sprayer” – Even experienced painters can make mistakes when it comes to cleaning their equipment. This article highlights some common pitfalls and provides solutions on how to avoid them. Learn from others’ mistakes so you can maintain your sprayer effectively without any hiccups.

3. “Troubleshooting Guide: Fixing Common Issues with Airless Paint Sprayers” – Sometimes, despite our best efforts in maintenance, problems can still arise with our sprayers. This troubleshooting guide walks you through various issues such as clogged nozzles or inconsistent spray patterns and provides step-by-step instructions on how to fix them.

4. “Choosing the Right Cleaning Solutions for Your Airless Paint Sprayer” – Not all cleaning solutions are created equal, and using the wrong ones could damage your equipment over time. This article explores different types of cleaning solutions available in the market and helps you make an informed decision on which one suits your needs best.

5. “Proper Storage Techniques: Keeping Your Airless Paint Sprayer in Top Shape” – Properly storing your sprayer when not in use is crucial for its longevity. This article delves into various storage methods and precautions that will protect your investment during periods of downtime.

6. “The Benefits of Regular Maintenance for Your Airless Paint Sprayer” – This article discusses the importance of regular maintenance for your airless paint sprayer. From increased efficiency to reduced downtime, learn why it pays to stay on top of your sprayer care routine.

Airless Paint Sprayer Maintenance

Maintaining your airless paint sprayer is essential to ensure its optimal performance and longevity. By following a few simple steps, you can keep your sprayer in top shape and avoid costly repairs or replacements.

Cleaning the sprayer after each use is crucial. This will prevent any leftover paint from drying inside the machine, which could clog the nozzle and cause uneven spray patterns. To clean it thoroughly, start by flushing water through the system until all traces of paint are gone. Use a brush to remove any stubborn residue, and make sure to empty and clean the filters as well.

Regular maintenance is also necessary for an airless paint sprayer. This includes inspecting all parts for wear or damage before each use. Check hoses for leaks or cracks, replace worn-out seals or gaskets, and lubricate moving parts according to manufacturer’s recommendations.

Investing in high-quality airless sprayer products can significantly enhance your maintenance routine. Using compatible accessories such as gun filters and tips specifically designed for your model of sprayer will improve its efficiency and prolong its lifespan.

If you own a Graco Airless Paint Sprayer, here are some easy steps to follow when cleaning it:

  • 1) Start by relieving pressure from the system by turning off both the prime valve knob and main power switch.
  • 2) Disconnect the spray gun from the hose.
  • 3) Remove any remaining paint from both ends of the suction tube using a small brush.
  • 4) Flush water through the pump until clear water comes out.
  • 5) Clean all removable components such as filters with warm soapy water before rinsing them thoroughly.
  • 6) Finally reassemble everything carefully once it’s completely dry.

It’s important to note that while these guidelines are specific to Graco Airless Paint Sprayers, many of these principles apply universally across different brands as well.

When dealing with various types of materials like latex or oil-based paints, it’s crucial to adjust your cleaning routine accordingly. Some materials may require more intensive cleaning procedures such as using specialized solvents or detergents. Make sure to refer to the manufacturer’s instructions regarding specific instructions for each type of paint you use.

By following these steps and using the right products, you can ensure that your airless paint sprayer remains in top condition for years to come!

Cleaning

Cleaning your airless paint sprayer is an essential step in maintaining its performance and longevity. Regular cleaning helps prevent clogs, ensures proper functioning of the machine, and extends its lifespan. In this section, we will discuss the importance of cleaning your airless paint sprayer and provide you with some tips on how to do it effectively.

Why is cleaning important? Well, when you use an airless paint sprayer, tiny particles of paint can get lodged inside the nozzle or other components of the machine. Over time, these build-ups can lead to clogging and affect the quality of your spray pattern. By regularly cleaning your sprayer after each use or at regular intervals during a large project, you can prevent these blockages from occurring.

To clean your airless paint sprayer properly, start by disconnecting it from any power source and relieving any pressure that may be left in the system. Next, remove the spray tip and filter (if applicable) from the gun assembly. These parts should be soaked in a cleaning solution recommended by the manufacturer.

While those parts are soaking, wipe down all exterior surfaces of the sprayer using a damp cloth or sponge. This will help remove any excess paint residue that might have accumulated during use. Be sure to pay attention to hard-to-reach areas like corners or crevices where debris may hide.

After allowing enough time for soaking (refer to manufacturer guidelines), rinse off all parts thoroughly with water until no traces of cleaner remain. Use a soft brush if necessary to dislodge stubborn residues without damaging delicate components.

Once everything has been cleaned and rinsed properly, reassemble all parts carefully according to manufacturer instructions. Double-check that everything fits snugly but not forcefully into place before moving on to your next painting task.

Remember that proper protective gear such as gloves and goggles should always be worn while handling chemicals used for cleaning purposes.

By following these simple steps and making cleaning a routine part of your airless paint sprayer maintenance, you can ensure its optimal performance and a longer lifespan.

Regular Maintenance

Maintaining your airless paint sprayer is essential to ensure its optimal performance and longevity. Regular maintenance not only helps prevent clogs and other issues but also ensures that you achieve the best possible results every time you use your sprayer. Here are some important steps for regular maintenance:

1. Clean the Filters: The filters in your airless paint sprayer play a crucial role in preventing debris from entering the system. It’s important to clean these filters regularly to keep them free from dirt and grime. Remove the filters according to the manufacturer’s instructions and rinse them thoroughly with water or a cleaning solution.

2. Check for Wear and Tear: Inspect all parts of your sprayer, including hoses, seals, nozzles, and gun tips, for any signs of wear or damage. Replace any worn-out parts immediately to avoid potential leaks or malfunctions during painting.

3. Lubricate Moving Parts: To keep your airless paint sprayer running smoothly, it’s important to lubricate all moving parts regularly. Apply lubricant as recommended by the manufacturer to ensure proper functioning of components such as pistons, motor bearings, and pump shafts.

4. Flush Out Excess Paint: After each use, flush out any remaining paint from the system by running clean water or a flushing solution through it until clear liquid comes out of the spray gun tip. This helps prevent dried-up paint residue that can lead to clogs.

5.

Clean Nozzles & Tips Thoroughly: Nozzles and spray tips are prone to clogging due to dried-up paint particles or debris accumulation over time.

Regularly remove these components from your airless spray gun accordingto manufacturer instructionsandclean them thoroughly using an appropriate cleaning solutionor solvent.

Remember,don’t use metal objectsor harsh abrasives while cleaningas they can damagethe nozzlesandtips.

6. Store Properly: When not in use, make sure to store your airless paint sprayer in a clean and dry place. This will help prolong its life and ensure safe operation for years to come.

By following these simple maintenance steps, you can keep your airless paint sprayer in top condition and avoid costly repairs or replacements.

Shop Airless Sprayer Products

If you own an airless paint sprayer, then you know how important it is to have the right products and accessories to keep it running smoothly. That’s where shop airless sprayer products come in handy. These specially designed items are meant to help you maintain and care for your sprayer so that it continues to work effectively for years to come.

One essential shop airless sprayer product is the spray gun filter. This small, but vital component helps prevent debris and particles from clogging up your spray gun nozzle. By regularly replacing or cleaning this filter, you can ensure a consistent flow of paint and avoid any potential damage to your equipment.

Another must-have item is the pump protector fluid. This special formula is specifically designed to lubricate and protect the internal components of your airless paint sprayer’s pump during storage or when not in use for extended periods of time. By using this product, you can extend the life of your pump and minimize any potential damage caused by corrosion or rust.

To keep your spray pattern smooth and even, consider investing in a tip cleaner kit. This handy tool allows you to easily remove any dried paint or debris from the tips of your spray gun without damaging them. Regularly cleaning your tips will ensure optimal performance and avoid any unwanted spraying patterns or blockages.

In addition to these maintenance products, there are also various accessories available that can enhance the functionality of your airless paint sprayer. For instance, extension poles allow you to reach high ceilings or walls with ease, while hose reels provide convenient storage options for long lengths of hose.

Before purchasing any shop airless sprayer products, make sure they are compatible with your specific model and brand of paint sprayer. It’s always best to consult the manufacturer’s recommendations or seek advice from knowledgeable professionals who can guide you towards the right products for your needs.

By investing in quality shop airless sprayer products and regularly maintaining your equipment, you can ensure that your paint sprayer continues to deliver professional-quality results for years to come.

Advertisement

How to Clean a Graco Airless Paint Sprayer (6 Easy Steps)

Cleaning your Graco airless paint sprayer is an essential part of its maintenance. By regularly cleaning your equipment, you can ensure optimal performance and longevity. Here are six easy steps to help you clean your Graco airless paint sprayer effectively.

1. First, make sure the sprayer is turned off and disconnected from any power source. This step is crucial for safety reasons before starting the cleaning process.

2. Next, remove any remaining paint or solvent from the fluid section of the sprayer by flushing it with a suitable cleaning solution or water. Follow the manufacturer’s instructions for choosing the appropriate cleaning solution based on the type of material used in your project.

3. After flushing out all traces of paint or solvent, disassemble various parts like spray tips, filters, and guard assemblies that may have accumulated debris during painting sessions.

4. Thoroughly clean these disassembled parts using mild soap and water or a recommended cleaner designed for removing dried paints or coatings efficiently.

5. Once cleaned, rinse all components thoroughly with clean water to remove any residue left behind by detergents or cleaners.

6. After rinsing, reassemble all parts back into place according to their original configuration as specified in Graco’s user manual.

Taking care of your Graco airless paint sprayer through regular cleaning not only ensures proper functioning but also extends its lifespan significantly. Neglecting this important step could lead to clogs and reduced performance down the line!

Remember always to follow safety recommendations when handling chemicals and working with high-pressure spraying equipment like a Graco airless paint sprayer! Protect yourself by wearing appropriate personal protective equipment (PPE) such as gloves and eye protection while performing these tasks.

Keep in mind that while these guidelines focus on cleaning a Graco airless paint sprayer specifically due to its popularity among professionals painters; they can generally be applied when maintaining other brands’ similar models as well!

To clean your Graco airless paint sprayer effectively, gather the necessary supplies.

What Do You Need to Know About Cleaning a Graco Sprayer?

Cleaning a Graco sprayer is an essential part of airless paint sprayer maintenance. Whether you are a professional painter or a DIY enthusiast, knowing how to clean your Graco sprayer properly can help ensure its longevity and optimal performance.

It’s important to understand that cleaning a Graco sprayer is not just about removing excess paint from the equipment. It also involves removing any debris or contaminants that may have accumulated during the painting process. This will prevent clogs and ensure smooth operation in future applications.

When cleaning your Graco sprayer, safety should always be your top priority. Make sure you wear appropriate protective gear such as gloves and goggles to avoid contact with any potentially harmful substances. Additionally, make sure the power source is disconnected before starting the cleaning process.

While these guidelines specifically focus on cleaning a Graco airless paint sprayer, many of the steps can be applied to other brands as well. However, it’s always recommended to consult the manufacturer’s instructions for specific guidance regarding different types of airless paint spraying equipment.

To clean your Graco sprayer effectively, gather all the necessary supplies beforehand. You’ll need water or solvent depending on whether you used oil-based or latex paints respectively, clean rags or towels for wiping down surfaces, and a brush for scrubbing off stubborn residue.

Now let’s dive into six simple steps to clean your Graco airless paint sprayer:

1) Start by releasing any pressure inside the system by turning off and unplugging the machine. Then trigger the spray gun until no more fluid comes out.
2) Remove all detachable parts such as filters, tips, guards, and hoses.
3) Rinse these components thoroughly using water or solvent depending on what type of paint was used.
4) Scrub away any remaining paint residue using a brush.
5) Wipe down all surfaces with clean rags or towels soaked in water/solvent.
6) Reassemble all the parts and store your Graco sprays in a dry, safe place.

Following these steps will help to ensure that your Graco sprayer is always in top condition and ready for the next job.

Safety Recommendations When Cleaning A Graco Airless Paint Sprayer?

Safety Recommendations When Cleaning A Graco Airless Paint Sprayer

When it comes to cleaning a Graco airless paint sprayer, safety should always be the top priority. Here are some important recommendations to consider:

1. Wear Protective Gear: Before you begin the cleaning process, make sure to wear appropriate protective gear such as gloves, goggles, and a respirator mask. This will help protect you from any potential hazardous substances that may be present in the paint or cleaning solution.

2. Ventilate the Area: Cleaning an airless paint sprayer can release fumes and vapors into the surrounding area. To prevent inhaling these harmful substances, ensure that you are working in a well-ventilated space with proper airflow or use exhaust fans to remove any potentially toxic fumes.

3. Follow Manufacturer’s Instructions: Each model of Graco airless paint sprayer may have specific instructions for cleaning and maintenance. It is crucial to read and follow these guidelines carefully to ensure safe operation and prolong the lifespan of your equipment.

4. Disconnect Power Source: Before starting any cleaning procedures, disconnect the power source or turn off the unit completely. This will prevent accidental activation of the sprayer while you are handling it or performing maintenance tasks.

5. Use Appropriate Cleaning Solutions: Make sure to use only recommended cleaning solutions that are compatible with your Graco airless paint sprayer model. Avoid using harsh chemicals or solvents that could damage internal components or compromise performance.

6. Clean Nozzles Carefully: The nozzles on your spray gun can become clogged with dried paint particles over time if not properly cleaned after each use. Take extra care when removing them for cleaning by following manufacturer instructions closely, using tools provided (if applicable), and avoiding excessive force which could cause damage.

7. Practice Proper Disposal Methods: After completing all necessary cleanings, dispose of any waste materials such as used brushes or rags according to local regulations. This includes emptying paint containers and disposing of leftover solutions in a safe and responsible manner.

Are These Guidelines Specific Only To the Graco Airless Paint Sprayer?

Are These Guidelines Specific Only To the Graco Airless Paint Sprayer?

When it comes to maintaining an airless paint sprayer, you might be wondering if these guidelines are specific only to the Graco brand. The answer is no, they are not exclusive to just one brand. While this blog post refers to cleaning a Graco airless paint sprayer specifically, many of the principles and steps can be applied to other brands as well.

While each brand may have its own unique features and specifications, the general process of cleaning and maintaining an airless paint sprayer remains quite similar across different models. It’s important to understand that regular maintenance and proper care are essential for any type of airless paint sprayer, regardless of the brand.

Whether you own a Graco or another reputable brand like Wagner or Titan, following these guidelines will help ensure optimal performance and longevity for your equipment. Regularly cleaning your spray gun, filters, hoses, and pump will prevent clogs and keep your machine running smoothly.

Different brands may have slight variations in terms of disassembly procedures or recommended cleaning solutions. However, the basic steps involved in cleaning an airless paint sprayer remain consistent – flushing out residual paint from the system with water or solvent-based cleaner being one common step across all brands.

It’s always a good idea to consult your manufacturer’s manual for specific instructions on how to clean their particular model. This way you can ensure that you’re using approved methods without risking damage or voiding any warranties.

In conclusion (as requested), while this blog post focuses on guidelines for cleaning a Graco airless paint sprayer specifically, many of these principles can be applied across various brands as well. By understanding the importance of regular maintenance and adhering to proper care techniques outlined in this article (and consulting your manufacturer’s manual when necessary), you’ll be able to keep your airless paint sprayer in top shape regardless of what brand you own. So, take the time to clean and maintain your airless paint sprayer properly and you will be rewarded with a machine that provides reliable, consistent results for many years to come.

Some Thoughts on Various Materials and How They May Affect Cleaning

When it comes to cleaning your airless paint sprayer, it’s important to consider the type of materials you’re working with and how they may affect the cleaning process. Different materials can have different properties that require specific care and attention.

One material that often poses challenges when it comes to cleaning is oil-based paints. These paints tend to be thicker and stickier than water-based paints, making them more difficult to remove from your sprayer. To effectively clean an airless paint sprayer used with oil-based paints, you may need to use specialized solvents or cleaners designed specifically for these types of coatings.

On the other hand, water-based paints are generally easier to clean compared to their oil-based counterparts. Water can be used as a primary cleaner for most water-based paint residues in your sprayer. However, if there are stubborn stains or dried-on paint, you may need additional tools such as brushes or scrapers to help remove them.

Another consideration is the type of surface you’re painting on. If you’re working with rough surfaces like stucco or textured walls, debris and particles can easily get trapped in the nooks and crannies of your sprayer equipment. Regular maintenance is crucial in preventing clogging or damage caused by build-up over time.

Additionally, certain additives or pigments used in specialty coatings can also impact the cleaning process. These additives can alter the viscosity and drying time of the paint, which means they might require extra care during cleanup.

It’s worth mentioning that some manufacturers provide specific guidelines for cleaning their airless paint sprayers based on compatibility with different materials. Always refer to these instructions before attempting any cleaning procedure.

To ensure proper maintenance of your airless paint sprayer regardless of material considerations:
1) Flush out excess paint immediately after each use.
2) Use appropriate solvents or cleaners recommended by the manufacturer.
3) Disassemble parts carefully according to instructions provided.
4) Clean all components thoroughly, including filters and nozzles.
5) Inspect for any wear or damage and make repairs if necessary.
6) Keep tools in good condition and store properly when not in use.

Advertisement

What Are The Supplies You’ll Need To Clean Your Graco Sprayer?

When it comes to cleaning your Graco airless paint sprayer, having the right supplies on hand is essential. Properly maintaining your sprayer will not only extend its lifespan but also ensure that you achieve the best results every time you use it. Here are some supplies you’ll need for cleaning your Graco sprayer:

1. Cleaning Solution: Start by preparing a suitable cleaning solution for your sprayer. You can either use warm soapy water or a solvent recommended by Graco for removing paint residue from the system.

2. Safety Equipment: Before starting the cleaning process, make sure to wear protective gear such as gloves, safety goggles, and a respirator mask to protect yourself from any fumes or chemicals.

3. Brushes and Scrapers: To remove dried-on paint and debris from various parts of the sprayer, keep different sizes of brushes and scrapers handy. These tools will help clean hard-to-reach areas effectively.

4. Wrenches and Pliers: It’s important to have wrenches and pliers available in case you need to disassemble any components of the sprayer during cleaning or maintenance.

5. Replacement Parts: Over time, certain parts of your Graco sprayer may wear out or become damaged due to heavy usage or improper maintenance. It’s always helpful to have replacement parts like filters, nozzles, gaskets, o-rings readily available so that you can replace them when necessary.

6. Lubricant: Applying lubricant regularly helps prevent rusting and keeps moving parts functioning smoothly in your airless paint sprayer. Make sure to use a lubricant recommended by Graco specifically for their equipment.

7. Clean Rags/Towels: Keep an ample supply of clean rags or towels nearby as they are crucial for wiping down surfaces after cleaning processes are complete.

By having these supplies ready before beginning the cleaning process with your Graco airless paint sprayer, you’ll be well-prepared to maintain the sprayer effectively. Regular cleaning and maintenance of your Graco paint sprayer will ensure that it lasts for a long time and continues to deliver high-quality results.

How to Clean A Graco Airless Paint Sprayer (6 Simple Steps)

Cleaning your Graco airless paint sprayer is an essential part of its maintenance routine. By keeping it clean and well-maintained, you can ensure that it continues to operate effectively and efficiently for years to come. In this blog post, we’ll walk you through the six simple steps to clean your Graco airless paint sprayer.

Step 1: Start by relieving the pressure in the system. This step is crucial for safety reasons before cleaning your sprayer. Make sure you turn off the power, release any built-up pressure, and remove all spray tips.

Step 2: Next, disassemble the gun filter housing and remove any filters or screens present. These components may have accumulated debris or dried paint over time, so give them a thorough cleaning using warm soapy water or an appropriate solvent recommended by Graco.

Step 3: Once the gun filter housing is cleaned thoroughly, move on to cleaning the spray tip guard and spray tip itself. Use a soft brush or toothbrush along with warm soapy water to remove any clogs or residue from these parts.

Step 4: After cleaning the gun filter housing and spray tip area, focus on flushing out any remaining paint from inside the pump assembly. Fill a bucket with water or solvent as directed by Graco’s recommendations and run this solution through your sprayer until clear liquid comes out of it.

Step 5: When flushing out your sprayer’s system with water or solvent, make sure not to forget about other components like suction tubes and hoses connected to your machine. Remove them if needed and clean them separately using suitable solvents or detergents provided by Graco.

Step 6: Once all components are cleaned thoroughly according to Graco’s guidelines, reassemble everything back together carefully ensuring proper alignment of all parts. Test-run your sprayer after reassembly without actual paint material first- just plain water -to ensure everything is working correctly.

Remember, proper maintenance and cleaning of your Graco airless paint sprayer is essential for its longevity and performance. Following the above steps every few months or so will help you keep your sprayer in top condition.

Other Valuable Resources for Cleaning your Graco Airless Sprayer

Other Valuable Resources for Cleaning your Graco Airless Sprayer

Keeping your airless paint sprayer well-maintained is crucial for its longevity and performance. While we have covered the essential steps to maintain and clean your Graco airless paint sprayer, there are always additional resources available that can provide further guidance.

If you’re looking for more in-depth information or specific tips on maintaining your particular model of Graco airless paint sprayer, be sure to check out the official website of Graco. They offer comprehensive manuals and instructional videos that can assist you in properly cleaning and maintaining your sprayer.

Additionally, online forums and communities dedicated to painting professionals or DIY enthusiasts can be valuable sources of knowledge. These platforms often feature discussions on best practices for airless paint sprayers, including maintenance tips from experienced users who have encountered similar issues.

Don’t overlook the importance of consulting with professional painters or contractors who have extensive experience with airless paint sprayers. Their expertise and insights can prove invaluable when it comes to proper care and maintenance.

Remember, regular cleaning and maintenance will not only prolong the lifespan of your airless paint sprayer but also ensure optimal performance every time you use it. By following these recommended steps and utilizing additional resources as needed, you’ll be able to keep your Graco airless paint sprayer in top-notch condition for years to come!

So go ahead, take good care of your investment by giving it the attention it deserves! Happy painting!

Continue Reading

Airless Paint Sprayers FAQs

How To Control Paint Flow In Wagner Airless Sprayer

Published

on

By

An image showcasing a skilled hand holding a Wagner airless sprayer, expertly adjusting the paint flow knob to achieve optimal control

Congratulations on acquiring a Wagner airless sprayer for your painting project! Now, the big question is how to control the paint flow for a smooth and flawless finish. Don’t fret, I am here to guide you through it. In this article, I will share the tips and techniques you need to master the art of managing paint flow with your Wagner airless sprayer.

Understanding the controls of your sprayer is the first step towards achieving optimal paint flow. Adjusting the pressure setting and using the correct nozzle size are crucial factors in ensuring a consistent and desired result. If needed, thinning the paint can also help achieve a smoother flow. And let’s not forget about maintaining a consistent spray pattern by keeping the gun at the right distance from the surface.

So, if you’re ready to take your painting skills to the next level, let’s dive in and explore the world of controlling paint flow in your Wagner airless sprayer.

Key Takeaways

  • Regular cleaning and maintenance is important for enhancing sprayer performance, preventing clogs and buildup, extending sprayer lifespan, and ensuring smooth paint flow.
  • Flushing out remaining paint with water or a recommended cleaning solution, and thoroughly cleaning and inspecting each part, especially the nozzle, helps maintain optimal sprayer performance and prevent clogs.
  • Addressing clogged nozzle issues by cleaning it with warm water or cleaning solution, and removing dried paint or debris, ensures smooth paint flow and maintains optimal sprayer performance.
  • Achieving consistent spray pattern by checking paint viscosity, inspecting paint hose and filter for obstructions, and cleaning or replacing obstructed parts, enhances overall sprayer performance and ensures even paint flow.

Understand the Controls of Your Wagner Airless Sprayer

Get a feel for the controls of your Wagner airless sprayer, as if you were dancing with it, effortlessly maneuvering the sprayer to create beautifully even paint flow.

To start, adjust the pressure setting for optimal paint flow. The pressure control knob is typically located on the front of the sprayer, allowing you to increase or decrease the pressure as needed. This is crucial for achieving the desired thickness and coverage of your paint.

Additionally, selecting the right nozzle size is essential. Different nozzle sizes produce different spray patterns and flow rates. Use the nozzle selector to choose the appropriate size for your project.

Advertisement

By understanding and mastering these controls, you can ensure that paint flows smoothly and evenly, resulting in a flawless finish.

Now, let’s delve into how to adjust the pressure setting for optimal paint flow.

Adjust the Pressure Setting for Optimal Paint Flow

To achieve the best paint application, you’ll want to fine-tune the pressure setting on your Wagner airless sprayer. This will ensure a smooth and even distribution of paint. Adjusting the pressure is crucial for achieving consistent paint flow.

Start by referring to the manufacturer’s recommendations for the optimal pressure range based on the type of paint you are using. Once you have determined the recommended range, start with the lowest pressure setting and gradually increase it until you achieve the desired flow.

Keep in mind that different surfaces and paints may require different pressure settings. It’s important to test the spray pattern on a scrap surface before starting your project. By adjusting the pressure, you can achieve a consistent and even paint flow, resulting in a professional-looking finish.

Advertisement

Now, let’s move on to the next section about using the correct nozzle size for the type of paint you’re using.

Use the Correct Nozzle Size for the Type of Paint You’re Using

To achieve optimal results and a professional finish, it’s crucial to use the correct nozzle size for the type of paint you’re using. This ensures that the right amount of paint is released and the spray pattern is appropriate. Using the wrong nozzle size can result in uneven coverage and wasted paint. Before you begin, always check the manufacturer’s recommendations for the specific paint you’re using. Different paints have different viscosities, or thicknesses, and require specific nozzle sizes for proper atomization.

In addition to using the right nozzle size, regular nozzle maintenance is essential for consistent paint flow. Clogs or worn-out nozzles can disrupt the flow and affect the quality of the spray pattern. By regularly checking and cleaning your nozzle, you can ensure smoother flow and achieve better results. Remember, using the correct nozzle size and maintaining it properly are key factors in achieving a professional-looking finish.

Thin the Paint if Necessary for Smoother Flow

If you want a flawless finish, it’s essential to ensure the paint is properly thinned for a smoother application. Thin paint flows better through the Wagner airless sprayer, resulting in a more even and professional-looking coat. The thinning ratio will vary depending on the type of paint you’re using, so it’s crucial to consult the manufacturer’s instructions or test on a small area before thinning the entire batch. Here is a helpful table to guide you:

Type of Paint Thinning Ratio
Latex 10-20%
Oil-based 5-10%
Enamel 10-15%
Lacquer 20-30%
Stain 5-10%

If you don’t have the recommended thinning materials, there are alternative thinning methods you can try. These include using water for latex paint or mineral spirits for oil-based paints. Just be sure to gradually add the thinner and stir thoroughly until you achieve the desired consistency. By properly thinning the paint, you’ll have better control over the flow and achieve a smoother finish. To maintain a consistent spray pattern, keep the gun at the right distance from the surface.

Advertisement

Maintain a Consistent Spray Pattern by Keeping the Gun at the Right Distance from the Surface

Maintaining a consistent spray pattern is crucial for achieving a smooth and uniform finish. To do this, it is important to keep the gun at the right distance from the surface. Typically, the ideal distance is around 12 inches. This distance ensures that the paint is evenly distributed and reduces the risk of overspray or uneven coverage. Throughout the painting process, it is essential to maintain this distance, moving the gun parallel to the surface at a steady pace. By doing so, you can prevent variations in the spray pattern and ensure that the paint flows consistently. In the next section, we will discuss using smooth, even strokes to control the flow of paint, allowing for precise control and a professional result.

Use Smooth, Even Strokes to Control the Flow of Paint

Achieving a flawless finish is as simple as smoothly gliding the gun across the surface, using even strokes that effortlessly guide the paint onto the canvas. To control the flow of paint in a Wagner airless sprayer, it is crucial to use proper technique. Here are three key points to keep in mind:

  1. Maintain a consistent distance: Hold the gun approximately 12 inches from the surface. This distance ensures optimal paint flow and prevents overspray.

  2. Control the trigger: Squeeze the trigger gently to release a controlled amount of paint. Avoid excessive pressure, as it can lead to uneven application and wastage.

  3. Move steadily: Move the gun in a smooth, continuous motion, overlapping each stroke slightly. This technique promotes an even distribution of paint and minimizes streaks.

By using these techniques, you can effectively control the flow of paint and achieve a professional finish. Practice with test sprays to find the right technique that suits your project.

Transitioning to the subsequent section, it is important to master these techniques before moving on to more complex tasks.

Practice with Test Sprays to Find the Right Technique

To truly hone your skills, it’s imperative that you practice with test sprays to find the technique that best suits your project. Technique refinement is crucial in controlling the paint flow in a Wagner airless sprayer.

Advertisement

Start by adjusting the pressure settings on your sprayer to achieve the desired flow rate. If the paint is coming out too fast or too slow, troubleshoot by adjusting the pressure accordingly.

Pay attention to the distance between the sprayer and the surface being painted. Holding the sprayer too close can result in excessive paint application, while holding it too far can cause uneven coverage.

Practice different strokes and movements to achieve a smooth and even application. Remember to keep the sprayer parallel to the surface for consistent results.

By mastering these techniques and troubleshooting tips, you can achieve optimal paint control with your Wagner airless sprayer.

Transitioning into the next section, it’s important to clean and maintain your sprayer regularly for optimal performance.

Advertisement

Clean and Maintain Your Wagner Airless Sprayer Regularly for Optimal Performance

Regularly cleaning and maintaining your Wagner airless sprayer is essential for optimal performance. Start by flushing out any remaining paint with water or a recommended cleaning solution. Disassemble the sprayer and clean each part thoroughly using a soft brush or cloth. Pay special attention to the nozzle to prevent clogs or buildup. Reassemble the sprayer and run water through it to remove any residue. Inspect the sprayer for damage or wear, such as worn seals or cracked hoses, and replace any faulty parts. By regularly maintaining your sprayer, you can troubleshoot paint flow issues and ensure smooth operation in your next project.

Troubleshoot any Issues with Paint Flow to Ensure Smooth Operation

To troubleshoot any issues with paint flow and ensure smooth operation, follow these steps:

  1. Clogged nozzle:

    • Turn off the sprayer and remove the nozzle tip.
    • Clean the tip thoroughly with warm water or a cleaning solution to remove dried paint or debris.
  2. Inconsistent spray pattern:

    • Check the paint viscosity and adjust it as needed.
    • Inspect the paint hose and filter for any obstructions and clean or replace them if necessary.

By addressing these common problems, you can achieve a smooth and even paint flow for optimal performance. Remember to always follow safety precautions and guidelines when using your Wagner airless sprayer to ensure a safe and effective painting experience.

Follow Safety Precautions and Guidelines for Using Your Wagner Airless Sprayer Safely and Effectively

To ensure smooth operation of your Wagner airless sprayer, it is crucial to follow safety precautions and guidelines. When it comes to paint flow troubleshooting, there are common mistakes that can hinder the effectiveness of your sprayer.

By adhering to safety measures, you can minimize the risk of accidents and maximize the efficiency of your painting projects. Always wear appropriate protective gear, such as gloves and goggles, to safeguard yourself from potential hazards.

Additionally, make sure to properly maintain and clean your sprayer after each use to prevent clogs and ensure consistent paint flow. Familiarize yourself with the user manual and understand the recommended operating procedures.

Advertisement

By following these safety precautions and guidelines, you can use your Wagner airless sprayer safely and effectively, while avoiding common mistakes that may disrupt paint flow.

Frequently Asked Questions

Can I use any type of paint with my Wagner airless sprayer?

Yes, you can use various paint types with your Wagner airless sprayer. However, it is crucial to select the best paint brands that are compatible with the sprayer to ensure optimal performance and achieve professional results.

How often should I clean and maintain my Wagner airless sprayer?

I clean and maintain my Wagner airless sprayer regularly to ensure optimal performance. I recommend cleaning the sprayer after each use and performing routine maintenance checks every 50 hours of operation. Here are some maintenance tips for your Wagner airless sprayer.

What safety precautions should I take when using my Wagner airless sprayer?

To ensure safe and proper usage of your Wagner airless sprayer, it is crucial to take necessary safety precautions. Wear protective clothing, gloves, and eyewear. Keep a safe distance from the spray and avoid pointing it at anyone.

How do I troubleshoot issues with paint flow in my Wagner airless sprayer?

To troubleshoot issues with paint flow in a Wagner airless sprayer, start by checking the spray tip for clogs or damage. Adjust the pressure settings and ensure the paint is properly thinned. Also, examine the filter, suction tube, and gun for any obstructions.

Advertisement

What is the optimal distance to keep the gun from the surface when using a Wagner airless sprayer?

The optimal distance to keep the gun from the surface when using a Wagner airless sprayer depends on the paint application technique used. Generally, it is recommended to maintain a distance of 8-12 inches for a smooth and even coat.

Conclusion

In conclusion, mastering the art of controlling paint flow in your Wagner airless sprayer is crucial for achieving flawless results. By understanding the controls and adjusting the pressure setting, you can have better control over the amount of paint being sprayed. Using the correct nozzle size is also important as it affects the spray pattern and paint flow. If needed, thinning the paint can help achieve a smoother application.

Maintaining a consistent spray pattern is essential for even coverage. Practicing with test sprays before starting your project can help you get a feel for the sprayer and make any necessary adjustments. Regularly cleaning and maintaining your sprayer will keep it in optimal condition and ensure consistent performance.

Just like a skilled artist delicately manipulating their brush strokes, you too can create a visual masterpiece with your Wagner airless sprayer.

Advertisement

Continue Reading
Advertisement

Affiliate disclaimer

As an affiliate, we may earn a commission from qualifying purchases. We get commissions for purchases made through links on this website from Amazon and other third parties.

Advertisement

Trending