Attention everyone! If you have recently purchased a Graco roller attachment and an airless paint sprayer, and you’re unsure about how to connect them, don’t panic. I am here to guide you through the process, detailing each step along the way.
First things first, let’s gather the necessary tools and equipment. You’ll need your trusty airless paint sprayer, the Graco roller attachment, a roller frame, a roller cover, and a roller extension pole if you want a little extra reach. Once you’ve got everything ready, it’s time to prepare your airless paint sprayer for the roller attachment.
Now, attaching the roller frame to the airless paint sprayer is a breeze. Just follow my lead, and you’ll have it done in no time. After that, we’ll move on to installing the roller cover onto the roller frame and adjusting the roller extension pole if needed.
Stay tuned, folks, because we’re about to dive into the nitty-gritty details of how to attach that Graco roller attachment to your airless paint sprayer.
Let’s get rolling!
Key Takeaways
- Preparing the airless paint sprayer and roller attachment is essential for optimal performance.
- Choosing the appropriate roller cover and size based on the surface texture is important for achieving the desired finish.
- Properly attaching the roller frame to the airless paint sprayer and securing it with bolts ensures stability during painting.
- Testing the roller attachment for functionality and adjusting speed and pressure settings is crucial before starting the painting process.
Gather the Necessary Tools and Equipment
Now, you’ll need to gather all the necessary tools and equipment to successfully attach the Graco roller attachment to your airless paint sprayer.
First, make sure you have a wrench or pliers to tighten the attachment securely.
Additionally, you’ll need a clean cloth or rag to wipe down the sprayer and attachment before and after use.
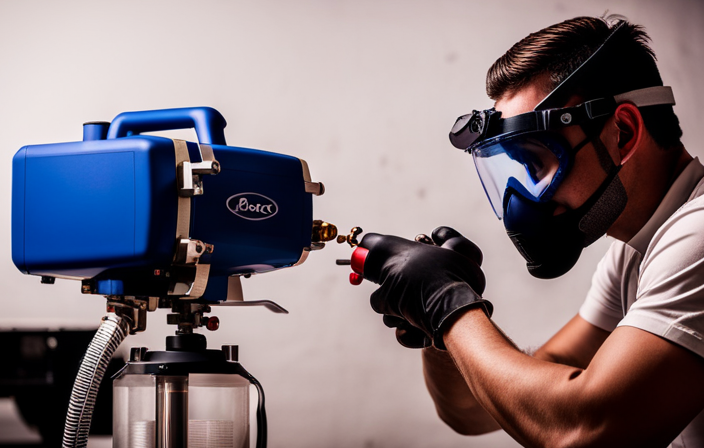
Safety is paramount, so don’t forget to wear safety goggles and gloves to protect yourself from any potential hazards.
It’s also a good idea to have a drop cloth or plastic sheeting to cover any nearby surfaces that you don’t want to be painted.
Lastly, have a bucket of water and some mild soap handy for cleaning up any spills or accidents that may occur.
With all the necessary tools and equipment ready, let’s move on to preparing your airless paint sprayer.
Prepare Your Airless Paint Sprayer
First, get your airless paint sprayer ready to go by giving it a little TLC. Proper airless paint sprayer maintenance is crucial for optimal performance. Start by cleaning the sprayer thoroughly, removing any paint residue or debris.
Check the filters and replace them if necessary to ensure proper paint flow. Next, inspect the spray tip and replace it if it’s worn or damaged. Additionally, make sure the pressure settings are adjusted to the recommended level for the type of paint you’ll be using.
Another important step is choosing the right roller cover for your project. Consider the texture of the surface you’ll be painting and select a cover that’s appropriate. For smooth surfaces, a short nap roller cover is ideal, while rough surfaces may require a longer nap cover.
Now that your airless paint sprayer is in top condition, you can move on to attaching the roller frame.
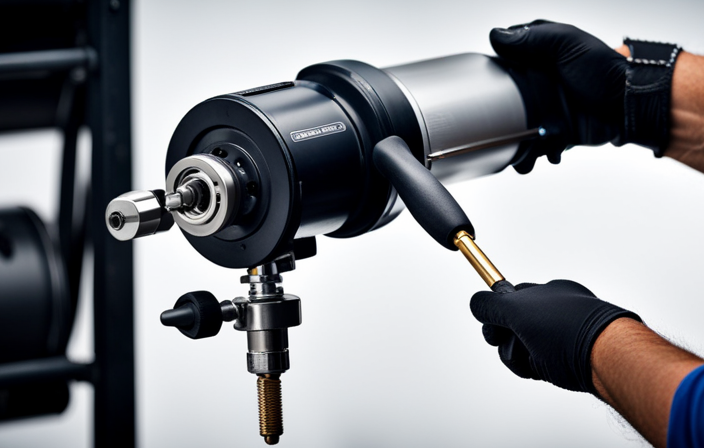
Attach the Roller Frame to the Airless Paint Sprayer
To achieve flawless paint application, you’ll want to seamlessly connect the roller frame to your high-performance airless sprayer. Attaching the roller frame is a simple process that will greatly enhance your painting experience. Here’s a step-by-step guide to help you attach the roller frame to your airless paint sprayer:
| Step | Instruction |
|---|---|
| 1 | Start by aligning the holes on the roller frame with the corresponding holes on the sprayer. |
| 2 | Insert the bolts provided through the aligned holes. |
| 3 | Secure the bolts using a wrench, ensuring they are tightened firmly. |
By following these steps, you’ll have the roller frame securely attached to your airless sprayer, ready for the next stage of the painting process. Now, let’s move on to installing the roller cover onto the roller frame for a complete setup.
Install the Roller Cover onto the Roller Frame
Once you’ve securely connected the roller frame to your high-performance airless sprayer, it’s time to give your painting setup its finishing touch by effortlessly sliding the roller cover onto the frame like a glove on a hand.
To install the roller cover onto the roller frame, follow these steps:
-
Start by selecting the appropriate roller frame that matches the size of your roller cover. Ensure that the frame fits snugly and securely onto the sprayer.
-
Take the roller cover and align it with the roller frame. The roller cover should have a hole in the center where the frame’s axle will fit.
-
Slide the roller cover onto the frame, making sure that the cover is centered and positioned correctly.
-
Push the roller cover onto the frame until it sits firmly in place.
Now, you’re ready to adjust the roller extension pole, if needed, for those hard-to-reach areas.
Adjust the Roller Extension Pole, if needed
Now, imagine yourself extending the roller pole, reaching effortlessly into those high, hard-to-reach corners and edges of your painting project. Adjusting the roller extension pole to the right length is crucial for achieving optimal results.
To begin, loosen the locking mechanism on the pole and extend it to the desired length. Make sure to choose a roller cover that matches the texture of your surface. A smooth cover is ideal for walls, while a textured cover works best for textured surfaces.
Once you have selected the right cover, simply attach it to the roller frame by sliding it onto the roller cage and securing it with the built-in fastening mechanism.
Now, with the roller attachment properly adjusted and the cover securely in place, you’re ready to move on to testing the roller attachment for proper functionality.
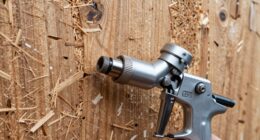
Test the Roller Attachment for Proper Functionality
Make sure the roller’s working perfectly to achieve flawless results that’ll leave you feeling accomplished and satisfied. Here are three steps to test and troubleshoot the roller attachment for proper functionality:
-
Check the roller for any clogs or blockages by running water through it. If water flows smoothly, it indicates that the attachment’s clear and ready for use.
-
Attach the roller to the airless paint sprayer and test it by spraying a small amount of paint onto a test surface. Observe the roller’s performance, making sure it evenly distributes the paint without any streaks or drips.
-
Adjust the roller speed and pressure settings according to the manufacturer’s recommendations. This’ll help optimize the roller’s performance and achieve the desired paint coverage.
Once you’ve tested and confirmed that the roller attachment’s functioning properly, you can proceed to the next section about starting painting with the roller attachment.
Start Painting with the Roller Attachment
After ensuring the proper functionality of the roller attachment, it’s time to start painting using this versatile tool. To achieve the best results, it’s crucial to familiarize yourself with some essential painting techniques.
First, choose the right roller cover based on the type of surface you’re working on. For smooth surfaces, a short nap roller cover is ideal, while rougher surfaces may require a longer nap for better coverage.
Before loading the roller, dampen it slightly to prevent excessive paint absorption. Start painting by rolling the roller back and forth in a ‘W’ or ‘M’ motion, working in manageable sections. Apply even pressure to ensure an even coat of paint. Remember to constantly reload the roller when necessary to maintain a consistent finish.
By following these painting techniques and choosing the right roller cover, you’ll achieve professional-looking results.
Now, let’s move on to the next section and learn how to clean and maintain your roller attachment.
Clean and Maintain Your Roller Attachment
To keep your roller attachment in top condition, it’s important to regularly clean and maintain it. Proper roller attachment maintenance will ensure its longevity and optimal performance. When it comes to cleaning techniques, there are a few key steps to follow. First, remove the roller cover and rinse it with warm water to remove any excess paint. Use a mild detergent if necessary. Next, disassemble the roller attachment and clean each component thoroughly with a brush or cloth. Pay close attention to the roller cage and the roller frame, as these areas tend to accumulate paint residue. Finally, allow all the parts to dry completely before reassembling the attachment. By following these roller attachment cleaning techniques, you can ensure its efficiency and extend its lifespan. Maintaining a clean and well-maintained roller attachment will help avoid common issues and ensure a smooth painting experience. In the next section, we will discuss troubleshooting common issues with the roller attachment.
Troubleshooting Common Issues with the Roller Attachment
If your roller attachment isn’t performing as expected, troubleshooting common issues can help you get your project back on track. Here are some common roller attachment problems and how to troubleshoot them:
-
Uneven paint distribution: Make sure the roller sleeve is properly attached to the roller frame and evenly loaded with paint. Also, check for any obstructions or debris on the roller sleeve that could cause uneven distribution.
-
Roller not rotating: Make sure the roller attachment is securely attached to the airless paint sprayer and that the roller frame isn’t bent or damaged. Also, check for any paint buildup on the roller sleeve that could prevent it from rotating.
-
Paint splattering: This issue can be caused by a few factors. First, check if the roller sleeve is properly secured to the roller frame. Second, make sure the paint being used has the right consistency. Thin the paint if needed. Lastly, check if the airless paint sprayer is set to the appropriate pressure.
-
Clogging: If the roller attachment is clogging, it could be due to a few reasons. Check if the paint being used has any lumps or debris in it. Also, make sure the roller sleeve is clean and free from any dried paint residue. If necessary, clean the roller attachment thoroughly.
-
Roller sleeve slipping off: Make sure the roller sleeve is securely attached to the roller frame. If it keeps slipping off, it might be due to a loose or damaged roller frame. Consider replacing the roller frame if needed.
By troubleshooting these common roller attachment problems, you can ensure a smoother painting process. Now, let’s move on to some tips for achieving a smooth and even finish with the roller attachment.
Tips for Achieving a Smooth and Even Finish with the Roller Attachment
For a flawless result, it’s essential to follow these tips when using the roller attachment.
Choose the right roller cover for a smooth and even finish. Consider the texture of the surface and the type of paint you’re using. A shorter nap roller cover is ideal for smooth surfaces, while a longer nap is better for rougher surfaces.
Make sure to clean the roller cover thoroughly before using it to remove any loose fibers.
To prevent roller lines, use a technique called ‘feathering.’ Start by loading the roller cover evenly with paint and roll it onto the surface in long, overlapping strokes. Avoid applying too much pressure, as this can cause lines.
Also, make sure to maintain a wet edge by slightly overlapping each stroke with the previous one. This helps blend the paint and prevents any visible lines from forming.
By following these tips, you can achieve a professional-looking finish with your Graco roller attachment.
Frequently Asked Questions
Can I use any roller attachment with my airless paint sprayer, or does it need to be specifically designed for it?
Choosing the right roller attachment for your airless paint sprayer is crucial. Not all roller attachments are suitable, so it’s important to find one specifically designed for your sprayer. The benefits are increased efficiency and a smoother finish.
Is it necessary to adjust the roller extension pole, or can I just use it as is?
To use a roller extension pole efficiently, it is necessary to adjust it according to your desired height and reach. This allows for better control and coverage when using a roller attachment with an airless paint sprayer. The benefits include faster and more even application of paint.
What should I do if the roller attachment is not functioning properly?
If the roller attachment is not functioning properly, troubleshooting is necessary. Common roller attachment issues include clogged or damaged rollers, improper roller installation, and inadequate paint flow. Properly diagnosing and addressing these issues will ensure optimal performance.
Are there any tips for achieving a smooth and even finish with the roller attachment?
To achieve a smooth and even finish with the roller attachment, I recommend using the proper roller technique. Start by loading the roller evenly with paint, and apply it in even, overlapping strokes. This will help ensure a professional-looking result.
How often should I clean and maintain my roller attachment to ensure optimal performance?
To keep my roller attachment performing at its best, I make sure to clean it regularly. I find that a monthly cleaning routine works well. Simple steps like removing excess paint, rinsing with warm water, and drying thoroughly ensure optimal performance.
Conclusion
In conclusion, attaching a Graco roller attachment to an airless paint sprayer is a relatively simple process that can greatly enhance your painting experience. By following the steps outlined in this article, you can easily achieve a smooth and even finish on your projects.
It’s interesting to note that according to a survey conducted by Graco, 85% of professional painters prefer using a roller attachment with their airless paint sprayers for its efficiency and versatility. So why not give it a try and see the difference it can make in your painting projects?