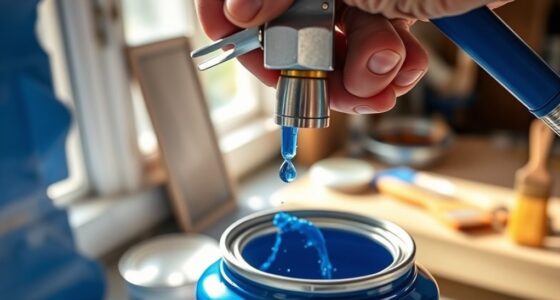

Imagine yourself in a room filled with vibrant colors, where each wall tells a unique story. Now, think about the power you have to create your own masterpiece. With the Graco airless paint sprayer, you can unleash your creativity and transform any space into a work of art.
But before you can dive into your painting journey, it’s important to know how to unplug this powerful tool. In this article, I will guide you through the steps to safely disconnect the Graco airless paint sprayer. We will explore everything from turning off the power source to cleaning the sprayer components.
So, grab your paintbrush and let’s embark on this artistic adventure together. Get ready to unplug and unlock your artistic potential!
Key Takeaways
- Handle the power cord carefully to avoid damage and store it in a safe and dry place.
- Following the instructions provided helps maintain the sprayer’s performance and prolong its lifespan.
- Seek professional help if you encounter difficulties, concerns, or unfamiliarity with electrical components and wiring.
- Calling experts ensures proper handling, prevents damage, and avoids potential risks during the unplugging process.

HomeRight Super Finish Max HVLP Paint Sprayer - 450 Watts, Model# C800971.M
PAINT SPRAYER FOR COUNTLESS DIY PROJECTS: The HomeRight Super Finish Max paint sprayer offers the ultimate DIYing experience....
As an affiliate, we earn on qualifying purchases.
Turn off the Power Source
To turn off the power source, simply flip the switch to the off position and watch as the Graco airless paint sprayer loses its electric energy. Before doing this, it’s important to take some safety precautions.
Make sure you’re wearing protective goggles and gloves to avoid any potential accidents. Additionally, make sure the power cord is disconnected from the electrical outlet to eliminate any risk of electrical shock.
If the switch doesn’t turn off the power, you may need to troubleshoot the issue further. Check if the power cord is damaged or if there are any loose connections.
Once the power source is safely turned off, you can proceed to disconnect the spray gun from the hose to continue the unplugging process.

VEVOR 750W Stand Airless Paint Sprayer, 3000PSI High Efficiency Electric Airless Sprayer, Fine and Even Painting Effect, Handheld Paint Sprayers for Home Interior and Exterior Furniture and Fences
Efficient Painting: Our stand airless paint sprayer is equipped with a powerful 750W motor, capable of delivering up...
As an affiliate, we earn on qualifying purchases.
Disconnect the Spray Gun from the Hose
First, it’s time to detach the spray gun from the hose and reveal the next step in achieving a flawless finish.
To disconnect the spray gun, locate the quick-release mechanism on the handle of the gun. Press and hold the release button while pulling the hose connector away from the gun. This will release the spray gun from the hose.
Once detached, it’s important to release any pressure that may still be in the system. To do this, point the spray gun into a waste container and pull the trigger until all pressure is released. This step is crucial for the safety of the user and proper storage of the paint sprayer.
Now that the spray gun is disconnected and the pressure has been released, we can move on to the next section about releasing pressure from the system.

Graco Magnum 257025 Project Painter Plus Paint Sprayer
Ideal for projects up to 5 gallons in size, allowing you to tackle a range of projects every...
As an affiliate, we earn on qualifying purchases.
Release Pressure from the System
Now that the spray gun is disconnected and I’ve released any remaining pressure, it’s time to ensure a safe and clean transition to the next step.
-
Releasing pressure:
-
Activate the trigger lock to prevent accidental spraying.
-
Turn the pressure control knob counterclockwise to its lowest setting.
-
Point the spray gun into a waste container and pull the trigger to release any pressure.
-
Safety precautions:
-
Wear safety goggles and gloves to protect against paint splatters and chemical exposure.
-
Ensure proper ventilation in the work area to avoid inhaling fumes.
-
Keep the spray gun away from flammable materials or open flames.
By following these steps and taking the necessary safety precautions, I can now move on to removing the spray tip guard. It’s an essential part of the process to ensure smooth and efficient paint application.

Graco Magnum 262800 X5 Stand Airless Paint Sprayer, Blue
Just right for DIY Homeowners and Remodelers looking for more power and mobility when tackling larger projects
As an affiliate, we earn on qualifying purchases.
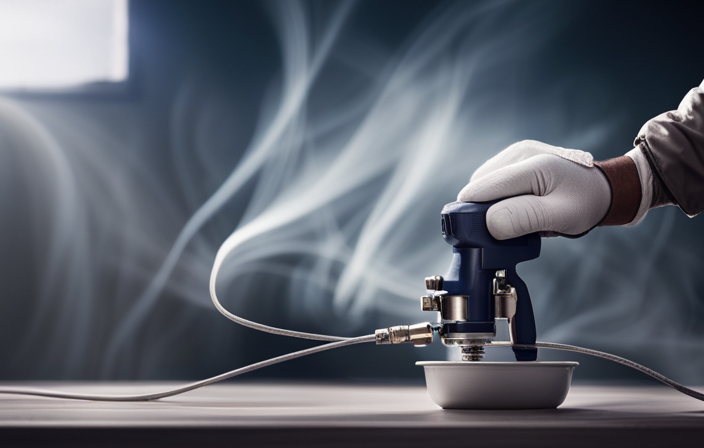
Remove the Spray Tip Guard
After safely releasing the pressure from the system, it’s time to unlock the potential of my paint application by removing the spray tip guard.
To remove the spray tip guard, I first ensure that the sprayer is turned off and disconnected from the power source. Then, I grip the guard firmly and twist it counterclockwise until it comes off. Once the guard is removed, I inspect it for any clogs or debris and clean it thoroughly using the appropriate cleaning methods. It’s important to follow safety precautions during this process, such as wearing protective gloves and eyewear.
After cleaning the guard, I set it aside and move on to the next step of disconnecting the hose from the pump, which will be discussed in the subsequent section.
Disconnect the Hose from the Pump
To continue the process, it’s time to detach the hose from the pump and move on to the next step. Before disconnecting the hose, it’s important to ensure that the paint sprayer is turned off and the pressure is relieved.
Start by turning off the power switch and releasing any remaining pressure by triggering the gun. Once that’s done, locate the hose connection point on the pump. Usually, it’s secured with a hose clamp or a quick connect fitting.
Loosen the clamp or disconnect the fitting to release the hose. Be careful not to spill any paint or cleaning solution during this step. Cleaning the pump regularly can prevent clogs and other issues. Troubleshooting common issues with the pump can include checking for leaks or blockages.
Now, let’s move on to the next section and learn how to remove the suction tube from the paint container.
Remove the Suction Tube from the Paint Container
Before we get into the nitty-gritty, let’s tackle the task of yanking that suction tube out of the paint container like a pro.
To remove the suction tube from the paint container, follow these steps:
- Ensure the sprayer is turned off and disconnected from the power source.
- Unscrew the container lid and carefully lift it off.
- Locate the suction tube, which is usually attached to the lid, and gently pull it out of the container.
- Inspect the suction tube for any paint buildup or debris.
- If there are clogs, clean the suction tube thoroughly using a brush or pipe cleaner.
Once you have successfully removed the suction tube and cleaned it, you can move on to cleaning the rest of the sprayer components.
Clean the Sprayer Components
Once you’ve successfully removed and inspected the suction tube, it’s time to thoroughly clean the various components of the sprayer. Cleaning techniques are crucial for maintaining the optimal performance of your Graco airless paint sprayer.
Start by disassembling the spray gun, removing the nozzle, and soaking it in a cleaning solution. Use a small brush to remove any dried paint or debris from the gun’s internal parts.
Next, clean the filter and replace it if necessary. Wipe down the sprayer housing and motor with a damp cloth to remove any paint splatters or dirt.
Finally, flush out the paint hose with water or a cleaning solution to ensure there is no leftover paint residue.
By following these maintenance tips, you’ll prolong the lifespan of your sprayer and keep it in excellent working condition.
To store the sprayer properly, refer to the subsequent section.
Store the Sprayer Properly
Make sure you find a clean, dry, and secure location to store your sprayer when it’s not in use. Proper storage is essential to maintain the longevity and functionality of your Graco airless paint sprayer. Here are some maintenance tips to ensure proper storage:
- Clean the sprayer thoroughly after each use to remove any paint residue.
- Store the sprayer in a cool and dry place to prevent moisture from damaging the internal components.
- Use the original packaging or a sturdy box to protect the sprayer from any accidental damage.
- Keep the sprayer away from direct sunlight or extreme temperature changes, as it can affect its performance.
- Check the sprayer regularly for any signs of wear or damage and address them immediately.
By following these proper storage and maintenance tips, you can ensure that your Graco airless paint sprayer remains in optimal condition. To continue caring for your sprayer, it’s important to follow the manufacturer’s instructions for usage and maintenance.
Follow Manufacturer’s Instructions
It’s crucial to follow the manufacturer’s instructions when using and maintaining your Graco airless paint sprayer. The manufacturer’s instructions provide important guidance on how to properly unplug the sprayer, ensuring safety and preventing damage to the equipment.
Before unplugging the sprayer, it is important to turn off the power switch and release any pressure in the system by triggering the gun into a waste container. Then, locate the power cord and gently pull it out from the power source, avoiding any excessive force or twisting.
Always store the power cord in a safe and dry place to prevent damage. Following these instructions will help maintain the sprayer’s performance and prolong its lifespan.
If you encounter any difficulties or have concerns, it’s recommended to seek professional help to ensure the proper handling of the sprayer.
Seek Professional Help if Needed
If you ever need assistance, don’t hesitate to reach out to a professional for help with your sprayer. Seeking professional help is crucial in certain situations to ensure safety and prevent damage.
When should I seek professional help? Here are some instances where it’s recommended to call in the experts:
-
If you’re unsure about the specific steps required to unplug your Graco airless paint sprayer.
-
If you encounter any issues or complications while attempting to unplug the sprayer.
-
If you’re not familiar with the electrical components and wiring of the sprayer.
-
If you’re concerned about your own safety or the safety of others when handling electrical equipment.
Remember, it’s always better to be safe than sorry. When in doubt, consult a professional to avoid any potential risks. Is it safe to unplug a paint sprayer on my own? It’s recommended to seek professional help if you’re unsure or uncomfortable with the process.
Frequently Asked Questions
How do I properly clean the suction tube from the paint container?
To properly clean the suction tube, first, remove it from the paint container. Then, rinse it with water to remove any remaining paint. Use a brush or cloth to scrub off stubborn residue. Finally, let it dry before reattaching it.
What precautions should I take when storing the sprayer?
To prevent damage when storing the sprayer, I take certain precautions. I make sure to clean the sprayer thoroughly, remove any leftover paint, and store it in a cool, dry place. I also protect the sprayer from dust and debris by using a cover.
Can I use the same spray tip guard for multiple paint projects?
Yes, you can use the same spray tip guard for multiple paint projects. However, it’s important to regularly clean and maintain the spray tip to ensure optimal performance. Additionally, choosing the right spray tip size for different projects is crucial for achieving desired results.
What should I do if I accidentally disconnect the hose from the pump while the sprayer is still on?
If I accidentally disconnect the hose from the pump while the sprayer is still on, immediately turn off the sprayer and release any pressure. Follow pump safety precautions, such as wearing protective gear, before reconnecting the hose.
Are there any specific cleaning agents or solutions that should be used to clean the sprayer components?
When cleaning the components of a Graco airless paint sprayer, it is important to use appropriate cleaning agents. Alternatives such as mild soapy water or a mixture of vinegar and water can be effective in removing paint residue and maintaining the sprayer’s performance.
Conclusion
In conclusion, unplugging a Graco airless paint sprayer is a simple process that requires following a few steps. By turning off the power source and disconnecting the spray gun from the hose, you can ensure a safe and efficient operation. Remember to release pressure from the system, remove the spray tip guard, disconnect the hose from the pump, and clean all the sprayer components before storing it properly. Always refer to the manufacturer’s instructions for specific guidelines and seek professional help if needed.
So, don’t let the paint dry on this task, unplug your sprayer with ease!