Did you know that by properly cleaning your airless paint sprayer, you could extend its lifespan by up to 50%? Regular maintenance and cleaning are essential in order to keep your paint sprayer in top condition and ensure a flawless paint job each time.
In this article, I’ll guide you through the step-by-step process of cleaning an airless paint sprayer, providing you with detailed instructions and useful tips along the way. From gathering the necessary cleaning supplies to disposing of paint waste properly, I’ll cover it all.
By following these instructions and incorporating regular cleaning into your maintenance routine, you’ll not only prolong the life of your paint sprayer but also save time and money in the long run. So, let’s dive in and learn how to clean an airless paint sprayer like a pro.
Key Takeaways
- Disconnect and relieve pressure before cleaning
- Clean the spray tip, guard, and filter with warm soapy water
- Remove dried paint and debris from the sprayer
- Reassemble and test the sprayer for proper functioning
Gather the Necessary Cleaning Supplies
Now that you’ve got everything you need, it’s time to gather all the necessary cleaning supplies to make your airless paint sprayer sparkle like new again!
When it comes to cleaning techniques for an airless paint sprayer, there are a few best practices to keep in mind. First, you’ll need a bucket or container to hold your cleaning solution. It’s recommended to use a mixture of warm water and a cleaning agent specifically designed for paint sprayers.
Additionally, you’ll need a cleaning brush with stiff bristles to scrub away any dried paint or debris. Don’t forget to have some clean rags or towels on hand to wipe down the sprayer after cleaning.
Lastly, make sure to have a pair of gloves and safety glasses for protection.
Now, let’s move on to disconnecting and emptying the paint sprayer.
Disconnect and Empty the Paint Sprayer
To properly disconnect and empty the airless paint sprayer, follow these steps:
- Turn off the sprayer and unplug it from the power source.
- Release pressure by activating the trigger until the sprayer is completely depressurized.
- Remove the paint container or reservoir from the sprayer and pour any leftover paint into a designated waste container.
- Use a clean cloth or paper towel to wipe out any excess paint from the container and the sprayer’s intake tube.
- Flush out the sprayer by running a cleaning solution through it, following the manufacturer’s instructions.
By following these cleaning techniques, you can troubleshoot common issues and ensure that your airless paint sprayer is ready for the next project.
Next, we will discuss how to remove and clean the spray gun and nozzles.
Remove and Clean the Spray Gun and Nozzles
To ensure optimal performance, start by removing and cleaning the spray gun and nozzles. This will help maintain a smooth and efficient painting process.
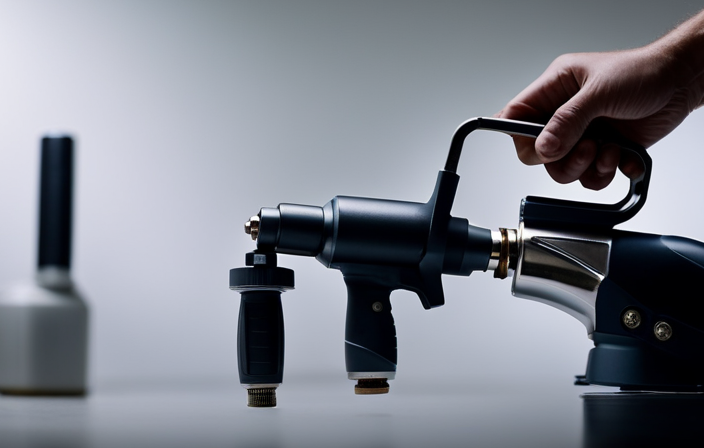
Begin by unscrewing the nozzle from the spray gun using a wrench or pliers. Inspect the nozzle for any clogs or debris, and use a small brush or toothpick to remove any obstructions.
Next, detach the spray gun from the paint sprayer and disassemble it by removing the handle, trigger, and filter. Clean each component thoroughly with warm soapy water, making sure to remove any paint residue. Rinse all parts with clean water and dry them completely before reassembling the spray gun.
For troubleshooting tips, check for worn or damaged parts and replace them if necessary.
Transitioning into the next section, flushing the paint sprayer with water or solvent is the next step in the cleaning process.
Flush the Paint Sprayer with Water or Solvent
Begin by thoroughly flushing the paint sprayer with either water or solvent, ensuring a pristine and efficient painting experience.
Cleaning techniques for airless paint sprayers involve removing any remaining paint from the system to prevent clogging and maintain optimal performance.
Flushing with water or solvent effectively removes residual paint, ensuring that the sprayer is clean and ready for future use. Regular cleaning offers numerous benefits, including preventing paint buildup that can affect spray patterns and result in uneven coating.
Additionally, it helps extend the lifespan of the sprayer by preventing corrosion and damage caused by dried paint.
Once the sprayer has been flushed, it is essential to proceed to the next step, which involves cleaning the pump and filters, ensuring a well-maintained and reliable paint sprayer for all your future projects.
Clean the Pump and Filters
Now it’s time to give the pump and filters a thorough cleaning, ensuring a well-maintained and reliable sprayer for all your future painting projects. To clean the pump and filters of your airless paint sprayer, follow these cleaning techniques and troubleshooting tips:
-
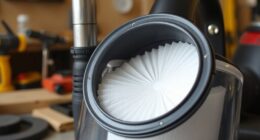
Remove the filters: Start by removing the filters from the sprayer. Rinse them with clean water or solvent, depending on the type of paint used. Ensure all the paint residue is completely removed.
-
Clean the pump: Use a brush or soft cloth to wipe away any paint residue on the pump. Pay special attention to the intake valve and piston rod. If necessary, use a toothbrush to reach into small crevices.
-
Check the pressure relief valve: Inspect the pressure relief valve for any clogs or debris. Clean it thoroughly to ensure proper functioning.
With the pump and filters cleaned, it’s time to move on to the next section about checking and cleaning the suction tube, ensuring optimal performance for your airless paint sprayer.
Check and Clean the Suction Tube
Make sure you inspect and maintain the suction tube to ensure optimal performance of your trusty painting tool. Cleaning techniques and troubleshooting tips for the suction tube are crucial for a smooth painting experience. To clean the suction tube, first, detach it from the pump and remove any leftover paint or debris. Next, use a cleaning solution and a brush to scrub the inside of the tube thoroughly. Rinse it with water until all traces of paint and residue are gone. Finally, reattach the suction tube to the pump, ensuring a secure connection.
By following these cleaning techniques and troubleshooting tips for the suction tube, you can prevent clogs and ensure that paint flows smoothly through your airless paint sprayer. After cleaning the suction tube, it is important to move on to inspecting and cleaning the pressure relief valve for further maintenance of your paint sprayer.
Inspect and Clean the Pressure Relief Valve
To ensure optimal performance of your trusty painting tool, it’s important to inspect and clean the pressure relief valve. This valve helps maintain the proper pressure in the system and acts as a safety net, releasing excess pressure to prevent paint spills or mishaps.
To begin, locate the pressure relief valve on your airless paint sprayer, typically found near the pump. Carefully remove the valve and inspect it for any signs of damage or debris.
Clean the valve using a soft brush and mild detergent, making sure to remove any accumulated dirt or paint residue. Once cleaned, reassemble the valve and test the paint sprayer to ensure it is functioning properly.
Now, let’s move on to the next step of reassembling and testing the paint sprayer to complete the cleaning process.
Reassemble and Test the Paint Sprayer
Once you’ve successfully inspected and cleaned the pressure relief valve, it’s time to reassemble and put your paint sprayer to the test. To ensure proper reassembly, follow these techniques:
-
Start by carefully attaching the pressure relief valve back into its original position, making sure it is securely tightened.
-
Reconnect the paint hose to the sprayer, ensuring a tight seal to prevent any leaks during operation.
-
Double-check all other connections, such as the gun trigger and nozzle, to ensure they are securely attached and aligned.
Troubleshooting common issues during reassembly:
-
If you encounter any difficulty, refer to the user manual for specific instructions or troubleshooting steps.
-
Check for any damaged or worn-out parts that may need replacement.
-
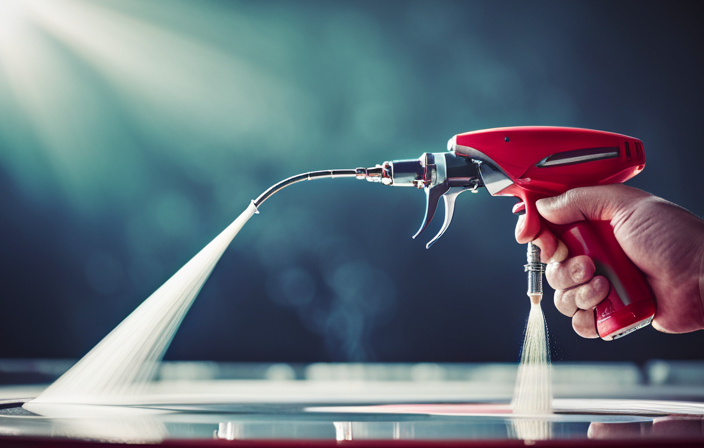
Test the sprayer by filling it with water and spraying it on a test surface to ensure proper functionality.
Now that your paint sprayer is reassembled and tested, it’s crucial to dispose of paint waste properly to prevent any environmental harm.
Dispose of Paint Waste Properly
Ensure that you properly dispose of any leftover paint to protect the environment and prevent harm. Proper paint waste disposal is crucial for maintaining a clean and sustainable working environment.
To effectively manage paint waste, follow these paint waste management guidelines:
- Collect any excess paint into a designated container, ensuring it is tightly sealed to prevent spills or leaks.
- Check with your local waste management facility to determine the appropriate method of disposal. Some areas may allow you to dispose of small amounts of paint in the regular trash, while others may require you to bring it to a hazardous waste disposal site.
By following proper paint waste disposal practices, you can help reduce the impact on the environment and keep your airless paint sprayer in optimal condition.
Moving on to regular maintenance and cleaning tips, it is important to…
Regular Maintenance and Cleaning Tips
Keeping your equipment in top shape is essential for optimal performance and longevity, so proper maintenance and regular cleaning are key. When it comes to cleaning an airless paint sprayer, there are a few techniques that can help you get the job done effectively.
Start by disconnecting the sprayer from the power source and relieving any pressure in the system. Next, remove the spray tip, guard, and filter and clean them thoroughly with warm soapy water. Use a small brush to remove any dried paint or debris from the sprayer’s components.
Once everything is clean, reassemble the sprayer and test it to ensure it’s working properly. If you encounter any issues, troubleshooting tips such as checking for clogs or leaks can help you identify and resolve the problem.
Regular maintenance and cleaning will keep your airless paint sprayer in great condition and ready for your next project.
Frequently Asked Questions
How often should I clean my airless paint sprayer?
I should clean my airless paint sprayer after every use to ensure effective operation and prevent clogs. This involves flushing the system with a cleaning solution and thoroughly cleaning the filters, hoses, and nozzle.
Can I use any type of solvent to flush the paint sprayer?
I wouldn’t recommend using just any solvent to flush the paint sprayer as it can damage the equipment. Instead, opt for solvents like mineral spirits or water-based solutions. Alternatively, you can also try alternative cleaning methods such as using warm soapy water or specialized cleaning agents.
Is it necessary to clean the suction tube every time I clean the paint sprayer?
It is recommended to clean the suction tube every time the airless paint sprayer is cleaned. This ensures proper paint flow and prevents clogs. Cleaning frequency and proper cleaning techniques are crucial for maintaining optimal performance.
How do I know if the pressure relief valve needs cleaning?
To determine if the pressure relief valve of an airless paint sprayer needs cleaning, inspect for reduced pressure output, inconsistent spray patterns, or leaking. Cleaning involves removing, inspecting, and clearing any debris or blockage from the valve.
Are there any additional safety precautions I should take when cleaning the paint sprayer?
When cleaning an airless paint sprayer, it is important to take additional safety measures. This includes wearing protective goggles and gloves, ensuring proper ventilation, and following the manufacturer’s instructions for proper cleaning techniques.
Conclusion
In conclusion, cleaning an airless paint sprayer is a crucial step in maintaining its performance and durability. By following the steps outlined in this article, you can ensure that your paint sprayer remains in optimal condition for future use.
Remember to gather the necessary cleaning supplies.
Disconnect and empty the sprayer.
Clean the spray gun and nozzles.
Flush the sprayer with water or solvent.
Clean the pump and filters.
Inspect and clean the pressure relief valve.
Reassemble and test the sprayer.
Dispose of paint waste properly.
Regular maintenance and cleaning will keep your sprayer working efficiently. So, next time you need to clean your airless paint sprayer, ask yourself: have I followed all the necessary steps to ensure its longevity?