
Have you ever thought about how much paint thinning is needed for an airless sprayer? Let me assure you, it’s not as difficult as it may seem. In fact, with the right knowledge and techniques, you can achieve a flawless finish on your walls in no time.
Thinning house paint is crucial when using an airless sprayer, as it ensures proper flow and coverage. But don’t worry, I’m here to guide you through the process step by step. From determining the right consistency to troubleshooting common issues, I’ll provide you with all the information you need to achieve optimal results.
So, let’s dive in and discover the secrets to thinning house paint for airless sprayers.
Key Takeaways
- Follow the manufacturer’s instructions for thinning ratios when using an airless sprayer
- Use high-quality paint brands such as Sherwin-Williams, Behr, and Benjamin Moore, which are formulated for airless spraying
- Thinning techniques may vary based on the type of paint and sprayer being used
- Using too much or too little paint can result in an uneven finish or clogging of the sprayer

NoCry Clear Safety Glasses for Men and Women with Anti-Fog and Scratch Resistant Wrap Around Lenses, Adjustable Temples and Nose Pads — ANSI Z87 Certified Protective Eyewear with 100% UV Shielding
- Durable Polycarbonate Frame: Wraparound design for full protection
- Lightweight & Comfortable Fit: Adjustable arms and soft nose pads
- Anti-Fog & Scratch Resistant Lenses: Ultrashield coating for clarity and durability
As an affiliate, we earn on qualifying purchases.
Understanding Airless Sprayers and Their Benefits
Airless sprayers, with their ability to evenly distribute paint and reduce overspray, are a contractor’s go-to choice for efficient and high-quality painting projects. Understanding airless sprayers is essential for choosing the right type for your project.
There are different models available, including handheld and professional-grade sprayers, each offering unique features and capabilities. Before starting your project, it’s important to troubleshoot common issues that may arise with airless sprayers, such as clogging or uneven spray patterns. Regular maintenance is also crucial to ensure optimal performance and longevity of your sprayer. This includes cleaning the filters, checking for worn-out parts, and lubricating moving components.
Now, let’s delve into the importance of thinning house paint for airless sprayers, which ensures smooth application and prevents clogging.
Importance of Thinning House Paint for Airless Sprayers
To ensure optimal performance, it’s crucial that you thin the paint properly before using it with your sprayer. Did you know that using the right amount of thinner can increase the coverage of your paint by up to 30%?
Here are four best practices for thinning house paint when using airless sprayers:
-
Follow the manufacturer’s recommendations: Different paint brands and sprayers may have specific guidelines for thinning ratios. It’s important to follow these instructions to achieve the desired results.
-
Gradual thinning: It’s best to thin the paint gradually by adding small amounts of thinner at a time. This allows you to control the consistency and avoid over-thinning, which can negatively affect the paint’s performance.
-
Test spray: Before starting your project, always conduct a test spray on a small area to ensure the paint flows smoothly and evenly. Adjust the thinning ratio if necessary.
-
Strain the paint: To prevent clogs and ensure a smooth finish, strain the paint before pouring it into the sprayer’s container.
By following these best practices for thinning house paint, you can achieve optimal results with your airless sprayer. Now, let’s explore the types of paint that require thinning.
Types of Paint that Require Thinning
When using your sprayer, you’ll want to know which types of paint require thinning so you can achieve the best results. Some types of paint that typically require thinning include oil-based paints, varnishes, and certain specialty coatings.
Thinning these types of paint helps to improve their flow and atomization, resulting in a smoother and more even finish. Thinning also allows the paint to be sprayed at a lower pressure, reducing overspray and minimizing the risk of clogging the sprayer.
Additionally, thinning can help the paint adhere better to the surface and prevent streaks or brush marks. Determining the right consistency for thinning is crucial for optimal performance, and we’ll explore this further in the next section about determining the right consistency for thinning.
Determining the Right Consistency for Thinning
Achieving the perfect consistency for thinning will ensure that your paint flows smoothly and effortlessly through your sprayer, resulting in a flawless finish that will leave you feeling satisfied and proud of your work.
When determining the right consistency for thinning, there are a few key techniques to keep in mind. First, consider the type of paint you’re using. Different types of paint may require different levels of thinning.
Secondly, pay attention to the manufacturer’s instructions. They often provide specific guidelines for thinning their paint products. By following these instructions, you can achieve optimal results.
Transitioning into the next section, let’s now delve into a step-by-step guide to thinning house paint.
Step-by-Step Guide to Thinning House Paint
Get ready to embark on a hilarious journey of transforming your goopy, gloppy house paint into a silky smooth masterpiece with this step-by-step guide to thinning that colorful goo.
Thinning house paint is a step-by-step process that can greatly benefit your painting project. The first step is to determine the type of paint you’re using and its recommended thinning ratio. Once you have that information, you can proceed to mix the paint and thinner in a separate container. Stir the mixture thoroughly until it reaches a smooth and even consistency.
Thinning paint has several benefits, including easier application, improved coverage, and reduced chances of brush or roller marks. With properly thinned paint, you can achieve a professional-looking finish.
Now, let’s dive into the next section about tools and techniques for effective thinning.
Tools and Techniques for Effective Thinning
Let’s explore the tools and techniques that’ll help you effectively thin your house paint for a smooth and professional finish.
When it comes to tools and equipment, an airless sprayer is the best choice for achieving optimal results with thinned paint. This high-pressure system allows for even distribution and a flawless application.
As for thinning agents, it’s important to choose the right one for your paint type. Water is a common and cost-effective option, but for oil-based paints, mineral spirits or paint thinner are recommended.
When using an airless sprayer, it’s crucial to follow the manufacturer’s instructions for the correct ratio of paint to thinning agent. This’ll ensure proper atomization and prevent clogging.
With the right tools and thinning agents, you’ll be well-equipped to achieve a professional-looking finish.
Now let’s move on to some tips for achieving optimal results with thinned paint.
Tips for Achieving Optimal Results with Thinned Paint
When it comes to achieving optimal results with thinned paint, there are a few tips that I’ve found helpful.
First and foremost, it’s important to use the correct paint thinner recommended by the manufacturer for your specific paint. This’ll ensure proper consistency and prevent clogs in the sprayer.
Additionally, taking the time to strain the thinned paint before pouring it into the sprayer can further prevent clogs and ensure a smooth finish.
Another tip to keep in mind is to start with a lower pressure setting on the sprayer and gradually increase it if needed. This’ll help avoid overspray and give you more control over the application.
Now that we’ve covered achieving optimal results, let’s move on to discussing the safety precautions when thinning house paint.
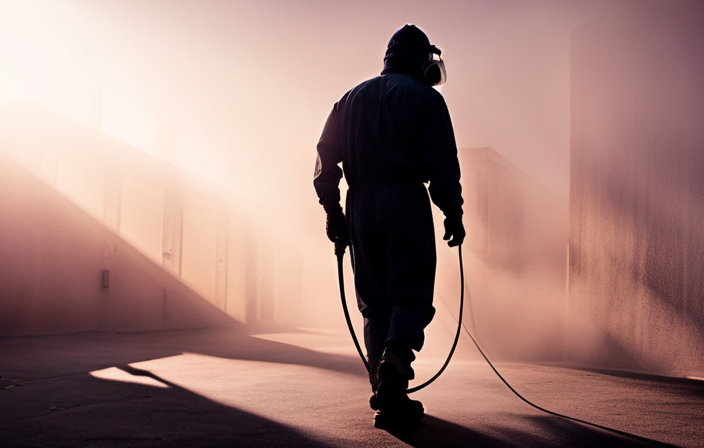
Safety Precautions when Thinning House Paint
It’s essential to prioritize safety when thinning paint for your home, as improper handling can lead to hazardous fumes and potential health risks. Did you know that according to a recent study, overexposure to volatile organic compounds (VOCs) found in paint thinner can cause respiratory issues and even contribute to long-term health problems? To ensure your safety while thinning house paint, follow these safety measures and proper ventilation practices:
| Safety Measures | Proper Ventilation |
|---|---|
| Wear protective clothing, gloves, and goggles | Open windows and doors to allow fresh air circulation |
| Work in a well-ventilated area or use exhaust fans | Use a respirator mask if necessary |
| Avoid smoking or using open flames near the paint thinner | Use a portable air cleaner for additional air purification |
| Store paint thinner in a cool, dry place away from heat sources | Clean up spills promptly and dispose of used paint thinner properly |
By taking these safety precautions and ensuring proper ventilation, you can minimize the risks associated with thinning house paint. Now, let’s move on to troubleshooting common issues with thinned paint.
Troubleshooting Common Issues with Thinned Paint
Are you experiencing any issues with your thinned paint? Troubleshooting paint clogs and avoiding overspray issues are common problems that can arise when using an airless sprayer. Here are some tips to help you address these issues:
-
Troubleshooting paint clogs:
-
Check the viscosity of the paint and adjust if necessary.
-
Clean the spray tip regularly to prevent buildup.
-
Use a larger tip size if clogging persists.
-
Ensure the filter is clean and properly installed.
-
Avoiding overspray issues:
-
Adjust the pressure settings on the sprayer to control the flow.
-
Use masking tape and drop cloths to protect surrounding areas.
-
Maintain a consistent distance from the surface being painted.
-
Practice proper spraying techniques to minimize overspray.
By following these troubleshooting tips, you can overcome common issues with thinned paint and achieve better results with your airless sprayer.
In the next section, we will discuss some final thoughts on thinning house paint for airless sprayers.
Final Thoughts on Thinning House Paint for Airless Sprayers
To achieve optimal results with an airless sprayer, remember to make mindful adjustments and adhere to proper spraying techniques when thinning your home’s paint. Thinning techniques can vary depending on the type of paint and sprayer you are using. It is important to follow the manufacturer’s instructions for thinning ratios, as using too much or too little can result in an uneven finish or clogging of the sprayer. When selecting a paint brand, it is recommended to choose a high-quality brand that is specifically formulated for airless spraying. Some of the best paint brands for airless sprayers include Sherwin-Williams, Behr, and Benjamin Moore. These brands offer a wide range of colors and finishes, and their paints are known for their durability and coverage.
Frequently Asked Questions
Can I use any type of paint with an airless sprayer?
Yes, you can use a variety of paint types with an airless sprayer. However, it’s important to achieve the right paint consistency for optimal spraying. Follow manufacturer guidelines and consider viscosity, additives, and thinning techniques.
What is the recommended consistency for thinned house paint when using an airless sprayer?
To achieve optimal results with an airless sprayer, it is recommended to thin house paint to a viscosity similar to that of whole milk. Some popular paint brands suitable for airless sprayers include Sherwin-Williams, Behr, and Benjamin Moore.
How long does it take for thinned paint to dry when applied with an airless sprayer?
Thinned paint applied with an airless sprayer typically dries within a few hours, depending on factors like temperature and humidity. To achieve a smooth finish, properly clean and maintain the sprayer, and follow tips for even application.
Are there any safety precautions I should take when thinning house paint for an airless sprayer?
When thinning house paint for an airless sprayer, it’s important to prioritize safety precautions. Wear protective clothing, gloves, and goggles. Follow manufacturer instructions for thinning techniques and ensure proper ventilation in your work area.
What are some common issues that can occur when using thinned paint with an airless sprayer, and how can I troubleshoot them?
Common issues with thinned paint in an airless sprayer include clogging, uneven coverage, and overspray. To troubleshoot, check paint viscosity, clean filters regularly, adjust pressure settings, and test spray patterns. Practice and experimentation will help achieve optimal consistency.
Conclusion
In conclusion, thinning house paint for airless sprayers is like adding wings to a bird, allowing it to soar effortlessly in the sky. It’s a crucial step that ensures smooth and even application, giving your walls a flawless finish. By following the step-by-step guide and taking necessary safety precautions, you can achieve optimal results and overcome any troubleshooting issues.
So, grab your sprayer, mix in the right consistency, and watch as your walls transform into a masterpiece with the magic of thinned paint.