Connect with us

Airless Paint Sprayers FAQs

How Much Do You Thin Latex Paint To Go Through A Airless Sprayer

Published

on

An image showcasing a professional painter with an airless sprayer, expertly thinning latex paint

When you use an airless sprayer for your painting projects, it can greatly enhance the overall experience for both DIY enthusiasts and professional painters. Its unmatched speed and effectiveness truly set it apart. But before you start using airless spray technology, keep in mind the important step of thinning your latex paint.

Like a maestro conducting a symphony, finding the perfect consistency for your paint is crucial for a flawless finish. Too thick, and it clogs the sprayer; too thin, and it splatters everywhere. So, how much do you thin latex paint to go through an airless sprayer?

In this article, I will guide you through the art of thinning latex paint for airless sprayers. We’ll explore factors like viscosity, recommended thinning ratios, proper ventilation, and even the handling and storage of thinning agents.

By the end of this journey, you’ll have the knowledge and confidence to create a smooth, professional-looking paint job with your airless sprayer. So, let’s get started and unlock the secrets to achieving paint perfection!

Table of Contents

Key Takeaways

  • Thinning latex paint is important for optimal performance and results when using an airless sprayer.
  • The viscosity of the paint determines its thickness and affects the performance of the sprayer.
  • Follow the manufacturer’s recommended thinning ratios for the specific paint and sprayer model.
  • Gradually thin the paint and test the consistency to achieve a smooth and flawless application.

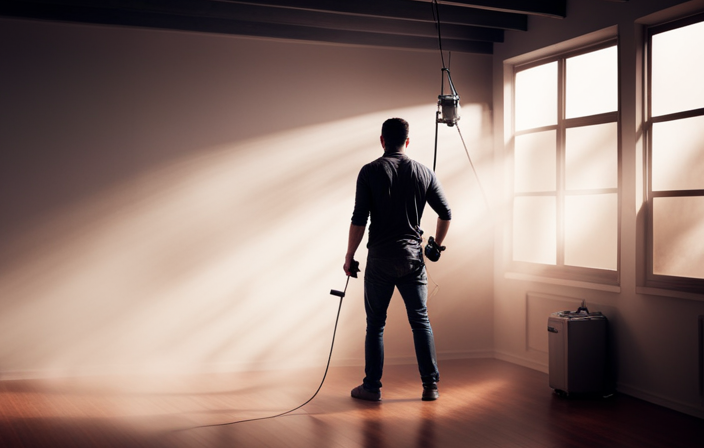
Understanding Airless Sprayers and Their Benefits

Advertisement

Understanding airless sprayers and their benefits is essential if you want to maximize efficiency and achieve a professional finish. Airless sprayers are game-changers for painting projects. They deliver a high volume of paint at a high pressure, resulting in even and consistent coverage. With an airless sprayer, you can tackle larger areas in a fraction of the time it would take with a brush or roller. There are different types of airless sprayers available, including handheld, cart-mounted, and towable models, so you can choose the one that suits your needs best.

Now, let’s move on to the importance of thin consistency for airless sprayers.

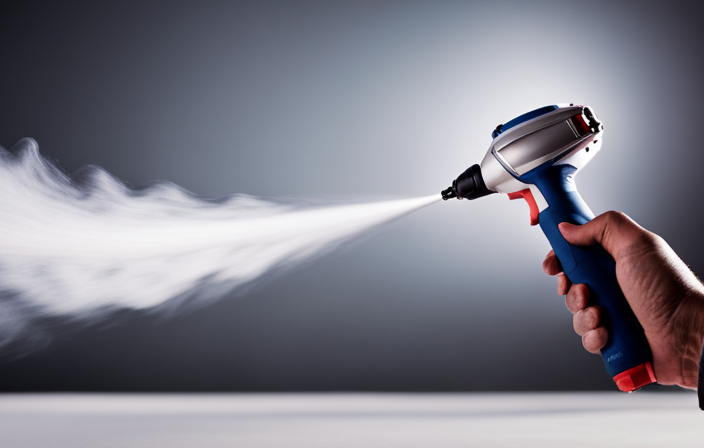
Importance of Thin Consistency for Airless Sprayers

Achieving a properly diluted consistency is crucial when using an airless sprayer. It ensures optimal performance and results. Proper thinning is important because thick paint can clog the sprayer nozzle, leading to uneven coverage and a compromised finish. Additionally, thick paint puts strain on the sprayer, potentially causing malfunctions or premature wear. By thinning latex paint to the appropriate consistency, you ensure smooth flow through the sprayer, resulting in an even application and a professional-looking finish.

Understanding the potential risks of using thick paint and the benefits of achieving the right consistency is essential. Now, let’s explore the factors to consider when thinning latex paint.

Factors to Consider When Thinning Latex Paint

Advertisement

To ensure a smooth and flawless application, it’s important to consider the viscosity of your paint when using an airless sprayer. The viscosity measurement refers to the thickness or consistency of the paint, and it plays a crucial role in achieving optimal results.

When using an airless sprayer, thinning latex paint is necessary to ensure proper atomization and flow through the nozzle. However, the amount of thinning required depends on various factors, including the type of sprayer, the desired finish, and the environmental conditions.

Factors such as temperature can significantly impact the viscosity of the paint, as higher temperatures can cause the paint to become thinner. It’s essential to follow manufacturer guidelines and conduct viscosity tests to determine the appropriate thinning ratio.

Understanding the impact of temperature on paint viscosity is crucial for achieving an even and professional finish. Moving on to the next section about the viscosity of the paint…

Advertisement

Viscosity of the Paint

When using an airless sprayer, it’s important to consider the viscosity of your paint for a smooth and flawless application. Paint viscosity refers to its thickness or resistance to flow.

Thicker paints may clog the sprayer nozzle and cause uneven coverage, while thinner paints may result in drips and runs.

To ensure optimal performance, it may be necessary to thin the latex paint before using it with an airless sprayer. There are various thinning techniques available, such as adding water or a paint conditioner to achieve the desired viscosity.

It is recommended to follow the manufacturer’s instructions for the specific paint product being used, as they may provide specific guidance on thinning ratios.

Understanding paint viscosity and employing the appropriate thinning techniques will help you achieve professional-looking results with your airless sprayer.

Advertisement

Recommended Thinning Ratios

For optimal results with your airless sprayer, it’s important to follow the recommended thinning ratios provided by the manufacturer. Thinning latex paint is necessary to ensure proper atomization and smooth application through the sprayer. The mixing ratios can vary depending on the specific paint and sprayer model, so it’s crucial to consult the manufacturer’s guidelines for the best practices. These guidelines typically specify the appropriate amount of water or paint thinner to add per gallon of paint. By adhering to these ratios, you can achieve a consistent and even spray pattern, reducing the risk of clogging or uneven coverage. Following the recommended thinning ratios will help you achieve professional-looking results with your airless sprayer. Moving on to the next section about the sprayer manufacturer’s guidelines, we can delve further into the specifics of operating the sprayer effectively.

Sprayer Manufacturer’s Guidelines

When it comes to thinning latex paint for an airless sprayer, it’s important to follow the guidelines provided by the sprayer manufacturer.

These guidelines are specific to each sprayer model and can vary based on factors such as nozzle size and pressure settings.

Advertisement

By adhering to the manufacturer’s recommendations, you ensure optimal performance and prevent any potential damage to the sprayer.

Additionally, sprayer maintenance plays a vital role in achieving successful paint application.

Regular cleaning and proper storage of the sprayer will prolong its lifespan and maintain its functionality.

It’s also crucial to choose the right paint for airless sprayers, as not all paints are suitable for this application method.

Pay attention to the paint’s viscosity and compatibility with airless sprayers.

Advertisement

Now, let’s explore the tools and techniques for thinning latex paint.

Tools and Techniques for Thinning Latex Paint

To achieve flawless and effortless paint application with an airless sprayer, it’s crucial to have the right tools and techniques for thinning your latex paint.

Thinning latex paint is necessary to achieve proper atomization and prevent clogging in the sprayer. One popular method is to use mixing additives specifically designed to thin latex paint. These additives help maintain the paint’s viscosity while ensuring smooth and even coverage.

Another alternative is to use alternative thinning methods such as using a drill with a paint-mixing attachment or a handheld paint shaker. These methods effectively mix the paint and reduce its viscosity for easy spraying.

However, it’s important to note that using a paint thinner or water is the most common and recommended method for thinning latex paint. This ensures proper consistency and flow for optimal performance in an airless sprayer.

Advertisement

Using a Paint Thinner or Water

When it comes to thinning latex paint for an airless sprayer, there are various options to consider. In the previous section, we discussed the tools and techniques for thinning latex paint. Now, let’s delve into the current subtopic: using a paint thinner or water.

Paint thinners are commonly used to achieve the desired consistency for spraying. However, there are alternative options available that provide similar results. One such alternative is water. Yes, plain old water can be used to thin latex paint for an airless sprayer.

Using water as a paint thinner offers several benefits. Firstly, it is readily available and inexpensive compared to traditional paint thinners. Additionally, water is less harsh on the environment and doesn’t release harmful fumes. Lastly, water is compatible with most latex paints, making it a versatile option.

Now, let’s move on to the subsequent section where we will explore gradual thinners and testing without compromising the quality of the paint job.

Gradual Thinners and Testing

When it comes to thinning latex paint, gradual thinning techniques can be incredibly helpful. By adding small amounts of thinner or water at a time, you can gradually reach the desired consistency without risking over-thinning the paint. This method allows for better control and ensures that your paint will flow smoothly through the sprayer without clogging or splattering.

Advertisement

Testing the consistency is also crucial to achieve optimal results. By spraying a small amount of thinned paint onto a test surface, you can evaluate its coverage and adjust accordingly. This way, you can avoid wasting paint and ensure a flawless finish.

Now, let’s delve into the next section about mixing techniques for consistency.

Mixing Techniques for Consistency

Let’s explore some mixing techniques that will help you achieve the perfect consistency for your paint.

When it comes to thinning latex paint for airless sprayers, it’s important to follow the recommended mixing ratios. Typically, a good starting point is to thin the paint with water at a ratio of 10% to 20%. However, it’s important to note that different paint brands and sprayers may require slight adjustments to achieve the desired consistency.

If you find that water alone is not achieving the desired thinning, there are alternative thinning methods you can try. For example, you can use a latex paint conditioner or a commercial paint thinner specifically designed for latex paints. These products can help you achieve a smoother and more even application.

Advertisement

Now that we’ve explored mixing techniques, let’s move on to a step-by-step guide to thinning latex paint for airless sprayers.

Step-by-Step Guide to Thinning Latex Paint for Airless Sprayers

Here is a revised version with logically grouped complete concepts on their own lines, with a double new line after each concept:

Now, let’s dive into a step-by-step guide on how to achieve the perfect consistency for your latex paint when using an airless sprayer.

Thinning latex paint is essential to ensure smooth application and avoid clogging the sprayer. The tools for thinning latex paint include a measuring container, clean water, and a stirring stick.

Start by pouring the desired amount of latex paint into the container. Gradually add water, stirring continuously, until you achieve the desired consistency.

Advertisement

Avoid over-thinning the paint, as this can lead to poor coverage and adhesion. It’s important to note that different paints may require different amounts of thinning, so it’s always best to consult the manufacturer’s recommendations.

Common mistakes to avoid include adding too much water at once or failing to mix thoroughly.

Once you have achieved the desired consistency, you can move on to preparing the paint and equipment for spraying.

Preparing the Paint and Equipment

To ensure optimal spraying results, it is important to properly prepare both your paint and equipment. Here are three essential tools for paint preparation and techniques for achieving smooth finishes:

  1. Paint Strainer: Before pouring the latex paint into the sprayer, use a paint strainer to remove any impurities or clumps. This step will prevent clogging and ensure a consistent spray pattern.

  2. Stir Stick: Thoroughly mix the paint with a stir stick to achieve a uniform consistency. This will help prevent uneven application and ensure a smooth finish.

  3. Pressure Adjustment: Adjust the airless sprayer’s pressure according to the manufacturer’s guidelines. This adjustment will allow for better control and reduce the chances of overspray.

By following these steps, you will have your paint and equipment ready for optimal spraying. Now, let’s move on to calculating the thinning ratio for your specific paint and sprayer setup.

Advertisement

Calculating the Thinning Ratio

To calculate the thinning ratio, follow these steps:

  1. Consult the manufacturer’s guidelines for the paint and sprayer.
  2. Look for the recommended thinning ratio.
  3. The thinning ratio will vary based on the type of latex paint and airless sprayer you have.
  4. The ratio will indicate the amount of paint thinner or water to add to the paint.
  5. Following the manufacturer’s recommendations ensures smooth paint flow and an even coat.
  6. Once you have determined the thinning ratio, proceed to mix the thinner and paint for a seamless application.

Mixing the Thinner and Paint

Once you’ve calculated the ideal thinning ratio, it’s time to mix the thinner and paint together for a flawless application. Here’s a step-by-step guide on how to do it:

  1. Gather the necessary materials: latex paint, appropriate thinner, measuring cup, and mixing stick.

  2. Determine the mixing proportions based on the thinning ratio you calculated. For example, if the ratio is 1:4 (1 part paint to 4 parts thinner), measure out the desired amounts accordingly.

  3. Pour the measured paint into a clean container, preferably a paint bucket. Make sure it’s large enough to accommodate the additional thinner.

  4. Gradually add the thinner to the paint while stirring continuously. Use the mixing stick to blend them thoroughly until you achieve a consistent mixture.

By following these mixing instructions and considering alternative thinning methods, you can ensure the paint and thinner are combined effectively.

This will set the stage for the subsequent section about testing the consistency.

Testing the Consistency

After mixing the paint and thinner together, it’s essential to test the consistency to ensure a smooth and flawless application. There are a few testing methods that can be used to measure the consistency of the paint.

One common method is to use a viscosity cup, which measures the time it takes for the paint to flow through a small hole. The longer it takes, the thicker the paint.

Advertisement

Another method is to dip a stir stick into the paint and observe how it drips off. If it drips in a steady stream, the paint is too thin. If it drips in clumps, the paint is too thick.

By testing the consistency, you can make adjustments to achieve the right viscosity for your airless sprayer.

Moving on to tips and tricks for achieving the right consistency…

Tips and Tricks for Achieving the Right Consistency

Achieving the perfect consistency for your paint can be a game-changer, ensuring smooth and flawless results that will leave you feeling satisfied and proud of your work. Here are some mixing techniques and troubleshooting tips to help you achieve the right consistency for your latex paint:

  1. Start with the right ratio: Follow the manufacturer’s recommendations for thinning latex paint. Most manufacturers suggest a ratio of 1:4, meaning one part paint to four parts water or paint thinner.

  2. Gradually add thinner: Start with less thinner and gradually add more until you reach the desired consistency. This will help you avoid over-thinning the paint, which can lead to drips and streaks.

  3. Mix thoroughly: Use a stirring stick or mixer to blend the paint and thinner together. This will ensure that the consistency is uniform throughout.

  4. Test and adjust: Before spraying the paint, test it on a small area to check the consistency. If it’s too thick, add more thinner. If it’s too thin, add more paint.

By following these tips and tricks, you can achieve the perfect consistency for your latex paint and ensure a smooth and flawless finish.

Advertisement

Next, let’s talk about why it’s important to start with less thinner and gradually add more.

Start with Less Thinner and Gradually Add More

To achieve the perfect consistency for your latex paint, start with a smaller amount of thinner and gradually add more. This gradual thinning process allows for better control over the final consistency of the paint.

Begin by adding a small amount of thinner to the paint and mix it thoroughly. Then, test the paint’s consistency by spraying it onto a scrap surface. If the paint is too thick and doesn’t spray evenly, add a little more thinner and repeat the process until you achieve the desired consistency.

This step ensures that the paint will flow smoothly through the airless sprayer without clogging or spattering.

Now, let’s move on to the next section and discuss how to test spray on a scrap surface to ensure optimal results.

Advertisement

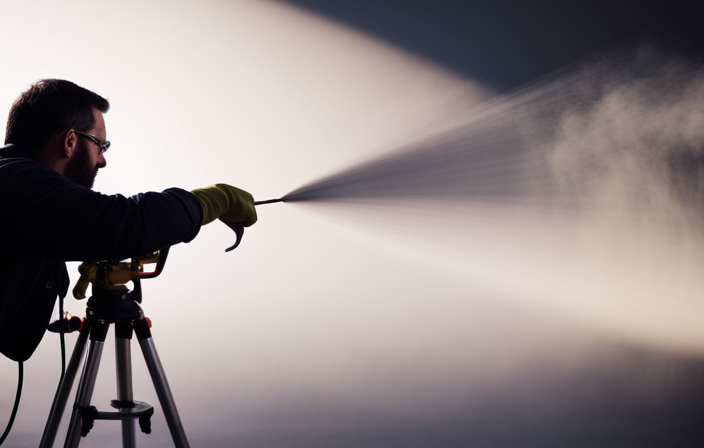
Test Spray on a Scrap Surface

Before you take the plunge, it’s always a good idea to test spray your paint on a scrap surface to ensure optimal results and avoid any surprises down the line. When it comes to testing methods for airless sprayers, there are a few key things to keep in mind.

First, start with a smaller amount of thinner and gradually add more if needed. This allows you to find the perfect thinning ratio without wasting too much paint.

Second, make sure to follow the manufacturer’s recommendations for thinning latex paint. They often provide guidelines for the ideal thinning ratio based on the specific sprayer model.

By following these best thinning techniques and testing methods, you can achieve smooth and even coverage with your airless sprayer.

Now, let’s move on to adjusting the thinning ratio for different conditions.

Advertisement

Adjusting the Thinning Ratio for Different Conditions

When adjusting the thinning ratio for different conditions, it’s important to consider factors such as temperature, humidity, and the desired finish. These variables can greatly impact the viscosity and flow of the paint. To achieve the best results when thinning latex paint for airless sprayers, follow these techniques:

  • Gradually add small amounts of water or paint thinner to the paint while stirring continuously.
  • Test the consistency by running the thinned paint through the sprayer to ensure it sprays evenly and smoothly.
  • Adjust the thinning ratio as needed, adding more water or paint thinner if the paint is too thick or reducing the ratio if it is too thin.
  • Keep in mind that different brands and types of latex paint may require different thinning ratios, so it’s essential to consult the manufacturer’s instructions.
  • Always mix the paint thoroughly before thinning and periodically during the painting process to maintain consistency.

By understanding the best techniques for thinning latex paint for airless sprayers, you can ensure optimal spraying performance.

Now let’s explore common mistakes to avoid when thinning latex paint.

Common Mistakes to Avoid When Thinning Latex Paint

When thinning latex paint, it is crucial to thoroughly mix the paint before proceeding. This ensures a consistent viscosity and optimal spraying performance.

Following the recommended thinning ratios is another important step to avoid common mistakes. Take the time to carefully read and follow the manufacturer’s instructions for the specific type of paint you are using.

Over-thinning the paint is a mistake that should be avoided. Adding too much thinner can result in a runny consistency, which will negatively impact the coverage and adhesion of the paint. To prevent this, add the thinner gradually and test the consistency as you go.

Advertisement

It is also important to be aware that over-thinning the paint can reduce its durability and longevity. This can lead to potential issues in the long run.

Now, let’s move on to the next section where we will discuss the potential problems that can arise from over-thinning the paint.

Over-thinning the Paint

Thinning latex paint excessively can turn it into a watery mess, leaving your walls looking like a haphazard watercolor painting. Over-thinning the paint can have severe consequences.

Firstly, it can result in poor coverage, as the paint may not adhere properly to the surface. This can lead to streaks, uneven color, and even peeling.

Secondly, over-thinning can cause the paint to drip and run, making it difficult to achieve a smooth, professional finish.

Advertisement

To avoid these issues, it’s important to follow the manufacturer’s guidelines for thinning ratios. If you find that your paint is still too thick, consider alternative methods such as using a paint conditioner or adding small amounts of water at a time until the desired consistency is achieved.

Underestimating the viscosity of the paint can also lead to problems, as we’ll discuss in the next section.

Underestimating the Viscosity of the Paint

Over-thinning the paint can lead to issues such as poor coverage and a lack of durability, but underestimating the viscosity of the paint can also cause problems when using an airless sprayer. Understanding paint viscosity is crucial for achieving optimal results. The viscosity of paint refers to its thickness or resistance to flow. It is important to have the proper paint consistency when using an airless sprayer to ensure a smooth and even application.

To illustrate the significance of proper paint consistency, consider the following table:

Paint Consistency Result
Too Thin Runs or drips on the surface, poor coverage
Too Thick Clogs the sprayer, uneven application, texture issues
Ideal Consistency Smooth and even application, excellent coverage

Neglecting to test the consistency of the paint before using an airless sprayer can lead to unwanted outcomes. It is essential to take the time to assess the paint’s viscosity to achieve the best possible finish.

Advertisement

Neglecting to Test the Consistency

Make sure you don’t skip the crucial step of testing the consistency of your paint before using an airless sprayer, as it can greatly impact the final result. Testing the consistency of your latex paint is essential to ensure that it will flow smoothly through the sprayer without clogging or splattering.

There are several testing methods you can use to determine the ideal consistency for your paint. One common method is the ‘dip and drip’ test, where you dip a stir stick into the paint and let it drip back into the can. The paint should flow off the stick in a steady, even stream.

Another method is the ‘roll and fold’ test, where you roll a small amount of paint between your hands and fold it over. The paint should form a smooth, ribbon-like fold without breaking or clumping.

Neglecting to test the consistency of your paint can result in uneven coverage, clogging of the sprayer, or a rough finish. By taking the time to test your paint, you can ensure a successful and professional-looking paint job.

In the next section, we will discuss troubleshooting thin latex paint for airless sprayers, so you can address any issues that may arise.

Advertisement

Troubleshooting Thin Latex Paint for Airless Sprayers

When neglecting to test the consistency of latex paint before using it in an airless sprayer, problems can arise. However, troubleshooting thin latex paint for airless sprayers is not an impossible task. To prevent paint clogs and achieve even coverage, there are a few steps to follow.

Firstly, ensure that the paint is properly mixed and strained to remove any impurities or lumps.

Secondly, adjust the sprayer’s pressure settings to match the viscosity of the paint. If the paint is still too thin, adding a small amount of water can help achieve the desired consistency.

Lastly, test the paint on a small surface before starting the project to ensure it sprays evenly.

By following these troubleshooting techniques, you can avoid paint clogging issues and achieve a professional finish.

Advertisement

Paint Clogging Issues

To avoid a messy situation, make sure your paint sprayer doesn’t become a clogged pipe dream. Properly thinning the paint is crucial to prevent clogging issues when using an airless sprayer with thin latex paint. There are a few paint thinning techniques you can use to achieve the right consistency.

First, follow the manufacturer’s recommendations for thinning ratios. This will vary depending on the specific paint brand and sprayer model you’re using.

Second, consider using a paint conditioner or flow improver. These can help reduce the chances of clogs.

Additionally, always strain your paint before pouring it into the sprayer. This removes any impurities or clumps that could cause blockages.

By following these paint thinning techniques and preventing paint clogs, you can ensure a smooth and even spray pattern. Now, let’s move on to the next topic of ‘uneven spray pattern’.

Advertisement

Uneven Spray Pattern

To achieve a more professional finish, it is important to ensure that your spray pattern is even and consistent. A smooth and uniform spray pattern is crucial for achieving a flawless paint job. Here are a few tips to help you achieve an even spray pattern.

First, make sure that the paint is properly thinned according to the manufacturer’s recommendations. Using the correct viscosity will help prevent clogs and ensure an even flow through the sprayer.

Secondly, adjust the spray tip to the appropriate size for the material being sprayed. Using the wrong tip can result in an uneven pattern.

Finally, it is important to practice proper technique by maintaining a consistent distance from the surface and moving the sprayer in a steady motion.

By following these tips, you can avoid common issues with an uneven spray pattern and achieve a smooth finish.

Advertisement

Now, let’s move on to the next section about drying time and coverage problems.

Drying Time and Coverage Problems

Now, let’s dive into the drying time and coverage problems you may encounter during your painting project.

  • The drying time of latex paint can vary depending on factors such as humidity and temperature. Adjusting the drying time can help ensure a smooth and even finish.

  • Coverage issues can arise if the paint is not properly thinned or if the sprayer is not adjusted correctly. Addressing these issues involves finding the right balance between thinning the paint to achieve proper atomization and avoiding over-thinning, which can result in poor coverage.

  • It is important to follow the manufacturer’s instructions for thinning the paint and to test the spray pattern and coverage on a small area before starting the full project.

When working with thinning agents, it is crucial to take safety precautions to protect yourself and the environment.

Safety Precautions When Working with Thinning Agents

When working with thinning agents, it’s important for your safety and the environment to follow proper precautions. These precautions include wearing protective gloves and goggles. According to a study, improper handling of thinning agents can lead to respiratory issues in 25% of painters. To minimize potential health risks, it is crucial to take the necessary handling precautions. Thinning agents contain chemicals that can be harmful if not handled correctly. Always read the product labels and follow the manufacturer’s instructions.

When using thinning agents, make sure you work in a well-ventilated area to avoid inhaling any fumes. Proper ventilation is essential to maintain a safe working environment.

Advertisement

So, let’s move on to the next section about proper ventilation and how it plays a vital role in ensuring your safety while using an airless sprayer.

Proper Ventilation

To ensure your safety, it’s important to have proper ventilation in your workspace when using an airless sprayer with thinning agents. Here are four reasons why proper ventilation is crucial for your safety:

  1. Prevents inhalation of harmful fumes: Proper ventilation helps remove any toxic fumes generated during the spraying process, preventing you from breathing them in and protecting your respiratory system.

  2. Reduces the risk of fires or explosions: Thinning agents can be highly flammable, and without proper ventilation, the buildup of vapors in the air can increase the risk of fires or explosions.

  3. Improves air quality: Adequate ventilation helps maintain a clean and fresh working environment by removing paint particles and other contaminants from the air, promoting a healthier atmosphere.

  4. Minimizes the chance of health issues: Good ventilation reduces the likelihood of experiencing symptoms like dizziness, headaches, or nausea that can result from prolonged exposure to paint fumes.

With proper ventilation in place, you can now move on to the next important safety measure – wearing protective gear.

Wearing Protective Gear

Make sure you’re fully prepared for the task ahead by suiting up in the necessary protective gear. When working with latex paint and an airless sprayer, it is crucial to prioritize your safety. Wearing the proper equipment can shield you from potential health hazards. Here’s a table to help you understand the essential protective gear you should wear:

Protective Gear Purpose
Safety goggles Protect your eyes from paint splatters
Respirator Prevent inhalation of paint fumes
Gloves Shield your hands from chemical exposure
Coveralls Cover your body to avoid paint contact
Boots Guard your feet against spills and drops

Wearing this gear will minimize the risks associated with painting and ensure your well-being. Now, let’s explore how to handle and store thinning agents properly, so you can achieve the best results.

Advertisement

Handling and Storage of Thinning Agents

To ensure your safety and achieve exceptional results with thinning agents, it is important to master the proper handling and storage techniques. Here are some key points to consider:

  1. Take necessary handling precautions to avoid accidents or health hazards. Wear protective gloves and safety goggles to protect your skin and eyes from potential contact with the agents.

  2. Work in a well-ventilated area to minimize the inhalation of fumes. This will help protect your respiratory system and ensure a safer working environment.

  3. Proper storage of thinning agents is crucial. Store them in a cool, dry place away from direct sunlight and sources of heat. This will help maintain their effectiveness and prevent degradation.

  4. Ensure that the containers are tightly sealed to prevent leakage or evaporation. This will help preserve the quality of the thinning agents and prevent any potential spills or accidents.

By following these handling precautions and proper storage techniques, you can safely and effectively use thinning agents for your airless sprayer.

Now, let’s transition into the next section to discuss some final thoughts and conclusions on achieving optimal results with latex paint and an airless sprayer.

Final Thoughts and Conclusion

As I wrap up my painting project, I want to share some final thoughts and conclusions on achieving exceptional results with latex paint and an airless sprayer.

One important aspect to consider is the adjusting thinning ratio. It is crucial to find the right balance between the paint and the thinning agent to achieve the desired consistency for spraying. Start by adding a small amount of the thinning agent and gradually increase as needed until you reach the perfect ratio. Remember, it’s always better to start with less and add more if necessary.

Advertisement

Additionally, don’t forget to test your paint mixture on a small surface before spraying the entire area. This will help you ensure that you have achieved the desired results and avoid any potential issues.

Following these tips will help you achieve professional-looking results with your airless sprayer and latex paint.

Frequently Asked Questions

Can I use latex paint straight from the can without thinning it for an airless sprayer?

Sure, go ahead and use thick, gloopy paint straight from the can. Who needs a smooth finish anyway? Just embrace the clumps and streaks. No need for the benefits of an airless sprayer or tips for a smooth finish. Enjoy the chaos!

What type of paint thinner should I use to thin latex paint for an airless sprayer?

I recommend using water as a type of paint thinner to thin latex paint for an airless sprayer. It is a common and effective method. However, there are alternative thinning methods available depending on your specific needs and preferences.

How do I know if I have thinned the latex paint enough for an airless sprayer?

How do you achieve the perfect consistency for latex paint in an airless sprayer? Follow these tips for troubleshooting common issues with thinning latex paint. Ensure it flows smoothly, without clogging or splattering, for optimal results.

Advertisement

Can I adjust the thinning ratio for different types of latex paint?

Yes, the thinning ratio can be adjusted for different types of latex paint. It is important to find the optimal thinning consistency for each type of paint to ensure smooth spraying and proper coverage.

What should I do if the latex paint clogs the airless sprayer while I am spraying?

To prevent clogs in an airless sprayer while using latex paint, it’s important to strain the paint before pouring it into the sprayer and make sure the paint is properly thinned. If a clog occurs while spraying, stop and clean the sprayer nozzle before continuing.

Conclusion

In conclusion, after understanding the benefits of airless sprayers and the importance of thinning latex paint for optimal performance, it is clear that proper thinning ratios and precautions are essential.

With the right viscosity and ventilation, along with wearing protective gear, one can achieve a flawless paint job.

Remember, handling and storing thinning agents safely is crucial. So, don’t let your painting dreams dry up like water in the desert. Thin that paint and let your creativity flow freely!

Advertisement

With James‘ articles, you can expect comprehensive breakdowns of airless paint sprayer features, performance assessments, and expert insights into the latest industry innovations. His meticulous approach ensures that readers gain a thorough understanding of the equipment they are considering, helping them make well-informed choices.

Continue Reading
Advertisement

Airless Paint Sprayers FAQs

How To Unclog Graco 360 Airless Paint Sprayer

Published

on

By

An image showcasing a step-by-step guide on unclogging a Graco 360 Airless Paint Sprayer, depicting a user removing the nozzle, flushing it with water, clearing the filter, and reassembling it meticulously

Have you ever found yourself in the middle of a painting project only to have your Graco 360 airless paint sprayer clog up on you? Dealing with a clog can be frustrating and a waste of time, but fear not! I am here to guide you through the process of unclogging your Graco 360 airless paint sprayer.

In this article, I will provide you with step-by-step instructions on how to:

  1. Identify the clog
  2. Release pressure
  3. Disassemble the sprayer
  4. Clean the spray tip and filter
  5. Reassemble the sprayer

I will also share tips on how to prevent future clogs and when it may be necessary to seek professional help.

So, grab your tools and get ready to tackle that clog head-on. By the end of this article, you’ll have your Graco 360 airless paint sprayer working like new again.

Let’s dive in and get your painting project back on track!

Key Takeaways

  • Troubleshooting tips for Graco 360 airless paint sprayer include checking power supply, priming and flushing properly, verifying paint viscosity, and inspecting for clogs or blockages.
  • To prevent future clogs, strain paint before pouring, clean filters and nozzles regularly, use appropriate paint viscosity, follow prevention techniques, and perform regular maintenance.
  • Professional help is important for complex clogs that require expertise, time constraints that necessitate professional assistance, lack of experience that can lead to accidents, situations where DIY solutions may not be effective, and to ensure efficiency and safety.
  • Signs of complex clogs include unsuccessful DIY methods, persistent clogs despite attempts, indication of more intricate issues, requirement of professional expertise, and the need to avoid potential damage or accidents.

Identify the Clog

Advertisement

To effectively troubleshoot the issue, it’s crucial to first identify the specific area where the clog is occurring within the Graco 360 airless paint sprayer. When it comes to troubleshooting common clog causes, there are a few things to keep in mind.

Start by checking the spray tip, as it is often the primary culprit. Inspect it for any debris or dried paint that may be causing the blockage.

Additionally, inspect the suction tube and filter for any obstructions. These areas can easily accumulate paint particles and cause clogs.

Once the clog is identified, it’s important to release the pressure and remove any remaining paint from the sprayer. This can be done by following the manufacturer’s instructions for releasing pressure and cleaning the system.

By taking these steps and implementing tips for preventing clogs in the future, you can ensure a smooth and efficient painting process.

Advertisement

Release Pressure and Remove Paint

First, make sure the pressure is released and all the paint is removed from the machine. To clean the Graco 360 airless paint sprayer effectively, follow these troubleshooting tips and cleaning techniques:

  • Begin by removing the spray tip and guard, using a wrench if necessary.
  • Next, detach the suction tube from the paint container, ensuring no paint remains inside.
  • Take off the prime valve and filter housing, carefully inspecting them for any clogs or debris.
  • Clean all the removed components thoroughly with warm, soapy water or a suitable cleaning solution.
  • Use a small brush or toothpick to remove any stubborn clogs from the spray tip or filter.
  • Rinse all parts with clean water, ensuring no residue remains.

By following these cleaning techniques and troubleshooting tips, you can effectively unclog your Graco 360 airless paint sprayer.

Now, let’s move on to the next section and disassemble the sprayer for further cleaning.

Disassemble the Sprayer

Now it’s time to break down the sprayer and delve into the inner workings of this powerful machine. Sprayer maintenance is crucial to ensure optimal performance and longevity.

Advertisement

To disassemble the sprayer, start by removing the spray gun from the hose.

Next, unscrew the tip guard and carefully take out the spray tip.

Use a wrench to disconnect the filter housing from the sprayer body.

Once the filter housing is removed, take out the filter and inspect it for any clogs or debris. Cleaning or replacing the filter may be necessary if it is dirty or damaged.

Troubleshooting tips for disassembling the sprayer include following the manufacturer’s instructions, wearing protective gloves, and working in a well-ventilated area.

Advertisement

With the sprayer disassembled, we can now move on to cleaning the spray tip and filter.

Clean the Spray Tip and Filter

Before you begin cleaning the spray tip and filter, it’s important to note that a clogged filter can decrease the efficiency of your sprayer by up to 50%.

To clean the spray tip:

  • Start by removing it from the sprayer gun using a wrench.
  • Once removed, inspect the tip for any clogs or debris.
  • If you notice any blockages, use a small wire brush or toothpick to carefully remove them.

To clean the filter:

  • Unscrew the housing and remove it from the sprayer.
  • Rinse the filter thoroughly with warm water to remove any paint residue or debris.
  • Gently tap the filter on a hard surface to dislodge any stubborn particles.

Finally, reassemble the spray tip and filter, ensuring they are securely tightened.

In the next section, we will discuss how to use a cleaning solution or solvent to further clean your sprayer.

Use a Cleaning Solution or Solvent

Advertisement

To ensure optimal performance, it’s important to enhance the effectiveness of your sprayer by using a cleaning solution or solvent.

When it comes to cleaning solution alternatives, there are a few options to consider. One commonly used option is a mixture of warm water and mild detergent. This mixture can effectively remove any paint residue from the sprayer.

Another alternative is using a commercial paint sprayer cleaner. These cleaners are specifically designed to break down paint and unclog the system, making them a great choice for thorough cleaning.

Whichever option you choose, it’s important to follow safety precautions. Always wear protective gloves and eyewear when handling cleaning solutions or solvents. Additionally, make sure to work in a well-ventilated area to avoid inhaling any fumes.

Advertisement

Now that you have cleaned the spray tip and filter, let’s move on to the next step: using a cleaning brush or needle.

Use a Cleaning Brush or Needle

Using a cleaning brush or needle is like giving your sprayer a thorough scrub, ensuring that every nook and cranny is free from any debris or buildup. Cleaning techniques using a brush or needle are alternative methods to unclog your Graco 360 airless paint sprayer. These tools allow you to manually remove any paint or residue that may be obstructing the spray nozzle or other components. The cleaning brush is perfect for scrubbing the larger parts of the sprayer, such as the spray tip, while the needle can be used to clean the smaller, harder-to-reach areas, like the nozzle or the filter. By using these tools, you can effectively dislodge any clogs and restore the proper functioning of your sprayer. After cleaning, you can proceed to reassemble the sprayer, ensuring all components are properly aligned and tightened.

Reassemble the Sprayer

Now that you have thoroughly cleaned all the components, it’s time to put everything back together and ensure a proper fit for your sprayer. Here are some reassemble techniques and troubleshooting tips to help you with this process:

  • Start by reattaching the spray gun to the hose, ensuring a secure connection.

  • Next, attach the hose to the pump, making sure it is tightly screwed in.

  • Reinstall the suction tube into the pump, ensuring it is properly seated.

  • Attach the spray tip guard to the spray gun, securing it in place.

  • Finally, test the trigger on the spray gun to ensure it is working smoothly.

By following these reassemble techniques and troubleshooting tips, you can ensure that your Graco 360 airless paint sprayer is properly put back together and ready for use.

Now, let’s move on to the next step and test the sprayer.

Advertisement

Test the Sprayer

Once everything is back together, it’s time for you to see the sprayer in action and put it to the test. To ensure that your Graco 360 airless paint sprayer is working properly after reassembling, follow these sprayer maintenance and troubleshooting tips.

First, check if the sprayer is priming correctly. Fill the paint container with water and turn on the sprayer. The water should flow smoothly through the nozzle without any sputtering or clogging. If there are any issues, refer back to the previous steps to troubleshoot and fix the problem.

Next, test the spray pattern by spraying water onto a test surface. The spray pattern should be even and consistent, without any splattering or uneven distribution. Adjust the spray tip if necessary to achieve the desired pattern.

Finally, check for any leaks or unusual noises during operation. If you notice any leaks, tighten the connections or replace any damaged parts. If there are unusual noises, it could indicate a problem with the motor or pump, and you may need to consult the user manual or contact Graco customer support for further assistance.

By following these troubleshooting tips, you can ensure that your Graco 360 airless paint sprayer is working efficiently. In the next section, we will discuss how to prevent future clogs and maintain the sprayer for long-lasting performance.

Advertisement

Prevent Future Clogs

To prevent future clogs in your Graco 360 airless paint sprayer, there are some important steps you can take:

  • Always strain your paint before pouring it into the sprayer. This will remove any debris or clumps that could potentially clog the nozzle.

  • Regularly clean the filters and nozzles of your sprayer to maintain optimal performance.

  • Use the appropriate paint viscosity for your sprayer. Using thicker paints can increase the risk of clogs.

By following these prevention techniques and regular maintenance tips, you can ensure that your Graco 360 airless paint sprayer stays clog-free and ready for your next project.

Remember, if you encounter persistent clogs or issues, it may be necessary to seek professional help.

Seek Professional Help if Needed

If you’re feeling overwhelmed or frustrated with persistent clogs, don’t hesitate to reach out to a professional for assistance. Knowing when to call a professional can save you time, money, and frustration. While unclogging a Graco 360 airless paint sprayer can often be done as a DIY project, there are times when it is best to seek professional help. Here are some situations where calling a professional is recommended:

  1. Complex clogs: If you’ve tried multiple DIY methods and the clog is still not resolved, it may be a sign of a more complex issue that requires professional expertise.

  2. Time constraints: If you have a tight deadline and cannot afford any delays, it’s best to let a professional handle the unclogging process to ensure efficiency and effectiveness.

  3. Lack of experience: If you’re not familiar with the inner workings of the paint sprayer or are unsure about the correct procedure, it’s safer to leave it to a professional to avoid potential damage or accidents.

Remember, while DIY solutions can work in many cases, there are times when professional help is the best choice. Don’t hesitate to call a professional if you’re unsure or experiencing difficulties.

Advertisement

Frequently Asked Questions

Can I use any cleaning solution or solvent to unclog my Graco 360 airless paint sprayer?

No, it is not recommended to use any cleaning solution or solvent for unclogging the Graco 360 Airless Paint Sprayer. It is important to follow the manufacturer’s instructions and use the recommended cleaning methods to prevent clogs.

How often should I clean the spray tip and filter to prevent clogs?

An ounce of prevention is worth a pound of cure. To prevent clogs in your paint sprayer, it’s important to regularly clean the spray tip and filter. This maintenance ensures optimal performance and avoids costly downtime.

What is the recommended method for disassembling the sprayer?

To disassemble the sprayer, follow these steps: 1) Turn off and unplug the sprayer. 2) Remove the spray tip, guard, and filter. 3) Use a wrench to loosen and remove the fluid section. Recommended tools for this process include a wrench and pliers.

Are there any specific cleaning brushes or needles that are recommended for unclogging the sprayer?

To effectively clean and unclog a Graco 360 airless paint sprayer, it is recommended to use cleaning tools such as brushes and needles specifically designed for this purpose. Regular maintenance tips should also be followed to prevent clogging issues.

What are some common signs or symptoms of a clogged Graco 360 airless paint sprayer?

Some common signs or symptoms of a clogged Graco 360 airless paint sprayer include poor spray pattern, spitting or sputtering, and reduced or uneven paint flow. Troubleshooting tips can help identify and resolve these issues.

Advertisement

Conclusion

When it comes to unclogging a Graco 360 Airless Paint Sprayer, there are a few steps you can follow. First, make sure to disconnect the sprayer from the power source and relieve any pressure in the system. Next, remove the spray tip and filter from the gun and clean them thoroughly. If the clog persists, you may need to disassemble the gun and clean the internal components. Be sure to refer to the manufacturer’s instructions for guidance on this step. Once everything is clean, reassemble the gun and test it to ensure the clog is fully cleared. Regular maintenance, such as cleaning the sprayer after each use and using the appropriate paint filters, can help prevent clogs in the future.

Continue Reading

Airless Paint Sprayers FAQs

How To Paint Underside Of Pipe Fence With Airless Sprayer

Published

on

By

An image capturing a skilled painter effortlessly coating the underside of a sturdy pipe fence with an airless sprayer
  • In my opinion, painting the lower section of a pipe fence can be challenging. However, with the right tools and techniques, it can be very rewarding.

  • That’s why I’m here to share my expertise on how to paint the underside of a pipe fence with an airless sprayer. This method not only saves time but also ensures a smooth and even finish.

  • By using an airless sprayer, you can easily reach those hard-to-access areas and achieve professional results.

  • In this article, I will guide you through the step-by-step process, from preparing your fence for painting to properly storing your equipment.

  • So, if you’re ready to transform your fence and give it a fresh new look, let’s dive in and get started!

Key Takeaways

  • Painting the underside of a pipe fence with an airless sprayer provides protection against rust, corrosion, moisture seepage, and rot, while enhancing the fence’s aesthetic appeal and property value.
  • Regular inspection and maintenance of the painted fence, including touch-ups and applying a protective clear coat, ensures durability, longevity, and the preservation of the property’s stunning feature.
  • To prevent paint overspray and equipment damage, proper painting techniques, appropriate equipment and materials, surface covering, maintaining a suitable spraying distance, and proper cleaning and storage of the equipment should be followed.
  • Using an airless sprayer for painting offers efficient and even coverage, reduced overspray and waste, faster application, the ability to reach tight or difficult areas, and suitability for various types of surfaces.

Prepare Your Fence for Painting

Now that you’ve gathered all your materials, it’s time to get your fence ready for a fresh coat of paint.

Choosing the right paint color is important for achieving the desired look and protecting the metal surface from rust. Opt for a paint that is specifically designed for use on metal, as it will provide better adhesion and durability.

Before painting, it’s crucial to prepare the surface by sanding and priming it. Sanding helps to remove any rust or loose paint, ensuring a smooth and even finish.

After sanding, apply a coat of primer to promote better paint adhesion and prevent future rusting.

Advertisement

Once the surface is prepped and primed, you’re ready to move on to the next step of gathering your materials and equipment for painting the underside of your pipe fence.

Gather Your Materials and Equipment

To start, gather all the necessary materials and equipment for the job. This includes a sturdy ladder, protective clothing, and a reliable paint application tool.

When choosing the paint color, consider the overall look you want to achieve and how it will complement your surroundings.

For hard-to-reach areas, an airless sprayer with an extended nozzle can provide even coverage. Don’t forget to have a paint shield or drop cloth to protect the ground or nearby objects from overspray.

Once you have all your materials ready, it’s time to set up a proper work area for a smooth painting process.

Advertisement

Set Up a Proper Work Area

To create a comfortable and efficient workspace, follow these steps:

  • Organize your tools: Keep your paint, sprayer, and other equipment easily accessible so you don’t waste time searching for them.

  • Lay down a drop cloth: Protect the ground from overspray and drips by covering it with a drop cloth. This will also make cleanup easier.

  • Clear any obstacles: Remove any objects that could hinder your movement or potentially get in the way while you’re painting.

  • Designing a comfortable workspace: Arrange your tools and materials in a way that allows you to move freely and comfortably around the fence.

Maximizing efficiency during the painting process is crucial to save time and effort. By setting up a proper work area, you can work more efficiently and avoid unnecessary delays.

Now, let’s talk about how to practice proper safety precautions while painting the underside of a pipe fence.

Advertisement

Practice Proper Safety Precautions

Ensure your safety while painting by following proper precautions and taking necessary steps to protect yourself.

One important safety precaution is the usage of a respirator to protect your lungs from inhaling paint fumes. Make sure to wear a properly fitted respirator that is suitable for painting tasks.

Additionally, it is crucial to practice ladder safety when working on the underside of the pipe fence. Ensure the ladder is stable and secure before climbing up. Always maintain three points of contact with the ladder, and avoid overreaching to prevent falls or accidents.

Once you have taken these safety measures, you can confidently start painting the underside of the fence, knowing that you have done everything necessary to protect yourself.

Start Painting the Underside of the Fence

Advertisement

As you start painting the underside of the fence, there are a few tips to keep in mind for a successful paint job.

First, it’s important to avoid overspray. Adjust the spray pattern and pressure on your airless sprayer according to the manufacturer’s instructions to prevent wasted paint and a messy surrounding area.

When painting hard-to-reach areas, use an extension pole or a ladder to get closer to the fence. This will provide better control and accuracy.

In the next section, we will discuss proper technique and angles to achieve a smooth and even finish.

Advertisement

Use Proper Technique and Angles

Using the right technique and angles while painting is essential for achieving a professional finish. Hold the sprayer perpendicular to the surface and maintain a consistent distance of about 12 inches. Start spraying from one end, moving in a smooth, sweeping motion. Overlap each pass by 50% to prevent streaks and ensure complete coverage.

Pay attention to the spray angle as well. Aim for a 45-degree angle to reach all the nooks and crannies of the fence. This will help ensure that every part of the fence is evenly coated.

By using proper technique and angles, you can achieve a flawless paint job that will enhance the appearance and durability of your pipe fence.

Now, let’s discuss the importance of taking breaks and allowing for proper drying time.

Take Breaks and Allow for Drying Time

Take a moment to rest and give your project the time it needs to dry properly. Proper drying time management is crucial for achieving a flawless finish and avoiding paint drips on the underside of your pipe fence. Here are some tips to help you manage the drying process effectively:

Advertisement
  • Plan your breaks strategically: Take short breaks between painting sessions to allow the paint to dry partially. This will help prevent any accidental smudging or smearing when you resume painting.

  • Allow for sufficient drying time: Don’t rush the process. Ensure that each coat of paint has ample time to dry before applying the next one. This will help the paint adhere better and reduce the risk of drips or uneven coverage.

Inspect and touch up as needed: Once the paint has fully dried, inspect the surface for any missed spots or imperfections. Touch up these areas as necessary to ensure a flawless finish.

Transitioning into the next section, it’s important to thoroughly inspect your painted pipe fence to ensure a professional-looking result.

Inspect and Touch Up as Needed

Now that we have taken breaks and allowed for drying time, it’s important to inspect and touch up the painted pipe fence as needed. This step ensures that the paint job is thorough and long-lasting. Inspect the fence carefully, looking for any missed spots or areas that may require additional attention. Use touch up techniques such as applying paint with a small brush or roller to these areas. Additionally, selecting the right paint color is crucial for achieving a seamless finish. Consider matching the color to the existing fence or choosing a complementary shade. To emphasize these touch up techniques and color selection, refer to the following table:

Touch Up Techniques Selecting the Right Paint Color
Small brush or roller Match existing fence color
Fill in missed spots Choose complementary shade

With the fence inspected and touched up, we can now move on to the next section about clean up and properly storing our equipment.

Clean Up and Properly Store Your Equipment

To ensure the longevity of your newly painted pipe fence, it’s essential to clean up and store your equipment properly. According to a study conducted by paint manufacturers, cleaning and storing painting tools can extend their lifespan by up to 50%. Here are a few tips to help with proper equipment care:

Advertisement
  • Thoroughly clean your airless sprayer by flushing it with clean water or recommended solvent for the paint type used.
  • Remove any leftover paint from hoses, filters, and nozzles to prevent clogs and ensure smooth operation in the future.
  • Store your equipment in a clean, dry place to prevent rust or damage.

By following these steps, you can prevent paint overspray and keep your equipment in excellent condition for future projects.

Now, let’s move on to the next section and admire your newly painted fence.

Admire Your Newly Painted Fence

Stand back and bask in the beauty of your freshly coated and vibrant barrier. Painting the underside of a pipe fence offers numerous benefits.

Firstly, it provides an added layer of protection against rust and corrosion, extending the lifespan of your fence.

Additionally, painting the underside prevents moisture from seeping into the metal, reducing the risk of rot and weakening.

Moreover, a well-painted fence enhances the overall aesthetic appeal of your property, adding value and curb appeal.

Advertisement

To maintain and preserve your newly painted fence, it is essential to regularly inspect for any signs of wear or damage. Touch up any chipped or scratched areas promptly to prevent further deterioration.

Additionally, consider applying a protective clear coat to further enhance the durability and longevity of your paint job.

With proper care and maintenance, your beautifully painted fence will remain a stunning feature of your property for years to come.

Frequently Asked Questions

How long does it take for the paint to dry on the underside of the fence?

To speed up the drying process of paint on the underside of the fence, try using a fan or a heat gun. These techniques can help to increase air circulation and evaporate moisture faster. Additionally, using a paint with a quick drying formula can also help.

Can I use a regular paintbrush instead of an airless sprayer?

When it comes to painting the underside of a pipe fence, using a paintbrush instead of an airless sprayer has its pros and cons. While a brush offers more control, it may take longer and require more effort to achieve a smooth and even finish. To ensure a great result, make sure to choose a high-quality brush, use long and even strokes, and apply thin coats of paint.

Advertisement

Do I need to apply a primer before painting the underside of the fence?

I recommend applying a primer before painting the underside of the fence. Using a primer helps improve adhesion and durability of the paint. However, if you prefer not to use a primer, be aware that the paint may not adhere as well.

What type of paint is recommended for painting the underside of a pipe fence?

The best paint brand for painting the underside of a pipe fence is one that is specifically designed for overhead surfaces. Some tips for painting overhead surfaces include using a roller or brush, using a paint with good coverage, and applying thin, even coats.

How often should I touch up the paint on the underside of the fence?

I recommend touching up the paint on the underside of the fence every 1-2 years to maintain its durability and appearance. Some of the best paint brands for this task include Sherwin-Williams, Behr, and Rust-Oleum.

Conclusion

There you have it! Painting the underside of a pipe fence with an airless sprayer is not as daunting as it may seem. With a little preparation, the right equipment, and some safety precautions, you can achieve a professional-looking finish.

First, make sure to clean the surface of the pipe fence thoroughly. This will ensure that the paint adheres properly and lasts longer. Use a wire brush or sandpaper to remove any rust or loose paint.

Advertisement

Next, protect the surrounding area by covering it with drop cloths or plastic sheets. This will prevent overspray and keep your work area clean.

Now, it’s time to set up your airless sprayer. Follow the manufacturer’s instructions for assembly and make sure you have the appropriate paint and nozzle size for the job. Fill the sprayer with paint and test it on a scrap piece of material to ensure it’s working properly.

When you’re ready to start painting, position yourself underneath the pipe fence and hold the sprayer about 12 inches away from the surface. Begin spraying in a smooth, sweeping motion, overlapping each pass to ensure even coverage.

Take breaks as needed and allow for drying time between coats. This will help prevent drips and ensure a professional finish. Be sure to wear protective clothing, gloves, and a mask to protect yourself from paint fumes and overspray.

Once you’ve finished painting the underside of the pipe fence, step back and inspect your work. Look for any areas that may need touch-ups or additional coats. It’s better to catch these now than to discover them later.

Advertisement

Finally, clean up your equipment according to the manufacturer’s instructions. Properly store any leftover paint and dispose of any waste materials responsibly.

Now, step back and admire your newly painted fence. You’ve done a great job!

Continue Reading

Airless Paint Sprayers FAQs

How To Remove Exterior Paint From Airless Paint Sprayer

Published

on

By

An image showcasing a hand wearing protective gloves, holding an airless paint sprayer nozzle, while pointed towards a weathered wooden surface

If you have ever had to clean exterior paint from an airless paint sprayer, you know how time-consuming and labor-intensive it can be. Trust me, I have been there.

But fear not, my fellow DIY enthusiasts, because I’m here to share with you my tried-and-true method for getting that stubborn paint off your sprayer and back to its pristine state.

In this article, I will guide you through each step of the process, from gathering the necessary materials to properly storing the sprayer for future use.

With my knowledgeable, precise, and detailed instructions, you’ll be able to tackle this daunting task with confidence and efficiency.

So, let’s dive in and say goodbye to that pesky exterior paint once and for all!

Advertisement

Key Takeaways

  • Choose suitable cleaning solutions for the type of paint being used
  • Disconnect and prepare the sprayer for paint removal by removing the nozzle and spray tip
  • Use brushes or toothpicks to remove dried paint from the sprayer
  • Flush the sprayer with water to remove excess paint and clean the components thoroughly

Gather the necessary materials

To effectively remove exterior paint from an airless paint sprayer, it is imperative to gather all the necessary materials.

First, you will need cleaning solution alternatives that are suitable for the type of paint you are removing. It is important to choose the right cleaning solution to ensure the paint is effectively stripped off the sprayer.

Additionally, you should gather the best practices for spray gun maintenance. This includes having a brush or a toothpick to remove any dried paint from the nozzle or the tip of the gun. It is also helpful to have a clean cloth or paper towels to wipe down the exterior of the sprayer.

Once you have all the materials ready, you can proceed to disconnect and prepare the sprayer for paint removal.

Disconnect and prepare the sprayer

To prepare the sprayer for use, start by disconnecting it. This is crucial for safety reasons and to prevent accidents. Make sure the sprayer is turned off and unplugged from the power source.

Next, remove the nozzle and spray tip from the sprayer and clean them thoroughly. This step is important to avoid any clogs or blockages during the paint removal process.

Advertisement

In addition, check the hose for any leaks or damages. It’s always a good idea to ensure that the equipment is in proper working condition before using it.

To protect yourself from potential paint splatters, it’s recommended to wear protective gloves and goggles. Safety should always be a priority when working with any type of equipment.

Once the sprayer is disconnected and prepared, you can proceed to the next step of removing excess paint from the sprayer.

Remove excess paint from the sprayer

Advertisement

Now, let’s tackle any leftover paint that may be lingering in your trusty sprayer.

To remove excess paint from the sprayer, there are a few cleaning techniques and maintenance tips you can follow.

First, ensure that the sprayer is disconnected from the power source and any paint supply.

Then, remove the spray tip and guard, as well as any filters or screens.

Use a clean cloth or rag to wipe away any paint residue on the exterior of the sprayer.

Advertisement

For stubborn paint, you can use a brush or toothbrush to scrub it away. Remember to be gentle to avoid damaging the sprayer.

Once you have removed all excess paint, you can proceed to the next step of flushing the sprayer with water.

Flush the sprayer with water

After disconnecting the sprayer from the power source and any paint supply, it’s time to give it a good flush with water. Flushing is an essential step in removing excess paint and preventing clogs. To effectively flush the sprayer, follow these steps:

  1. Fill a bucket with clean water.
  2. Attach the sprayer’s hose to the bucket, ensuring a secure connection.
  3. Turn on the sprayer and spray the water into a waste container until it runs clear.
  4. Release the trigger and turn off the sprayer.
  5. Disconnect the hose from the bucket and empty any remaining water.

Common mistakes to avoid while flushing an airless paint sprayer include not using enough water and not thoroughly cleaning the sprayer’s components. By properly flushing the sprayer, you can maintain its longevity and prevent paint buildup. In the next section, we will discuss how to disassemble and clean the spray gun, ensuring its optimal performance.

Disassemble and clean the spray gun

Advertisement

To properly maintain your spray gun, you’ll need to disassemble and clean it thoroughly. Here are some cleaning techniques and maintenance tips to help you with this task:

  1. Start by removing the nozzle and the tip guard from the spray gun. This will allow you to access all the internal components that need to be cleaned.

  2. Use a cleaning brush or a toothbrush to scrub off any paint residue from the spray gun body. Pay close attention to the areas around the trigger and the air inlet.

  3. Soak the disassembled parts in a bucket of warm soapy water for about 15 minutes. This will help to loosen any stubborn paint particles.

  4. Rinse all the parts thoroughly with clean water to remove any soap residue. Make sure to inspect each component for any signs of damage or wear.

Now that the spray gun is clean, let’s move on to the next step of the process: cleaning the filters and nozzles.

Clean the filters and nozzles

After disassembling and cleaning the spray gun, it’s important to clean the filters and nozzles of your airless paint sprayer. These components play a crucial role in ensuring a smooth and consistent paint flow.

To clean the filters, remove them from the sprayer and rinse them thoroughly with water. Use a soft brush to gently scrub away any paint residue or debris.

For the nozzles, soak them in a bucket filled with warm soapy water for about 15 minutes. Then, use a small brush to remove any remaining paint or clogs. Rinse the nozzles with clean water and ensure they are completely dry before reassembling the sprayer.

Advertisement

These cleaning techniques and maintenance tips will help maintain the performance and longevity of your airless paint sprayer.

Moving on to the next section, let’s discuss how to use a cleaning solution for stubborn paint.

Use a cleaning solution for stubborn paint

If stubborn paint is giving you trouble, try using a cleaning solution to easily tackle the problem. Cleaning solutions are a great alternative to remove exterior paint from airless paint sprayers. They are specially formulated to break down and dissolve paint, making it easier to remove.

Here are three cleaning solution alternatives that can help you get the job done effectively and efficiently:

  • Acetone: This powerful solvent can quickly dissolve paint buildup and leave your sprayer clean and ready for use.
  • Vinegar: A natural and cost-effective option, vinegar can help prevent paint buildup and keep your sprayer in good condition.
  • Paint thinner: This versatile solution can effectively remove stubborn paint and restore your sprayer to its optimal performance.

By regularly using these cleaning solutions, you can prevent paint buildup and ensure the longevity of your airless paint sprayer. Once you have successfully cleaned the filters and nozzles, it’s time to move on to the next step: rinse and dry the sprayer components.

Rinse and dry the sprayer components

To ensure optimal performance and prevent potential damage, it is important to thoroughly rinse and dry all the components of your sprayer. Properly cleaning and maintaining your sprayer can increase its lifespan by up to 50%. Rinsing and drying the components is a crucial step in airless paint sprayer maintenance. After using a cleaning solution to remove stubborn paint, it is important to rinse off any residue to prevent clogs in the sprayer. Thoroughly rinse all the parts, including the spray gun, hose, and filters, using clean water. Once rinsed, make sure to dry each component thoroughly before reassembling the sprayer. This will help prevent any moisture-related issues and ensure that your sprayer functions at its best. Now, let’s move on to how to reassemble the sprayer and get it ready for your next painting project.

Advertisement

Reassemble the sprayer

To reassemble the sprayer, carefully fit the cleaned and dried components together like puzzle pieces, ensuring a snug and secure fit. Here are some important steps to follow in the reassembly process:

  • Start by reattaching the spray gun to the hose, making sure the connection is tight.
  • Next, insert the suction tube into the paint container, ensuring it is securely in place.
  • Attach the pump housing to the sprayer body, aligning the tabs and locking it into position.
  • Once the pump housing is secured, reattach the power cord to the sprayer.
  • Finally, double-check all connections to ensure they are tight and secure before testing the sprayer.

If you encounter any issues during the reassembly process, refer to the troubleshooting tips provided in the sprayer’s instruction manual.

Now that the sprayer is reassembled, let’s move on to how to properly store it for future use.

Properly store the sprayer for future use

After reassembling the sprayer, it’s time to store it properly for future use.

Properly cleaning the sprayer after each use is crucial to ensure its longevity and effectiveness.

First, I recommend flushing the sprayer with water or a cleaning solution to remove any leftover paint residue. This will prevent clogging and maintain the sprayer’s performance.

Advertisement

Next, disassemble the nozzle and clean it thoroughly, removing any dried paint or debris.

It’s also important to lubricate the sprayer’s moving parts to prevent rust and keep them in good working condition.

Regular maintenance is key to prolonging the life of your airless paint sprayer.

By following these steps and storing the sprayer in a clean, dry place, you’ll be ready for your next painting project with a sprayer that’s in top-notch shape.

Frequently Asked Questions

Can I use any type of cleaning solution to remove stubborn paint from the sprayer?

Sure, you can use a variety of cleaning solutions to tackle stubborn paint on your sprayer. Options like vinegar, rubbing alcohol, or paint thinner can be effective alternatives. Just be sure to follow safety precautions and test a small area first.

Advertisement

How often should I clean the filters and nozzles of the airless paint sprayer?

To keep your airless paint sprayer in optimal condition, it is important to clean the filters and nozzles regularly. This helps prevent clogs and ensures a smooth painting process. Troubleshoot common issues by checking for debris or worn-out parts.

Is it necessary to disassemble the spray gun in order to clean it properly?

To properly clean the spray gun, it is necessary to disassemble it. This allows for a thorough cleaning of all the components. There are also alternative cleaning solutions available that can help remove paint effectively.

Can I use a pressure washer to flush the sprayer with water?

I wouldn’t recommend using a pressure washer to flush an airless paint sprayer with water. It could damage the delicate parts. Instead, use a garden hose or consider alternative methods like using paint thinner or specialized cleaning solutions.

What is the best way to store the airless paint sprayer for future use?

Storing an airless paint sprayer properly is crucial for its future use. To ensure the best paint sprayer maintenance, clean the sprayer thoroughly, lubricate the parts, and store it in a dry, temperature-controlled environment. Preventing clogs in the airless paint sprayer is essential and can be achieved by using the right filters, strainers, and properly thinning the paint.

Conclusion

In conclusion, removing exterior paint from an airless paint sprayer requires careful preparation and thorough cleaning. By following the steps outlined in this article, you can ensure the longevity and efficiency of your sprayer.

Advertisement

Remember the old saying, ‘A clean tool is a happy tool.’ So, take the time to disassemble, clean, and reassemble your sprayer properly.

With regular maintenance and proper storage, your sprayer will be ready for future painting projects. Happy painting!

Continue Reading
Advertisement

Affiliate disclaimer

As an affiliate, we may earn a commission from qualifying purchases. We get commissions for purchases made through links on this website from Amazon and other third parties.

Advertisement

Trending