Connect with us

Airless Paint Sprayers FAQs

How Much Water Base Latex Paint Will It Take To Spray 29 Doors With A Graco Airless Sprayer Youtube

Published

on

An image showcasing a Graco airless sprayer in action, precisely spraying a generous amount of water-based latex paint onto 29 doors

Hello, everyone! Have you ever pondered the amount of water-based latex paint needed to cover an impressive 29 doors using a Graco airless sprayer? If so, you’re in the right place, as I have all the information you need right here.

In this article, we’re diving deep into the world of water-based latex paint, learning how to calculate the exact amount you’ll need for your door painting extravaganza.

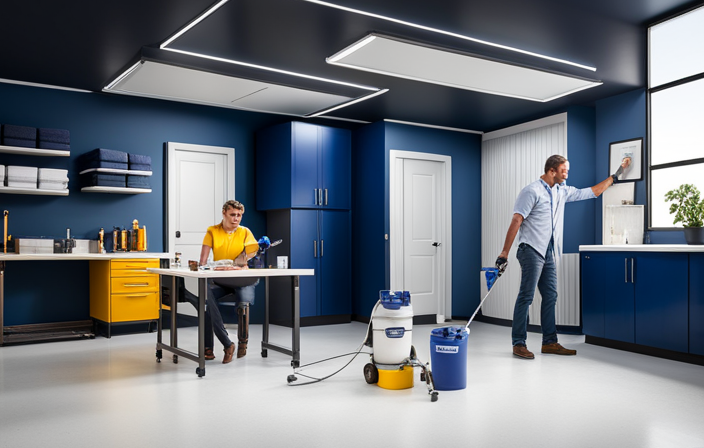
But that’s not all! We’ll also be exploring the ins and outs of efficient spraying with a trusty Graco airless sprayer, because let’s face it, nobody wants to spend more time than necessary on this project.

I’ll be sharing some handy tips on preparing your doors for painting, choosing the right type of paint, and avoiding common mistakes along the way.

And as an added bonus, we’ll be taking a trip to YouTube where you can find expert advice and demonstrations to make your painting process even smoother.

Advertisement

So, grab your paintbrushes and get ready to transform those doors into masterpieces!

Key Takeaways

  • Understanding the proper techniques and equipment for spraying water-based latex paint is essential for a successful door painting project.
  • Calculating the amount of paint needed and considering factors for efficient spraying can save time and resources.
  • Proper preparation, including cleaning and priming the doors, is crucial for achieving a professional-looking finish.
  • Regular maintenance and troubleshooting of the Graco airless sprayer is necessary to ensure optimal performance and longevity.

Understanding the Basics of Water-Based Latex Paint

Understanding the basics of water-based latex paint is easy! One key concept is paint viscosity. Water-based latex paint has a low viscosity, meaning it flows easily and can be sprayed onto surfaces with minimal effort. To achieve optimal results, it’s important to use proper spraying techniques. This includes holding the sprayer at the right distance from the surface, moving in a steady and even motion, and overlapping each pass slightly.

Now that you have a good grasp on the basics of water-based latex paint and proper spraying techniques, let’s dive into calculating the amount of paint needed for 29 doors.

Calculating the Amount of Paint Needed for 29 Doors

To calculate the amount of paint needed for 29 doors, you need to consider the type and size of the doors, as well as the coverage rate of the paint. A general rule of thumb is that one gallon of water-based latex paint can cover around 350-400 square feet. Assuming the doors are standard-sized, approximately 80 square feet each, you can estimate that it would take around 7 gallons of paint to cover all 29 doors.

Advertisement

However, it’s always a good idea to purchase a little extra to account for any touch-ups or mistakes. Estimating paint costs can be done by multiplying the number of gallons needed by the price per gallon.

Now, let’s explore the factors to consider for efficient spraying with a Graco airless sprayer.

Factors to Consider for Efficient Spraying with a Graco Airless Sprayer

To achieve efficient spraying with a Graco airless sprayer, there are several factors to consider. These include proper nozzle selection, sprayer settings, and technique and motion.

Advertisement

Firstly, it is important to choose the appropriate nozzle size for the type of paint being used and the desired finish. This ensures optimal coverage and reduces overspray.

Secondly, adjusting the pressure and fan width of the sprayer according to the size and condition of the doors is crucial. This helps achieve a consistent and efficient application of paint.

Lastly, technique and motion play a significant role in efficient spraying. Maintaining a consistent distance from the doors and using long, overlapping strokes helps avoid streaks or uneven coverage. Moving smoothly and steadily ensures a uniform finish.

By implementing these best practices for paint application, you can save time and effort while achieving professional-looking results. Now, let’s move on to some tips for preparing the doors for painting.

Tips for Preparing the Doors for Painting

Ready to transform your doors into works of art? Let’s dive into some expert tips for preparing them for a flawless painting job.

Advertisement

First, start by cleaning the doors thoroughly. Remove any dirt, dust, or grease using a mild detergent and water.

Next, lightly sand the surface to create a rough texture for better paint adhesion.

After that, it’s time to choose the right primer for your doors. A high-quality primer will enhance the paint’s durability and provide a smooth base for a professional finish.

Apply the primer evenly using a brush or roller, making sure to achieve full coverage.

Once the doors are prepped and primed, you can transition into the subsequent section on choosing the right type of paint for your project.

Advertisement

Choosing the Right Type of Paint for Your Project

When it comes to choosing paint colors, the options are endless. From soft neutrals to bold and vibrant hues, the color you select can set the mood and create a stunning visual impact.

Consider the impact of paint finishes as well. A glossy finish can add a touch of sophistication, while a matte finish creates a more subtle and relaxed atmosphere.

Don’t forget about the power of texture too! Adding a textured finish can bring depth and dimension to your doors.

Advertisement

So, take your time and explore different color and finish options to find the perfect combination that reflects your personal style and enhances the overall look of your space.

Now, let’s dive into the proper techniques for spraying doors with an airless sprayer.

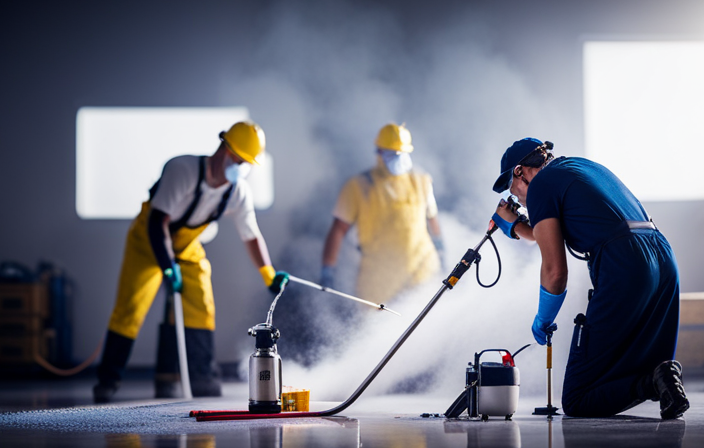
Proper Techniques for Spraying Doors with an Airless Sprayer

Proper techniques for spraying doors with an airless sprayer are crucial for achieving a flawless finish. Here are some steps to follow:

  1. Prepare the doors: Before using an airless sprayer, ensure that the doors are clean and free from dirt or dust. This will help the paint adhere properly.

  2. Apply primer: Use a high-quality primer to create a smooth surface for the paint. This will help the paint to adhere better and provide a better finish.

  3. Spraying technique: Hold the sprayer at a consistent distance from the door and move it in a steady, even motion. Overlapping each pass slightly will help to avoid streaks or uneven coverage.

  4. Take your time: It’s important to take your time and apply thin, even coats. This will prevent drips or runs and ensure a professional-looking finish.

By following these proper spraying techniques, you can achieve a smooth and flawless finish on your doors.

Now, let’s discuss common mistakes to avoid when painting doors.

Advertisement

Common Mistakes to Avoid When Painting Doors

Avoiding these common mistakes will ensure a flawless finish when painting doors. One of the most important things to remember is to avoid drips. Drips can ruin the look of a freshly painted door and are often caused by applying too much paint at once or not using the right technique. To prevent drips, it’s crucial to choose the right paintbrush. A high-quality brush with the appropriate bristle type and size will help you achieve smooth and even coverage. Additionally, make sure to load the brush properly and apply paint in thin, even coats. This will minimize the chance of drips and create a professional-looking finish. By following these tips, you can avoid common mistakes and achieve excellent results when painting doors. In the next section, we will discuss the maintenance and cleaning of the graco airless sprayer.

Maintenance and Cleaning of the Graco Airless Sprayer

Maintaining and cleaning the Graco Airless Sprayer is like giving your painting equipment a refreshing spa treatment. To ensure optimal performance and longevity, regular maintenance is essential.

Start by disconnecting the sprayer from the power source and relieving the pressure. Remove the spray tip, filter, and guard for a thorough cleaning. Use warm soapy water to clean the parts, making sure to remove any paint residue.

Inspect the pump for any signs of damage or wear and replace any worn-out parts. Lubricate the pump and other moving parts to keep them running smoothly.

Additionally, check the hoses and connections for leaks or blockages.

Advertisement

By following these maintenance tips and troubleshooting techniques, you can keep your Graco Airless Sprayer in top shape and ready for your next painting project.

Speaking of smooth processes, let’s move on to troubleshooting tips for a seamless painting experience.

Troubleshooting Tips for a Smooth Painting Process

Having a properly functioning and well-maintained Graco Airless Sprayer is crucial for a flawless and efficient painting process. To troubleshoot common painting problems and achieve a smooth finish quickly, here are some tips:

  • Check the paint consistency: Ensure that the paint is properly mixed and not too thick or thin. Adjust the viscosity if needed.

  • Clean the spray tip: Clogs in the spray tip can cause uneven spraying. Regularly clean the tip and remove any debris.

  • Adjust the pressure: Experiment with different pressure settings to find the right one for your specific project.

  • Maintain a consistent distance: Keep the sprayer at a consistent distance from the surface being painted to avoid streaks or drips.

  • Use smooth, even strokes: Move the sprayer in a steady back-and-forth motion for an even application.

By following these troubleshooting tips, you can achieve a smooth finish quickly. For expert advice and demonstrations on youtube, check out the next section.

Expert Advice and Demonstrations on YouTube

For those seeking expert advice and demonstrations on YouTube, there’s a treasure trove of videos that can guide you through the painting process like a trusted friend, providing invaluable tips and tricks for achieving a flawless finish. When it comes to YouTube advertising, it’s important to follow best practices to maximize your reach and engagement. Here’s a breakdown of some key strategies to consider:

Advertisement
Strategy Description
Targeted audience Identify your target audience and tailor your content to their specific needs and interests.
Compelling thumbnails Create eye-catching thumbnails that entice viewers to click on your video.
Engaging content Produce high-quality videos with engaging content that keeps viewers hooked and encourages them to watch until the end.
Call-to-action Include a clear call-to-action at the end of your videos, directing viewers to subscribe, like, comment, or visit your website.

By implementing these best practices, you can enhance your YouTube advertising efforts and effectively connect with your audience.

Frequently Asked Questions

What are some common mistakes to avoid when painting doors with a Graco airless sprayer?

When painting doors with a Graco airless sprayer, it’s important to avoid common mistakes such as not properly preparing the surface, using too much paint, or spraying too close. Here are some tips for using the sprayer effectively.

How do I properly maintain and clean a Graco airless sprayer?

To properly maintain and clean a Graco airless sprayer, follow these techniques: 1) Regularly inspect and clean filters, hoses, and nozzles. 2) Use appropriate solvents for cleaning. 3) Store the sprayer in a clean and dry area.

Are there any troubleshooting tips for a smooth painting process with a Graco airless sprayer?

To achieve a smooth finish with a Graco airless sprayer, follow these troubleshooting tips: 1) Clean the sprayer thoroughly before use. 2) Adjust the pressure for optimal coverage. 3) Use a high-quality paint and strain it to remove any impurities.

Can you provide expert advice and demonstrations on YouTube for painting doors with a Graco airless sprayer?

Sure, I can provide expert advice and demonstrations on YouTube for painting doors with a Graco airless sprayer. I’ll cover painting techniques and best practices to ensure a smooth process.

Advertisement

How do I choose the right type of paint for my project?

Choosing the right paint colors for your project is crucial. Consider the symbolism behind different colors and how they can enhance the desired atmosphere. Additionally, ensure proper surface prep by cleaning, sanding, and priming to achieve a smooth and long-lasting finish.

Conclusion

After diving into the world of water-based latex paint and exploring the ins and outs of spraying doors with a Graco airless sprayer, I am amazed at the knowledge and tips I have gained.

One important aspect to consider is calculating the perfect amount of paint needed for the job. This will ensure that you have enough paint to cover all 29 doors without running out in the middle of the project. It’s recommended to measure the surface area of each door and then multiply it by the number of doors to get the total square footage. This will give you an estimate of how much paint you’ll need.

Another crucial step is preparing the doors for painting. This involves cleaning them thoroughly to remove any dirt or grease that may affect the paint’s adhesion. It’s also important to sand the doors to create a smooth surface for the paint to adhere to.

With expert advice and demonstrations available on YouTube, you can learn the best techniques for spraying doors with a Graco airless sprayer. These videos provide valuable insights on how to achieve a professional finish and avoid common mistakes.

Advertisement

Armed with the knowledge and tips gained from these resources, you’ll feel equipped to tackle any painting project with finesse. So grab your brushes and sprayers, and let’s transform those doors into works of art!

With James‘ articles, you can expect comprehensive breakdowns of airless paint sprayer features, performance assessments, and expert insights into the latest industry innovations. His meticulous approach ensures that readers gain a thorough understanding of the equipment they are considering, helping them make well-informed choices.

Continue Reading
Advertisement

Airless Paint Sprayers FAQs

How To Prime An Airless Paint Sprayer

Published

on

By

An image showcasing a step-by-step guide on priming an airless paint sprayer

Congratulations on your decision to embark on a painting project, and on acquiring an airless paint sprayer! You’re stepping into the realm of high-quality painting, my friend.

But before you can start transforming your space with a fresh coat of color, there’s one crucial step you must take: priming your sprayer.

In this article, I’ll guide you through the process of priming an airless paint sprayer, step by step. We’ll cover everything from preparing the sprayer to cleaning it after priming. By the time we’re done, you’ll be armed with the knowledge and skills to ensure a smooth and efficient painting experience.

So grab your sprayer, roll up your sleeves, and let’s get priming! Together, we’ll make sure your paint sprayer is ready to deliver flawless results.

Key Takeaways

  • Maintain consistent distance while priming an airless paint sprayer
  • Check for clogs or blockages and clean or replace the nozzle if needed
  • Adjust pressure settings as necessary and pay attention to speed
  • Thoroughly clean the sprayer and equipment after priming to prevent clogs or malfunctions

Prepare the Sprayer for Priming

Advertisement

Now it’s time to get this sprayer ready for priming, so let’s roll up our sleeves and get to work!

Before starting, it’s crucial to perform some sprayer maintenance to ensure optimal performance. First, check all connections and make sure they’re tight and secure.

Inspect the sprayer’s filters and clean or replace them if necessary. Troubleshooting tips can be helpful if you encounter any issues during the priming process.

For example, if the sprayer doesn’t start or has uneven pressure, check the power source, make sure the intake tube’s submerged in the primer, and inspect the spray tip for clogs.

Once the sprayer’s in good condition, it’s time to fill the paint container with primer.

Advertisement

Fill the Paint Container with Primer

To get started, let’s pour the primer into the container and get ready to give your walls a fresh makeover. Here are some priming techniques to consider:

  1. Choosing the right primer: Select a primer that matches the type of paint you’ll be using. Oil-based primers work well for oil-based paints, while latex primers are suitable for latex paints. Consider the surface you’re painting on as well, whether it’s wood, metal, or drywall.

  2. Clean the container: Ensure that the paint container is clean and free from any residue or previous paint. This will prevent any contamination and ensure a smooth application.

  3. Fill the container: Pour the primer into the container, making sure not to overfill it. Leave some space at the top to prevent spills and allow for proper mixing.

  4. Secure the lid: Close the container tightly to avoid any leaks or spills during priming.

Now that the container is filled with primer, let’s move on to attaching it to the sprayer for the next step.

Attach the Paint Container to the Sprayer

Let’s get the paint container connected to the sprayer so we can start giving those walls a fresh new look! To attach the paint container to the sprayer, follow these steps:

Advertisement
  1. Locate the paint container attachment on the sprayer. It is usually a threaded connector located near the handle.
  2. Align the threads on the paint container with the connector on the sprayer.
  3. Slowly twist the container clockwise until it is securely attached.
  4. Ensure that the attachment is tight to prevent any leakage during the painting process.
  5. Refer to the user manual for your specific sprayer model for any additional instructions or troubleshooting tips.

Now that we have successfully attached the paint container to the sprayer, we can move on to the next step of turning on the sprayer and adjusting the pressure for optimal painting results.

Turn on the Sprayer and Adjust the Pressure

Get ready to unleash the power of your sprayer by activating it and fine-tuning the pressure for impeccable painting results. Here are four key steps to follow for optimal sprayer maintenance and troubleshooting common issues:

  1. Turn on the sprayer: Locate the power switch and flip it to the ‘on’ position. Ensure that the sprayer is securely plugged into a grounded outlet.

  2. Adjust the pressure: Use the pressure control knob to increase or decrease the pressure according to your painting needs. Start with a lower pressure setting and gradually increase it until you achieve the desired spray pattern.

  3. Check for leaks: Inspect the sprayer and connections for any leaks. Tighten any loose fittings or replace damaged parts as necessary.

  4. Clean the filters: Regularly clean or replace the filters to prevent clogs and maintain optimal spray performance.

Now that you’ve activated the sprayer and adjusted the pressure, it’s time to test the flow of primer on a scrap surface.

Test the Flow of Primer on a Scrap Surface

After activating the sprayer and adjusting the pressure, it’s time to see how the primer flows on a scrap surface. This step is crucial as it allows you to identify any common mistakes when testing primer on a scrap surface.

Advertisement

One common mistake is not properly preparing the surface before applying the primer, which can lead to uneven coverage and adhesion issues. Another mistake is not selecting the correct nozzle size, which can result in an inconsistent flow and overspray.

To achieve a smooth and consistent primer flow on different surfaces, here are some tips: ensure the surface is clean and free of dust or debris, hold the sprayer at a consistent distance from the surface, and use smooth and overlapping strokes.

By testing the primer flow on a scrap surface, you can assess its consistency and make any necessary adjustments to the pressure and nozzle settings if needed, ensuring optimal results.

Adjust the Pressure and Nozzle Settings if Needed

After testing the flow of primer on a scrap surface, it may be necessary to adjust the pressure and nozzle settings of the airless paint sprayer. This step is crucial to ensure optimal paint application and prevent any issues that may arise during the priming process. To begin, check the pressure gauge on the sprayer and adjust it accordingly, taking care not to exceed the recommended pressure for the primer being used. Next, consider the nozzle size and make any necessary adjustments to achieve the desired spray pattern and coverage. Troubleshooting common issues such as uneven spray, clogging, or overspray can often be resolved by fine-tuning the pressure and nozzle settings. Once these adjustments have been made, you are ready to begin priming the surface with even, overlapping strokes.

Begin Priming the Surface with Even, Overlapping Strokes

Start by smoothly gliding the sprayer across the surface, ensuring that each stroke overlaps with the previous one, creating a seamless coat of primer.

Advertisement

To achieve a smooth finish with an airless paint sprayer, it’s crucial to maintain a consistent speed and distance from the surface. Avoid going too fast or too slow, as it can result in an uneven application. Additionally, be mindful of the pressure and nozzle settings, which should be adjusted according to the thickness of the primer and the desired coverage.

Common mistakes to avoid when priming with an airless paint sprayer include applying too much pressure, which can cause drips and runs, and not overlapping the strokes properly, resulting in missed spots. By following these tips, you can ensure a professional-looking finish.

Continue priming until the surface is fully covered, ensuring that no areas are left untreated.

Continue Priming Until the Surface is Fully Covered

Continue priming until the entire surface is completely covered, ensuring a flawless and professional finish. To achieve the best results, it is important to employ proper continue priming techniques and troubleshoot any priming issues that may arise. One effective technique is to maintain a consistent distance of around 12 inches from the surface, moving the sprayer in even, overlapping strokes. This ensures an even application of the primer and prevents streaking or uneven coverage. Additionally, it is crucial to pay attention to the speed at which the sprayer is moved, as moving too quickly can result in inadequate coverage.

To further enhance the understanding of continue priming, refer to the table below:

Advertisement
Continue Priming Techniques Troubleshooting Priming Issues
Maintain consistent distance Check for clogs or blockages
Use even, overlapping strokes Adjust pressure settings if necessary
Pay attention to speed Clean or replace nozzle if needed

Now that the surface has been fully covered, it is time to transition into the subsequent section about cleaning the sprayer after priming.

Clean the Sprayer After Priming

To ensure a smooth and efficient process, make sure you thoroughly clean the equipment after you finish priming. Cleaning the sprayer is an essential step to maintain its longevity and prevent any clogs or malfunctions during future use. Here are some steps to follow for proper cleaning:

  • Start by disconnecting the sprayer from the power source and releasing any remaining pressure.
  • Remove the spray tip, guard, and filter housing, and rinse them with water to remove any excess paint.
  • Prepare a cleaning solution by mixing warm water with a mild detergent or a recommended cleaning agent.
  • Use a brush or a cloth to scrub the inside of the sprayer, ensuring all paint residues are removed.

After cleaning, make sure to store the sprayer in a dry and secure place to prevent any damage.

Now, you’re ready to start painting with your desired paint color.

Start Painting with Your Desired Paint Color

Get ready to unleash your creativity and bring your vision to life by diving into the vibrant world of colors with your preferred shade. Now that you’ve primed your airless paint sprayer, it’s time to start painting with your desired paint color.

Before you begin, it’s important to understand some painting techniques that’ll help you achieve the best results. One key technique is selecting the right paintbrush for the job. Consider the type of paint you’re using and the surface you’re painting on. A synthetic bristle brush is ideal for latex or water-based paints, while a natural bristle brush is better suited for oil-based paints.

Advertisement

Additionally, consider the size of the brush and the surface area you need to cover. A larger brush is great for larger areas, while a smaller brush is perfect for detailed work. By using the right painting techniques and selecting the right paintbrush, you can achieve a professional-looking finish with your airless paint sprayer.

Frequently Asked Questions

How long does it usually take to prime an airless paint sprayer?

It usually takes a few minutes to prime an airless paint sprayer. To troubleshoot common issues, check for clogs in the spray tip or filter, ensure proper paint consistency, and maintain and store the sprayer according to manufacturer guidelines.

Can any type of primer be used with an airless paint sprayer?

Certainly! When it comes to primer compatibility with an airless paint sprayer, it’s essential to select the best primers. Consider using high-quality oil-based or latex primers, as they are commonly recommended for optimal results.

What safety precautions should be taken when using an airless paint sprayer?

When using an airless paint sprayer, it is crucial to follow safety precautions. Wear protective gear, such as goggles and gloves, to prevent injury. Keep a safe distance from the spray, and ensure proper ventilation in the workspace.

How often should the nozzle on an airless paint sprayer be cleaned?

Cleaning the nozzle of an airless paint sprayer is essential for optimal performance. It is recommended to regularly clean the nozzle to prevent clogs and ensure even spray patterns. Follow the manufacturer’s instructions for proper cleaning techniques.

Advertisement

Can an airless paint sprayer be used for both indoor and outdoor projects?

Yes, an airless paint sprayer can be used for both indoor and outdoor projects. It offers the benefit of providing a smooth, even finish and is efficient for large areas. It eliminates brush strokes and allows for quick and easy application.

Conclusion

To conclude, priming an airless paint sprayer is a crucial step in ensuring a smooth and even finish on your surfaces. By following the steps outlined in this article, you can successfully prepare the sprayer, fill it with primer, adjust the pressure, and test the flow before beginning the priming process.

Remember to clean the sprayer thoroughly after priming to maintain its functionality. Now, armed with this knowledge, you can confidently start painting with your desired paint color and achieve professional-looking results.

Continue Reading

Airless Paint Sprayers FAQs

How To Spray Paint Cabinet Doors With Airless Sprayer

Published

on

By

An image capturing a skilled hand effortlessly gliding an airless sprayer over a row of cabinet doors, releasing a fine mist of paint that delicately coats the surface, transforming them into a flawless masterpiece

Hello! Have you ever desired to refresh the appearance of your kitchen or bathroom cabinets without spending a fortune? Fear not, because I have the ideal answer for you.

In this article, I’m going to show you how to spray paint cabinet doors with an airless sprayer. Trust me, it’s easier than you think!

I know what you’re thinking – painting cabinets sounds like a daunting task. But with the right tools and a little guidance, you’ll be amazed at the transformation you can achieve.

We’ll cover everything from gathering your materials to reattaching the doors, so you’ll have a step-by-step roadmap to follow.

So, if you’re ready to take your cabinets from drab to fab, let’s dive in and get started!

Advertisement

Key Takeaways

  • Spray painting cabinet doors with an airless sprayer is a cost-effective way to give kitchen or bathroom cabinets a fresh new look.
  • Proper preparation and setup, including protecting the workspace and removing cabinet doors and hardware, are crucial for achieving an even spray paint application.
  • Using an airless sprayer requires maintaining a consistent distance, steady hand motion, and troubleshooting common spraying issues for a professional finish.
  • Applying multiple thin coats of paint, allowing each coat to dry before applying the next, and ensuring proper drying and curing time are essential for a durable and long-lasting result.

Gather Your Materials and Prepare Your Workspace

Now that you’ve got all your materials ready and your workspace prepped, it’s time to dive into the exciting world of spray painting your cabinet doors with an airless sprayer!

When choosing the right spray paint color for your cabinet doors, consider the overall aesthetic of your kitchen or the desired style you want to achieve. Neutral colors like white or gray are always a safe bet, but don’t be afraid to go bold with a pop of color if you want to make a statement.

Before you start spraying, it’s important to protect your workspace from overspray. Cover countertops, floors, and surrounding areas with drop cloths or plastic sheets to prevent any paint from getting where it shouldn’t.

Now that your color is chosen and your workspace is protected, it’s time to move on to the next step: removing the cabinet doors and hardware.

Advertisement

Remove Cabinet Doors and Hardware

First, it’s time to bid farewell to your cabinet doors and their accompanying hardware, giving them a temporary vacation from their daily duties. Start by removing all the hardware from the doors, such as handles, knobs, and hinges. This will ensure that you can spray paint the doors evenly without any obstructions.

Next, carefully detach the cabinet doors from their frames using a screwdriver or drill. Place them in a safe, clean area where they won’t get damaged. As you remove the doors, take note of their original position so you can easily reinstall them later.

Additionally, take this opportunity to prepare your workspace by covering any nearby furniture or surfaces with drop cloths or plastic sheets to protect them from overspray.

Now that your cabinet doors and hardware are safely stored away and your workspace is prepped, it’s time to move on to the next step: cleaning and sanding the cabinet doors.

Clean and Sand the Cabinet Doors

Advertisement

Get ready to transform your tired and worn-out cabinet doors into beautiful works of art by giving them a thorough cleaning and sanding. Properly cleaning and sanding the cabinet doors is crucial for achieving a smooth and professional finish. Start by removing any hardware and laying the doors flat on a clean workspace. Using a bucket of warm water and mild detergent, wipe down the doors to remove any grease or dirt. Once they are clean and dry, use a fine-grit sandpaper to gently sand the surface, going with the grain of the wood. This will create a rough texture that helps the primer adhere better. Speaking of primer, choosing the right one is essential. Look for a primer specifically designed for use on cabinets, as it will provide better adhesion and durability. Apply the primer using smooth, even strokes, and let it dry completely before moving on to the next step of spraying on the paint.

Apply Primer to the Cabinet Doors

To achieve a smooth and professional finish, it’s important to apply a primer specifically designed for cabinets to the freshly cleaned and sanded cabinet doors.

When it comes to priming techniques, there are a few things to consider. First, make sure to choose the right primer for your project. Look for a primer that’s compatible with the type of paint you plan to use and offers good adhesion to the cabinet surface. Additionally, opt for a primer that has good coverage and dries quickly to save you time.

When applying the primer, use smooth and even strokes, moving in the same direction as the wood grain. This’ll help ensure an even coat and minimize brush or roller marks.

Advertisement

Once the primer is dry, you can move on to the next step of setting up your airless sprayer and testing the spray pattern.

Set Up Your Airless Sprayer and Test Spray

Once you have all your tools and materials ready, step into the world of transforming your cabinets by setting up your powerful, high-tech painting machine and experiencing the excitement of testing the smooth, even spray that will bring your cabinets to life.

Common Issues Troubleshooting
Uneven spray Adjust pressure
Clogging Clean nozzle
Drips Check viscosity
Overspray Adjust nozzle
Dry patches Increase pressure

Before you start spraying the cabinet doors, it’s important to test the pressure of your airless sprayer. Adjust the pressure according to the manufacturer’s instructions to ensure an even and controlled spray. Troubleshoot common issues such as uneven spray, clogging, drips, overspray, and dry patches. By testing the spray and addressing any issues, you’ll be able to achieve professional results. Now that you’ve set up your sprayer and tested the spray, it’s time to move on to the next step of spraying the cabinet doors.

Advertisement

Start Spraying the Cabinet Doors

After setting up your airless sprayer and conducting a test spray to ensure everything’s working properly, it’s time to start spraying the cabinet doors.

Here are some tips for achieving a flawless finish and troubleshooting common spraying issues. First, make sure to maintain a consistent distance between the sprayer and the doors, usually around 8-12 inches. This helps to avoid uneven coverage and drips.

Additionally, keep your hand steady and move in a smooth, controlled motion to ensure an even application. If you notice any areas with excessive paint buildup or drips, quickly smooth them out with a brush or roller before they dry.

Finally, always spray in a well-ventilated area and wear a mask for personal protection. With these tips in mind, you’ll be well on your way to a professional-looking finish.

Now, let’s move on to applying multiple coats for a smooth finish.

Advertisement

Apply Multiple Coats for a Smooth Finish

For a flawless finish, you’ll want to apply multiple coats, ensuring a smooth and professional look. Start by applying thin coats of paint to the cabinet doors, using smooth and even strokes with your airless sprayer. This will help prevent drips and uneven coverage.

As you apply each coat, make sure to overlap your strokes slightly to ensure complete coverage. Take your time and allow each coat to dry before applying the next one. This will help prevent any smudging or streaking.

For a professional finish, it’s also important to maintain a consistent distance from the surface and move the sprayer at a steady pace. By following these tips and applying multiple thin coats, you’ll achieve a smooth and professional finish.

Now, let the paint dry and cure before moving on to the next step.

Allow the Paint to Dry and Cure

Let the paint work its magic as it dries and cures, transforming your cabinets into a stunning masterpiece. After applying the final coat of paint, it’s important to allow sufficient drying time before handling or reattaching the cabinet doors.

Advertisement

The drying time can vary depending on factors such as temperature and humidity, so it’s best to refer to the paint manufacturer’s instructions for specific guidelines. Typically, it takes around 24 to 48 hours for the paint to dry completely.

Once the paint is dry, it will go through a curing process, which can take up to a week or longer. During this time, the paint will harden and reach its maximum durability.

Once the paint has dried and cured, you can move on to reattaching the cabinet doors and hardware, bringing your project to its final stage.

Reattach Cabinet Doors and Hardware

Now it’s time to bring your cabinets back to life by reattaching the doors and adding the finishing touches with your chosen hardware. Reattaching cabinet doors securely is crucial to ensure they function properly and look seamless. Begin by aligning the hinges on the door with the corresponding holes on the cabinet frame. Use a screwdriver to tighten the screws and secure the doors in place. Once the doors are reattached, it’s time to choose the right hardware. Consider the style and finish of your cabinets when selecting handles or knobs. A 2 column and 4 row table can help you visualize the options. Remember to measure the hole spacing accurately to find hardware that fits perfectly. With the doors securely reattached and the hardware installed, you can now move on to the next step and enjoy your newly painted cabinet doors.

Enjoy Your Newly Painted Cabinet Doors

After all your hard work, you can finally kick back and enjoy the fresh new look of your cabinets. Imagine walking into your kitchen and being greeted by beautifully painted cabinet doors that perfectly complement the rest of your decor.

Advertisement

Here’s how you can enjoy your newly painted cabinet doors:

  1. Choose the right paint color: Consider the overall style and color scheme of your kitchen. Opt for a color that harmonizes with the rest of the room and reflects your personal taste.

  2. Properly clean and maintain painted cabinet doors: Use a gentle cleaner or mild soap to clean the doors regularly, avoiding harsh chemicals that can damage the paint. Wipe away any spills or stains immediately to prevent them from setting in.

  3. Avoid excessive moisture: Be mindful of steam from cooking or hot water, as prolonged exposure can cause the paint to peel or bubble. Use ventilation to minimize moisture buildup.

  4. Handle with care: Avoid slamming or scratching the doors, and use soft-close mechanisms if possible. Regularly inspect and tighten any loose hardware to ensure longevity.

By following these tips, you can enjoy your newly painted cabinet doors for years to come.

Frequently Asked Questions

Can I use a regular paint sprayer instead of an airless sprayer for this project?

Using a regular paint sprayer instead of an airless sprayer for cabinet doors has pros and cons. Pros include ease of use and portability, but cons include potential for uneven coverage. Recommended techniques include thinning the paint and using a fine finish tip.

How long should I wait between applying coats of primer and paint?

I typically wait for the primer to dry completely before applying the paint. The drying time can vary depending on the product, so it’s best to follow the manufacturer’s instructions. It’s recommended to apply multiple coats of paint for a smooth, even finish.

Do I need to remove the cabinet doors from the hinges to spray paint them?

Removing cabinets for spray painting is like trying to catch a wild squirrel with chopsticks. It’s unnecessary and a major hassle. Instead, learn the right spray painting techniques to achieve professional results without removing the cabinet doors from the hinges.

Advertisement

Can I spray paint over existing paint on the cabinet doors?

Yes, you can spray paint over existing paint on cabinet doors. However, it’s important to properly prepare the surface by cleaning and sanding it. Applying a primer before spraying can also help achieve a smooth finish.

What type of paint should I use for the best results when spray painting cabinet doors?

For the best results when spray painting cabinet doors, I recommend using high-quality paint brands like Sherwin-Williams or Benjamin Moore. These brands offer excellent coverage and durability. Additionally, using proper spray painting techniques such as even strokes and overlapping passes will ensure a smooth and professional finish.

Conclusion

Well, there you have it! I’ve just walked you through the process of spray painting your cabinet doors with an airless sprayer. It may seem like a daunting task, but with the right materials and a little bit of elbow grease, you can achieve a professional-looking finish.

Remember, practice makes perfect, so don’t be afraid to test spray and apply multiple coats. Once everything is dry and cured, you’ll be able to sit back and admire your handiwork.

So go ahead, give your kitchen a fresh new look and watch those cabinet doors shine like a diamond in the rough.

Advertisement
Continue Reading

Airless Paint Sprayers FAQs

What Should I Paint First With Airless Sprayer Site:Youtube.Com

Published

on

By

An image capturing the precise moment of an airless sprayer smoothly gliding over a weather-worn wooden fence, effortlessly leaving behind a flawless coat of vibrant paint, displaying the artistry of efficient paint application

I understand the confusion and intimidation that comes with deciding on the initial painting project when operating an airless sprayer. The abundance of choices and potential surfaces can lead to a standstill, bogged down by overthinking. However, worry not! Within this piece, I will navigate you through the journey of picking the ideal surface that will transform into your airless sprayer work of art.

Using an airless sprayer is a game-changer when it comes to efficiency and achieving a professional finish. But before you dive in, it’s essential to gather your painting supplies and understand the basics of using this powerful tool. Once you have that foundation, we’ll explore how to prepare your chosen surface for painting and maintain your airless sprayer for optimal performance.

But wait, what if you encounter issues along the way? Don’t worry, I’ve got you covered. We’ll troubleshoot common problems and share helpful tips and tricks to make your painting experience smooth and enjoyable.

So, grab your airless sprayer and let’s paint the town (or at least the first surface) together!

Introduction to Using an Airless Sprayer

Advertisement

Now that you’ve got your airless sprayer ready, it’s time to dive into the exciting world of using it to paint your first masterpiece.

Using an airless sprayer gives you the ability to achieve professional-looking results with ease.

One important aspect to consider when using an airless sprayer is understanding paint viscosity. Different paint finishes require different viscosities, so it’s crucial to adjust the sprayer settings accordingly.

Thicker paints like latex will require a higher viscosity, while thinner paints like stains will need a lower viscosity. By adjusting the sprayer to the correct viscosity, you’ll ensure a smooth and even application.

Advertisement

Now, let’s move on to the next section where we’ll gather all the necessary painting supplies.

Gather Your Painting Supplies

To begin using an airless sprayer, you first need to acquire the necessary equipment. This includes purchasing or renting an airless sprayer. You also need to gather other painting supplies such as drop cloths, tape, and brushes.

Once you have your equipment, you then need to prepare your painting area. This involves covering furniture and floors with drop cloths and ensuring proper ventilation.

Lastly, you must select the right paint and accessories. Take into consideration the type of surface you are painting and any specific requirements or preferences you have.

Acquire an Airless Sprayer

To acquire an airless sprayer, start by getting yourself one. This equipment will allow you to paint like a pro in no time. Consider the following factors when acquiring an airless sprayer:

Advertisement
  1. Power and Pressure: Look for an airless sprayer that offers sufficient power and pressure. This will ensure a smooth and even application of paint on the surface you’re working with.

  2. Tip Size: Different tip sizes produce different spray patterns. Choose a tip size that suits your project’s requirements. Narrow spray patterns are ideal for detailed work, while wider spray patterns are better for larger surfaces.

  3. Capacity and Portability: Consider the size and weight of the sprayer. A larger capacity is ideal for bigger projects, while a portable and lightweight sprayer is more convenient for smaller areas or when you need to move around.

  4. Troubleshooting Techniques: Familiarize yourself with the sprayer’s troubleshooting techniques. This will help you quickly address any issues that may arise during your painting process.

Now that you have acquired an airless sprayer, let’s move on to preparing your painting area.

Prepare Your Painting Area

Before you begin, make sure your painting area is properly prepared for a smooth and professional finish. To achieve this, start by organizing your painting supplies. Gather all the necessary tools such as brushes, rollers, and paint trays and arrange them in a convenient and accessible manner.

Next, prepare the surfaces to be painted by cleaning them thoroughly and removing any loose or peeling paint. Make sure to cover any furniture or fixtures that you don’t want to be painted. Additionally, protect the surrounding areas by using drop cloths or plastic sheets.

Familiarize yourself with different painting techniques such as brush strokes or sprayer patterns to achieve the desired effect. Finally, ensure proper ventilation in the area to prevent the buildup of fumes.

As you prepare your painting area, remember to select the right paint and accessories for a successful project.

Advertisement

Select the Right Paint and Accessories

Ensure that you have chosen the appropriate type of paint and the necessary accessories to achieve a professional and polished finish in your painting project. When selecting paint colors, consider the atmosphere you want to create in your space. Whether you prefer bold and vibrant or calm and soothing, the right color can make all the difference. Additionally, choosing the right paint finish is essential for achieving the desired look. Matte finishes are great for hiding imperfections, while glossy finishes add a touch of elegance. Don’t forget to gather the necessary accessories such as paint filters, stir sticks, and a paint sprayer tip suitable for your chosen paint type. Understanding the basics of using an airless sprayer will ensure a smooth transition into the next step of your project.

Understand the Basics of Using an Airless Sprayer

Before you start using an airless sprayer, it’s important to familiarize yourself with the sprayer controls. This includes understanding how to adjust the pressure, spray pattern, and flow rate to achieve the desired results.

Additionally, practicing proper technique is crucial for achieving an even and professional-looking finish. This involves maintaining a consistent distance from the surface, moving the sprayer in smooth and overlapping strokes, and avoiding common mistakes such as spraying too quickly or too close to the surface.

Lastly, always prioritize safety measures by wearing protective gear, working in a well-ventilated area, and following the manufacturer’s instructions for handling and cleaning the sprayer.

Familiarize Yourself with the Sprayer Controls

Get ready to have some fun as you familiarize yourself with the controls of your airless sprayer! To make the most out of your painting experience, it’s crucial to understand and adjust the sprayer settings according to your needs. Here are the key controls you need to know:

Advertisement
  1. Pressure Control: This knob allows you to adjust the pressure of the paint flow. Higher pressure results in a faster and thinner application, while lower pressure gives you more control and thicker coats.

  2. Spray Pattern: The spray pattern can be adjusted from a narrow stream to a wide fan shape. This allows you to customize the width and coverage of your paint application.

  3. Trigger Lock: The trigger lock feature helps to reduce hand fatigue during extended painting sessions. It allows you to lock the trigger in the ‘on’ position, so you don’t have to continuously hold it down.

Now that you are familiar with the sprayer controls, it’s time to practice proper sprayer technique and achieve flawless results.

Practice Proper Technique

Mastering proper technique is like learning to dance with your sprayer, gracefully gliding across the surface and creating beautiful, seamless strokes of color. To achieve this level of skill, it is crucial to understand and practice proper technique. Avoiding common mistakes can make a significant difference in the outcome of your painting project.

One common mistake is holding the sprayer too close to the surface, resulting in an uneven application and potential overspray. On the other hand, holding it too far can lead to a thinner coat and a longer painting process. Maintaining a consistent distance is key. Additionally, moving the sprayer too quickly can cause streaks, while moving too slowly can result in excessive paint buildup. Finding the right balance is essential for a professional finish.

In the table below, you can find a summary of proper technique and common mistakes to be aware of:

Proper Technique Common Mistakes
Maintain consistent distance from the surface Holding sprayer too close or too far
Move at a steady pace Moving too quickly or too slowly
Overlap strokes by 50% Not overlapping strokes adequately
Maintain a vertical or horizontal pattern Random or inconsistent spraying direction
Adjust pressure and fan width for desired coverage Not adjusting settings properly

By mastering proper technique and avoiding these common mistakes, you will be well on your way to achieving excellent results with your airless sprayer. However, it is important to also maintain safety measures throughout the painting process.

Advertisement

Maintain Safety Measures

Ensuring a safe painting experience is crucial. It’s like donning a protective shield, guarding against potential hazards and creating a secure environment for your artistic endeavors.

When using an airless sprayer, following safety precautions is essential. Always wear the appropriate protective equipment, such as safety goggles, gloves, and a respirator mask. These items will protect you from potential paint overspray and harmful fumes.

Additionally, make sure to work in a well-ventilated area or use proper ventilation equipment. This will prevent the buildup of hazardous vapors.

Taking these safety measures will not only protect your health but also allow you to focus on your art without any distractions.

Now, let’s transition into the next section and discuss how to choose the right surface to paint first.

Advertisement

Choose the Right Surface to Paint First

Starting off with a blank canvas, it’s crucial to prioritize the surface that will serve as the foundation for your masterpiece. When using an airless sprayer, choosing the right surface to paint first is essential to ensure a flawless finish. Before applying any paint, it’s important to select the appropriate primer for your surface. Primers help to improve adhesion and create a smooth base for the paint to adhere to. Additionally, understanding different paint finishes is crucial in achieving the desired result. Whether you want a glossy or matte finish, selecting the right type of paint will ensure that your artwork shines. By choosing the right primer and understanding different paint finishes, you can create a surface that is ready for the next step of preparing it for painting.

Prepare the Surface for Painting

To get your surface ready for painting, it’s important to properly prepare it. Surface preparation is key to achieving a smooth and long-lasting paint finish.

First, thoroughly clean the surface to remove any dirt, dust, or grease. Use a mild detergent and water for this step.

Next, inspect the surface for any imperfections such as cracks, holes, or peeling paint. These should be repaired and patched using appropriate fillers or putty.

Once the surface is clean and repaired, it’s time to sand it. This step ensures proper adhesion of the paint. Use sandpaper with a grit appropriate for the surface material, and sand in a circular or back-and-forth motion. This will create a slightly rough texture that allows the paint to adhere better.

Advertisement

With the surface properly prepared, you are now ready to start painting with the airless sprayer. This will ensure a professional and flawless finish.

Start Painting with the Airless Sprayer

When starting to paint with an airless sprayer, I begin by applying the first coat evenly and smoothly, making sure to cover the surface completely.

After applying the first coat, it is important to allow sufficient drying time before applying any additional coats. This will ensure that the paint adheres properly and prevents any streaking or unevenness.

If needed, I will apply additional coats to achieve the desired finish, making sure to follow the same process of applying and allowing drying time between each coat.

Apply the First Coat

Begin by applying the first coat with your airless sprayer, ensuring a smooth and even coverage throughout the surface. To achieve a smooth finish, it’s important to apply techniques such as maintaining a consistent spraying distance and keeping the sprayer moving at a steady pace. This will help prevent any uneven application or overspray. Additionally, adjusting the pressure on the sprayer can help control the flow of paint and further improve the overall finish.

Advertisement

To guide you further, here is a table that outlines the recommended settings for different types of surfaces:

Surface Type Spray Tip Size Pressure (PSI)
Smooth surfaces 0.015 – 0.017 2000 – 2500
Textured surfaces 0.019 – 0.021 2500 – 3000
Rough surfaces 0.023 – 0.025 3000 – 3500

Once you have applied the first coat, allow sufficient drying time before applying any additional coats. This will ensure proper adhesion and a professional-looking finish.

Allow Sufficient Drying Time

After applying the first coat, it’s crucial to give it enough drying time, like waiting for a freshly baked cake to cool before adding the frosting, to ensure a professional-looking finish. To achieve optimal drying, here are three effective drying techniques to follow:

  1. Proper ventilation: Ensure the area is well-ventilated to allow the paint to dry evenly and prevent any moisture buildup.

  2. Time allocation: Different paint types require different drying times. Check the paint can label or manufacturer’s instructions for specific drying times and adhere to them strictly.

  3. Avoiding humidity: High humidity levels can prolong drying time and affect the quality of the finish. Consider using dehumidifiers or fans to regulate humidity levels during the drying process.

By employing these drying techniques and using appropriate paint application methods, such as using an airless sprayer, you can achieve a flawless finish. Now, let’s move on to applying additional coats if needed.

Apply Additional Coats if Needed

To achieve a flawless finish, it’s time to consider adding more coats if necessary. Applying additional coats is crucial for even coverage and a professional-looking result. Here are some techniques you can use to ensure the best outcome:

Advertisement
Technique Description
Cross-hatching Apply the second coat in a perpendicular direction to the first coat.
Feathering Overlap each stroke slightly to blend the coats together seamlessly.
Wet-on-wet application Apply the next coat while the previous one is still wet to avoid lines or gaps.

By employing these techniques, you can achieve a smooth and uniform finish. Remember to allow sufficient drying time between coats and follow the manufacturer’s instructions for the specific paint you are using. Once you have achieved the desired coverage, it’s important to maintain and clean your airless sprayer regularly to ensure its longevity and optimal performance.

Maintain and Clean Your Airless Sprayer

When it comes to maintaining and cleaning your airless sprayer, there are three key points to keep in mind:

  1. Proper storage: Store the sprayer and its accessories in a clean and dry environment. This helps prevent damage and clogs that can affect its performance.

  2. Thorough cleaning: After each use, clean the sprayer thoroughly to remove any paint residue. This prevents build-up that could impact its performance. Pay attention to all parts, including the nozzle, hose, and filter.

  3. Regular maintenance: Perform regular maintenance and inspections to ensure all parts are in good working condition. Replace any worn-out or damaged components as needed. This helps keep the sprayer in optimal condition and prolongs its lifespan.

Following these practices will help you maintain and clean your airless sprayer effectively.

Properly Store the Sprayer and Accessories

Properly storing the airless sprayer and its accessories is crucial for maintaining their longevity and performance. Studies have shown that poorly stored sprayers can experience a 30% decrease in efficiency over time.

To properly store your airless sprayer, make sure to clean it thoroughly after use. This includes removing any leftover paint, flushing the system with water or solvent, and ensuring all components are free from debris.

Advertisement

Avoid common mistakes when storing the sprayer, such as leaving paint residue in the hoses or gun, as this can lead to clogs and damage. By properly cleaning and storing your sprayer, you can ensure its efficient operation and prolong its lifespan.

After cleaning the sprayer thoroughly, it is time to move on to the next step: preparing to paint your first project.

Clean the Sprayer Thoroughly After Use

Make sure to thoroughly clean the sprayer after each use to keep it in top-notch condition and enjoy long-lasting performance. Cleaning the sprayer is a crucial step in proper maintenance and will prevent clogs and build-up that can affect the sprayer’s performance.

To clean the sprayer, start by removing any remaining paint from the container and flushing it with water. Next, disassemble the sprayer and clean each component thoroughly using a cleaning technique recommended by the manufacturer. It’s important to use the proper cleaning products to avoid damaging the sprayer.

Once all the parts are clean, reassemble the sprayer and perform regular maintenance and inspections to ensure it continues to work effectively.

Advertisement

Perform Regular Maintenance and Inspections

Performing regular maintenance and inspections is essential to ensure the sprayer continues to perform at its best and avoid any potential issues. To keep your airless sprayer in top shape, follow these inspection techniques and regular maintenance practices:

  • Check the filters regularly and clean or replace them as needed to prevent clogs and ensure proper paint flow.
  • Inspect the spray tip for any signs of wear or damage and replace it if necessary to maintain precise spraying patterns.
  • Regularly inspect the hoses for any leaks, cracks, or signs of deterioration, and replace them promptly to prevent paint wastage and ensure smooth operation.
  • Clean the sprayer thoroughly after each use to remove any residual paint or debris that could cause clogs or damage.

By performing regular maintenance and inspections, you can extend the lifespan of your airless sprayer and prevent common issues.

Transitioning into troubleshooting common issues with the airless sprayer, it is important to address and resolve any problems promptly to maintain optimal performance.

Troubleshoot Common Issues with the Airless Sprayer

Having trouble with your airless sprayer? Let’s tackle some common issues together!

When it comes to troubleshooting your airless sprayer, there are a few common problems that you may encounter. One of the most common issues is clogging in the spray tip. This can be caused by using the wrong size tip for the material being sprayed or by debris in the paint.

To fix this problem, you can try cleaning the tip with a small wire brush or replacing it with a new one.

Advertisement

Another common issue is uneven spray pattern, which can be caused by a worn or damaged spray tip or an incorrect pressure setting. Adjusting the pressure or replacing the spray tip can usually solve this problem.

Lastly, if your sprayer is not priming or pumping paint, it could be due to a worn inlet valve or a clogged filter. Cleaning or replacing these parts should resolve the issue.

These troubleshooting tips should help you get your airless sprayer back in working order. Now, let’s move on to some tips and tricks for using an airless sprayer without missing a beat.

Tips and Tricks for Using an Airless Sprayer

Master the art of using an airless sprayer like a pro and watch your painting projects transform into works of pure beauty. To ensure smooth and efficient spraying, it’s crucial to properly maintain your airless sprayer. Here are some tips and tricks to enhance your airless spraying technique:

  • Regularly clean the filters, replace worn-out parts, and lubricate moving components.
  • Troubleshoot common issues like clogs and uneven spray patterns.
  • Adjust the pressure settings according to the material being sprayed for optimal coverage.
  • Use a wide spray pattern to cover large areas quickly and evenly.
  • Maintain a consistent distance from the surface to avoid uneven application.
  • Overlap each pass by 50% to ensure complete coverage.
  • Practice on a test surface before starting your actual project to fine-tune your spraying technique.

By mastering these techniques and understanding proper airless sprayer maintenance, you’ll be well on your way to achieving professional-quality results. Watch instructional videos on YouTube for visual guidance and inspiration as you embark on your painting journey.

Watch Instructional Videos on YouTube for Visual Guidance and Inspiration

Get inspired and gain valuable insight by watching instructional videos on YouTube. These videos provide a great resource for beginners and experienced painters alike. By watching these videos, you can see firsthand how to properly set up and operate an airless sprayer, as well as learn helpful techniques and tricks for achieving professional results.

Advertisement

The visual aspect of these videos allows you to see the spray patterns, pressure adjustments, and painting techniques in action, which can be incredibly helpful in understanding how to use the sprayer effectively. Additionally, watching these videos can provide you with visual inspiration for your own painting projects, as you can see what others have created using an airless sprayer.

So, grab some popcorn and start watching these instructional videos on YouTube to enhance your skills and get inspired!

Frequently Asked Questions

Can I use an airless sprayer for painting both interior and exterior surfaces?

Yes, an airless sprayer can be used for both interior and exterior surfaces. While it provides fast and even coverage, the cons include overspray and the need for proper ventilation. Overall, it’s a versatile tool for efficient painting.

How do I know if the surface is suitable for airless spraying?

To determine if a surface is suitable for airless spraying, I check for any loose or flaking paint, cracks, or rough spots. I then prepare the surface by cleaning it thoroughly and ensuring it is dry and free from any dirt or debris.

What type of paint is best for use with an airless sprayer?

The best paint brands for use with an airless sprayer include Sherwin-Williams, Behr, and Benjamin Moore. Airless sprayers offer efficient and fast application, but they require proper preparation and cleanup.

Advertisement

Can I use an airless sprayer for intricate or detailed painting projects?

Yes, an airless sprayer can be used for intricate or detailed painting projects. The benefits of using an airless sprayer for small scale projects include precise control, smooth finish, and faster application.

How do I prevent overspray when using an airless sprayer?

To prevent overspray when using an airless sprayer, it’s crucial to choose the right technique. Start by adjusting the pressure and fan pattern on the sprayer. Cover surrounding areas with drop cloths or masking tape for added protection.

Conclusion

In conclusion, using an airless sprayer for your painting projects can be a game changer. By following the steps outlined in this article, you can achieve professional-looking results with ease.

Remember the adage ‘practice makes perfect’ as you embark on your painting journey. With proper maintenance and troubleshooting, your airless sprayer will continue to serve you well for future projects.

Don’t forget to watch instructional videos on YouTube for additional guidance and inspiration. Happy painting!

Advertisement
Continue Reading
Advertisement

Affiliate disclaimer

As an affiliate, we may earn a commission from qualifying purchases. We get commissions for purchases made through links on this website from Amazon and other third parties.

Advertisement

Trending