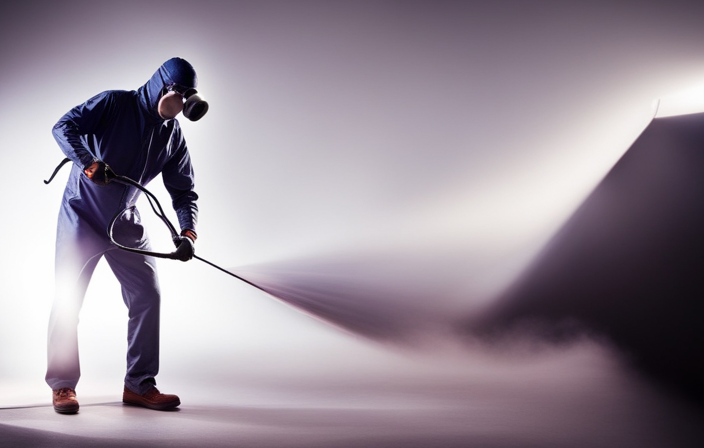
Imagine yourself as an artist, standing in front of a blank canvas, ready to create a masterpiece. You dip your brush into a pot filled with latex paint, but something feels off. The paint is too thick, making it difficult to achieve the flawless finish you desire.
That’s where the magic of an airless sprayer comes in. But here’s the catch – you need to find the perfect water-to-paint ratio to achieve optimal results.
In this article, I will guide you through the intricacies of mixing water with latex paint for an airless sprayer. We’ll explore the basics of latex paint and airless sprayers, the importance of the water-to-paint ratio, and how to adjust it based on your desired consistency.
With a few tips and tricks up your sleeve, you’ll be able to achieve the perfect consistency and unleash your artistic potential. So, let’s dive in and discover the secrets to creating a flawless finish with your airless sprayer.
Key Takeaways
- Adding excessive water to latex paint for an airless sprayer can result in a thin and runny paint mixture.
- Excessive water can lead to poor coverage and adhesion, as well as uneven color and texture.
- Using dirty water for latex paint in an airless sprayer can result in imperfections in the paint finish.
- Regular maintenance, including cleaning the equipment thoroughly after each use and periodically inspecting and replacing worn-out parts, is essential for the reliable and optimal performance of an airless sprayer.

Gyfent 22Pcs Airless Paint Sprayer Gun Kit & 50Ft x 1/4“ NPT Hose, 3600PSI
- Complete Spray Gun Kit: Includes spray gun, hose, tips, and accessories
- Universal Compatibility: Fits most airless paint sprayers with 50ft hose
- Versatile Nozzles and Extensions: Six spray tips and four extension rods for various needs
As an affiliate, we earn on qualifying purchases.
As an affiliate, we earn on qualifying purchases.
Understanding the Basics of Latex Paint and Airless Sprayers
So, you’re wondering how much water you should mix with your latex paint for an airless sprayer? Understanding the basics of latex paint and airless sprayers is essential for achieving the best results.
When it comes to the water-to-paint ratio, it’s crucial to find the right balance. The general rule of thumb is to mix one part water with ten parts latex paint. However, this ratio can vary depending on factors such as the desired consistency and the paint manufacturer’s recommendations.
Getting the water-to-paint ratio right has several benefits. It helps improve paint flow, reduces clogging in the sprayer, and ensures an even application. Troubleshooting airless sprayer issues, such as poor coverage or paint streaks, can often be attributed to an incorrect water-to-paint ratio.
Understanding the importance of this ratio is key to achieving professional-looking results.
Importance of the Water-to-Paint Ratio
To achieve the perfect consistency, you’ll want to find the right balance between the amount of water and paint you mix together for your airless sprayer. The importance of proper dilution can’t be overstated.
If you don’t add enough water, the paint may be too thick and won’t spray evenly. On the other hand, if you add too much water, the paint may become too thin and won’t adhere properly to the surface.
Getting the water-to-paint ratio just right is crucial for achieving a smooth and professional finish. An incorrect water to paint ratio can have a significant impact on the final result, leading to issues like streaks, drips, or an uneven coating.
To ensure you start off on the right foot, it’s always a good idea to begin with the manufacturer’s recommendations. This will provide you with a solid starting point for achieving the desired consistency.
Start with the Manufacturer’s Recommendations
Begin by following the manufacturer’s recommendations for the ideal water-to-paint ratio, as this can greatly impact the final result of your painting job. The manufacturer’s recommendations provide valuable guidance on achieving the best water ratio for your specific latex paint. Here are some key reasons why it’s important to start with the manufacturer’s recommendations:
-
Consistency: Following the recommended water ratio ensures that your paint will have the ideal consistency for smooth application.
-
Coverage: The manufacturer knows the optimal ratio to achieve maximum coverage, ensuring that you can paint efficiently.
-
Drying Time: Using the correct water-to-paint ratio allows for proper drying, preventing issues such as cracking or peeling.
-
Adhesion: The recommended ratio promotes good adhesion, ensuring that the paint bonds well to the surface.
-
Durability: By following the manufacturer’s recommendations, you can achieve a durable and long-lasting finish.
Once you’ve followed the manufacturer’s recommendations, you can then adjust the ratio based on your desired consistency. This’ll allow you to fine-tune the paint mixture to suit your specific painting needs.
Adjusting the Ratio Based on Desired Consistency
Once you’ve followed the manufacturer’s recommendations, you can easily tweak the paint mixture to achieve your desired consistency, just like an experienced artist adjusting the strokes of their brush to create the perfect masterpiece.
Adjusting the viscosity of the latex paint can have a significant impact on the application process. If you find that the paint is too thick and not flowing smoothly through the airless sprayer, you can add a small amount of water to thin it out. On the other hand, if the paint is too thin and is causing drips or runs, you can add a bit more paint to thicken it up.
It’s important to find the right balance, as the viscosity of the paint will affect the overall finish and durability. After adjusting the ratio, it’s recommended to test the mixture on a test surface to ensure it provides the desired results.
Testing the Mixture on a Test Surface
After adjusting the ratio, it’s recommended to test the paint mixture on a small sample surface to ensure it produces the desired results. Here are four testing techniques to help evaluate the outcome:
-
Spray Pattern: Examine the spray pattern on the test surface. The paint should evenly cover the area without any clumps or streaks.
-
Coverage: Check if the paint provides adequate coverage. It should hide the surface beneath and create a smooth finish.
-
Drying Time: Allow the test surface to dry completely. Observe how long it takes for the paint to dry. Ideally, it should dry within a reasonable timeframe.
-
Adhesion: Test the adhesion of the paint by lightly scratching the surface. The paint should adhere well and not easily peel off.
By conducting these tests, you can assess the effectiveness of your paint mixture.
Moving forward, let’s explore the factors to consider when determining the water-to-paint ratio.
Factors to Consider When Determining the Water-to-Paint Ratio
To determine the water-to-paint ratio, you’ll need to consider a few key factors. Just like a master chef finding the right balance of ingredients for a delicious dish, finding the perfect recipe for your paint mixture is essential.
The first factor to consider is the type of paint you’re using. Different paints have different consistencies, so it’s important to understand how adding water will affect them.
Another factor is the desired finish. If you want a smoother finish, you may need to add more water. On the other hand, if you’re looking for a thicker, more textured finish, less water may be required.
Additionally, the temperature and humidity of your environment can impact the drying time and consistency of your paint, so it’s important to take these factors into account.
By considering these factors, you can achieve optimal consistency in your paint mixture.
Now, let’s move on to some tips and tricks for achieving the perfect consistency.
Tips and Tricks for Achieving the Perfect Consistency
Achieving the perfect consistency is like finding the right balance of ingredients in a recipe – it’s an art that requires finesse and attention to detail. To help you achieve the desired consistency for your latex paint, here are some tips and tricks to keep in mind.
Firstly, perfecting your spray technique is crucial. Make sure to hold the sprayer at the correct distance from the surface and move it in a steady, even motion to avoid uneven coverage. Additionally, troubleshooting common paint consistency issues is essential. If the paint is too thick, gradually add small amounts of water until it reaches the desired consistency. On the other hand, if the paint is too thin, you can add small amounts of paint to thicken it.
By following these guidelines, you can achieve a perfect consistency for your latex paint. In the next section, we will discuss common mistakes to avoid when mixing water and latex paint.
Common Mistakes to Avoid When Mixing Water and Latex Paint
Be careful not to make these common mistakes when mixing water and latex paint. Achieving consistency is crucial for a successful paint job. Here are some common mistakes to avoid:
-
Adding too much water: Adding excessive water can result in a thin and runny paint mixture, leading to poor coverage and adhesion.
-
Not mixing thoroughly: Failing to mix the water and paint thoroughly can result in uneven color and texture on your surfaces.
-
Using dirty water: Using water that’s contaminated with dust or debris can cause imperfections in your paint finish.
-
Mixing too quickly: Mixing too quickly can create air bubbles in the paint, which can lead to a rough and uneven application.
-
Ignoring manufacturer instructions: Not following the manufacturer’s recommendations for water-to-paint ratio can result in inconsistent results.
Now that you know how to avoid these common mistakes, let’s move on to cleaning and maintaining your airless sprayer to ensure its longevity.
Cleaning and Maintaining Your Airless Sprayer
Properly caring for your airless sprayer is like giving it a gentle hug, ensuring its longevity and performance. Cleaning techniques play a crucial role in maintaining the efficiency of your sprayer.
After each use, it’s essential to thoroughly clean the machine to prevent any clogs or blockages. Start by flushing the system with clean water to remove any remaining paint particles.
Next, disassemble the spray gun and clean each component individually. Use a mild detergent and a brush to remove any stubborn paint residue.
Once everything is clean, reassemble the spray gun and run clean water through the system again to ensure all traces of paint are removed.
In addition to regular cleaning, familiarize yourself with troubleshooting tips to address any potential issues. If you experience uneven spray patterns, check the tip for clogs or wear and replace if necessary. If the sprayer isn’t priming, ensure all connections are secure and the intake tube is free from debris.
By following these cleaning techniques and troubleshooting tips, you can keep your airless sprayer in optimal condition and ready for your next painting project.
As we conclude, let’s explore some final thoughts and recommendations for achieving the best results with your airless sprayer.
Final Thoughts and Conclusion
Take a moment to reflect on the care and attention you’ve given your airless sprayer, knowing that by doing so, you’ve ensured its reliability and performance for all your future painting projects.
Here are three final thoughts to consider:
-
Importance of experimentation: Don’t be afraid to try different techniques and settings when using your airless sprayer. Each project may require slight adjustments to achieve the best results. Take the time to experiment and find what works best for you.
-
Learn from experience: As you gain more experience with your airless sprayer, you’ll become more familiar with its capabilities and limitations. Pay attention to the feedback it provides during each project and use that knowledge to improve your painting skills.
-
Regular maintenance is key: Cleaning and maintaining your airless sprayer is crucial for its longevity. Make it a habit to clean the equipment thoroughly after each use, and periodically inspect and replace any worn-out parts.
By following these final thoughts and maintaining your airless sprayer, you can ensure its reliability and enjoy excellent performance for years to come.
Frequently Asked Questions
Can I use any type of water with latex paint in an airless sprayer?
You can use any type of water to dilute latex paint in an airless sprayer. However, the type of water used can affect the overall performance and quality of the paint application.
What are the consequences of using too much water in the paint mixture?
Using too much water in your latex paint mixture is like diluting a powerful potion. It weakens the paint, resulting in poor coverage and adhesion. To achieve the proper water to paint ratio, follow these tips for optimal results.
How long does it take for the paint and water mixture to settle before use?
To properly clean an airless sprayer after using a paint and water mixture, start by flushing the system with clean water. Then, disassemble the gun and clean each part thoroughly. For a smooth finish, ensure the paint and water mixture is well-mixed and strain it before use.
Are there any safety precautions I should take when using an airless sprayer with latex paint and water?
When using an airless sprayer with latex paint and water, it is important to take safety measures and follow best practices. This ensures a safe and effective painting process.
Can I reuse the leftover paint and water mixture?
Sure, you can totally reuse the leftover paint and water mixture. Just make sure to properly dispose of it afterwards. Remember, it’s important to follow the guidelines for safe disposal of paint and water to protect the environment.
Conclusion
In conclusion, finding the right water-to-paint ratio for your airless sprayer is crucial for achieving a smooth and even finish with latex paint. Remember to always start with the manufacturer’s recommendations and make adjustments based on your desired consistency.
Interestingly, studies have shown that a water-to-paint ratio of around 10-20% can significantly improve the flow and atomization of the paint, resulting in a more professional-looking finish.
By following these guidelines and properly maintaining your sprayer, you can achieve excellent results every time.
Happy painting!