Did you know that adjusting the pressure settings on your airless paint sprayer can have a major impact on the quality of your paint job? It’s true! By making precise pressure adjustments, you can achieve a smooth and consistent application, ensuring that your projects always look professional. In this article, I will guide you through the process of adjusting the pressure on your airless paint sprayer, explaining each step in detail.
To get started, you’ll need a few tools and equipment, such as a pressure control knob or dial. Once you’ve gathered everything you need, it’s time to locate the pressure control on your sprayer.
Starting with a low pressure setting is recommended, as this allows you to gradually increase the pressure until you achieve the desired spray pattern. It’s important to pay attention to the material and surface you’re painting, as different surfaces may require different pressure settings.
By following these instructions and regularly maintaining your sprayer, you’ll be able to find the perfect pressure for optimal painting results.
So let’s dive in and learn how to adjust the pressure on your airless paint sprayer like a pro!
Key Takeaways
- Regular sprayer maintenance is important for extending lifespan and ensuring optimal performance.
- Thoroughly cleaning the sprayer after each use prevents clogging and enhances paint application.
- Regular inspection of hoses, fittings, and seals is necessary to avoid further issues and maintain sprayer reliability.
- Experimenting and finding the perfect pressure is crucial for achieving professional finish and consistent results.
Understand the Importance of Pressure Adjustment
Adjusting the pressure on your airless paint sprayer is like finding the perfect balance between a gentle breeze and a powerful gust. It ensures a flawless and even coat of paint. Understanding the importance of pressure control is crucial in achieving professional-quality results.
Improper pressure adjustment can have a significant impact on your paint job. If the pressure is too high, it can lead to overspray and uneven application. This causes wasted paint and an unattractive finish. On the other hand, if the pressure is too low, it may result in an uneven distribution of paint. This leaves visible streaks and an inconsistent color.
To avoid these issues, it is essential to gather the necessary tools and equipment for adjusting the pressure correctly.
Gather the Necessary Tools and Equipment
To get started, make sure you have all the tools and equipment you’ll need for this DIY adventure. When choosing the right paint for your airless sprayer, consider the viscosity and compatibility with your sprayer. Look for paints labeled for airless sprayers for optimal performance.
Be mindful of common mistakes to avoid when using an airless paint sprayer. These include not thinning the paint properly, using the wrong tip size, and spraying too quickly or too close to the surface. Avoiding these mistakes will help you achieve a smooth and even finish.
Now, let’s move on to locating the pressure control knob or dial.
Locate the Pressure Control Knob or Dial
Before we dive into the next step, let’s find the knob or dial that gives you complete control over unleashing your creativity with a single twist.
The pressure control knob or dial is a crucial component of an airless paint sprayer. It allows you to adjust the pressure according to your painting needs. By turning the knob clockwise, you increase the pressure, while turning it counterclockwise decreases the pressure.
Mastering pressure control techniques is essential for achieving the desired paint finish and avoiding potential issues such as overspray or uneven coverage. If you encounter any pressure issues, such as fluctuating pressure or loss of pressure, troubleshooting may be required.
Now that we have located the pressure control knob, let’s move on to the next section and start with a low pressure setting.
Start with a Low Pressure Setting
Take a moment to ease into your painting journey by starting with a gentle touch. Set the stage for a masterpiece by beginning with a low-pressure setting.
When using an airless paint sprayer, it’s essential to start with a higher pressure setting and then adjust it based on the paint viscosity. Starting with a higher pressure allows for better atomization of the paint, resulting in a smoother and more even finish.
However, it’s important to note that different paints have varying viscosities. Therefore, it’s crucial to adjust the pressure accordingly. Thicker paints may require a higher pressure, while thinner paints may need a lower pressure.
By adjusting the pressure based on the paint viscosity, you can achieve optimal paint flow and coverage.
Now, let’s move on to the next section and discuss how to test the spray pattern and adjust it as needed.
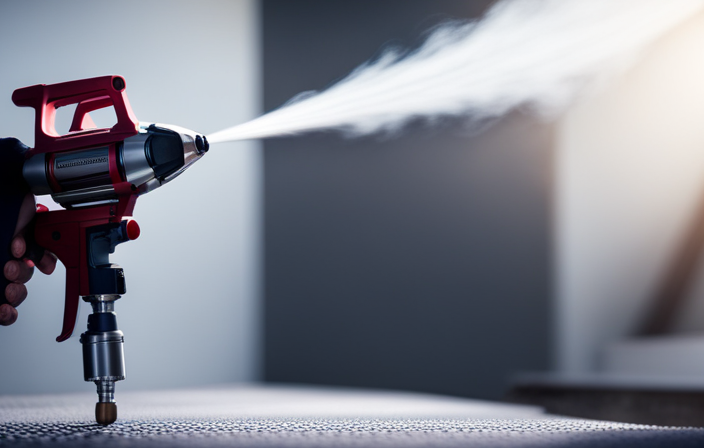
Test the Spray Pattern and Adjust as Needed
To test the spray pattern and adjust as needed, follow these steps:
-
Experiment with different settings to explore the spray pattern and fine-tune your painting technique.
-
Adjust the pressure settings on your airless paint sprayer. Start with a low pressure setting and gradually increase it until you achieve the desired pattern.
-
Ensure that the spray pattern is even and consistent, without any uneven patches or excessive overspray.
-
Pay attention to the width and coverage of the paint, as well as the atomization of the particles, while testing the spray pattern.
-
Control the flow of paint and ensure optimal results by adjusting the pressure settings.
Remember to increase or decrease the pressure gradually in small increments to avoid sudden changes that could affect the quality of your paint job.
Increase or Decrease the Pressure Gradually
After testing the spray pattern and making necessary adjustments, it is time to fine-tune the pressure settings on your airless paint sprayer. Increasing or decreasing the pressure gradually is crucial to achieve the desired results.
To increase the pressure, simply turn the pressure adjustment knob clockwise in small increments. This will gradually raise the pressure and allow for a higher volume of paint to be sprayed.
On the other hand, to decrease the pressure, turn the knob counterclockwise in small increments. This will reduce the pressure and result in a lower volume of paint being sprayed.
It is important to make these adjustments slowly and carefully to avoid sudden changes that may affect the paint application.
Now, let’s move on to the next section and discuss the importance of paying attention to the material and surface being painted.
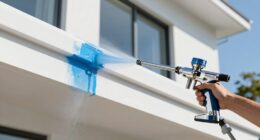
Pay Attention to the Material and Surface Being Painted
To ensure a flawless paint job, it’s crucial to consider the type of material and surface you’re working with. Choosing the right paint type and proper surface preparation are key factors in achieving optimal results with an airless paint sprayer. Different materials and surfaces require different paint types and preparation techniques to ensure adhesion and durability. Before starting the painting process, it’s important to determine whether the material is porous or non-porous, as this will affect the type of paint that should be used. Additionally, the surface should be thoroughly cleaned, sanded, and primed if necessary to create a smooth and even finish. By carefully considering the material and surface, you can ensure that the paint adheres properly and provides long-lasting results. Now, let’s move on to the next section and fine-tune the pressure for optimal results.
Fine-tune the Pressure for Optimal Results
To fine-tune your settings for the best outcome, it’s important to find the perfect balance between the power of the machine and the precision of your hand. This can be achieved by understanding pressure adjustment techniques and troubleshooting any pressure issues that may arise.
Start by adjusting the pressure knob or dial on your sprayer to increase or decrease the pressure output. Pay close attention to the spray pattern and make adjustments accordingly until you achieve a consistent and even application.
Consider the viscosity of the paint being used as well. Thicker paints may require higher pressure settings to ensure proper atomization and coverage.
Regularly cleaning and maintaining your sprayer is also crucial in preventing clogs and ensuring optimal performance.
By fine-tuning the pressure and taking care of your sprayer, you can achieve professional-quality results with your airless paint sprayer.
Clean and Maintain Your Sprayer Regularly
To keep your sprayer in top condition and guarantee exceptional results every time, it is important to regularly clean and maintain it. Proper maintenance helps prevent common sprayer problems and ensures optimal performance.
Start by thoroughly cleaning the sprayer after each use, making sure to remove any leftover paint or debris. Pay special attention to the nozzle and filters, as they can easily become clogged.
Regularly inspect the hoses, fittings, and seals for any signs of wear or damage. If you notice any worn-out parts, replace them promptly to avoid further issues.
In addition to cleaning, it is important to lubricate the moving parts of the sprayer as recommended by the manufacturer.
By following these sprayer troubleshooting and maintenance practices, you can extend the lifespan of your equipment and achieve excellent painting results. As you practice and experiment with different settings, you will be able to find the perfect pressure for your specific painting needs.
Practice and Experiment to Find the Perfect Pressure
Experiment with different settings and techniques to uncover the ideal pressure for your specific painting needs, allowing you to achieve flawless results with your sprayer. Finding the sweet spot for your airless paint sprayer’s pressure is crucial for a professional finish.
Start by adjusting the pressure to a low setting and gradually increase it until you reach the desired outcome. This trial and error process will help you understand the impact of different pressure levels on your paint application. Keep in mind that factors such as paint viscosity, surface type, and desired finish also play a role in determining the perfect pressure.
Take note of the pressure settings that yield the best results and use them as a reference for future projects. Remember, practice makes perfect, so don’t be afraid to experiment and fine-tune your technique to achieve optimal pressure control.
Frequently Asked Questions
How do I clean and maintain my airless paint sprayer?
To clean and maintain my airless paint sprayer, I follow a thorough cleaning process. I start by removing any paint residue, then disassemble and clean the components. Regular maintenance tips include checking for clogs and lubricating moving parts.
What are the necessary tools and equipment needed to adjust the pressure on an airless paint sprayer?
To adjust pressure on an airless paint sprayer, you’ll need a pressure gauge, an adjustable wrench, and a clean cloth. These necessary tools and equipment ensure accurate pressure adjustments for precise and efficient painting.
Can I adjust the pressure on an airless paint sprayer while it is in use?
Yes, you can adjust the pressure on an airless paint sprayer while it is in use. By following troubleshooting tips and using the necessary tools and equipment, you can easily adjust the pressure to achieve the desired results.
How do I know if the pressure needs to be increased or decreased when adjusting an airless paint sprayer?
To determine if the pressure needs adjusting on an airless paint sprayer, I assess the application. If the paint is not covering well, increasing pressure may be necessary. If excessive overspray occurs, decreasing pressure is recommended.
Are there any specific safety precautions I should take when adjusting the pressure on an airless paint sprayer?
When adjusting the pressure on an airless paint sprayer, it is important to take specific safety measures. Wear protective clothing, goggles, and a respirator. Follow troubleshooting tips to ensure the equipment is functioning properly and avoid accidents.
Conclusion
In conclusion, adjusting the pressure on an airless paint sprayer is a crucial step in achieving optimal results. By following the steps outlined in this article, you can ensure that your paint sprayer is set to the right pressure for the material and surface you are working with.
Remember to regularly clean and maintain your sprayer to keep it in top condition. So, why settle for mediocre results when you can achieve professional-quality finishes with just the right amount of pressure?