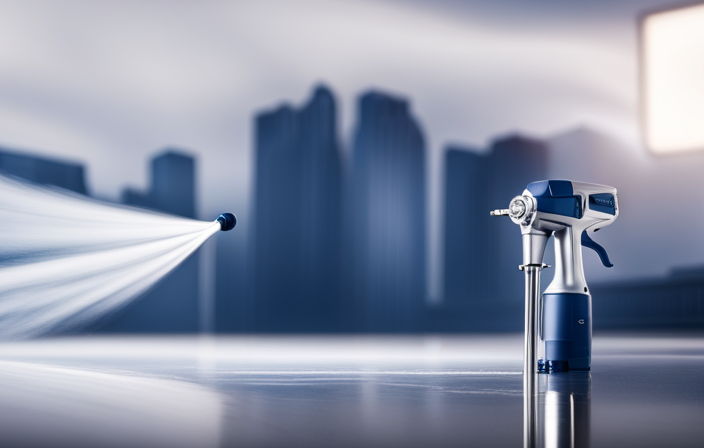
Have you ever struggled to achieve a flawless finish when using an airless paint sprayer? Don’t worry! This article will help you adjust your sprayer settings for maximum coverage and impressive results. With some simple tweaks, you’ll be able to tackle any painting project like a pro.
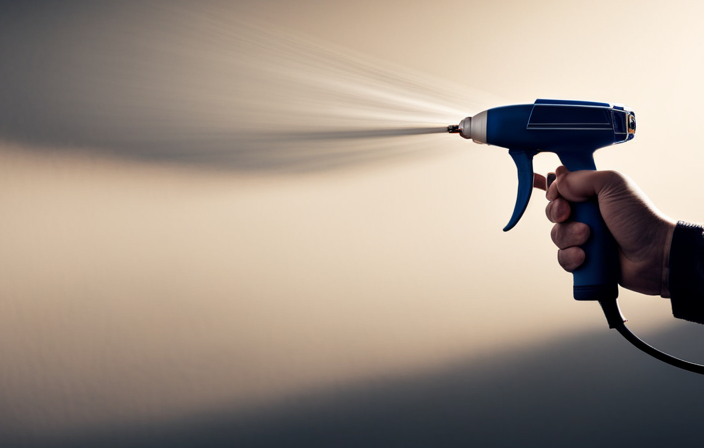
Understanding the sprayer’s settings is the key to success. By adjusting the pressure, you can control the flow of paint and achieve a smooth, even coat. Additionally, adjusting the spray pattern allows you to adapt to different surfaces and angles, ensuring that no area is left untouched.
But it doesn’t stop there! I will also walk you through testing and fine-tuning the sprayer’s performance, as well as proper distance and angle for spraying. And of course, I’ll share tips on maintaining and cleaning the sprayer for long-lasting use.
So grab your protective gear and let’s dive into the world of airless paint sprayers!
Key Takeaways
- Adjusting the pressure settings is crucial for achieving consistent spray and desired painting results.
- Experimenting with different spray patterns, such as vertical, horizontal, or circular, can help achieve the desired coverage and texture.
- Maintaining a consistent distance from the surface while spraying ensures even application and uniform coverage.
- Mastering the techniques and tips for using an airless paint sprayer, along with practice and patience, is key to achieving professional-looking results.
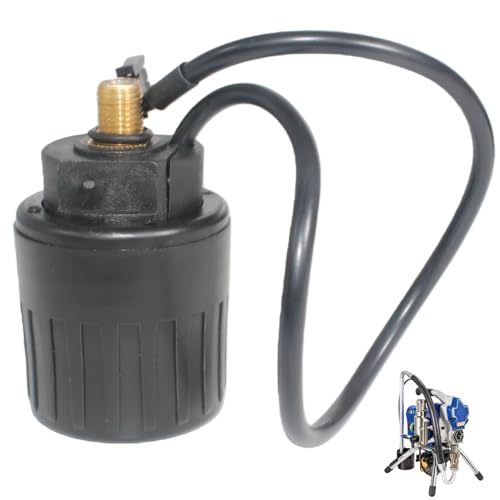
249005 Pressure Regulating Valve Fit for Graco 190 210 390 390PC ProX7
- Replacement for Graco 390 Parts: Compatible with various Graco models
- Consistent Pressure Control: Ensures even spray pattern and quality
- Durable Construction: Made with copper, stainless steel, reinforced plastic
As an affiliate, we earn on qualifying purchases.
As an affiliate, we earn on qualifying purchases.
Understanding the Sprayer’s Settings
To achieve the best results, it is crucial to understand the sprayer’s settings and how they can be adjusted. Proper sprayer maintenance is essential for optimal performance. Regularly check for clogs or debris in the nozzle, as this can affect the spray pattern and coverage.
If there are any issues, troubleshooting tips can help you identify and resolve them quickly.
Adjusting the pressure is another important aspect of achieving optimal coverage. By increasing the pressure, you can achieve a finer spray pattern and better coverage on larger surfaces. Conversely, decreasing the pressure can be useful for more detailed work or when using thinner paints.
Understanding how to adjust the sprayer’s pressure for optimal coverage is key to achieving professional-looking results.
Adjusting the Pressure for Optimal Coverage
To achieve the most flawless and thorough coverage, it’s crucial to find that perfect pressure setting on your airless paint sprayer. Adjusting the nozzle is the first step in troubleshooting pressure issues. Make sure it is properly aligned and tightened to avoid any leaks.
Next, check the pressure control knob and adjust it according to the type of surface you are painting. Start with a lower pressure setting and gradually increase it until you achieve the desired coverage without overspray. It’s important to remember that different surfaces may require different pressure settings, so always test on a small area before proceeding.
By adjusting the pressure on your airless paint sprayer, you can ensure optimal coverage and minimize any potential issues.
Now, let’s move on to the next section about adjusting the spray pattern for different surfaces.
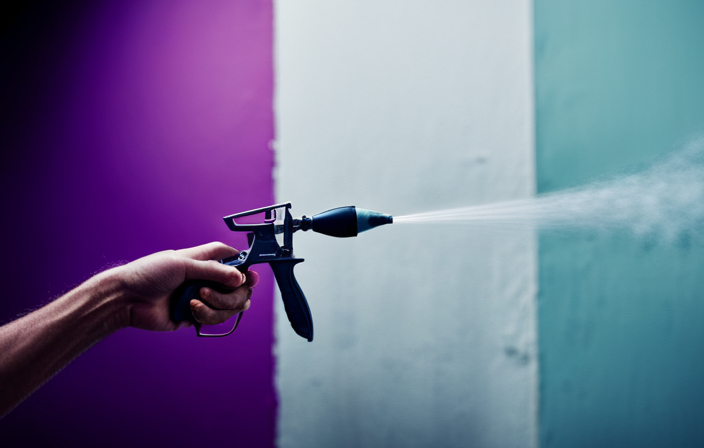
Adjusting the Spray Pattern for Different Surfaces
Achieving flawless coverage on different surfaces is a breeze when you know how to customize the spray pattern. The spray pattern adjustment techniques allow you to adapt the sprayer to various materials and achieve optimal results. To troubleshoot spray pattern issues, it is essential to understand the three main factors affecting the pattern: fan width, shape, and overlap. By adjusting these factors, you can create a narrow or wide fan, choose between horizontal, vertical, or circular shapes, and ensure proper overlap between each pass. To simplify the process, refer to the table below for a quick reference guide on spray pattern adjustments:
| Factor | Adjustment | Result |
|---|---|---|
| Fan Width | Decrease | Narrower pattern |
| Increase | Wider pattern | |
| Shape | Rotate nozzle | Horizontal, vertical, or circular pattern |
| Overlap | Overlap each pass | Uniform coverage |
By mastering these spray pattern adjustment techniques, you can overcome any issues and achieve professional-quality results. Testing and fine-tuning the sprayer’s performance is the next step in ensuring flawless coverage.
Testing and Fine-Tuning the Sprayer’s Performance
Once you’ve mastered the spray pattern adjustment techniques, testing and fine-tuning your sprayer’s performance will allow you to ensure flawless coverage and achieve professional-quality results. Here are some testing techniques and troubleshooting tips to help you optimize your sprayer’s performance:
-
Conduct a test spray on a scrap surface to evaluate the coverage and adjust the pressure accordingly. This will help you determine the optimal pressure setting for your specific project.
-
Check for any clogs or blockages in the sprayer nozzle by removing it and inspecting for debris. Clean the nozzle thoroughly to ensure a smooth flow of paint.
-
Test the sprayer’s performance by adjusting the spray width and fan pattern. This will help you achieve the desired coverage and minimize overspray.
-
Regularly inspect the sprayer’s filters and replace them if necessary to maintain optimal performance.
By following these testing techniques and troubleshooting tips, you can fine-tune your sprayer’s performance and achieve professional results.
Moving on to the next section, let’s discuss the proper distance and angle for spraying.
Proper Distance and Angle for Spraying
Make sure you stand at the proper distance and angle when spraying to ensure even coverage and avoid overspray. Proper technique is crucial for achieving professional results with an airless paint sprayer. One common mistake is standing too close to the surface, which can result in paint buildup and uneven coverage. On the other hand, standing too far away may lead to overspray and wasted paint. To determine the correct distance, refer to the manufacturer’s guidelines, but as a general rule, aim for a distance of about 12-18 inches from the surface. Additionally, it is important to hold the sprayer at a 90-degree angle to the surface for optimal coverage. Remember to maintain a consistent distance and angle throughout the spraying process to achieve a uniform finish. Using the correct nozzle size for the job is the next crucial step in achieving professional results.
Using the Correct Nozzle Size for the Job
To truly nail the art of spraying, you have to get hip to the nozzle size that’s right for the gig. The correct nozzle size plays a crucial role in achieving the desired paint application.
When selecting a nozzle, consider the paint viscosity and the desired spray pattern. A nozzle with a smaller orifice is suitable for thinner paints, while a larger orifice is better for thicker paints. Using the wrong nozzle size can result in uneven coverage or clogging.
Regular nozzle maintenance is essential to ensure optimal performance. It’s important to clean the nozzle after each use to prevent buildup and clogs. Additionally, inspect the nozzle for any signs of wear or damage and replace if necessary.
Maintaining and cleaning the sprayer for longevity is the next step in achieving professional results.
Maintaining and Cleaning the Sprayer for Longevity
Taking proper care of your equipment is crucial for ensuring long-lasting performance and achieving professional-quality results. When it comes to maintaining and cleaning your airless paint sprayer, there are a few important steps to follow. Here are four cleaning techniques to prevent clogs and keep your sprayer in top condition:
-
Flush the sprayer: After each use, flush the sprayer with a cleaning solution or water to remove any leftover paint or debris.
-
Clean the filters: Regularly clean and inspect the filters to ensure they are free from paint buildup. Replace them if necessary.
-
Check the spray tip: Remove the spray tip and clean it thoroughly to remove any paint or residue that may cause clogs.
-
Lubricate the pump: Apply a few drops of pump lubricant to keep the pump running smoothly and prevent premature wear.
By following these cleaning techniques, you can prolong the life of your sprayer and prevent common issues.
In the next section, we will discuss troubleshooting common issues with the sprayer.
Troubleshooting Common Issues with the Sprayer
If your sprayer starts acting like a stubborn mule, troubleshooting common issues can be as tricky as untangling a knot in a fishing line.
When it comes to troubleshooting clogging issues, start by checking the paint consistency. If it’s too thick, add some water or solvent to thin it out.
Another common culprit is a dirty or worn-out nozzle. Remove the nozzle and clean it thoroughly using a brush and solvent. If the nozzle is damaged, replace it with a new one.
To troubleshoot uneven spray patterns, check the pressure settings on your sprayer. Adjust the pressure accordingly to achieve a consistent spray. Additionally, inspect the spray tip for any obstructions or damage. Clean or replace the tip if necessary.
Proper maintenance and troubleshooting will ensure your sprayer performs optimally.
Now, let’s move on to the next important section on safety precautions and protective gear.
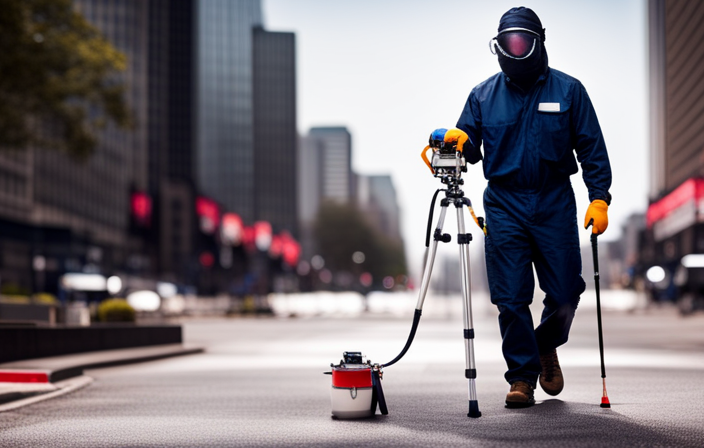
Safety Precautions and Protective Gear
Before diving into using this powerful tool, it’s essential to prioritize safety. Follow proper precautions and wear protective gear. Here are three important safety measures to keep in mind:
-
Importance of proper ventilation during painting: Ensure the area you’re working in is well-ventilated. Prevent the buildup of paint fumes by opening windows or using fans to circulate fresh air, especially when working indoors.
-
Steps to take in case of accidental paint exposure: Accidents happen, so be prepared. Keep a first aid kit nearby and know the steps to take in case of accidental paint exposure. Rinse the affected area with water and seek medical attention if necessary.
-
Wearing protective gear: Always wear appropriate protective gear, including goggles, a respirator or mask, gloves, and coveralls. This shields you from potential hazards like paint splatters, fumes, and skin irritation.
By taking these safety precautions and wearing protective gear, you ensure a safer painting experience. When transitioning to the subsequent section about ‘practice and patience for perfect results,’ remember to prioritize safety without compromising quality.
Practice and Patience for Perfect Results
Mastering the art of painting requires practice, patience, and a keen eye for detail. When it comes to adjusting the sprayer on an airless paint, it is essential to understand the various painting techniques, tips, and tricks that can help achieve perfect results.
One important tip is to start by adjusting the pressure setting on the sprayer. This will determine the flow rate of the paint and ensure an even coat.
Additionally, adjusting the spray pattern is crucial for achieving the desired coverage and texture. Experimenting with different spray patterns, such as vertical, horizontal, or circular, can help achieve different effects.
It is also important to maintain a consistent distance from the surface being painted to ensure an even application.
By practicing these techniques and being patient with the process, one can achieve professional-looking results with an airless paint sprayer.
Frequently Asked Questions
What safety precautions should I take while using an airless paint sprayer?
When using an airless paint sprayer, it is crucial to prioritize safety. To do so, always wear appropriate safety gear such as goggles, gloves, and a respirator. Additionally, ensure proper ventilation in the workspace to minimize exposure to fumes.
How often should I clean and maintain my airless paint sprayer?
I clean and maintain my airless paint sprayer every 3 months to keep it in top condition. Troubleshooting common issues includes checking for clogs, ensuring proper pressure, and inspecting the filters regularly.
What are some common issues I might encounter with my airless paint sprayer?
Common troubleshooting issues with an airless paint sprayer include clogged spray tips, low pressure, leaking seals, and uneven spray patterns. To troubleshoot, clean or replace clogged parts, check for loose connections, and adjust pressure settings as needed.
How do I know if I am using the correct nozzle size for my painting job?
Choosing the correct nozzle size is crucial for achieving smooth and even paint coverage with an airless paint sprayer. Consider factors like paint viscosity, desired spray pattern, and surface type. Using the right nozzle ensures optimal results.
How long does it typically take to become proficient in using an airless paint sprayer?
Becoming proficient in using an airless paint sprayer requires a significant time commitment and involves a learning curve. It typically takes several weeks of consistent practice and experimentation to develop the necessary skills and achieve optimal results.
Conclusion
In conclusion, mastering the art of adjusting the sprayer on an airless paint is crucial for achieving flawless results. Just like a skilled conductor manipulating the delicate balance of an orchestra, adjusting the sprayer requires precision and finesse.
To adjust the sprayer effectively, it is important to understand the sprayer’s settings. Familiarize yourself with the pressure control knob, which regulates the amount of pressure applied to the paint. Additionally, become knowledgeable about the spray pattern adjustment, which determines the width and shape of the spray fan.
Once you have a good understanding of the sprayer’s settings, you can begin adjusting the pressure and spray pattern to achieve the desired results. Start by setting the pressure to a low level and gradually increase it until the paint flows smoothly. As for the spray pattern, experiment with different settings to find the one that provides the best coverage and finish.
Testing and fine-tuning the sprayer’s performance is another important step. Before starting a project, test the sprayer on a scrap surface to ensure it is spraying evenly and producing the desired results. If necessary, make further adjustments to the pressure and spray pattern until you achieve the desired outcome.
Regular maintenance and cleaning of the sprayer is vital to keep it in optimal condition. After each use, thoroughly clean the sprayer by flushing it with water or an appropriate cleaning solution. This helps prevent clogs and ensures that the sprayer operates smoothly for future projects.
Lastly, always prioritize safety when working with an airless paint sprayer. Wear protective gear such as goggles, gloves, and a respirator to protect yourself from paint particles and fumes. Follow the manufacturer’s instructions and guidelines to ensure safe and proper usage of the sprayer.
With practice and patience, you will become a maestro in the world of airless paint spraying. By mastering the art of adjusting the sprayer, you will be able to create masterpieces on any surface with ease.