Imagine taking a step back to admire your freshly painted walls, only to discover an unsightly texture resembling an orange peel. Annoying, isn’t it? But fret not, because I have the solution that promises a smooth and flawless finish every time.
In this article, I will guide you through the process of avoiding orange peel when using an airless paint sprayer.
As a seasoned painter, I understand the importance of using the right tools and techniques to achieve professional results. By following my expert advice, you’ll be able to pinpoint the causes of orange peel, choose the appropriate paint and equipment, and properly prepare the surface for painting.
I’ll also share tips on achieving the perfect spraying technique, adjusting the pressure and flow rate, and applying multiple thin coats for best results.
So, if you’re tired of dealing with pesky orange peel, join me on this journey towards flawlessly painted surfaces. Let’s dive in and master the art of avoiding orange peel with an airless paint sprayer.
Key Takeaways
- Use a dehumidifier in the painting area to prevent orange peel effect.
- Follow manufacturer’s instructions for drying times to ensure proper paint curing.
- Sand and buff the surface to smooth out imperfections and enhance the overall finish.
- Adjust the spray pattern and paint flow rate properly, and maintain the proper distance while spraying to prevent orange peel effect.

NoCry Clear Safety Glasses for Men and Women with Anti-Fog and Scratch Resistant Wrap Around Lenses, Adjustable Temples and Nose Pads — ANSI Z87 Certified Protective Eyewear with 100% UV Shielding
- Durable Polycarbonate Frame: Wraparound design for full protection
- Lightweight & Comfortable Fit: Adjustable arms and soft nose pads
- Anti-Fog & Scratch Resistant Lenses: Ultrashield coating for clarity and durability
As an affiliate, we earn on qualifying purchases.
Understand the Causes of Orange Peel
Want to know why your paint job has that annoying orange peel texture? The causes of orange peel in paint application can vary, but they often stem from improper spraying techniques or the use of the wrong paint and equipment.
One common cause is spraying the paint at too high of a pressure, which can result in the paint drying before it has a chance to level out. Another cause is using the wrong nozzle size, which can lead to an uneven application of paint.
To prevent orange peel, it’s important to ensure that you are using the correct pressure settings and nozzle size for your specific paint and surface. Additionally, maintaining a consistent spraying distance and speed can also help to achieve a smooth finish.
By understanding the causes of orange peel and following these tips for preventing it, you can achieve a flawless paint job. Now, let’s move on to the next section on how to choose the right paint and equipment.
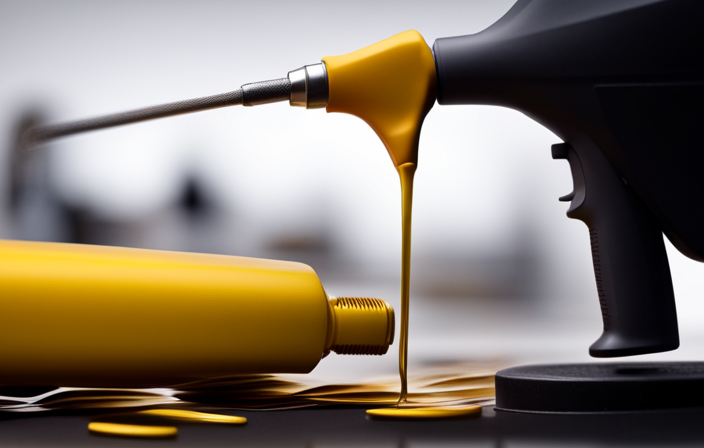
Choose the Right Paint and Equipment
To achieve a smooth finish, it’s crucial to select the appropriate paint and equipment when using an airless sprayer.
When it comes to paint types, it’s important to choose one that is specifically formulated for spraying. These paints are usually thinner and have a smoother consistency, which helps to minimize orange peel.
Additionally, make sure to properly maintain your equipment. Regular cleaning and maintenance of the sprayer, including checking for clogs and replacing worn parts, will ensure optimal performance. Neglecting equipment maintenance can result in uneven spray patterns and increased chances of orange peel.
By selecting the right paint and keeping your equipment in top shape, you are setting yourself up for success in achieving a flawless finish.
Now, let’s transition into the next section about preparing the surface properly.
Prepare the Surface Properly
Make sure you take the time to properly prepare the surface before applying your chosen paint. This will greatly increase your chances of achieving a flawless and professional-looking finish. Surface preparation is key to avoiding orange peel with an airless paint sprayer.
Start by thoroughly cleaning the surface to remove any dirt, debris, or grease. Next, inspect the surface for any imperfections and repair them as necessary. This may involve filling in holes or cracks with a suitable filler and sanding down any rough areas.
When sanding, use the appropriate sanding techniques to create a smooth and even surface. Remember to sand in the direction of the grain and gradually increase the grit size.
By properly preparing the surface, you will create a solid foundation for your paint application and minimize the risk of orange peel.
Now, let’s move on to the next section and discuss how to practice proper spraying technique.
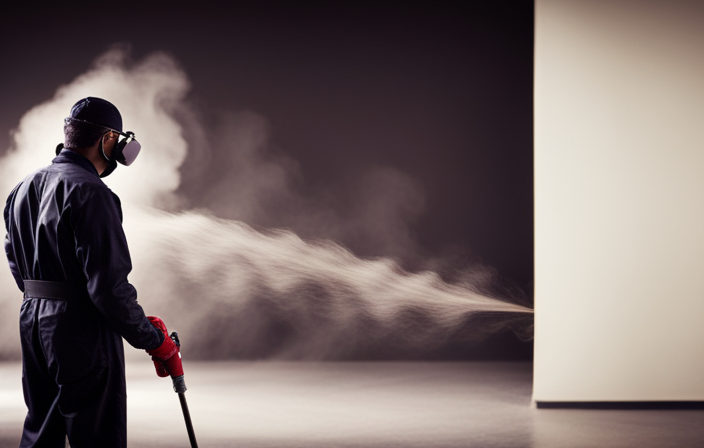
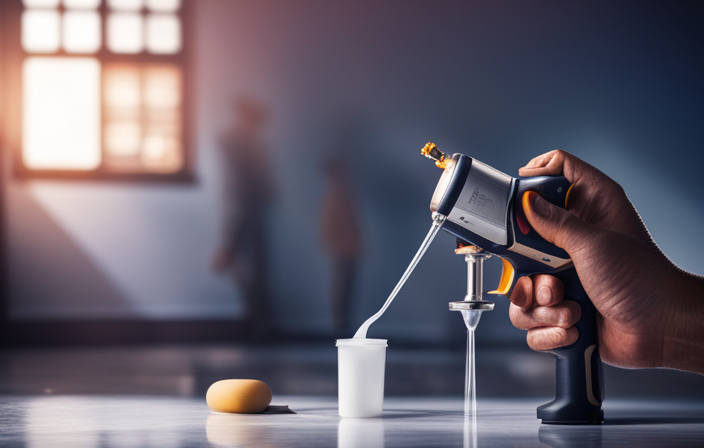
Practice Proper Spraying Technique
To practice proper spraying technique and achieve a flawless and professional-looking finish on your painted surface, follow these tips:
- Hold the sprayer at a consistent distance from the surface, usually around 12 inches.
- Move your arm smoothly and steadily, using overlapping strokes to ensure even coverage.
- Keep the sprayer perpendicular to the surface, avoiding tilting or angling that can result in uneven application.
- Maintain a steady pace, neither too fast nor too slow, to prevent buildup or thin spots.
By practicing these techniques, you can achieve a smooth and uniform coat of paint, minimizing the risk of orange peel.
Once you’ve mastered your spraying technique, it’s time to adjust the pressure and flow rate for optimal results.
Adjust the Pressure and Flow Rate
Once you’ve perfected your spraying technique, it’s fascinating to note that adjusting the pressure and flow rate can significantly impact the quality of your painted surface.
Proper pressure adjustment is crucial in preventing orange peel and achieving a smooth finish. If the pressure is too high, it can cause the paint to atomize excessively, leading to an uneven texture on the surface. On the other hand, if the pressure is too low, the paint may not atomize properly, resulting in a rough and patchy appearance.
Similarly, flow rate control is essential for a consistent and even application of paint. By adjusting the flow rate, you can ensure that the paint is delivered in a steady manner, minimizing the chances of orange peel.
With the pressure and flow rate dialed in, you can now move on to maintaining the correct distance between the sprayer and the surface to further enhance the quality of your paint job.
Maintain the Correct Distance
Achieving a flawless finish on your painted surface hinges on maintaining the correct distance between the sprayer and the surface. This allows for an even distribution of the paint without any undesirable texture.
It is important to avoid common mistakes when it comes to distance. Holding the sprayer too close can result in excessive paint buildup and create a thick, uneven layer known as orange peel. On the other hand, holding it too far away can lead to a dry, patchy finish.
To troubleshoot this, start by practicing on a scrap surface to find the optimal distance for your specific sprayer. Additionally, pay attention to the manufacturer’s recommendations for distance.
By maintaining the correct distance, you can avoid orange peel and achieve a professional-looking paint job.
Transitioning into the next section, it is also important to use multiple thin coats for best results.
Use Multiple Thin Coats
To achieve a professional-looking finish, you’ll want to apply several thin coats, building up the color gradually like a skilled artist layering brushstrokes on a canvas. By using multiple thin coats instead of one thick coat, you can reduce the chances of getting an orange peel texture on your painted surface. This technique allows the paint to dry more evenly and minimizes the risk of excessive paint buildup. When using an airless paint sprayer, it’s important to consider both spray patterns and paint viscosity. Adjusting the spray pattern can help you achieve a more even application, while choosing the right viscosity ensures that the paint flows smoothly through the sprayer. By mastering these factors and applying multiple thin coats, you can avoid the dreaded orange peel texture and achieve a flawless finish. Now, let’s move on to the next step and discuss the importance of allowing sufficient drying time.
Allow Sufficient Drying Time
To achieve a flawless finish, it is important to allow sufficient drying time for the paint. Here are five important things to keep in mind:
- Give ample time for the paint to dry completely. Allow at least 24 hours of drying time between coats.
- Ensure proper ventilation during the drying process. This will help the paint cure evenly.
- Use a moisture meter to determine the moisture content of the paint before proceeding to the next coat.
- Avoid applying paint in humid or damp conditions.
- Improve air circulation by using fans or opening windows. Consider using a dehumidifier in the painting area.
Check the manufacturer’s instructions for specific drying times. By following these guidelines, you can avoid the dreaded orange peel effect and achieve a smooth, professional-looking finish.
Once the paint is completely dry, you can proceed to the next step of sanding and buffing if necessary.
Sand and Buff if Necessary
Once the paint has completely dried, it’s time to smooth out any imperfections by sanding and buffing if necessary, giving your project that extra touch of finesse. Buffing techniques are essential to achieve a flawless finish, and with the right tools and know-how, you can easily restore the surface to its desired smoothness. To help you get started, here are some troubleshooting tips and a 3×3 table that showcases different buffing pads, their recommended usage, and the corresponding results:
| Buffing Pad | Recommended Usage | Result |
|---|---|---|
| Wool | Heavy oxidation | High cut |
| Foam | Light scratches | Medium cut |
| Microfiber | Final buffing | Finishing polish |
By following these techniques and using the appropriate buffing pad, you can eliminate any orange peel effect and achieve a professional-looking finish. With practice and patience, you’ll soon master the art of buffing and be ready to move on to the next step of your project.
Practice and Patience
Developing a skill like buffing requires consistent practice and patience to achieve a flawless finish. When it comes to using an airless paint sprayer, improving your spraying skills is essential to avoid orange peel.
Here are four key tips to troubleshoot orange peel and achieve a smooth, professional-looking paint job:
-
Adjust the spray pattern: Experiment with different spray patterns to find the one that works best for your project. This will help you achieve an even distribution of paint and minimize orange peel.
-
Control the paint flow: Adjusting the paint flow rate is crucial in preventing orange peel. Practice controlling the trigger to achieve a steady and consistent flow of paint.
-
Maintain proper distance: Hold the sprayer at a consistent distance from the surface you are painting. Too close or too far can result in uneven paint application and orange peel.
-
Apply multiple thin coats: Instead of trying to achieve full coverage with one heavy coat, apply multiple thin coats. This allows each coat to dry properly and reduces the chances of orange peel.
By following these tips, practicing consistently, and being patient, you can improve your spraying skills and successfully avoid orange peel with an airless paint sprayer.
Frequently Asked Questions
Can I use any type of paint with an airless paint sprayer?
I’ve got good news! You can use various types of paint with an airless paint sprayer. To achieve a flawless finish, keep these tips in mind: choose the right paint viscosity, adjust pressure settings, and practice proper spraying techniques.
How do I clean and maintain an airless paint sprayer?
To clean and maintain an airless paint sprayer, start by flushing the system with a cleaning solution. Then, disassemble and clean each component thoroughly. Troubleshoot common issues like clogs or uneven spray patterns by following troubleshooting guides provided by the manufacturer.
Can I use an airless paint sprayer on textured surfaces?
Yes, an airless paint sprayer can be used on textured surfaces. To achieve a smooth finish, use a low-pressure setting, apply multiple thin coats, and make sure to maintain a consistent distance from the surface.
What should I do if I accidentally apply too much paint in one area?
If I accidentally apply too much paint in one area, don’t panic! To fix an uneven paint finish, blend the excess paint by feathering it out with a dry brush or roller. Take your time and be patient for a seamless result.
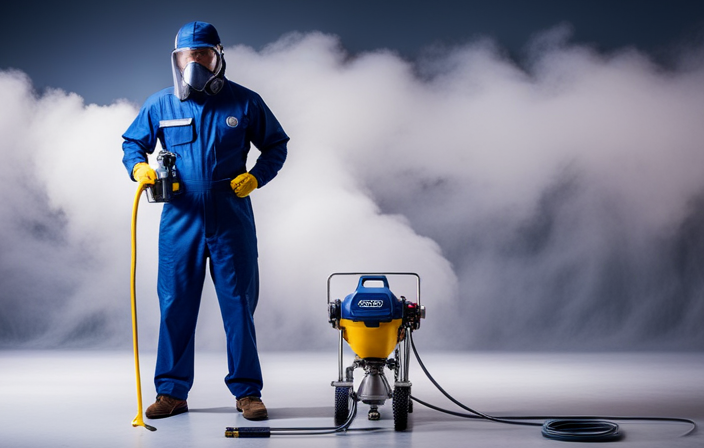
Is it necessary to wear protective gear while using an airless paint sprayer?
Yes, it is absolutely necessary to wear proper protective gear when using an airless paint sprayer. Safety precautions such as wearing goggles, a respirator, gloves, and coveralls are important to protect against potential hazards and ensure a safe painting experience.
Conclusion
In conclusion, mastering the art of avoiding orange peel with an airless paint sprayer requires finesse, precision, and a deep understanding of the craft. Here are some tips to help you achieve a smooth and flawless finish:
-
Choose the right paint and equipment: Use a high-quality paint that is specifically formulated for spraying. Ensure that your airless paint sprayer is in good working condition and has the appropriate nozzle size for the paint you are using.
-
Prep the surface diligently: Clean the surface thoroughly and remove any dirt, grease, or previous coatings. Repair any imperfections, such as cracks or holes, and sand the surface to create a smooth and even base.
-
Practice proper spraying techniques: Hold the sprayer at the correct distance from the surface, usually around 12 inches. Keep the sprayer moving at a steady pace, overlapping each pass by 50% to ensure even coverage. Avoid spraying too much paint in one area, as this can lead to orange peel.
-
Be patient and allow proper drying time: Avoid rushing the process and allow each coat of paint to dry completely before applying the next one. This will help prevent orange peel and ensure a smooth finish.
-
Sand and buff if needed: If you do encounter any imperfections or orange peel, don’t hesitate to sand the surface lightly with fine-grit sandpaper. After sanding, buff the surface using a polishing compound to restore a smooth and glossy finish.
With practice and patience, you can become a maestro of the airless paint sprayer, creating flawless masterpieces with ease.