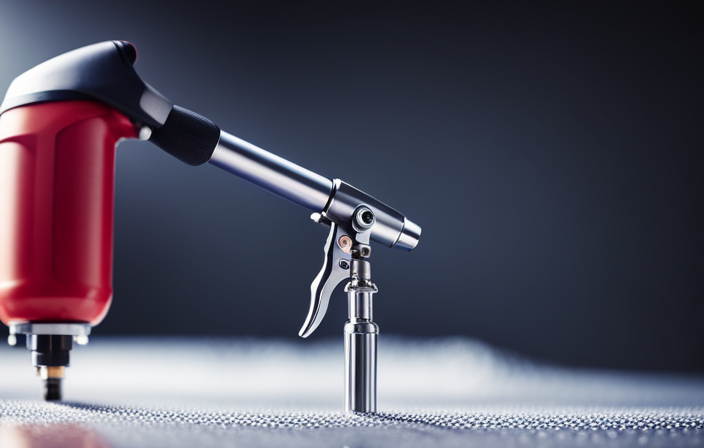
Have you ever experienced difficulties with an airless paint sprayer that just won’t work properly no matter what you try? I can relate to that frustration. That’s why I’m sharing my knowledge and tips on effectively maintaining an airless paint sprayer.
In this article, I will guide you through the essential steps of understanding the basics, preparing your sprayer, choosing the right materials, setting up your work area, and practicing proper spraying techniques.
I will also provide troubleshooting tips for common issues that may arise and explain the importance of regular maintenance and inspection. Safety precautions will also be covered to ensure your well-being while using the sprayer.
So, whether you’re a DIY enthusiast or a professional painter, this article will equip you with the necessary skills to keep your airless paint sprayer in top shape and achieve smooth, flawless results every time.
Let’s get started!
Key Takeaways
- Regular maintenance extends the lifespan of the airless paint sprayer
- Proper care prevents clogging and reduces downtime
- Understanding the basics of the sprayer saves time and frustration during painting projects
- Proper cleaning techniques and products ensure compatibility with the sprayer and prevent clogs

InoKraft MaXpray M1 Airless Paint Sprayer, 3000 PSI 550W Corded Electric, Thinning-Free for Latex & Stain, DIY Home Interior Exterior Walls Fences Decks, Includes Spray Gun Kit & 12" Tip Extension
- Fast Painting Speed: 5X faster than rolling, 12X faster than brushing
- High-Pressure Performance: 3000 PSI, 0.29 GPM for even coverage
- Direct from Bucket: Draw paint from 5-gallon bucket for large projects
As an affiliate, we earn on qualifying purchases.
Understand the Basics of Your Airless Paint Sprayer
To effectively use your airless paint sprayer, it is important to understand its basics. This includes proper maintenance, which is crucial for keeping your sprayer in good working condition. Regularly inspect and clean the filters, hoses, and nozzles to prevent clogging and ensure optimal performance.
Troubleshooting techniques are also essential for addressing any issues that may arise. Familiarize yourself with the manual and learn how to identify common problems such as uneven spray patterns or loss of pressure. Knowing how to troubleshoot these issues will save you time and frustration during your painting projects.
Now that you understand the basics and how to keep your sprayer in top shape, let’s move on to preparing your sprayer before use.
Prepare Your Sprayer Before Use
Before using my airless paint sprayer, I always make sure to clean it thoroughly to ensure optimal performance. I carefully check for any clogs or damage that may affect the spray pattern or cause issues during painting.
Additionally, I test the sprayer before starting my project to ensure everything is working properly and that the paint is flowing smoothly. Taking these steps ensures that my sprayer is in top condition and ready to deliver professional-quality results.
Clean the sprayer thoroughly
After using the airless paint sprayer, make sure to clean it thoroughly to prevent clogs and maintain its optimal performance. Proper sprayer maintenance is essential for longevity and consistent results. When cleaning the sprayer, start by removing the spray tip and guard, then flush any remaining paint from the hose and gun. Use a cleaning solution recommended by the manufacturer, ensuring it is compatible with the type of paint used. Scrub the parts with a brush, paying attention to any stubborn paint residue. Rinse all the components with clean water until no paint or cleaning solution remains. Finally, reassemble the sprayer and perform a test spray to ensure it is working properly. By following these cleaning techniques, you can keep your airless paint sprayer in excellent condition. Now, let’s move on to the next step and check for any clogs or damage.
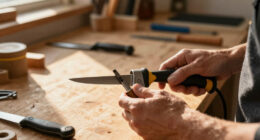
Check for any clogs or damage
Inspect the device for any obstructions or signs of wear and tear that may hinder its performance.
Start by checking for clogs in the sprayer. Look for any debris or paint buildup in the nozzle, hose, or filter. Clear any clogs using a small brush or a toothpick.
Next, inspect the sprayer for any damage. Check the hose for cracks or leaks, and ensure that all connections are secure. Look for any dents or scratches on the body of the sprayer that may affect its functionality.
It is important to address any clogs or damage before using the sprayer to ensure optimal performance.
Once you have checked for clogs and inspected for damage, you can move on to testing the sprayer before starting your project to ensure everything is in working order.
Test the sprayer before starting your project
Before starting your project, it’s important to test the sprayer to ensure it’s functioning properly. Here are four steps to follow during the test:
- Fill the sprayer with water and connect it to a power source.
- Turn on the sprayer and adjust the pressure settings as recommended by the paint manufacturer.
- Spray the water onto a test surface, moving the sprayer consistently and steadily.
- Evaluate the spray pattern and adjust the settings as needed to achieve the desired result.
By following these troubleshooting steps, you can identify and address any issues before starting your paint project. Now that the sprayer has been tested, let’s move on to the next section about choosing the right paint and materials.
Choose the Right Paint and Materials
To achieve professional-looking results, it’s essential to carefully select the appropriate paint and materials for your airless paint sprayer. Choosing paint colors that match your desired aesthetic is crucial for a successful project. Additionally, proper paint storage is important to maintain the quality of your paint and prevent any issues during application. To help you visualize the importance of choosing the right paint and materials, here is a table that highlights the key factors to consider:
| Paint Colors | Proper Paint Storage |
|---|---|
| Color selection | Temperature control |
| Finish type | Humidity control |
| Paint quality | Light exposure |
| Coverage | Container seal |
| Drying time | Shelf life |
By understanding these factors and making informed choices, you can ensure optimal paint performance and achieve the desired results. Now, let’s move on to properly setting up your work area for a seamless painting experience.
Properly Set Up Your Work Area
To properly set up your work area, it is important to consider a few key factors. Firstly, ensure that your workspace is clean and free of clutter. This will allow you to move around comfortably and have easy access to your materials. Additionally, make sure that there is enough space for you to maneuver and work with your airless paint sprayer effectively.
Proper ventilation is another crucial aspect of setting up your work area. Paint fumes can be harmful if inhaled for extended periods, so it is important to have good airflow. Open windows or use fans to circulate fresh air throughout the space. If you are working indoors, consider wearing a respirator for added protection.
In order to protect nearby furniture or flooring from accidental paint splatters, it is advisable to cover them with drop cloths. This will help to prevent any damage and make the cleanup process much easier.
By following these guidelines and taking the necessary precautions, you can create a safe and efficient work area for your painting projects. Now, let’s move on to the next section where we will discuss practicing proper spraying techniques.
Practice Proper Spraying Techniques
Now that you have properly set up your work area, let’s dive into the next crucial step: practicing proper spraying techniques. As someone who’s been using airless paint sprayers for years, I’ve learned a few valuable lessons along the way. Here are four key tips to help you master this skill:
-
Maintain a consistent distance: Keep the sprayer about 12 inches away from the surface for an even application.
-
Move your arm smoothly: Avoid jerky movements that can result in uneven coverage.
-
Overlap strokes: Make sure to overlap each spray stroke by about 50% to prevent streaks.
-
Adjust the pressure: Experiment with different pressure settings until you achieve optimal atomization.
Remember, even with the best techniques, problems can arise. That’s why troubleshooting tips are essential. But before we delve into that, let’s talk about how to clean your sprayer after use.
Clean Your Sprayer After Use
After you’ve finished using the sprayer, it’s important to give it a thorough cleaning to ensure its longevity and optimal performance. Cleaning your airless paint sprayer may seem like a daunting task, but with the right techniques and products, it can be a breeze.
Start by disconnecting the sprayer from the power source and relieving any pressure in the system. Then, disassemble the sprayer and remove any excess paint or debris. Use a brush and warm soapy water to clean the parts, making sure to remove any clogs or buildup.
Rinse the parts thoroughly and allow them to dry before reassembling the sprayer. When it comes to cleaning products, opt for ones specifically designed for airless sprayers to ensure compatibility. With proper cleaning techniques and the best cleaning products, your sprayer will be ready for its next use.
Now, let’s move on to troubleshooting common issues with your airless paint sprayer.
Troubleshooting Common Issues
If you’re experiencing any issues with your sprayer, troubleshooting common problems can help resolve them quickly and efficiently.
When it comes to troubleshooting paint flow, the first thing to check is the viscosity of your paint. If the paint is too thick, it can clog the sprayer and cause uneven spray patterns. Diluting the paint to the correct consistency should solve this issue.
Another common problem is pressure-related issues. If your sprayer is not producing enough pressure, check the pump for any blockages or leaks. Additionally, make sure the spray tip is clean and properly sized for the material being sprayed. Troubleshooting these issues will ensure optimal performance of your airless paint sprayer.
Moving on to regular maintenance and inspection, it is important to…
Regular Maintenance and Inspection
When it comes to regular maintenance and inspection of your airless paint sprayer, there are a few key points to keep in mind.
Firstly, it is important to regularly check and replace any worn-out parts to ensure optimal performance. This includes components such as filters, seals, and nozzles.
Additionally, lubricating moving parts as needed will help to prevent friction and ensure smooth operation.
Lastly, keeping your sprayer in good working condition overall will not only extend its lifespan but also guarantee consistent and high-quality results.
Check and replace worn-out parts
To ensure optimal performance, regularly inspect and swap out any worn-out components in your airless paint sprayer. This is a crucial step in maintaining the longevity and efficiency of your equipment. Here are some maintenance tips to keep in mind:
-
Check the spray gun for any signs of wear or damage, such as leaks or clogs. Replace any worn-out parts, such as the nozzle or needle, to ensure a smooth and even spray pattern.
-
Inspect the pump assembly for any signs of wear on the packings or seals. Replace these components if necessary to prevent any leaks or loss of pressure.
-
Examine the hoses and fittings for any cracks or breaks. Replace any damaged parts to avoid any potential leaks or interruptions in the paint flow.
By regularly checking and replacing worn-out parts, you can ensure that your airless paint sprayer operates at its best.
Once you have completed this step, it’s time to move on to the next section about lubricating moving components as needed.
Lubricate moving components as needed
After checking and replacing worn-out parts on your airless paint sprayer, it’s important to move on to the next step: lubricating the moving components.
Regular lubrication is crucial for maintaining the sprayer’s efficiency and extending its lifespan. There are various lubrication techniques that can be used, depending on the specific model of your sprayer.
One common method is to apply a few drops of lubricating oil to the piston rod and other moving parts. This helps reduce friction and ensures smooth operation.
Additionally, it’s important to clean and lubricate the sprayer’s filters regularly to prevent clogs and maintain optimal performance.
By incorporating these lubrication techniques into your regular maintenance routine, you can keep your sprayer in good working condition for years to come.
Transitioning to the next section, let’s now discuss how to keep your sprayer in good working condition without compromising its performance.
Keep your sprayer in good working condition
Maintaining the health of your sprayer is like nurturing a well-oiled machine, ensuring its longevity and peak performance. To keep your airless paint sprayer in good working condition, follow these tips:
-
Proper storage: After each use, clean the sprayer thoroughly and store it in a dry and dust-free area. This will prevent clogs and rust, extending the lifespan of your machine.
-
Troubleshooting tips: Regularly inspect the sprayer for any signs of wear or damage. Check the hoses, nozzles, and filters for clogs or leaks. If you notice any issues, address them promptly to avoid further damage or poor performance.
-
Periodic maintenance: Follow the manufacturer’s guidelines for regular maintenance tasks, such as lubricating moving components and replacing worn-out parts. This will ensure smooth operation and prevent costly repairs down the line.
By maintaining your sprayer properly, you can maximize its lifespan and performance.
Now let’s move on to discussing safety precautions to keep in mind while using an airless paint sprayer.
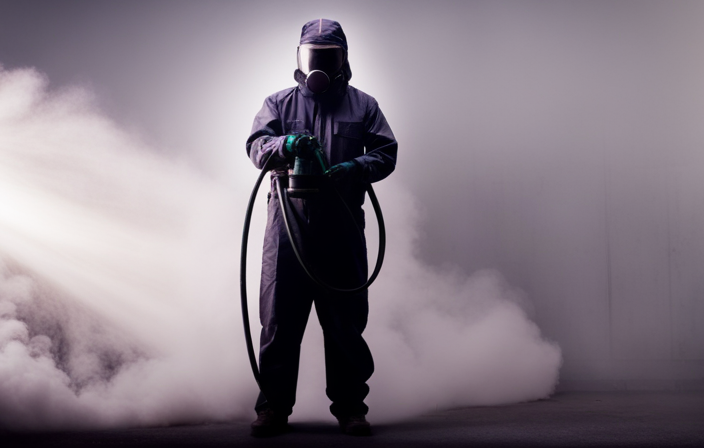
Safety Precautions
When it comes to using an airless paint sprayer, safety should always be a top priority. To protect myself, I always make sure to wear the necessary protective gear, such as goggles and gloves, to prevent any potential injuries.
Additionally, I avoid spraying in windy or dusty conditions to ensure that the paint goes where it’s supposed to and doesn’t cause any unnecessary mess.
Lastly, I always follow the manufacturer’s instructions and guidelines to ensure that I am using the paint sprayer correctly and safely.
Wear protective gear, such as goggles and gloves
To ensure a higher level of safety, it’s advisable to wear protective gear, such as goggles and gloves, while using an airless paint sprayer.
Protective gear is of utmost importance as it shields you from potential hazards and prevents any injuries that may occur during the painting process.
By wearing goggles, you can protect your eyes from paint particles and debris that may be propelled by the sprayer.
Gloves, on the other hand, provide a barrier between your skin and the paint, preventing any contact or absorption.
Proper handling techniques, coupled with the use of protective gear, ensure a safe and incident-free painting experience.
Remember, safety should always be the top priority when using an airless paint sprayer.
Moving on to the next section about avoiding spraying in windy or dusty conditions…
Avoid spraying in windy or dusty conditions
It’s best to avoid spraying in gusty or dusty conditions to prevent mishaps. When using an airless paint sprayer, consider the environment you’re working in. Windy conditions can cause uneven paint dispersion, leading to an inconsistent finish. Dusty conditions can interfere with spraying, creating a rough texture. To avoid these issues, choose a calm day with minimal wind and ensure a clean, dust-free area. Use proper spraying techniques and choose the right paint materials for your project. Following these guidelines will help you achieve a professional finish.
Moving on to the next section, it’s important to follow the manufacturer’s instructions for safe and effective use of your airless paint sprayer.
Follow manufacturer’s instructions and guidelines
Now that you understand the importance of avoiding windy or dusty conditions when using an airless paint sprayer, let’s delve into the next crucial aspect of caring for your sprayer: following the manufacturer’s instructions and guidelines.
This step is essential to ensure the longevity and optimal performance of your equipment. By carefully reading and adhering to the manufacturer’s recommendations, you can gain a comprehensive understanding of the maintenance requirements and troubleshooting techniques specific to your sprayer model.
This knowledge will empower you to handle routine maintenance tasks effectively and address any minor issues that may arise during operation. However, it’s important to note that even with proper care and maintenance, there may be instances where seeking professional help becomes necessary.
In the subsequent section, we will explore when and how to reach out for professional assistance.
Seek Professional Help if Needed
If you’re unsure about how to properly care for your airless paint sprayer, don’t hesitate to reach out to a professional for assistance. Seeking professional help can ensure that you are following the correct maintenance procedures and troubleshooting tips for your specific model.
These experts have extensive knowledge and experience with airless paint sprayers, and they can provide valuable insights and guidance to help you care for your sprayer effectively.
When you contact a professional, they can walk you through the proper steps to clean and maintain your sprayer, including removing and cleaning the filters, flushing the system with the appropriate cleaning solution, and inspecting the spray tip for any clogs or damage. They can also provide troubleshooting tips for common issues such as uneven spray patterns or a loss of pressure.
By seeking professional assistance, you can avoid potential mistakes or damage that could occur from improper care. Their expertise will ensure that your airless paint sprayer continues to perform at its best, providing you with professional-quality results for your painting projects.
Frequently Asked Questions
Can I use my airless paint sprayer for other types of projects, such as staining a deck or applying lacquer?
Yes, you can definitely use your airless paint sprayer for deck staining and applying lacquer. It provides efficient and even coverage, making these projects easier and faster. Just make sure to clean the sprayer thoroughly between different types of coatings.
How often should I replace the filters on my airless paint sprayer?
I replace the filters on my airless paint sprayer every 25-50 gallons of paint or when I notice signs of clogged filters, such as reduced spray pattern or excessive overspray. Regularly cleaning filters is crucial for optimal performance.
Can I use water-based paint with my airless paint sprayer, or is it only compatible with oil-based paints?
Yes, you can use water-based paint with your airless paint sprayer. It is not limited to oil-based paints. However, it is important to thoroughly clean your sprayer after each use to prevent clogs and ensure optimal performance.
What should I do if my airless paint sprayer starts to produce a sputtering or uneven spray pattern?
If my airless paint sprayer starts sputtering or producing an uneven spray pattern, there are a few troubleshooting tips I can share. Regular maintenance techniques like cleaning the nozzle, checking the filter, and adjusting the pressure can help resolve these issues. Remember, "prevention is better than cure."
Are there any specific safety precautions I need to take when using my airless paint sprayer indoors?
When using an indoor airless paint sprayer, it’s crucial to take safety precautions. Make sure to wear protective clothing, goggles, and a respirator. Additionally, cover surfaces and furniture to prevent paint overspray indoors.
Conclusion
In conclusion, caring for an airless paint sprayer is essential for its longevity and optimal performance. By understanding the basics, preparing the sprayer, choosing the right materials, and practicing proper spraying techniques, you can achieve professional-quality results.
Regular maintenance and inspection, along with safety precautions, ensure safe and efficient operation.
Remember, a well-maintained sprayer is a painter’s best friend, allowing you to effortlessly transform any surface. So, go ahead and unleash your creativity with confidence, knowing that your airless paint sprayer is in top-notch condition.
Happy painting!