At first glance, cleaning a Wagner airless paint sprayer may seem like a formidable task, but fear not! I’m here to guide you through every step of the way, making sure it’s as easy as possible.
With just a few supplies and a little bit of time, you can ensure that your sprayer stays in top-notch condition, ready for your next painting project.
In this article, I will show you how to:
- Properly disconnect and prepare the sprayer
- Remove and clean the filters
- Flush the system
- Clean the spray gun and nozzle
- Reassemble the sprayer
I will also provide tips on testing the sprayer for proper functioning and storing it correctly for future use.
So, if you want to keep your Wagner airless paint sprayer performing at its best, let’s dive in and get those brushes clean!
Key Takeaways
- Properly align and attach components to prevent leaks and malfunctions
- Thoroughly clean the sprayer after each use to prevent clogging and buildup
- Store the sprayer in a cool, dry place away from extreme temperatures and direct sunlight
- Follow the manufacturer’s instructions for troubleshooting and maintenance tips to ensure optimal performance and longevity of the sprayer

InoKraft MaXpray M1 Airless Paint Sprayer, 3000 PSI 550W Corded Electric, Thinning-Free for Latex & Stain, DIY Home Interior Exterior Walls Fences Decks, Includes Spray Gun Kit & 12" Tip Extension
- Fast Painting Speed: 5X faster than rolling, 12X faster than brushing
- High-Pressure Performance: 3000 PSI, 0.29 GPM for even coverage
- Direct from Bucket: Draw paint from 5-gallon bucket for large projects
As an affiliate, we earn on qualifying purchases.
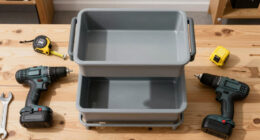
Gather the necessary supplies
Now, you’re going to want to gather all the supplies you’ll need to clean your Wagner airless paint sprayer. Start by getting some cleaning solutions specifically designed for paint sprayers. Look for solutions that are solvent-based and can effectively remove paint residues and clogs.
Additionally, make sure to have a bucket, a clean cloth, and a soft-bristle brush on hand. Safety precautions are crucial, so don’t forget to wear protective gloves and safety goggles to protect your skin and eyes from any potential splashes or fumes.
Once you have all the necessary supplies, you’re ready to move on to the next section. Disconnect and prepare the sprayer by following the steps outlined below.
Disconnect and prepare the sprayer
First, it’s time to unplug and get your trusty tool ready for a much-needed makeover. Before disconnecting the sprayer, make sure to turn off the power switch and relieve any pressure in the system by triggering the gun until the pressure gauge reads zero. This step is crucial for disconnecting safely and avoiding any accidental paint spray. Once the sprayer is unplugged, gather the necessary tools and materials as shown in the table below:
| Tools | Materials |
|---|---|
| Wrench | Clean rags |
| Screwdriver | Bucket or container |
| Cleaning solution | Protective gloves |
Next, protect the surrounding surfaces by covering them with a drop cloth or plastic sheeting. This will prevent any paint overspray from damaging your work area. Now that the sprayer is disconnected and the workspace is protected, we can move on to the next section about removing and cleaning the filters. This step is essential to ensure optimal performance of your Wagner airless paint sprayer.
Remove and clean the filters
To achieve peak performance and ensure a flawless finish, it’s crucial to give your sprayer a thorough filter cleaning. Cleaning the filters is an essential step in maintaining your Wagner airless paint sprayer.
Start by disconnecting the sprayer from the power source and removing the filters from the sprayer housing. Carefully inspect the filters for any clogs or debris. If there are any blockages, use a brush or compressed air to remove them.
Next, rinse the filters under running water to remove any remaining paint or residue. For stubborn stains, you can use a cleaning solution specifically designed for paint sprayers. Gently scrub the filters with a soft brush to ensure a thorough cleaning.
Once the filters are clean and dry, you can proceed to the next step of flushing the system with water or a cleaning solution, as discussed in the subsequent section about flushing the system.
Flush the system with water or cleaning solution
Make sure you give your sprayer’s system a thorough flush with water or a cleaning solution to ensure a smooth and flawless performance. It’s like giving it a refreshing cleanse to eliminate any lingering impurities.
It is important to regularly maintain your Wagner airless paint sprayer by flushing the system. This step is crucial in preventing clogs and maintaining optimal spraying performance. Using alternative cleaning methods, such as a cleaning solution specifically designed for paint sprayers, can be effective in removing stubborn paint residues.
Start by filling a bucket with water or the cleaning solution, then connect the hose to the sprayer and immerse the suction tube into the liquid. Turn on the sprayer and allow the water or solution to flow through the system, flushing out any remaining paint. This will ensure that your sprayer is ready for the next use.
Now, let’s move on to cleaning the spray gun and nozzle.
Clean the spray gun and nozzle
Now, get ready to spruce up your spray gun and nozzle, giving them a refreshing makeover for flawless painting results. Cleaning the spray gun and nozzle is a crucial step in maintaining your Wagner airless paint sprayer. To ensure optimal performance, follow these cleaning techniques and maintenance tips.
First, disassemble the spray gun by removing the nozzle, needle, and fluid tip. Clean each part thoroughly using a cleaning solution or water. Pay close attention to any paint buildup or debris and use a brush or toothpick to remove it.
Next, clean the nozzle using a nozzle cleaning brush, making sure to remove any clogs or dried paint.
After cleaning the individual parts, reassemble the spray gun and test it to make sure it is working properly.
Incorporate the following table to visualize the cleaning process:
| Step | Action |
|---|---|
| 1 | Disassemble the spray gun |
| 2 | Clean each part thoroughly |
| 3 | Clean the nozzle with a brush |
| 4 | Reassemble the spray gun |
Now that your spray gun and nozzle are sparkling clean, let’s move on to the next section and clean the suction tube and hose without delay.
Clean the suction tube and hose
Once you’ve finished sprucing up your spray gun and nozzle, it’s time to give some attention to the suction tube and hose. To effectively clean these components, follow these best practices:
- Begin by removing the suction tube from the paint container and detach the hose from the sprayer.
- Rinse both the suction tube and hose with clean water to remove any residual paint.
- For tougher paint residue, consider using a cleaning solution specifically designed for paint sprayers.
When maintaining the suction tube and hose, it’s important to remember a few key points. Firstly, always inspect them for any signs of damage or wear and replace if necessary. Secondly, ensure that the connections between the suction tube, hose, and sprayer are tight to avoid any leaks. Lastly, store the suction tube and hose in a clean and dry place to prevent any build-up of dirt or debris.
With the suction tube and hose now clean and well-maintained, it’s time to move on to the next step: cleaning the spray tip and guard.
Clean the spray tip and guard
After cleaning the suction tube and hose, it’s crucial to move on to the next step of maintaining your Wagner airless paint sprayer: cleaning the spray tip and guard. These components are responsible for delivering the paint onto the surface, so it’s essential to ensure they’re clean for optimal performance.
Start by removing the spray tip and guard from the sprayer. Using a clean cloth or brush, gently remove any paint residue or debris from the tip and guard. If there are stubborn stains, you can soak them in a cleaning solution specifically designed for paint sprayers.
Once clean, thoroughly rinse the tip and guard with water to remove any remaining cleaning solution. Now you’re ready to reassemble the sprayer and continue with your painting project.
Reassemble the sprayer
To ensure optimal performance, it’s important to carefully reassemble the components of your sprayer. Here are some reassemble techniques and troubleshooting tips to help you:
-
Start by placing the pump housing on a clean surface and align the piston rod with the guide pin.
-
Attach the sprayer handle to the housing, ensuring a secure fit.
-
Reattach the spray tip and guard, making sure they are aligned properly.
-
Finally, secure the suction tube and tighten the clamps.
By following these reassemble techniques, you can ensure that all the components are properly aligned and securely attached, preventing any leaks or malfunctioning.
Once you have reassembled the sprayer, you can proceed to the next step and test the sprayer for proper functioning.
Test the sprayer for proper functioning
After reassembling the sprayer, it’s essential to test it for proper functioning before storing it.
To troubleshoot a malfunctioning sprayer, start by ensuring that all connections are secure and that there are no clogs in the nozzle or hose.
Next, turn on the sprayer and adjust the pressure setting according to the manufacturer’s instructions.
To test the spray pattern, hold a piece of cardboard or scrap material in front of the sprayer and pull the trigger. The spray pattern should be even and consistent.
Additionally, check the pressure gauge to ensure that it’s within the recommended range.
If any issues are detected, refer to the user manual for troubleshooting tips or contact the manufacturer for assistance.
Once the sprayer has been tested and is working properly, it’s time to move on to the next step: storing the sprayer properly for future use.
Store the sprayer properly for future use
Properly storing the sprayer is like putting a bow on a gift, preserving its functionality for future use. To ensure proper storage and maintenance of your Wagner airless paint sprayer, follow these tips:
-
Clean the sprayer thoroughly after each use. This includes flushing out any remaining paint and cleaning the filters, nozzle, and gun.
-
Remove any excess paint from the sprayer and its components to prevent clogging and buildup.
-
Store the sprayer in a cool, dry place to avoid rust or damage. Keep it away from extreme temperatures or direct sunlight.
-
Use the original packaging or a dedicated storage case to protect the sprayer from dust, debris, and potential damage during transportation or storage.
By following these proper storage and maintenance tips, you can ensure the longevity and optimal performance of your Wagner airless paint sprayer for future projects.
Frequently Asked Questions
Can I use any type of cleaning solution to flush the system of my Wagner airless paint sprayer?
I recommend using a specific cleaning solution suitable for flushing a Wagner airless paint sprayer. It is crucial for proper maintenance to choose a solution that effectively removes paint residue and prevents clogging.
How often should I clean the filters of my Wagner airless paint sprayer?
Proper maintenance of the filters in a Wagner airless paint sprayer is crucial. To ensure optimal performance, it is recommended to replace the filters regularly. Follow the manufacturer’s guidelines for the recommended frequency of filter replacement.
Is it necessary to clean the suction tube and hose of my Wagner airless paint sprayer after each use?
Yes, it is necessary to clean the suction tube and hose of my Wagner airless paint sprayer after each use. Cleaning frequency is important to prevent clogs and ensure optimal performance. There are alternative cleaning methods available, such as using cleaning solutions and brushes.
Can I use a regular brush or cloth to clean the spray gun and nozzle of my Wagner airless paint sprayer?
You should not use a regular brush or cloth to clean the spray gun and nozzle of your Wagner airless paint sprayer. It is recommended to use specific cleaning techniques and avoid alternative cleaning methods to ensure proper maintenance and longevity of the equipment.
What is the recommended way to store my Wagner airless paint sprayer to ensure its longevity?
To ensure the longevity of your Wagner airless paint sprayer, proper storage is crucial. Here are some maintenance tips: store in a clean and dry area, relieve pressure from the system, and protect the sprayer from extreme temperatures and dust.
Conclusion
In conclusion, cleaning a Wagner airless paint sprayer is a crucial step in maintaining its performance and longevity. By following the steps outlined in this article, you can ensure that your sprayer is always ready for your next painting project.
Just like a well-oiled machine, a clean sprayer operates smoothly and efficiently, allowing you to achieve professional-looking results. So take the time to clean your sprayer properly and store it correctly, and you’ll be rewarded with a reliable tool that’ll continue to serve you for years to come.