I am thrilled to share all about the amazing technique for cleaning tips of airless paint sprayers! If you have ever experienced the frustration of a clogged tip or uneven paint application, this article is specifically designed for you.
Cleaning your airless paint sprayer tips is a crucial step in maintaining its performance and ensuring a smooth painting process. In this article, I will guide you through the precise steps of cleaning your tips using simple supplies that you probably already have on hand.
From gathering your cleaning materials to reattaching the tip to the sprayer, I’ve got you covered.
So, let’s dive in and discover the secrets to keeping your airless paint sprayer tips in tip-top shape!
Key Takeaways
- Reattach the tip securely to the sprayer nozzle by aligning and pushing it firmly until it clicks, then twist it clockwise to lock it in place. Gently tug the tip to ensure a secure attachment.
- Clean the tip to prevent any attachment issues and check for debris on both the tip and the nozzle. Also, inspect the tip and nozzle for any damage or wear.
- Before painting, test the cleaned tip by filling the sprayer with water or a thin paint mixture. Adjust the pressure to the desired level and aim the spray gun at a test surface. Pull the trigger to release paint and observe the spray pattern for any issues such as uneven coverage or clogging. Troubleshoot by checking for debris or adjusting the pressure.
- Thoroughly clean the tip before using actual paint to ensure the accuracy of paint application and to avoid any unwanted surprises during the painting project.
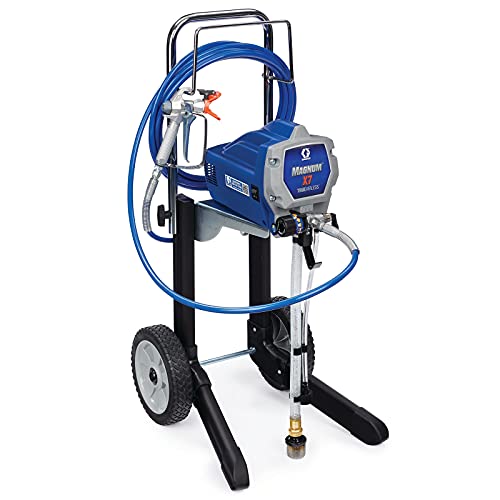
Graco Magnum 262805 X7 Cart Airless Paint Sprayer, Gray
CONTROL PAINT FLOW: Fully adjustable pressure to give you ultimate control of paint flow for any project size;...
As an affiliate, we earn on qualifying purchases.
Gather Your Cleaning Supplies
Before you begin the process of cleaning your airless paint sprayer tips, make sure you’ve got all your cleaning supplies ready to go. Cleaning techniques for airless paint sprayer tips vary depending on the type of material being used.
The frequency of cleaning is also important to maintain the optimal performance of your sprayer. For water-based paints, it’s recommended to clean the tips after every use to prevent clogging. Solvent-based paints, on the other hand, require cleaning after every 5 to 6 hours of use.
To remove the tip from the sprayer, ensure the sprayer is turned off and the pressure is released. Gently unscrew the tip using a wrench or your fingers, being careful not to damage the delicate parts.

Wagner Spraytech 2435698 Control Pro 130 Paint Sprayer with T2 Gun, High Efficiency Airless Sprayer with Low Overspray, Yellow
WAGNER AIRLESS PAINT SPRAYER: The Control Pro 130 Power Tank applies coatings 3X faster than a roller with...
As an affiliate, we earn on qualifying purchases.
Remove the Tip from the Sprayer
First, you gotta wrench that pesky tip off the dang sprayer.
When removing the tip from an airless paint sprayer, it’s essential to follow the proper steps to prevent any damage or clogging. To avoid common mistakes, make sure the sprayer is turned off and disconnected from the power source. Use a wrench to loosen the tip in a counterclockwise motion until it comes off. Be careful not to apply excessive force, as it can lead to stripped threads or broken parts.
Once the tip is removed, it’s time to move on to the next step of rinsing it with water. This will help clear any remaining paint residue and ensure a clean tip for the next use.

VEVOR 750W Stand Airless Paint Sprayer, 3000PSI High Efficiency Electric Airless Sprayer, Fine and Even Painting Effect, Handheld Paint Sprayers for Home Interior and Exterior Furniture and Fences
Efficient Painting: Our stand airless paint sprayer is equipped with a powerful 750W motor, capable of delivering up...
As an affiliate, we earn on qualifying purchases.
Rinse the Tip with Water
After successfully removing the tip, you’ll want to take a moment to rinse it with water, allowing a refreshing stream to flow over its surface and wash away any lingering remnants. This step is crucial in maintaining the performance and longevity of your airless paint sprayer.
Importance of regular maintenance:
- Regularly cleaning the tip prevents clogs and ensures a smooth, even spray.
- It helps maintain the integrity of the tip, preventing premature wear and tear.
- Regular maintenance saves you time and money by avoiding costly repairs or replacements.
- It ensures consistent and high-quality paint application.
Common mistakes to avoid when cleaning paint sprayer tips:
- Using harsh chemicals or solvents that can damage the tip’s material.
- Neglecting to thoroughly rinse the tip, leaving behind residue that can affect future paint jobs.
- Scrubbing too forcefully, which can cause damage to the tip’s delicate components.
- Failing to clean the tip after each use, leading to buildup and decreased performance.
To transition into the subsequent section about ‘scrub the tip with a cleaning solution’, it’s important to thoroughly rinse the tip before moving on to the next step.

Baotree Airless Paint Sprayer, High-Pressure Electric Paint Spray Gun with Extension Rod, Thinning-Free Professional Painting Tool for Interior/Exterior Walls, Fences, Ceilings, Cabinets
1. High efficiency and time saving, the spraying speed is 5 times faster than traditional brushing ✅ High...
As an affiliate, we earn on qualifying purchases.
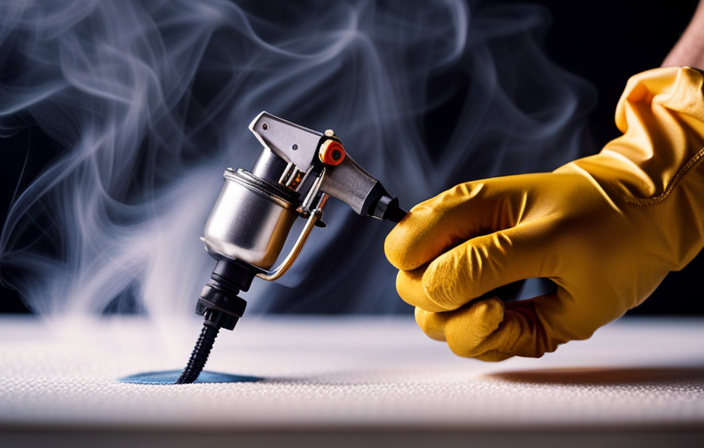
Scrub the Tip with a Cleaning Solution
Now it’s time to give the tip a good scrub using a cleaning solution, ensuring it is free from any stubborn residue. When it comes to cleaning airless paint sprayer tips, there are various cleaning solution alternatives you can use. One option is a mixture of warm water and mild dish soap. Another effective solution is a mixture of water and vinegar. These solutions help break down the paint and make it easier to remove. To clean the tip, simply dip a small brush into the cleaning solution and scrub it gently in a circular motion. This will help dislodge any remaining paint particles and prevent paint build-up. After scrubbing, rinse the tip with water to remove any residue. Following these tips for preventing paint build-up will ensure the longevity and efficiency of your airless paint sprayer. Transitioning to the next section, using a small brush to remove stubborn paint build-up is another effective method to keep your sprayer in top condition.
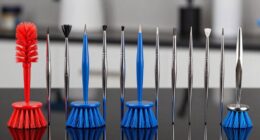
Use a Small Brush to Remove Stubborn Paint Build-Up
To tackle stubborn paint build-up, grab a small brush and gently scrub away the lingering remnants, revealing a clean and efficient tool. Using solvents for paint removal is an effective method to dissolve and remove tough paint deposits on the airless paint sprayer tip. However, if you prefer alternative methods, a small brush can be used to manually remove the stubborn paint build-up.
Ensure the brush has stiff bristles to effectively scrub away the paint. Carefully work the brush in a back-and-forth motion, applying slight pressure to dislodge the paint particles. Continue scrubbing until the tip is free from any remaining paint. This method is particularly useful for areas where solvents may not be suitable, such as when working with delicate materials.
Transitioning into the subsequent section, soaking the tip in a cleaning solution will provide a deeper clean and ensure all paint is thoroughly removed.
Soak the Tip in a Cleaning Solution
Immerse the nozzle in a solution of cleaning agents, allowing it to soak and dissolve any stubborn residue, leaving your tool refreshed and ready for future use. When cleaning airless paint sprayer tips, there are various cleaning techniques and alternative cleaning solutions that can be used to effectively remove paint build-up. One method is to soak the tip in a cleaning solution, which helps to break down and loosen the paint particles. To make the cleaning process more interesting and engaging, here is a table outlining some popular cleaning solutions:
| Cleaning Solution | Ingredients |
|---|---|
| Vinegar | White vinegar and water |
| Dish soap | Mild dish soap and water |
| Citric acid solution | Citric acid and water |
| Commercial cleaning agents | Follow manufacturer’s instructions |
After soaking the tip, it is important to rinse it thoroughly to remove any remaining residue. This ensures that the tip is clean and ready for the next use.
Rinse the Tip Thoroughly
After soaking the tip, it’s crucial to give it a thorough rinse to ensure all residue is removed, providing a clean surface for optimal performance.
Did you know that a study found that rinsing the tip for at least 30 seconds can remove up to 95% of leftover paint particles? Thoroughly rinsing the tip is essential for preventing clogs during painting.
To achieve this, I recommend using clean water and a high-pressure source, such as a sink sprayer or a pressure washer set to a low setting. Direct the water flow directly into the tip, ensuring it passes through all the tiny openings. This will dislodge any remaining paint or debris that may cause clogs.
Once the rinsing process is complete, you can proceed to dry the tip completely, which we will discuss in the following section.
Dry the Tip Completely
Once the tip has been thoroughly rinsed, it’s crucial to ensure it’s completely dry before using it again to prevent any potential issues. Properly drying the airless paint sprayer tip is an essential step in airless paint sprayer maintenance to prevent clogs and ensure optimal performance.
After rinsing, gently shake off any excess water from the tip. Then, use a clean, lint-free cloth to carefully dry the tip, making sure to reach all the crevices. Take extra care not to damage the delicate orifice or the spray pattern may be affected.
It’s important to note that even a small amount of moisture left on the tip can lead to paint buildup and eventual clogging. Once the tip is completely dry, it can be safely reattached to the sprayer, ready for the next painting task.
Reattach the Tip to the Sprayer
Now that you’ve thoroughly dried the tip, it’s time to reattach it to your sprayer and get back to painting in no time. Reattaching tips securely is crucial to ensure proper paint flow and prevent any leakage. Follow these simple steps to securely reattach the tip:
| Step | Instructions |
|---|---|
| 1 | Align the tip with the sprayer nozzle. |
| 2 | Push the tip firmly onto the nozzle until you hear a click. |
| 3 | Twist the tip clockwise to lock it in place. |
| 4 | Give the tip a gentle tug to ensure it is securely attached. |
Troubleshooting tip attachment issues? Make sure the tip is clean and free from any debris. If it still doesn’t attach properly, check for any damage or wear on the tip or sprayer nozzle. Now that you have reattached the tip securely, it’s time to test the cleaned tip before painting to ensure optimal performance.
Test the Cleaned Tip Before Painting
Before you start painting, take a moment to ensure the newly attached tip is working perfectly by giving it a test run. Testing the cleaned tip is crucial to ensure the accuracy of your paint application.
To begin, fill the paint sprayer with water or a thin paint mixture, and adjust the pressure to the desired level. Aim the spray gun at a test surface, such as a piece of cardboard or scrap material, and pull the trigger to release the paint.
Observe the spray pattern and check for any issues, such as uneven coverage or clogging. If the spray pattern is inconsistent or the tip clogs, troubleshoot the problem by checking the tip for debris or adjusting the pressure.
Remember to clean the tip thoroughly before testing it with actual paint to avoid any unwanted surprises during your painting project.
Frequently Asked Questions
How often should I clean my airless paint sprayer tip?
I replace my airless paint sprayer tip when it starts to show signs of wear, such as uneven spray patterns or clogs. Regular cleaning is necessary to maintain optimal performance, typically after every use.
Can I use any type of cleaning solution to scrub the tip?
Yes, you can use different types of cleaning solutions to scrub the airless paint sprayer tip. Some options include using mineral spirits or a specialized paint thinner. It’s important to follow proper cleaning techniques to ensure optimal performance and longevity of the tip.
Is it necessary to soak the tip in a cleaning solution, or can I just rinse it?
Soaking the tip in a cleaning solution is necessary for a thorough clean, as it helps to dissolve dried paint and debris. However, if time is a constraint, rinsing can be a quick alternative, although it may not remove all the residue.
Can I use a regular paintbrush instead of a small brush to remove stubborn paint build-up?
Using a regular paintbrush for stubborn paint build-up on airless paint sprayer tips is not recommended. It may not effectively remove the paint and could potentially damage the tip. Stick to using appropriate cleaning methods for best results.
How long should I let the tip dry before reattaching it to the sprayer?
I investigated the drying time required before reattaching the tip to the sprayer. The optimal drying time varies depending on the type of paint used, but generally it takes around 24 hours for the tip to fully dry and be ready for reattachment.
Conclusion
In conclusion, cleaning airless paint sprayer tips is a crucial step in maintaining their optimal performance. By following the steps outlined in this article, you can ensure that your tips are free from paint build-up and ready for your next painting project.
Remember, a clean tip is key to achieving smooth and even paint application. So don’t forget to give your airless paint sprayer tips some TLC! Happy painting, folks! And always remember, a clean tip is a happy tip!