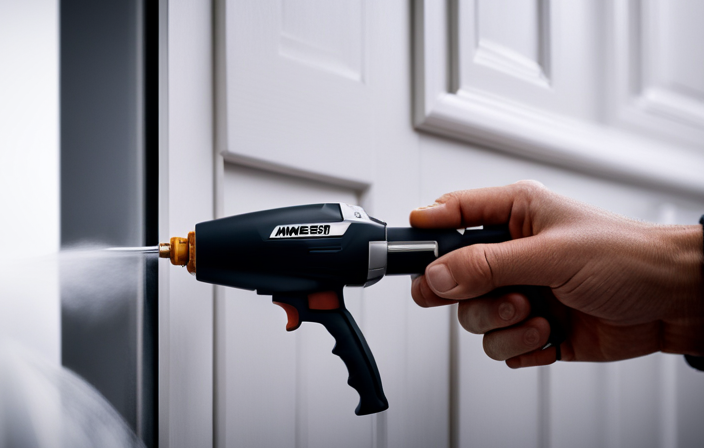
Hello there! So, you’ve got yourself a 1140 Titan Airless Paint Sprayer, huh? Let me tell you, this tool is a real workhorse when it comes to getting your painting job done quickly and efficiently. Just like any machine, it needs some regular TLC to keep it running at its best. And that’s where I come in.
In this article, I’m going to walk you through the step-by-step process of cleaning your 1140 Titan Airless Paint Sprayer, so you can keep it in tip-top shape and ready for your next project.
Now, I know cleaning might not be the most exciting task, but trust me, it’s absolutely crucial if you want your sprayer to last. So, grab your cleaning supplies and let’s get started!
Key Takeaways
- Properly reassemble the sprayer components after cleaning, following the manufacturer’s instructions.
- Test the sprayer for leaks before moving on to the next step to ensure proper functioning.
- Clean the sprayer thoroughly before storage, paying extra attention to the hoses, fittings, and seals.
- Regularly check the sprayer’s hoses, fittings, and seals for wear or damage, and replace any worn-out parts to maintain optimal performance.
Gather the necessary cleaning supplies
To properly clean your 1140 Titan airless paint sprayer and maintain its performance and longevity, it is important to gather all the necessary cleaning supplies. Here’s what you’ll need:
- A bucket of warm, soapy water
- A soft brush or sponge
- A cleaning solution specifically formulated for paint sprayers
- A clean cloth or rag
Once you have these supplies ready, you can start the cleaning process. Begin by using the brush or sponge to gently scrub away any paint residue from the exterior of the sprayer, paying close attention to the nozzle and spray tip. It is important to be thorough in this step to ensure the sprayer is completely clean.
After you have finished scrubbing, it’s time to move on to the next step of the cleaning process. Disconnect the sprayer from the power source and proceed accordingly.
Disconnect the sprayer from the power source
First, make sure you’ve unplugged the device from the power source before proceeding with the cleaning process. This step is crucial to ensure your safety and prevent any potential damage to the sprayer.
When it comes to maintaining an airless paint sprayer, there are a few tips you should keep in mind. Firstly, always refer to the manufacturer’s instructions for specific cleaning guidelines. Secondly, avoid using harsh chemicals or solvents that could damage the sprayer’s components. Additionally, be sure to wear protective gloves and goggles to protect yourself from any splatters or fumes.
Common mistakes to avoid when cleaning an airless paint sprayer include neglecting to clean the filters and not properly flushing out the system after each use.
Once you’ve disconnected the sprayer from the power source, the next step is to empty any remaining paint from the sprayer.
Empty any remaining paint from the sprayer
To properly maintain your sprayer, follow these steps to empty any remaining paint:
-
Use a clean container: Empty the remaining paint into a suitable container. Make sure the container is clean and free from contaminants that could affect the paint quality.
-
Flush with water or solvent: Fill the sprayer’s reservoir with water or a recommended solvent. Run the sprayer until clear liquid is dispensed through the nozzle.
-
Clean the filters: Remove and clean any filters in the sprayer. Use a brush or solvent to remove any paint particles stuck on the filters.
-
Wipe down surfaces: Use a clean cloth or sponge to wipe down the sprayer’s exterior surfaces, removing any paint residue.
By following these techniques and tips, you can ensure the longevity and optimal performance of your 1140 Titan airless paint sprayer. Now, let’s move on to disassembling the sprayer components.
Disassemble the sprayer components
To disassemble the various parts of your sprayer, follow these steps:
- Start by removing the spray tip and guard.
- Next, take off the gun filter and housing.
- Unscrew the fluid section from the main body to expose the piston and packings.
- Check for any worn or damaged O-rings or gaskets that may need replacement.
- Inspect the suction tube and remove any debris that may have accumulated.
- Detach the pump manifold and clean it thoroughly.
Once all the components are disassembled, you’ll have a clear understanding of how everything works together.
Now, let’s move on to the next section and clean the filters and screens to ensure optimal functionality of your Titan 1140 airless paint sprayer.
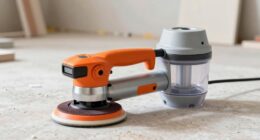
Clean the filters and screens
Once all the components are disassembled, it’s time to give the filters and screens a thorough cleaning to ensure optimal functionality. Cleaning the filters and screens is essential for maintaining the performance of your 1140 Titan airless paint sprayer.
To start, remove the filters and screens from their respective locations. Rinse them under warm water to remove any excess paint or debris. For stubborn residue, use a soft brush or toothbrush to gently scrub the filters and screens. Avoid using harsh chemicals or abrasive materials that could damage the filters.
Once cleaned, allow them to dry completely before reassembling the sprayer. Remember to inspect the filters and screens for any signs of damage or wear, as this may require replacement.
Troubleshooting tip: If your sprayer is experiencing reduced pressure or clogging, cleaning the filters and screens should be the first step in resolving the issue.
With the filters and screens cleaned and reinstalled, we can now move on to the next section: flushing the system with a cleaning solution.
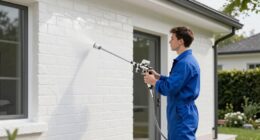
Flush the system with cleaning solution
Now, it’s time to flush the system with a cleaning solution to ensure optimal performance. Using a cleaning solution is essential for removing paint residue from the sprayer. Here are five steps to follow:
-
First, prepare the cleaning solution by mixing the recommended amount of paint thinner or mineral spirits with water.
-
Next, detach the paint container and attach a bucket or container filled with the cleaning solution to the sprayer.
-
Turn on the sprayer and allow the cleaning solution to circulate through the system for a few minutes.
-
Afterward, switch the sprayer to the flush mode and spray the cleaning solution onto a waste surface until the sprayer runs clear.
-
Finally, flush the system with water to ensure all cleaning solution is removed.
By following these steps, you’ll effectively remove any paint residue and ensure the longevity of your 1140 Titan Airless Paint Sprayer.
Now, let’s move on to the next section where we will clean the spray gun and nozzle.
Clean the spray gun and nozzle
Cleaning the spray gun and nozzle is an essential step in maintaining the performance of your 1140 Titan airless paint sprayer. To start, detach the nozzle from the gun and soak both parts in warm, soapy water for at least 15 minutes.
Using a soft brush, scrub away any paint residue, paying special attention to the nozzle tip. Rinse thoroughly and inspect for any clogs or damage. If you encounter any issues, such as inconsistent spray patterns or paint buildup, try troubleshooting techniques like adjusting the pressure or using a nozzle cleaning tool.
Once you are satisfied with the cleanliness and functionality of the gun and nozzle, you can move on to reassembling the sprayer components.
Reassemble the sprayer components
Now that you have thoroughly cleaned the spray gun and nozzle, it’s time to put the sprayer components back together. Reassembling the Titan 1140 airless paint sprayer is a relatively straightforward process, but it requires attention to detail and proper technique. To help you with this task, I have created a table outlining the reassembling steps:
| Component | Reassembling Technique |
|---|---|
| Piston Rod | Insert the piston rod into the main housing and secure tightly |
| Pump Cylinder | Align the pump cylinder with the piston rod and lock in place |
| Prime/Spray Valve | Attach the prime/spray valve to the pump cylinder |
| Suction Tube | Connect the suction tube to the prime/spray valve |
| Spray Gun Assembly | Reattach the spray gun to the prime/spray valve |
Troubleshooting common issues during reassembly may include ensuring proper alignment and tight connections. Once you have successfully reassembled the sprayer components, you can proceed to the next step of testing the sprayer for proper functioning.
Test the sprayer for proper functioning
After reassembling the components, it’s time to put the sprayer to the test and see if it’s working properly, ensuring a flawless painting experience.
To check the spray pattern and pressure, start by connecting the sprayer to a power source and filling the paint container with water. Adjust the pressure settings according to the manufacturer’s instructions.
Next, turn on the sprayer and observe the spray pattern. It should be even and consistent without any sputtering or clogging. If there are any issues, troubleshoot them by checking for clogged nozzles or inadequate pressure.
Once you are satisfied with the sprayer’s performance, it’s time to move on to the next step of storing the sprayer in a clean and dry place, protecting it from dust and moisture.
Store the sprayer in a clean and dry place
Find a safe, dry spot to store your sprayer, ensuring it remains protected from dust and moisture. Proper storage is crucial to maintain the longevity and performance of your 1140 Titan airless paint sprayer.
Here are some storing tips and maintenance recommendations:
-
Clean the sprayer thoroughly before storing it. Remove any leftover paint and clean all the components with a suitable solvent.
-
Store the sprayer in a well-ventilated area to prevent the buildup of fumes. Avoid storing it near flammable materials or heat sources.
-
Protect the sprayer from dust and debris by covering it with a clean cloth or a plastic bag. This will prevent any contaminants from entering the system.
-
Regularly check the sprayer’s hoses, fittings, and seals for any signs of wear or damage. Replace any worn-out parts to ensure optimal performance when you use it again.
By following these storing tips and maintenance recommendations, you can ensure that your 1140 Titan airless paint sprayer remains in excellent condition, ready for your next painting project.
Frequently Asked Questions
How often should I clean my 1140 titan airless paint sprayer?
I clean my 1140 Titan airless paint sprayer regularly to ensure optimal performance. It is recommended to clean an airless paint sprayer after each use. Here are some tips for maintaining it:
Can I use any cleaning solution to flush the system?
You should not use just any cleaning solution to flush the system of your 1140 Titan airless paint sprayer. Using the wrong solution can damage the sprayer and lead to clogs or other issues.
Are there any specific brushes or tools I should use to clean the filters and screens?
To clean the filters and screens of the 1140 Titan airless paint sprayer, specific brushes and alternative tools can be used. These tools ensure thorough cleaning, removing any debris or paint residue for optimal performance.
How long should I let the sprayer components dry before reassembling them?
Once the sprayer components are clean, I recommend allowing them to air dry for at least 24 hours before reassembling. This ensures that all moisture is completely evaporated, preventing any potential issues with performance or clogging.
Can I store the sprayer with paint still inside?
Yes, you can store the sprayer with paint still inside, but it is important to follow the proper cleaning process. This ensures the paint does not dry inside the sprayer, which could lead to clogs and damage.
Conclusion
In conclusion, cleaning the 1140 Titan airless paint sprayer is a crucial step in maintaining its performance and prolonging its lifespan. By following the detailed steps outlined in this article, you can ensure that your sprayer is always ready for the next painting project.
For example, let’s imagine a scenario where a professional painter, John, forgot to clean his sprayer after using it. As a result, the dried paint clogged the filters and nozzle, leading to uneven spray patterns. However, by properly cleaning the sprayer, John was able to restore its functionality and achieve flawless paint finishes once again.
Remember, regular maintenance is key to a reliable and efficient paint sprayer.