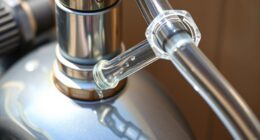
Cleaning an airless paint sprayer may seem daunting, but I assure you it’s easier than it looks. In fact, by following a few simple steps, you can quickly restore your sprayer to its original condition and efficiency.
In this article, I will guide you through the process of cleaning an airless paint sprayer after it has been sitting idle for a while.
First, we’ll gather all the necessary cleaning supplies.
Then, we’ll disconnect the sprayer from the power source and relieve any pressure.
Next, we’ll disassemble the sprayer and remove any paint residue that may have built up.
After that, we’ll clean the spray gun and nozzle with warm soapy water.
To ensure the pump and hoses are clean, we’ll flush them with either clean water or a solvent.
Once everything is clean and dry, we’ll reassemble the sprayer and perform a test spray to make sure it’s working properly.
By following these steps and regularly maintaining your sprayer, you can prolong its lifespan and ensure it’s always ready for your next painting project.
And remember, if you encounter any issues or difficulties, don’t hesitate to seek professional help.
Key Takeaways
- Cleaning an airless paint sprayer after each use is important to prevent paint buildup and clogs, extend its lifespan, and ensure optimal performance.
- Following the manufacturer’s instructions and guidelines for cleaning is crucial to maintain the sprayer’s longevity and avoid potential damage.
- Seeking professional help for any issues or difficulties with cleaning or maintenance can save time, frustration, and ensure quick issue resolution.
- Professional assistance also provides expertise, access to specialized tools and equipment, and helps avoid voiding warranties, ultimately preserving the investment in the sprayer.
Gather the necessary cleaning supplies
Now that you’ve finished painting, it’s time to gather the necessary cleaning supplies to get your airless paint sprayer looking brand new again.
The cleaning process for an airless paint sprayer is crucial to maintain its performance and durability. To start, gather a bucket of warm water, a cleaning solution specifically designed for paint sprayers, a soft brush, and some clean rags. These supplies will help you remove any paint residue and prevent clogging.
It’s essential to follow the best cleaning techniques to ensure a thorough clean.
After gathering the supplies, you can move on to disconnecting the sprayer from the power source and relieving the pressure. This step is necessary to ensure safety and avoid any accidental spraying.
Disconnect the sprayer from the power source and relieve pressure
First, disconnect the sprayer from the power source and relieve any built-up pressure. This is important for safely relieving pressure and avoiding clogging issues. To do this, turn off the power switch and unplug the sprayer. Then, trigger the gun to release any remaining pressure by pointing it into a waste container or an appropriate disposal area.
This step is crucial as it prevents accidental spraying and potential injuries during the cleaning process.
Once the pressure is relieved, you can move on to the next step. Disassemble the sprayer and remove any paint residue. This ensures that your airless paint sprayer is thoroughly cleaned and ready for the next use.
Disassemble the sprayer and remove any paint residue
Once you’ve safely disconnected and relieved the pressure, it’s time to carefully disassemble the sprayer and eliminate any lingering paint residue. To ensure thorough cleaning, follow these steps:
| Step | Action | Importance |
|---|---|---|
| Step 1 | Remove the nozzle and guard | High |
| Step 2 | Unscrew the fluid section from the gun | Medium |
| Step 3 | Take apart the gun handle and trigger assembly | Low |
| Step 4 | Clean each part with a solvent or paint thinner | High |
By disassembling the sprayer, you can access all the nooks and crannies where paint residue may hide. This step is crucial to prevent clogging and ensure optimal performance. Once the sprayer is disassembled and all parts are free of paint residue, we can move on to the next step of cleaning the spray gun and nozzle with warm soapy water.
Clean the spray gun and nozzle with warm soapy water
To get started, give the spray gun and nozzle a thorough cleaning using warm soapy water. Here are some key steps to follow:
- Fill a bucket with warm water and add a small amount of mild dish soap.
- Remove the nozzle and submerge it in the soapy water. Use a soft brush to scrub away any paint residue.
- Wipe down the spray gun with a clean cloth soaked in the soapy water. Pay close attention to the trigger and other moving parts.
- Rinse the nozzle and spray gun with clean water to remove any remaining soap residue.
After cleaning, it’s important to properly dry the spray gun and nozzle before reassembling. Use a clean, lint-free cloth to wipe away any moisture and ensure no water is left behind. This will prevent any potential damage or clogging.
Now, it’s time to flush the pump and hoses with clean water or solvent for the next step.
Flush the pump and hoses with clean water or solvent
Now, let’s give the pump and hoses a good flush with some fresh water or solvent. This step is crucial to ensure that any leftover paint or debris is completely removed from the system.
To begin, disconnect the hoses from the sprayer and place them in a bucket of clean water or solvent. Turn on the sprayer and let it run for a few minutes, allowing the water or solvent to flow through the pump and hoses. This will effectively flush out any remaining paint or residue.
If the paint is particularly stubborn, you can try cleaning the pump and hoses with a mixture of vinegar and water or by using a pressure washer. These methods will help to break down any dried or clogged paint.
Once the pump and hoses are thoroughly flushed, we can move on to the next step of removing and cleaning the filters and screens.
Remove and clean the filters and screens
After flushing the pump and hoses, it’s time to remove and clean the filters and screens. This is a crucial step in the cleaning process and should not be overlooked.
Regular maintenance of these components is important to ensure optimal performance of your airless paint sprayer. Start by removing the filters and screens from the sprayer.
Rinse them thoroughly with clean water or solvent to remove any paint residue or debris. Use a soft brush or toothbrush to gently scrub away any stubborn particles. Make sure to clean both sides of the filters and screens.
Once clean, allow them to dry completely before reassembling the sprayer and performing a test spray. This will help ensure that your sprayer is in proper working condition and ready for your next painting project.
Reassemble the sprayer and perform a test spray
Once you have finished cleaning the filters and screens, it’s time to put everything back together and give the sprayer a test spray to ensure it’s working properly.
Reassemble the sprayer by following the manufacturer’s instructions. Make sure all the parts fit snugly and securely.
Once the sprayer is reassembled, it’s important to perform a test spray before using it on a project. This will help troubleshoot any issues and ensure that the sprayer is functioning correctly.
Start by filling the paint cup with water or a cleaning solution, then turn on the sprayer and spray the liquid onto a test surface. Check for any irregularities, such as uneven spray patterns or clogs.
If everything looks good, you can proceed to the next step, which is properly storing the sprayer for future use.
Properly store the sprayer for future use
To ensure your sprayer is ready for future use, take a moment to properly store it in a safe and secure place, preserving its functionality for your next project.
Properly storing your airless paint sprayer is essential for its longevity and optimal performance. Start by cleaning the sprayer thoroughly, ensuring that all paint residue is removed.
Next, disassemble the sprayer and store each component separately in a clean and dry area. It is important to protect the sprayer from extreme temperatures and moisture to prevent damage.
Additionally, consider investing in a storage case or bag specifically designed for airless paint sprayers to provide added protection.
By following these maintenance tips and properly storing your sprayer, you can prolong its lifespan and ensure it is always ready for your next painting project. Regularly maintain and clean the sprayer to prolong its lifespan.
Regularly maintain and clean the sprayer to prolong its lifespan
Regularly maintaining and cleaning your sprayer will ensure it stays in top condition, allowing you to tackle your painting projects with confidence and ease. By regularly maintaining your paint sprayer, you can prevent paint buildup and clogs, which can affect its performance.
Cleaning the sprayer after each use removes any leftover paint or debris that may cause blockages or damage to the internal components. Additionally, regular maintenance helps to extend the lifespan of your airless sprayer, saving you money on repairs or replacements.
Remember to clean the filters, flush the system with cleaning solution, and lubricate the moving parts as recommended by the manufacturer. If you encounter any issues or difficulties during the cleaning process, it’s advisable to seek professional help to avoid further damage or accidents.
Seek professional help if you encounter any issues or difficulties
If you’re struggling with any problems or difficulties while cleaning your sprayer, it’s crucial to seek professional help. This will prevent further damage or accidents. Seeking professional assistance for troubleshooting common issues can save you time and frustration. Here are some reasons why it’s important to reach out to experts:
- Expertise: Professionals have the knowledge and experience to identify and resolve issues quickly and efficiently.
- Safety: They can ensure that all safety precautions are followed, reducing the risk of accidents or injuries.
- Equipment: Professionals have specialized tools and equipment that may be necessary for diagnosing and fixing problems.
- Warranty: Consulting a professional can help you avoid voiding any warranties on your sprayer.
Don’t hesitate to seek professional help if you encounter any difficulties. They can provide valuable guidance and ensure your sprayer is in optimal condition for future use.
Frequently Asked Questions
What are the necessary cleaning supplies needed to clean an airless paint sprayer?
To clean an airless paint sprayer, you’ll need necessary cleaning supplies such as a cleaning solution, a brush or sponge, a bucket, and safety goggles. Proper pressure relief is important before starting the cleaning process.
How do you properly relieve the pressure of an airless paint sprayer?
To relieve the pressure of an airless paint sprayer, first turn off the power, then engage the trigger lock and squeeze the trigger to release any remaining pressure. This is important for proper storage and troubleshooting common issues.
What is the best method to clean the spray gun and nozzle?
The best cleaning techniques for the spray gun and nozzle involve removing any excess paint, soaking in a cleaning solution, and using a brush to remove stubborn residue. Common cleaning mistakes include neglecting to clean immediately after use and using harsh chemicals.
Should clean water or solvent be used to flush the pump and hoses?
Using water to flush the pump and hoses of an airless paint sprayer is a good option because it is easily accessible and environmentally friendly. However, using a solvent can be more effective for removing tough paint residues. To prevent clogs and build up, make sure to clean the sprayer thoroughly after each use and use a paint strainer to filter out any debris.
How often should the filters and screens be removed and cleaned?
To maintain peak performance, the filters and screens of an airless paint sprayer should be removed and cleaned regularly. The recommended maintenance schedule is to clean them after every use to prevent clogs and ensure a smooth paint application.
Conclusion
In conclusion, cleaning an airless paint sprayer after it has been sitting requires a few simple steps:
- Gather the necessary cleaning supplies.
- Disconnect the sprayer from the power source.
- Safely disassemble the sprayer.
- Remove any paint residue.
- Clean the spray gun and nozzle with warm soapy water.
- Flush the pump and hoses with clean water or solvent.
- Ensure the sprayer is ready for future use.
- Regularly maintain and clean the sprayer to prolong its lifespan.
- Seek professional help if you encounter any difficulties.
Happy painting!


