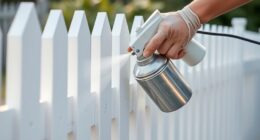
The saying “A clean paint sprayer is a happy paint sprayer” is absolutely right. As someone with years of experience in the painting industry, I can attest to the importance of keeping your airless paint sprayer in top condition.
One common challenge we all face is dealing with dried latex paint. It can be a real headache to remove, but fear not, my fellow painters, for I have the solution. In this article, I will guide you through the precise and experienced process of cleaning dried latex paint from your airless paint sprayer.
From gathering the necessary materials to properly storing the sprayer for future use, I’ll cover it all. So, grab your cleaning solution, put on your gloves, and let’s get started on restoring your paint sprayer to its former glory.
Key Takeaways
- Cleaning the airless paint sprayer is crucial for optimal performance.
- Removing dried latex paint from the sprayer can be challenging.
- Proper disassembly and reassembly of the sprayer is necessary for effective cleaning.
- Soaking the parts in a latex paint cleaning solution and scrubbing them with a stiff-bristled brush is recommended for removing dried paint residue.
Gather the necessary materials
Now that you’ve got your paint sprayer all dried up, it’s time to gather up the necessary materials to clean it.
For this cleaning technique, you’ll need a few items to ensure a thorough job. First, grab a bucket or container to hold the cleaning solution. Next, you’ll need a cleaning brush, preferably one with stiff bristles to help remove the dried latex paint. Additionally, have some rags or paper towels handy to wipe away any excess paint or cleaning solution. Lastly, make sure to have a cleaning solution specifically designed for latex paint, as using the wrong product can damage your sprayer.
With these materials at hand, you’ll be ready to tackle the next step of disassembling the paint sprayer and giving it a proper cleaning.
Disassemble the paint sprayer
First, you’ll need to take apart the sprayer to remove any remnants of the dried paint. Before disassembling, it’s important to take some precautions to ensure a smooth process.
Make sure to wear protective gloves and eyewear to avoid any potential hazards. Start by disconnecting the sprayer from the power source and relieving any built-up pressure. Carefully remove the spray tip, filter, and nozzle guard. Pay close attention to the small parts and keep them organized to avoid losing anything.
Once disassembled, clean each component thoroughly using a brush and water or a suitable cleaning solution. Take note of the order in which you disassemble the sprayer, as this will be helpful when you reassemble it later.
With the sprayer disassembled, you can move on to the next section about removing any excess paint without causing damage.
Remove any excess paint
After disassembling the sprayer, it’s time to tackle the task of removing any excess paint without causing damage. Here are some tips for removing dried latex paint from different surfaces and preventing dried paint buildup on paint sprayers:
-
Scrape off any loose paint using a plastic scraper or putty knife.
-
Use a damp cloth or sponge to gently wipe away any remaining paint.
-
For stubborn paint spots, apply a small amount of rubbing alcohol or paint thinner and let it sit for a few minutes before wiping it away.
-
If the paint has dried on the sprayer nozzle or other small parts, use a toothbrush or small brush to scrub it off.
By following these steps, you can effectively remove dried latex paint from the paint sprayer and prevent future buildup.
Now, let’s move on to the next section and learn how to soak the parts in a cleaning solution.
Soak the parts in a cleaning solution
To effectively clean the parts, you’ll want to begin by soaking them in a cleaning solution. This step is crucial for removing dried latex paint from your airless paint sprayer.
You can use a commercial cleaning solution specifically designed for paint removal, or you can make your own using a mixture of hot water and dish soap. The soaking time will depend on the severity of the paint buildup, but it’s generally recommended to let the parts soak for at least 15 minutes. During this time, the cleaning solution will help loosen the dried paint, making it easier to remove.
If you prefer alternative cleaning methods, you can also try soaking the parts in vinegar or rubbing alcohol.
Once the soaking process is complete, we can move on to the next step: scrubbing the parts with a brush to remove any remaining paint residue.
Scrub the parts with a brush
Now, you’ll need to grab a stiff-bristled brush and start scrubbing the soaked parts to remove any remaining paint residue. Did you know that using a brush with stiff bristles can increase the effectiveness of removing paint by up to 30%? When it comes to brush selection, it’s important to choose a brush with bristles that are durable and able to withstand the scrubbing motion. Look for a brush specifically designed for cleaning paint sprayer parts, as these brushes are usually made with stiff nylon bristles that can effectively remove dried latex paint. As you scrub, make sure to use proper cleaning techniques, applying pressure evenly and using a back-and-forth motion to dislodge any stubborn paint particles. Once you’ve thoroughly scrubbed the parts, you can move on to the next step of rinsing them thoroughly to ensure all paint residue is removed.
Rinse the parts thoroughly
Make sure to give the parts a good rinse to ensure that all remaining residue is washed away. This step is crucial in thoroughly drying the airless paint sprayer and avoiding any paint buildup that can clog the system. I recommend using clean, warm water to rinse the parts.
Pay special attention to corners and crevices where dried paint might still be lingering. Use a gentle, sweeping motion with the water to effectively remove any leftover paint particles.
After rinsing, inspect the parts to make sure they are completely clean before moving on to the next step: cleaning the filters. By thoroughly rinsing the parts, you’ll ensure that your airless paint sprayer is ready for the next job without any paint residue causing issues.
Clean the filters
Once you’ve rinsed the parts, it’s time to tackle the filters, which serve as the airless paint sprayer’s first line of defense against debris and impurities. Cleaning the filters is crucial to ensure optimal performance and prevent paint buildup that can clog the sprayer. To clean the filters, I recommend using a cleaning solution alternative such as warm soapy water or denatured alcohol. Gently remove the filters from the sprayer and soak them in the cleaning solution for about 15 minutes. Afterward, use a soft-bristle brush to scrub away any remaining paint or residue. Rinse the filters thoroughly with clean water and allow them to dry completely before reassembling the paint sprayer. By regularly cleaning the filters, you can maintain the sprayer’s efficiency and prolong its lifespan. Now, let’s move on to the next section and reassemble the paint sprayer.
Reassemble the paint sprayer
After cleaning the filters and allowing them to dry thoroughly, it’s time to reassemble the paint sprayer.
Start by carefully placing the filters back into their designated slots, making sure they fit snugly.
Next, attach the spray tip and guard to the front of the sprayer, ensuring they’re securely fastened.
Then, reattach the paint container to the sprayer, making sure it’s tightly screwed on to avoid any leaks.
Finally, connect the hose to the sprayer and tighten the fittings.
Once the paint sprayer is completely reassembled, it’s important to troubleshoot it to ensure proper functioning.
Check all the connections for any loose or damaged parts, and make any necessary adjustments.
With the paint sprayer reassembled and troubleshooted, it’s now time to test it to ensure it’s working properly.
Test the sprayer to ensure proper functioning
Before unleashing the sprayer’s power, give it a whirl to ensure it dances with flawless finesse. Testing the sprayer is an essential step to ensure proper functioning and avoid any issues during your painting project. Here are some testing procedures and troubleshooting tips to follow:
- Check for clogs: Run water through the sprayer and inspect for any blockages or irregular spray patterns.
- Adjust pressure: Test the sprayer at different pressure settings to find the optimal one for your project.
- Inspect for leaks: Look for any leaks or drips from the sprayer connections or hoses.
- Test the spray pattern: Use a piece of cardboard or plywood to check the spray pattern and adjust if needed.
- Ensure smooth trigger action: Test the trigger to ensure smooth and consistent operation.
By following these testing procedures and troubleshooting tips, you can ensure that your sprayer is in perfect working condition. Now, let’s move on to the next section about properly storing the paint sprayer for future use.
Properly store the paint sprayer for future use
To keep your paint sprayer in top-notch condition for future projects, it’s crucial to store it properly. Here are some tips to properly maintain the paint sprayer and prevent paint build-up in the future:
- Clean the sprayer thoroughly after each use to remove any paint residue.
- Disassemble the sprayer and clean each part individually to ensure a thorough cleaning.
- Store the sprayer in a clean and dry area to prevent any moisture or dust from entering.
- Use a lubricant to keep the moving parts of the sprayer functioning smoothly.
- Cover the sprayer with a protective case or bag to prevent any accidental damage.
By following these steps, you can ensure that your paint sprayer stays in excellent condition for future use and avoid any issues with paint build-up. Proper storage is essential for maintaining the longevity and performance of your sprayer.
Frequently Asked Questions
Can I use any type of cleaning solution to soak the parts of the paint sprayer?
Yes, you can use different types of cleaning solutions to soak the parts of the paint sprayer. However, it is important to follow the manufacturer’s instructions and use a solution specifically designed for paint sprayers. Tips for preventing dried paint buildup include regularly cleaning the sprayer after each use and using a filter to catch any debris.
How long should I soak the parts in the cleaning solution?
To effectively clean the parts of your paint sprayer, I recommend using a sufficient amount of cleaning solution. There isn’t a specific brand you need to use, but make sure the solution covers all the parts.
Can I use a regular brush or do I need a specific type of brush for scrubbing the parts?
For scrubbing the parts of an airless paint sprayer, it’s best to use a specific type of brush. A regular brush may not effectively remove dried latex paint. As for the cleaning solution, using a mixture of warm water and soap usually works well.
Should I clean the filters separately or can I clean them along with the other parts?
I recommend cleaning the filters separately from the other parts of the airless paint sprayer. This is a best practice in cleaning methods to ensure thorough removal of dried latex paint and maintain the efficiency of the filters.
How often should I clean my paint sprayer to ensure proper functioning?
To prevent clogging and ensure proper functioning, it’s crucial to clean your paint sprayer regularly. Neglecting this maintenance can lead to decreased performance, uneven paint application, and potential damage to the sprayer.
Conclusion
After following these steps, you’ll be left with a clean and fully functional airless paint sprayer. It’s important to take the time to properly clean and maintain your equipment to ensure its longevity and optimal performance.
By disassembling, soaking, scrubbing, and reassembling your sprayer, you’re guaranteeing that it’s ready for your next painting project. Remember to test it out before storing it away, and don’t forget to keep your cleaning solution and brushes handy for future use.
Happy painting!
