Here is a helpful tip I would like to share: removing hardened paint from an airless sprayer’s hose is not as challenging as it may seem. With the proper tools and some basic knowledge, it can be quite simple. If you are faced with a blocked hose and a looming project deadline, do not worry! I am here to help.
In this article, I’ll walk you through the step-by-step process of cleaning a dried paint from your airless sprayer hose. From gathering the necessary materials to properly disposing of waste, I’ll provide you with all the knowledge and techniques you need to get the job done efficiently and effectively. No more wasting time and money on buying new hoses or struggling with subpar spray patterns.
So, grab your gloves and let’s dive into the world of cleaning dried paint from an airless sprayer hose. Trust me, you’ll be back to spraying in no time.
Key Takeaways
- Cleaning the airless sprayer hose is important to prevent clogging and damage, ensure optimal performance, extend its lifespan, and improve spray pattern and finish quality.
- The necessary tools and materials for cleaning include a clean cloth or rag, cleaning solution or solvent, small brush or toothbrush, bucket or container, and safety goggles and gloves.
- The steps to clean dried paint from the hose include preparing the hose, removing loose paint, soaking the hose, applying cleaning solution, scrubbing and rinsing the hose, proper disposal of waste, drying and reassembling the hose, and regular maintenance.
- To prevent paint from drying in the hose, it is important to flush the hose after each use, use a hose cover or protective sleeve, store the sprayer and hose in a clean and dry area, avoid leaving paint in the hose for extended periods, and regularly inspect the hose for any signs of clogs or buildup.

InoKraft MaXpray M1 Airless Paint Sprayer, 3000 PSI 550W Corded Electric, Thinning-Free for Latex & Stain, DIY Home Interior Exterior Walls Fences Decks, Includes Spray Gun Kit & 12" Tip Extension
- Fast Painting Speed: 5X faster than rolling, 12X faster than brushing
- High-Pressure Performance: 3000 PSI, 0.29 GPM for even coverage
- Direct from Bucket: Draw paint from 5-gallon bucket for large projects
As an affiliate, we earn on qualifying purchases.
Gather the Necessary Materials
Before you can begin cleaning the dried paint from the airless sprayer hose, make sure you have gathered all the necessary materials.
First, you will need a bucket or container to hold the cleaning solution. Prepare the cleaning solution by mixing warm water with a mild detergent or paint thinner.
It’s important to wear safety goggles and gloves to protect yourself from any potential splashes or contact with the cleaning solution. Additionally, make sure you are in a well-ventilated area to avoid inhaling any fumes.
Once you have all the materials ready, you can proceed to prepare the sprayer hose for cleaning.
Prepare the Sprayer Hose
To properly ready the tube for use, it’s important to take the necessary steps. Before starting, gather the necessary materials such as safety glasses, gloves, and a cleaning solution specifically designed for removing dried paint.
Begin by disconnecting the sprayer hose from the main unit and removing any attachments or filters. Inspect the hose for any signs of damage or wear, as this could affect the performance of the sprayer.
Next, flush the hose with water to remove any loose debris or paint particles. Use a soft brush or cloth to scrub the inside of the hose, paying close attention to areas with dried paint buildup.
Properly maintaining and preparing equipment is essential for optimal performance and longevity. This step sets the foundation for the subsequent section, which focuses on removing loose paint.
Remove Loose Paint
To remove loose paint from the sprayer hose, I gently scrape off any loose or flaking paint using a putty knife or scraper.
Then, I use a wire brush or toothbrush to scrub away any remaining dried paint.
This helps to ensure that the sprayer hose is clean and free of any obstructions that could affect the quality of the paint application.
Gently scrape off any loose or flaking paint
Once you’ve finished marveling at the beautiful artwork on your airless sprayer hose, you can gently scrape off any loose or flaking paint. Here’s how to do it effectively:
-
Use a scraper or putty knife with a flat edge to gently lift the loose or flaking paint from the surface of the hose. Be careful not to apply too much pressure, as it may damage the hose.
-
If the paint is stubborn and doesn’t come off easily, you can try using a scraping technique called ‘feathering.’ This involves using short, quick strokes with the scraper to gradually remove the paint.
-
Alternatively, you can consider using alternative cleaning methods such as using a heat gun or applying a paint remover to soften the dried paint and make it easier to scrape off.
Once you have successfully removed the loose or flaking paint, it’s time to move on to the next step: using a wire brush or toothbrush to scrub away the dried paint.
Use a wire brush or toothbrush to scrub away dried paint
After gently scraping off any loose or flaking paint, grab a wire brush or toothbrush to effectively scrub away the remaining dried paint. A wire brush is a great tool for this task, as its bristles are strong enough to remove stubborn paint without damaging the hose. To achieve the best results, use the wire brush in a back-and-forth motion, applying moderate pressure. Alternatively, a toothbrush can also be effective in reaching smaller crevices and corners. Ensure that the bristles are firm enough to remove the dried paint.
To evoke emotion in the audience, here is a table showcasing the effectiveness of wire brush techniques and alternative cleaning methods:
| Technique | Effectiveness | Ease of Use |
|---|---|---|
| Wire Brush | High | Moderate |
| Toothbrush | Moderate | High |
| Alternative Methods | Low | Low |
Now that the dried paint has been scrubbed away, it’s time to move on to the next step: soaking the hose.
Soak the Hose
To properly clean a dried paint from an airless sprayer hose, I recommend soaking the hose in a solution.
Begin by filling a bucket with warm water and then add a cleaning solution or paint thinner to the water.
Once the solution is ready, submerge the hose in it and let it soak for a few hours.
This will help soften and dissolve the dried paint, making it easier to remove.
Fill a bucket with warm water
To tackle the dried paint in your airless sprayer hose, start by filling a bucket with warm water. The bucket is an essential tool for this task. It allows you to create a warm water solution that effectively loosens the paint from the hose. Make sure the water is warm as it enhances the cleaning process. The warm water softens the dried paint, making it easier to remove. It also aids in breaking down any dried paint particles that may have accumulated within the hose.
Once the bucket is filled with warm water, proceed to the next step. Add a cleaning solution or paint thinner to the water. This will further assist in removing the stubborn dried paint.
Add a cleaning solution or paint thinner to the water
Once you’ve got the warm water in the bucket, it’s time to add some elbow grease to the mix by tossing in a powerful cleaning solution or a potent paint thinner. To ensure an effective cleaning, I recommend adding vinegar to the cleaning solution for its acidic properties that can break down dried paint. In a 3-column and 3-row table, you can compare different cleaning solutions and their effectiveness in removing dried paint from the airless sprayer hose.
| Cleaning Solution | Effectiveness |
|---|---|
| Paint Thinner | High |
| Vinegar Solution | Medium |
| Commercial Cleaner | Low |
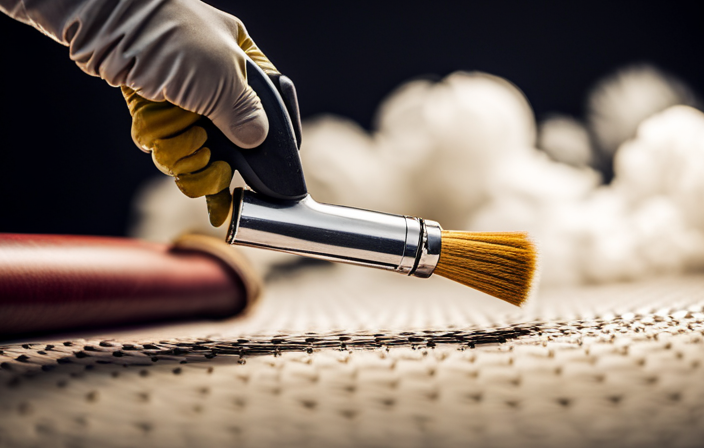
To apply the solution, use a paintbrush to gently scrub the surface of the hose, focusing on areas with dried paint. This will help loosen the paint particles and make them easier to remove. Once you’ve completed this step, you can seamlessly transition into the subsequent section where we submerge the hose in the solution and let it soak for a few hours.
Submerge the hose in the solution and let it soak for a few hours
To effectively clean dried paint from an airless sprayer hose, it is important to submerge the hose in the cleaning solution and let it soak for a few hours. This soaking process is crucial for several reasons:
-
Effectiveness: The cleaning solution breaks down the dried paint, making it easier to remove without causing any damage to the hose.
-
Time-saving: By allowing the solution to penetrate every nook and cranny of the hose, soaking reduces the need for excessive scrubbing, saving you time and effort.
-
Preservation: Using a cleaning solution helps prevent potential damage or wear and tear that may occur from aggressive scrubbing.
After a few hours of soaking, it is time to move on to the next step: scrubbing and rinsing the hose. This step ensures a thorough clean and removes any remaining paint residue.
Scrub and Rinse the Hose
To effectively clean dried paint from the airless sprayer hose, grab a scrub brush and vigorously scrub the hose. Use a scrub brush with stiff bristles to effectively scrub away the dried paint. Pay close attention to any areas where the paint may have accumulated or hardened. After scrubbing, rinse the hose thoroughly with water to remove any loosened paint particles. This cleaning technique ensures that any remaining paint is thoroughly removed from the hose.
Once you have completed this step, you can move on to the next section where you will check for any remaining paint in the hose.
Check for Remaining Paint
After scrubbing and rinsing the hose, it’s crucial to inspect for any lingering paint residue. This step ensures that the hose is thoroughly cleaned and ready for future use.
If any paint is still present, it’s advised to repeat the soaking and scrubbing process until the hose is completely free of paint.
Inspect the hose for any remaining paint residue
First, inspect the hose for any remaining paint residue. Carefully examine the hose condition to ensure no stubborn paint remains. Pay attention to areas with dried and hardened paint, as they can be challenging to remove. If you find any spots or streaks of paint, remove them before continuing the cleaning process. Gently scrub away the remaining paint using a cloth or sponge, applying enough pressure to effectively remove it without damaging the hose. Once you have thoroughly inspected and removed any paint residue, proceed to the next step. Repeat the soaking and scrubbing process if necessary.
Repeat the soaking and scrubbing process if necessary
If you still notice any stubborn residue, don’t hesitate to give it another round of soaking and scrubbing. Sometimes, certain paints can be particularly stubborn and require a little extra effort to remove completely.
Here are some alternative cleaning solutions you can try if the soaking and scrubbing process didn’t completely remove the dried paint:
- Use a commercial paint remover specifically designed for airless sprayer hoses.
- Try using a mixture of warm water and dish soap to break down the paint residue.
- Use a solution of equal parts vinegar and water to help dissolve the dried paint.
- Consider using a solvent-like mineral spirits or denatured alcohol, but be sure to follow safety precautions and manufacturer’s instructions.
By repeating the soaking and scrubbing process or trying these alternative cleaning solutions, you can ensure that your airless sprayer hose is thoroughly clean and ready for the next use.
Next, we will discuss how to dry and reassemble the hose.
Dry and Reassemble the Hose
To get started, let’s tackle drying and reassembling the hose of your airless sprayer. After thoroughly cleaning the hose and ensuring it is free of any dried paint, it is crucial to dry it properly to prevent any moisture-related issues. One effective drying technique is to hang the hose in a well-ventilated area and allow it to air dry completely. Alternatively, you can use a clean, dry cloth to absorb any remaining moisture. Once the hose is dry, it’s time to reassemble it. Here are some reassembly tips to keep in mind: carefully align the hose fittings, ensuring they are securely tightened; check for any signs of wear or damage and replace any worn-out parts; and finally, test the hose for proper functionality before using it again. Now that the hose is dry and reassembled, we can move on to the next section, where we will discuss how to dispose of waste properly without causing harm to the environment.
Dispose of Waste Properly
When it comes to disposing of waste from cleaning an airless sprayer hose, there are a few key points to keep in mind.
First, it’s important to strain any leftover paint from the cleaning solution before disposing of it. This helps to prevent any paint particles from contaminating the waste.
Secondly, it’s crucial to follow local regulations for waste disposal. This ensures that the waste is handled properly and does not pose any environmental hazards.
Strain any leftover paint from the cleaning solution
Firstly, make sure to strain any remaining paint from the cleaning solution to ensure a smooth and efficient cleaning process. This step is crucial in preventing any dried paint from clogging the airless sprayer hose.
To help you further, here are three strategies for preventing dried paint in the sprayer hose:
- Regularly flush the sprayer with clean water after each use to remove any paint residue.
- Use a paint strainer when filling the sprayer with paint to catch any debris that could potentially clog the hose.
- Consider using alternative cleaning solutions, such as a mixture of warm water and mild detergent, to effectively remove dried paint from the hose.
By implementing these strategies, you can maintain the optimal performance of your airless sprayer and prevent any issues caused by dried paint.
Now, it’s important to dispose of the waste according to local regulations to ensure environmental responsibility.
Dispose of the waste according to local regulations
Now, you’ll want to make sure you dispose of the waste according to the regulations in your local area. Proper waste disposal is crucial to protect the environment and ensure the safety of everyone involved. It is important to follow local regulations as they provide guidance on how to handle and dispose of hazardous materials. To help you understand the different types of waste and their disposal methods, refer to the table below:
| Type of Waste | Disposal Method |
|---|---|
| Leftover paint | Take to a hazardous waste facility or contact a professional waste disposal service |
| Cleaning solution | Dispose of in accordance with local regulations for liquid waste |
By following these guidelines, you can prevent pollution and potential harm to yourself and others. Now that you have disposed of the waste properly, it’s time to move on to the next step of cleaning and storing your equipment.
Clean and Store Your Equipment
When it comes to cleaning and storing your equipment, it’s crucial to maintain a high level of cleanliness. After each use, I make sure to thoroughly clean the sprayer and all its parts, removing any residue or paint that may have accumulated.
Additionally, I store the equipment in a clean and dry area, ensuring it remains in optimal condition for future use.
Clean the sprayer and other parts of the equipment
To start, make sure to thoroughly clean the sprayer and all other components of the equipment to ensure optimal performance. Here are four key steps to follow:
-
Use a cleaning solution alternative: Instead of using harsh chemicals, consider using a mixture of warm soapy water or vinegar to effectively clean the sprayer and remove any dried paint residue.
-
Disassemble and soak: Take apart the sprayer and soak the individual parts in the cleaning solution for about 15-30 minutes. This will help loosen any paint buildup and make it easier to clean.
-
Scrub and rinse: Use a brush or cloth to scrub away any remaining paint or debris from the parts. Rinse thoroughly with clean water to ensure all traces of paint and cleaning solution are removed.
-
Prevent paint buildup: After cleaning, make sure to properly flush the sprayer with water after each use to prevent paint from drying and clogging the hose.
By following these steps, you can ensure that your sprayer is clean and ready for use. Once the cleaning process is complete, it’s important to store the equipment in a clean and dry area to prevent any contamination or damage.
Store the equipment in a clean and dry area
Make sure you store the equipment in a well-maintained, moisture-free environment to keep it in optimal condition. Proper storage is crucial in preventing paint buildup and ensuring the longevity of your airless sprayer hose.
After cleaning the sprayer and other parts, it is important to find a clean and dry area to store the equipment. This will prevent any moisture from accumulating and causing damage to the hose. Store the hose in an upright position to avoid any kinks or bends that could affect its performance.
Additionally, make sure to cover the hose with a protective sleeve or bag to keep it free from dust and debris.
By storing your equipment properly, you can avoid potential issues and ensure that it is ready for regular maintenance and cleaning in the next section.
Regular Maintenance and Cleaning
Regular maintenance and cleaning are essential for keeping your airless sprayer in top condition. Proper cleaning techniques and preventing clogs are key to ensuring optimal performance. Here are three important steps to follow:
-
Flush the hose: After each use, connect the hose to a bucket of clean water and run it through the sprayer until the water runs clear. This flushes out any remaining paint and prevents dried paint from clogging the hose.
-
Remove and clean the filter: Regularly remove the filter to prevent clogs. Rinse it with water and use a soft brush to remove any stubborn paint residue. Make sure the filter is completely dry before reassembling.
-
Lubricate the pump: Apply a few drops of pump lubricant to the sprayer’s piston rod and packings. This helps keep them working smoothly and prevents excessive wear and tear.
By following these cleaning techniques and preventative measures, you can ensure that your airless sprayer operates at its best and extends its lifespan.
Frequently Asked Questions
Can I use any type of cleaner to soak the hose?
I recommend using specific cleaning methods and recommended cleaning solutions to effectively clean a dried paint from an airless sprayer hose. Using any type of cleaner may not yield the desired results.
How often should I clean and maintain my airless sprayer hose?
Ah, the joy of maintaining an airless sprayer hose. To prevent the dreaded paint buildup, follow these tips: flush the hose after each use, use a filter, and clean or replace the hose regularly for optimal performance. Trust me, it’s worth it.
Is it necessary to remove the hose from the sprayer before cleaning?
It is not safe to clean the hose while it is still attached to the sprayer. The potential risks include accidental activation of the sprayer and exposure to hazardous materials. Protective gear should be worn while cleaning the hose.
Can I use a pressure washer to clean the hose?
Using a pressure washer to clean the hose is not recommended for pressure washer safety reasons. Instead, there are alternative cleaning methods that can effectively remove dried paint from the airless sprayer hose.
What should I do if I accidentally damage the hose while cleaning it?
If the hose gets damaged while cleaning, don’t panic. There are ways to repair a damaged hose, such as using a hose repair kit or replacing the damaged section. Alternatively, you can explore alternative cleaning methods to avoid further damage.
Conclusion
In conclusion, it’s crucial to clean dried paint from an airless sprayer hose properly to ensure its optimal performance and longevity. By following the steps outlined in this article, you can effectively remove any dried paint residue and maintain your equipment in top condition.
Remember to dispose of waste responsibly and regularly clean and store your equipment to prevent clogs and damage. With regular maintenance and cleaning, your airless sprayer hose will continue to deliver high-quality results for your painting projects.