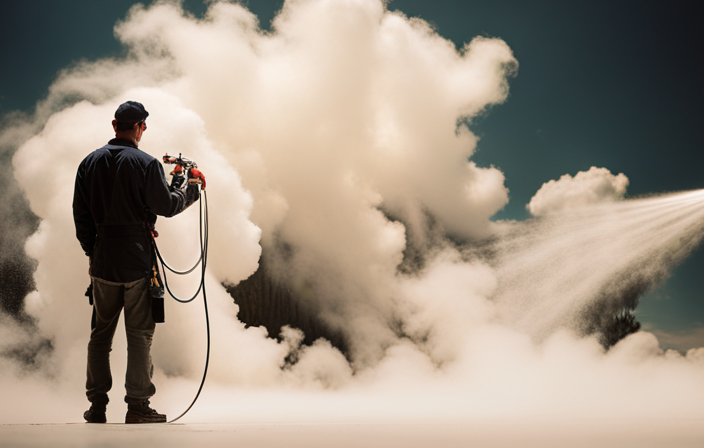
Are you aware that regularly cleaning and maintaining your Graco airless paint sprayer can greatly increase its lifespan and guarantee optimal performance?
In this article, I will guide you through the step-by-step process of cleaning your Graco airless paint sprayer, so you can keep it in top-notch condition. By following these simple instructions, you’ll be able to remove any paint residue, prevent clogs, and avoid costly repairs.
First, we’ll gather the necessary supplies and prepare the paint sprayer for cleaning.
Then, I’ll show you how to disassemble the paint sprayer, clean the spray tip and guard, as well as the hose and gun.
After that, I’ll guide you through the reassembly process and explain how to properly test the paint sprayer to ensure it’s working efficiently.
Lastly, I’ll provide some valuable maintenance tips to help you keep your Graco airless paint sprayer in excellent shape for years to come.
So, let’s get started and give your paint sprayer the TLC it deserves!
Key Takeaways
- Regular cleaning and maintenance are essential for the longevity of a Graco airless paint sprayer.
- The cleaning process involves removing and rinsing the filter, scrubbing the pump housing, and thoroughly rinsing and drying the pump before reassembling.
- Properly attaching the hose to the gun and connecting the gun to the hose is important to ensure a secure and leak-free connection.
- Soaking the spray tip in cleaning solution, using a brush or toothpick to remove dried paint, and wiping the guard with a damp cloth are necessary steps to clean the spray tip and guard.
Gather the Necessary Supplies
Now that you’re ready to tackle cleaning your Graco airless paint sprayer, let’s gather all the supplies you’ll need!
To effectively clean your paint sprayer, you’ll need a few essential items. First, make sure you have a bucket or a container to hold cleaning solution. You’ll also need a cleaning solution specifically designed for paint sprayers, such as Graco Pump Armor or a mix of water and mineral spirits.
Additionally, grab a clean cloth or rag for wiping down the sprayer. Don’t forget to have a brush or small tool to remove any stubborn paint residue. Lastly, keep a pair of gloves and safety glasses handy to protect yourself during the cleaning process.
With these supplies gathered, you’re now ready to move on and prepare the paint sprayer for cleaning.
Prepare the Paint Sprayer for Cleaning
Before beginning the cleaning process for my Graco airless paint sprayer, I first disconnect it from the power source to ensure safety.
Next, I carefully remove any remaining paint from the sprayer, making sure to follow the manufacturer’s instructions.
Finally, I release the pressure from the sprayer by turning the pressure control knob counterclockwise until the pressure is fully relieved.
Taking these steps will ensure that the sprayer is ready for a thorough cleaning.
Disconnecting from power source
First, make sure you unplug your Graco airless paint sprayer from the power source to ensure safety while cleaning. Disconnecting the sprayer from the power source is vital to avoid any electrical accidents during the cleaning process. To illustrate the importance of this step, refer to the table below which outlines the potential risks and recommended safety precautions.
| Potential Risks | Safety Precautions |
|---|---|
| Electric shock | Unplug the sprayer |
| Fire hazard | Disconnect power |
| Damage to equipment | Turn off the power |
By disconnecting the paint sprayer from the power source, you minimize the risk of accidents and protect yourself from potential harm. Once the sprayer is disconnected, you can proceed to the next section where we will discuss removing paint and pressure without compromising safety.
Removing paint and pressure
To safely remove the paint and pressure, take a moment to disconnect the power source and then proceed with the next step. First, ensure the sprayer is turned off and unplug it from the electrical outlet.
Next, relieve the pressure by turning the prime/spray valve counterclockwise. This will release any built-up pressure inside the system.
Now, remove the clogged nozzle by twisting it counterclockwise and pulling it out. If there’s paint buildup on the nozzle, use a brush or a toothpick to gently remove it.
Additionally, clean the guard and the tip holder to prevent any further paint buildup.
With the paint and pressure removed, you can now move on to the next section about disassembling the paint sprayer.
Disassemble the Paint Sprayer
Start by carefully taking apart the paint sprayer, making sure to avoid any potential mess or spills. To disassemble the Graco airless paint sprayer, follow these steps:
-
Remove the spray tip by unscrewing it counterclockwise. Be cautious not to damage the tip or the threads.
-
Next, detach the guard by loosening the nut that holds it in place. This will allow you to access the pump and other internal components.
-
Finally, remove the pump assembly by unscrewing the retaining bolts. This step might require a wrench or socket set.
Disassembling the paint sprayer is crucial for troubleshooting common issues such as clogs or leaks. Once the sprayer is disassembled, you can easily inspect and clean the individual parts.
Now, let’s move on to the next section and learn how to clean the spray tip and guard.
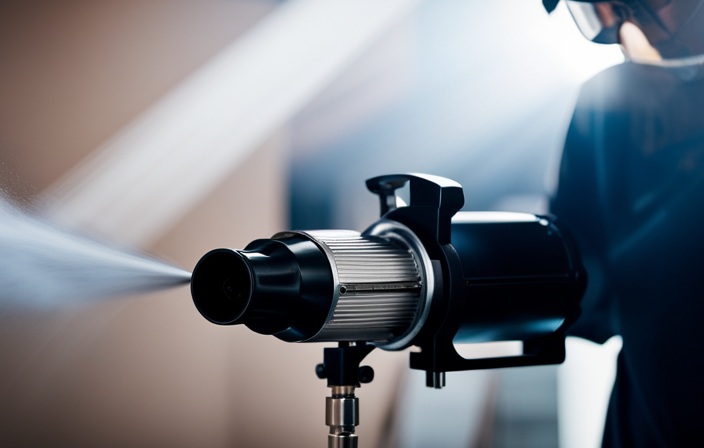
Clean the Spray Tip and Guard
To properly clean the spray tip and guard of a paint sprayer, start by soaking them in a cleaning solution. This allows the solution to break down any dried paint or residue that may be stuck on the tip and guard.
After soaking, use a brush to gently scrub off any remaining residue, ensuring that all surfaces are thoroughly cleaned.
By following these steps, you can maintain the performance and longevity of your paint sprayer, ensuring optimal results every time.
Soaking in cleaning solution
After soaking the Graco airless paint sprayer in the cleaning solution, you’ll see the paint gradually dissolve and loosen from the surface.
It’s recommended to use an alternative cleaning solution specifically designed for paint removal, as it ensures a more effective cleaning process. The benefits of using a cleaning solution with detergent are numerous. The detergent helps break down the paint particles, making them easier to remove. Additionally, it helps to remove any grease or oil that may be present on the surface of the sprayer.
This thorough cleaning ensures that the sprayer is free from any residue that could affect its performance. Once the paint has dissolved and loosened, the next step is to brush off any residue remaining on the surface, preparing it for the next step of the cleaning process.
Brushing off any residue
After soaking the graco airless paint sprayer in the cleaning solution, it’s time to move on to the next step: brushing off any residue. This crucial step ensures that any stubborn stains or leftover paint are completely removed from the sprayer. To accomplish this, I recommend using a stiff-bristle brush or a toothbrush. Gently scrub the surface of the sprayer, paying close attention to any areas with visible residue. If necessary, you can also use a cleaning solvent to help loosen and remove the stubborn stains.
To help you better visualize the process, here’s a handy table that outlines the steps:
| Step | Action | Tools |
|---|---|---|
| 1 | Soak the sprayer in cleaning solution | Bucket, cleaning solution |
| 2 | Brush off residue | Stiff-bristle brush, toothbrush |
| 3 | Clean stubborn stains | Cleaning solvent |
Now that the residue has been removed, we can move on to the next section where we will learn how to clean the hose and gun of the graco airless paint sprayer.
Clean the Hose and Gun
Start by disassembling the hose and gun, making sure to remove any clogs or debris that may be hindering your paint sprayer’s performance, leaving you with a smooth and hassle-free painting experience.
To clean the hose, detach it from the gun and flush it with water to remove any residual paint or blockages. For stubborn clogs, you can use a small brush or pipe cleaner to gently scrub the inside of the hose.
Moving on to the gun, carefully disassemble it by removing the tip, guard, and filter. Rinse these components with water, ensuring all paint particles are removed. If you encounter any issues during this process, refer to your user manual for troubleshooting techniques.
Once the hose and gun are thoroughly cleaned, proceed to clean the pump and filter to ensure optimal performance.
Clean the Pump and Filter
Once you’ve tackled the task of disassembling and cleaning the hose and gun, it’s crucial to give equal attention to the pump and filter, as they play a pivotal role in maintaining the smooth operation of your paint sprayer. Cleaning the pump and filter should be done regularly according to a cleaning schedule to prevent clogs and ensure optimal performance. Start by removing the filter from the pump and rinsing it with water, making sure to remove any debris or paint buildup. Next, use a brush to gently scrub the pump housing, paying close attention to any areas with stubborn residue. Rinse the pump thoroughly and allow it to dry completely before reassembling the paint sprayer. By following this brushing technique and cleaning schedule, you’ll keep your Graco airless paint sprayer in top shape and ready for your next project. In the next section, we’ll discuss how to reassemble the paint sprayer and get it back to work.
Reassemble the Paint Sprayer
To reassemble the paint sprayer, the first step is to attach the hose and gun. Start by aligning the hose with the gun’s inlet and firmly pushing it in until it clicks into place. Ensure that the connection is secure by giving it a slight tug.
Next, install the spray tip and guard by aligning the tip with the gun’s tip guard and twisting it clockwise until it’s snug. Make sure it’s tightened properly to prevent any leakage during operation.
Attaching the hose and gun
First, make sure you have the hose and gun ready to attach to your Graco airless paint sprayer.
To begin the cleaning process, follow these steps:
- Attach the hose to the sprayer by aligning the threads and twisting it clockwise until it’s securely in place.
- Connect the gun to the hose by pushing the quick connect fitting on the gun onto the hose’s nipple and pulling back to lock it into position.
- Ensure that the connections are tight and properly aligned to prevent any leaks during operation.
When troubleshooting, check for any loose connections or damaged parts that may affect the performance of the paint sprayer. It’s important to address these issues before proceeding with the cleaning process.
Next, we’ll move on to installing the spray tip and guard, which is crucial for achieving the desired spray pattern.
Installing the spray tip and guard
Now, let’s focus on how to properly install the spray tip and guard, an essential step for achieving the perfect spray pattern. Did you know that using the correct spray tip size can increase your paint coverage by up to 30%? When it comes to spray tip maintenance, it’s important to clean it thoroughly after each use to prevent clogs and ensure optimal performance. Start by removing the spray tip from the guard using a wrench or pliers. Then, soak it in a cleaning solution or mineral spirits for about 15 minutes. Use a small brush or toothpick to remove any dried paint or debris from the tip, and rinse it with water. As for guard cleaning techniques, simply wipe it down with a damp cloth to remove any paint residue. With the spray tip and guard properly installed and maintained, you’re now ready to test the paint sprayer and see the results for yourself. Transitioning into the next section, let’s move on to how to test the paint sprayer to ensure it’s working correctly.
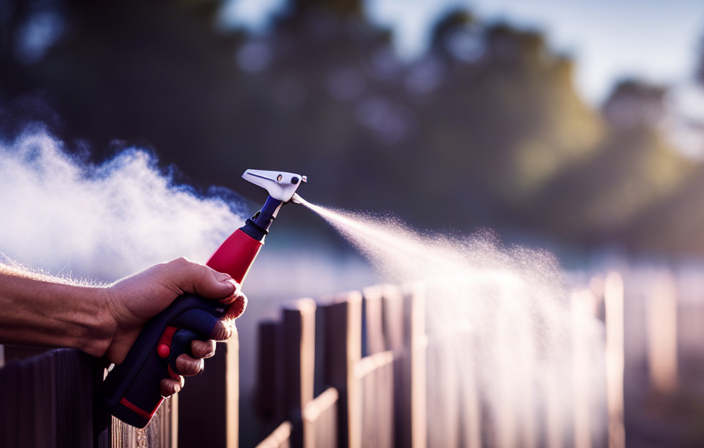
Test the Paint Sprayer
When testing the paint sprayer, it’s crucial to check for proper functionality. This involves ensuring that all components are working correctly and that there are no leaks or blockages in the system.
If any issues are detected, adjustments to the settings may be necessary. This could include adjusting the pressure, flow rate, or spray pattern to achieve the desired results.
Checking for proper functionality
To ensure your Graco airless paint sprayer is functioning properly, start by checking all the components for any signs of damage or wear. Here are four important steps for testing the functionality of your paint sprayer:
-
Testing for leaks: Inspect the hoses, fittings, and connections for any leaks. Tighten or replace any damaged parts to prevent paint wastage and ensure a smooth spraying experience.
-
Troubleshooting common issues: Check the motor for any abnormal noises or vibrations. Ensure the pressure control knob is set correctly and adjust if necessary. Also, verify that the suction tube is properly submerged in the paint container to prevent suction problems.
-
Checking the spray pattern: Connect the sprayer to a clean water source and engage the trigger. Observe the spray pattern to ensure it is even and consistent. Adjust the tip or pressure settings as needed to achieve the desired spray pattern.
-
Verifying the pressure: Use a pressure gauge to confirm that the sprayer is operating at the recommended pressure level. Adjust the pressure settings if necessary to achieve optimum paint flow.
By following these steps, you can identify any potential issues and ensure your Graco airless paint sprayer is ready for use.
Now, let’s move on to adjusting the settings if necessary.
Adjusting settings if necessary
Once you’ve ensured proper functionality, it’s time to make any necessary adjustments to the settings for an optimal painting experience. Start by adjusting the pressure on your Graco airless paint sprayer. This can be done by turning the pressure control knob clockwise to increase the pressure or counterclockwise to decrease it.
It’s important to find the right pressure for your project, as too high of a pressure can cause overspray and uneven coverage, while too low of a pressure can result in poor paint adhesion.
If you encounter any issues while painting, troubleshooting common problems can help. For example, if the paint is splattering or dripping, check if the nozzle is clogged and clean it if necessary. Additionally, make sure the paint is properly mixed and strained before using it in the sprayer.
Now that you have adjusted the settings and resolved any issues, it’s important to properly store the paint sprayer to maintain its longevity and functionality.
Properly Store the Paint Sprayer
Make sure you don’t just toss the paint sprayer in the corner like a forgotten toy, but instead, give it the luxurious treatment it deserves by properly storing it after use.
To properly clean the paint sprayer and prevent paint buildup and clogs, follow these steps. First, remove the spray tip and filter, and clean them thoroughly with warm soapy water.
Next, flush the system with clean water until the water runs clear. Once cleaned, dry all the parts completely to prevent rust and damage.
Store the paint sprayer in a cool, dry place, away from direct sunlight and extreme temperatures. By properly storing your paint sprayer, you can ensure its longevity and keep it in optimal condition.
Now, let’s move on to some maintenance tips for longevity.
Maintenance Tips for Longevity
Caring for your paint sprayer properly ensures it’ll last for years to come. To maintain the longevity of your Graco airless paint sprayer, it’s essential to follow a regular maintenance schedule. Here are some tips to keep your sprayer in top condition:
-
Clean the sprayer thoroughly after every use. Flush out any remaining paint by running cleaning solution through the system.
-
Inspect the sprayer’s filters regularly and clean or replace them as needed. Clogged filters can lead to decreased performance.
-
Lubricate the sprayer’s moving parts to prevent friction and ensure smooth operation.
-
Check the sprayer’s hoses and connections for any leaks or damage. Replace any faulty parts immediately.
-
Troubleshoot common issues such as clogged spray tips or uneven spray patterns by referring to the manufacturer’s manual.
By following these maintenance tips, you can extend the lifespan of your Graco airless paint sprayer and enjoy flawless paint application for years to come.
Frequently Asked Questions
How long does it take to clean a Graco airless paint sprayer?
Cleaning a Graco airless paint sprayer is a breeze! It only takes a few minutes to thoroughly clean and store it properly. Follow these steps to ensure your sprayer stays in top condition and ready for your next painting project.
Can I use any type of cleaning solution to clean the paint sprayer?
You should use a cleaning solution specifically designed for paint sprayers to clean a Graco airless paint sprayer. Using the wrong solution can damage the sprayer. There are alternative cleaning methods available, but always follow the manufacturer’s recommendations for best results.
Is it necessary to clean the pump and filter after every use?
Yes, it is necessary to clean the pump and filter after every use to maintain the performance of your Graco airless paint sprayer. Proper storage and regular cleaning will prevent clogs and ensure smooth operation.
Can I leave paint residue in the hose and gun if I plan on using the paint sprayer again soon?
I don’t recommend leaving paint residue in the hose and gun if you plan on using the paint sprayer again soon. It is important to clean the hose and gun thoroughly to avoid clogs and ensure optimal performance. Proper paint sprayer maintenance includes regular cleaning to prevent any issues. Here are some cleaning tips to follow.
How often should I perform maintenance on my Graco airless paint sprayer to ensure its longevity?
To ensure the longevity of my Graco airless paint sprayer, I perform regular maintenance. By following the recommended maintenance frequency and implementing the best cleaning practices, I can keep my sprayer in optimal condition.
Conclusion
In conclusion, cleaning a Graco airless paint sprayer is a simple yet crucial task to ensure its optimal performance. By gathering the necessary supplies and following the step-by-step process, you can disassemble, clean, and reassemble the sprayer with ease.
Remember to test the sprayer afterwards to ensure it’s working efficiently. By properly storing the sprayer and following maintenance tips, you can extend its longevity and continue to achieve professional-quality results.
So, take care of your Graco airless paint sprayer, and it’ll take care of your painting needs.