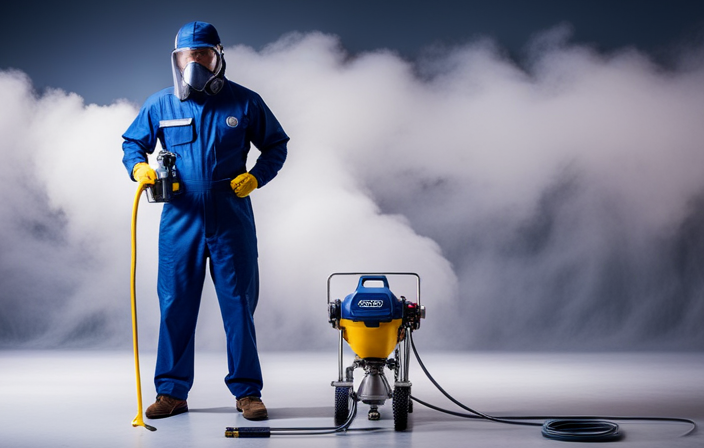
Tired of struggling with your old-fashioned airless paint sprayer? No need to worry! In this article, I will guide you through the process of giving your trusty sprayer a complete cleaning, rejuvenating it to make sure it operates smoothly once more.
Cleaning an airless paint sprayer may seem like a daunting task, but with the right technique and a little bit of patience, you’ll have it looking and working like new in no time.
First, gather all the necessary supplies, such as cleaning solution, brushes, and safety equipment.
Then, prepare the sprayer for cleaning by relieving any pressure and disconnecting the power source.
After that, it’s time to disassemble and clean the nozzle and tip, making sure to remove any dried paint or debris.
Next, clean the paint container, pump, and filter thoroughly to ensure optimal performance.
Finally, run a test spray to make sure everything is in working order before properly cleaning and storing the sprayer.
In addition to these step-by-step instructions, I’ll also provide you with some regular maintenance tips and troubleshooting advice.
So, let’s dive in and give your old airless paint sprayer the TLC it deserves!
Key Takeaways
- Proper storage in a temperature-controlled environment and using a cover or case is important to protect the airless paint sprayer from dust and contaminants.
- Thoroughly cleaning the sprayer before storage by removing paint residue and debris, soaking parts in a cleaning solution, and rinsing everything with water is essential.
- Regular maintenance, including cleaning after each use, lubricating moving parts, and promptly replacing worn or damaged parts, is necessary to prevent rust, corrosion, clogged nozzles, and ensure consistent paint application.
- Troubleshooting common issues by checking the pump inlet filter for clogs, inspecting the spray tip for clogs or wear, and adjusting pressure settings for a consistent spray pattern can resolve around 80% of problems.
Gather the Necessary Supplies
Before you can begin cleaning your old airless paint sprayer, you’ll need to gather all the necessary supplies.
First, you’ll need a cleaning solution to remove any paint residue and debris from the sprayer. There are several cleaning solution alternatives you can use, such as a mixture of warm water and dish soap or a specialized paint sprayer cleaner.
Additionally, you’ll need a bucket or container to hold the cleaning solution, a cleaning brush with stiff bristles to scrub the sprayer, and a small wire brush to clean the nozzle and other small parts.
To prevent clogs in the future, it’s important to clean the sprayer after each use and avoid letting paint dry inside.
Now that you have all the necessary supplies, you can move on to preparing the sprayer for cleaning.
Prepare the Sprayer for Cleaning
First, make sure you’ve got all your ducks in a row before diving into the cleaning process. To prepare the sprayer for cleaning, gather the necessary supplies as listed in the table below:
| Supplies | Quantity |
|---|---|
| Cleaning solution alternatives | 1 bottle |
| Preventing clogs and build up | 1 brush |
Cleaning solution alternatives are important for effectively removing paint residue from the sprayer. These can include a mixture of warm water and mild dish soap or a specialized paint thinner. Using these alternatives will help prevent clogs and build up in the sprayer, ensuring optimal performance. After preparing the necessary supplies, you’ll be ready to proceed with disassembling and cleaning the nozzle and tip of the sprayer, which will be covered in the subsequent section.
Disassemble and Clean the Nozzle and Tip
To ensure optimal performance, you should now proceed with the process of disassembling and cleaning the nozzle and tip of your sprayer. Here’s how:
-
Start by removing the nozzle and tip from the sprayer.
-
Use a soft brush or toothbrush to carefully remove any dried paint or debris from the nozzle and tip.
-
Soak the disassembled parts in a mixture of warm water and mild detergent for about 30 minutes.
-
Rinse the parts thoroughly with clean water to remove any soap residue.
-
Finally, use a small pin or needle to clear any clogs in the nozzle or tip.
By following these cleaning techniques and troubleshooting tips, you can ensure that your nozzle and tip are thoroughly cleaned and ready for use.
Now, let’s move on to the next section and clean the paint container.
Clean the Paint Container
Now it’s time to freshen up the container that holds your paint. To clean the paint container of your airless paint sprayer, start by emptying any remaining paint into a separate container.
Then, fill the container with a cleaning solution specifically designed for removing stubborn paint. Allow the solution to sit in the container for a few minutes to loosen any dried paint.
Next, use a brush or sponge to scrub the inside of the container, making sure to reach all the corners and edges. Rinse the container thoroughly with clean water until all traces of paint and cleaning solution are gone.
Now, let’s move on to the next section and clean the pump and filter of the paint sprayer.
Clean the Pump and Filter
After freshening up the paint container, it’s essential to ensure that the pump and filter are also thoroughly cleaned to maintain optimal functionality.
To clean the pump and filter effectively, follow these steps:
- Remove the pump from the sprayer by unscrewing it carefully.
- Rinse the pump with warm soapy water to remove any paint residue.
- Use a small brush to clean the pump thoroughly, paying close attention to the nooks and crannies.
- Unclog the filter by removing it from the pump and rinsing it under running water.
By cleaning the pump and filter, you prevent any clogs or blockages that could affect the sprayer’s performance. Once the pump and filter are clean, it’s time to reassemble the sprayer and get ready for your next painting project.
Reassemble the Sprayer
Once the pump and filter have been given a fresh start, it’s time to put all the pieces back together and let the sprayer unleash its painting magic once again. Reassembling the sprayer may seem daunting, but with a few tips and tricks, it can be a smooth process.
Start by referring to the user manual for specific instructions on how to reassemble your airless paint sprayer model. Take note of any special considerations or troubleshooting tips provided.
Make sure to properly align and secure all the components, such as the pump, filter, hose, and nozzle. Double-check that all connections are tight and leak-free.
Once reassembled, it’s time to run a test spray to ensure everything is functioning correctly.
Run a Test Spray
To ensure everything’s in good working order, give your sprayer a test spray. Testing techniques are essential to troubleshoot any problems that may arise during the painting process.
Start by connecting the sprayer to the air compressor and filling it with clean water or a paint thinner solution. Adjust the pressure settings according to the manufacturer’s recommendations.
Then, hold the sprayer at a distance of about 12 inches from a test surface and pull the trigger to spray. Observe the spray pattern and ensure it’s even and consistent. If there are any issues, such as clogs or uneven spray, refer to the troubleshooting section of your sprayer’s manual. This’ll help you identify and fix any problems.
Once you’ve completed the test spray, you can proceed to clean and store the sprayer properly, ensuring its longevity and optimal performance.
Clean and Store the Sprayer Properly
To properly clean and store my old airless paint sprayer, I need to follow two key points.
First, I need to remove any excess water from the sprayer to prevent any damage or corrosion.
Second, I should store the sprayer in a cool, dry place to maintain its functionality and prevent any potential mold or mildew growth.
Remove Excess Water
First, make sure you’re prepared for the next step in cleaning your old airless paint sprayer by removing any excess water. To remove water residue and prevent clogging, follow these steps:
| Step 1: | Step 2: | Step 3: | Step 4: |
|---|---|---|---|
| Drain remaining paint | Flush system with clean water | Run water through sprayer | Empty water from container |
Start by draining any remaining paint from the sprayer. Next, flush the system with clean water to remove any paint residue. Run water through the sprayer until it runs clear. Finally, empty any remaining water from the container.
By removing excess water, you ensure that your airless paint sprayer is thoroughly cleaned and ready for storage. Speaking of storage, it’s important to store your sprayer in a cool, dry place to maintain its longevity and performance.
Store in a Cool, Dry Place
Make sure you find a cool, dry spot to store your airless paint sprayer to protect its performance and longevity. Proper storage is crucial in preventing moisture damage to your equipment. Moisture can cause rust and corrosion, which can lead to clogged nozzles and decreased spraying efficiency.
Store your airless paint sprayer in a location where it won’t be exposed to extreme temperatures or humidity. A temperature-controlled environment, such as a garage or basement, is ideal. Make sure to clean the sprayer thoroughly before storing it to remove any paint residue or debris. Additionally, consider using a cover or case to protect it from dust and other contaminants.
By following these proper storage practices, you can ensure that your airless paint sprayer stays in optimal condition for future use. Now, let’s move on to some regular maintenance tips.
Regular Maintenance Tips
After each use of my airless paint sprayer, I make sure to clean it thoroughly to prevent any paint residue from drying and clogging the system.
I also regularly lubricate the moving parts to ensure smooth operation and prevent any potential damage.
If I notice any worn or damaged parts during my maintenance routine, I promptly replace them to maintain the sprayer’s optimal performance.
Clean After Each Use
To keep your old airless paint sprayer in top shape, don’t forget to give it a thorough cleaning after every use! Cleaning techniques play a vital role in maintaining its performance.
Start by removing any remaining paint from the sprayer. Use a brush or a cloth to wipe off any stubborn paint on the nozzle, filters, and other parts. If the paint is hard to remove, you can soak the parts in a cleaning solution for a few minutes before scrubbing.
Make sure to rinse everything thoroughly with water after cleaning. Once the sprayer is clean and dry, you can move on to lubricating the moving parts. This will help prevent any friction and ensure smooth operation.
Lubricate Moving Parts
Don’t forget to give your trusty paint gun a little TLC by lubricating its moving parts regularly. Proper lubrication techniques are essential for maintaining the performance and longevity of your airless paint sprayer.
Here are five important reasons why regular maintenance is important:
- Prevents friction and wear on moving parts
- Reduces the risk of clogs and blockages
- Improves overall efficiency and performance
- Extends the lifespan of your paint sprayer
- Ensures smoother and more consistent paint application
By lubricating your paint gun’s moving parts, you minimize friction and wear, allowing it to operate smoothly and effectively. However, regular maintenance doesn’t stop at lubrication.
In the next section, we’ll discuss the importance of replacing worn or damaged parts to keep your paint sprayer in top shape.
Replace Worn or Damaged Parts
Replacing worn or damaged parts is crucial in keeping your trusty paint gun in top shape and ensuring its longevity. Regularly inspecting your airless paint sprayer for any signs of wear or damage is essential.
Common parts that may need replacement include the spray tip, piston, seals, and filters. To replace these parts, refer to the manufacturer’s instructions or consult a professional.
It’s also important to follow a regular maintenance schedule to prevent major issues. This includes cleaning the sprayer after each use, lubricating moving parts, and checking for any leaks or clogs.
By following these repair techniques and maintaining a proper maintenance schedule, you can avoid costly repairs and keep your airless paint sprayer running smoothly.
Now, let’s move on to troubleshooting common issues that may arise.
Troubleshooting Common Issues
One interesting statistic is that 80% of common issues with airless paint sprayers can be resolved with basic troubleshooting. Troubleshooting common issues is an essential skill for maintaining the optimal performance of your airless paint sprayer. Here are some maintenance techniques to help you troubleshoot and resolve these issues:
-
No spray or low-pressure issues:
-
Check the pump inlet filter for clogs and clean if necessary.
-
Ensure that the spray tip isn’t clogged and clean or replace if needed.
-
Uneven spray pattern:
-
Check the spray tip for wear and replace if necessary.
-
Adjust the pressure settings on the sprayer to achieve a consistent spray pattern.
By following these troubleshooting steps and implementing proper maintenance techniques, you can easily resolve common issues and keep your airless paint sprayer in excellent working condition.
Frequently Asked Questions
How often should I clean my airless paint sprayer?
I clean my airless paint sprayer after each use to prevent clogs and maintain its performance. This helps prevent common problems with airless paint sprayers and ensures smooth operation for future painting projects.
Can I use any type of cleaning solution for the sprayer?
I can use a variety of cleaning solutions for my airless paint sprayer. Some options include water, mineral spirits, or a specialized paint thinner. It’s important to follow the manufacturer’s recommendations for cleaning and maintenance.
Is it necessary to disassemble the nozzle and tip for cleaning?
Yes, it is necessary to disassemble the nozzle and tip for cleaning. Proper nozzle cleaning ensures optimal spray performance, while tip maintenance prevents clogging and extends the lifespan of your airless paint sprayer.
How do I properly clean the pump and filter?
To properly clean the pump and filter, it’s important to avoid common cleaning mistakes. Regularly inspect and clean the filter, removing any debris. Flush the pump with water or a cleaning solution to keep it running smoothly. These tips will help maintain pump performance.
What should I do if my sprayer is not spraying paint evenly?
If my sprayer is not spraying paint evenly, I would follow these troubleshooting tips. Common paint sprayer problems include clogged nozzle, incorrect pressure settings, worn-out seals, or thin paint.
Conclusion
In conclusion, giving your old airless paint sprayer a thorough cleaning is like breathing new life into it. Just like how a fresh coat of paint can transform a room, cleaning your sprayer can transform its performance. By disassembling and cleaning each part meticulously, you ensure optimal functionality and longevity.
So, don’t neglect the maintenance of your sprayer. Treat it like a prized possession and it’ll reward you with flawless paint application every time.
Happy spraying!
