The task of cleaning an airless sprayer after utilizing oil paint can appear daunting. I completely relate to the challenge. But, there’s no need to fret any longer, because I’ll guide you through the cleaning procedure, step by step. In this article, you will discover the correct ways to eliminate oil paint from your airless sprayer, ensuring it’s ready and set for your next endeavor.
Cleaning an airless sprayer may seem like a time-consuming chore, but it is essential to maintain the sprayer’s performance and prolong its lifespan. By following these simple instructions, you will be able to remove all traces of oil paint from your sprayer and prevent any clogs or blockages.
So, gather your cleaning supplies, disconnect the sprayer from the power source, and let’s get started on making your airless sprayer shine like new again. Trust me, the results will be well worth the effort.
Key Takeaways
- Use paint thinner or warm water and dish soap as cleaning solutions.
- Disconnect the sprayer properly by unplugging it and avoiding forcefully pulling the cord.
- Release pressure and empty the paint by turning off the power switch, slowly turning the pressure relief valve counterclockwise, and opening the drain valve.
- Clean the spray tip, guard, pump, and filter regularly to maintain optimal performance.
Gather Your Cleaning Supplies
Now it’s time to gather all the supplies you’ll need to tackle the task of cleaning oil paint from your airless sprayer.
-
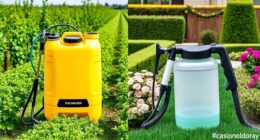
Cleaning solution alternatives are an important consideration when it comes to cleaning oil paint from your sprayer. One option is to use a paint thinner or mineral spirits, which can effectively break down the paint and make it easier to clean. Another alternative is to use a mixture of warm water and dish soap, which can also be effective in removing oil paint.
-
Additionally, it’s important to have a clean cloth or rag on hand to wipe away any excess paint.
-
Tips for preventing clogs include regularly cleaning the filters and using a strainer when pouring paint into the sprayer.
With these supplies in hand, you’re ready to move on to the next step of disconnecting the sprayer from the power source.
Disconnect the Sprayer from the Power Source
First, make sure you’ve unplugged the sprayer to ensure your safety as you begin the process of disconnecting it from the power source.
It is important to regularly maintain your airless sprayer to keep it in good working condition. Here are some common mistakes to avoid when disconnecting the sprayer from the power source:
-
Never disconnect the sprayer while it is still powered on, as this can be dangerous and may cause electric shock.
-
Avoid pulling the cord forcefully when unplugging the sprayer, as it can damage the cord or the power source.
-
Do not use excessive force to disconnect the sprayer, as it can lead to breakage or damage.
Now that you have safely disconnected the sprayer, you can proceed to the next step of releasing the pressure and emptying the paint.
Release the Pressure and Empty the Paint
After safely disconnecting the sprayer, it’s time to relieve the pressure and remove any remaining paint. To do this, follow these steps:
-
Start by turning off the power switch and unplugging the sprayer from the power source. This will ensure your safety while working with the equipment.
-
Next, locate the pressure relief valve on the sprayer. Slowly turn it counterclockwise to release the pressure. Be cautious as the paint may still be under pressure and could splatter.
-
Once the pressure is released, place a container underneath the sprayer’s siphon tube. This will catch any remaining paint. Open the drain valve, located near the bottom of the sprayer, and allow the paint to flow out.
| Key Point 1 | Key Point 2 | Key Point 3 |
|---|---|---|
| Safely dispose of oil paint | Prevent clogging in an airless sprayer | Remove remaining paint |
Now that the pressure is relieved and the paint is emptied, we can move on to the next step of removing the spray tip and guard.
Remove the Spray Tip and Guard
To safely proceed, you’ll need to detach the spray tip and guard from the equipment once the pressure has been relieved and the paint has been emptied. Here are some tips for properly removing the spray tip and guard:
-
Use a wrench or tool provided by the manufacturer to loosen the spray tip. Turn it counterclockwise until it comes off easily.
-
Be careful not to damage the spray tip threads while removing it. If the spray tip is stuck, you can use a pair of pliers to gently twist it off.
-
After removing the spray tip, detach the guard by unscrewing it from the nozzle housing. This will allow for easier cleaning and maintenance.
-
Inspect the spray tip and guard for any clogs, debris, or damage. Clean them thoroughly before reinstalling or replacing them.
Proper maintenance for airless sprayers and preventing clogs in spray tips are crucial for optimal performance.
Now, let’s move on to the next step of flushing the system with a cleaning solution.
Flush the System with Cleaning Solution
Next, you’ll want to ensure optimal performance by flushing the system with a specialized cleaning solution. This step is crucial in preventing clogs and blockages that can occur when using alternative solvents. By using a cleaning solution specifically designed for oil paint, you can effectively remove any residue and maintain the performance of your airless sprayer.
To flush the system, follow these steps:
- Fill the sprayer’s reservoir with the cleaning solution.
- Attach the spray gun to the sprayer and turn on the machine.
- Point the spray gun into a waste container and pull the trigger.
- Allow the cleaning solution to run through the system until it comes out clear.
By thoroughly flushing the system, you can ensure that any remaining oil paint is removed, preventing any potential issues. Once the system is flushed, you can proceed to the next step of cleaning the spray tip and guard.
Clean the Spray Tip and Guard
To ensure flawless application and maintain the longevity of my spray equipment, I need to give it a meticulous scrub. Cleaning the spray tip and guard is an essential step in airless sprayer maintenance.
To clean the spray tip, I’ll start by removing it from the guard using a wrench. Then, I’ll use a cleaning brush to remove any dried paint or debris from the tip. After that, I’ll rinse the tip with warm water to ensure it’s completely clean.
Moving on to the guard, I’ll once again use a cleaning brush to remove any paint build-up. It’s crucial to be thorough in this process to prevent clogs and ensure consistent spray patterns.
Once the tip and guard are clean, I can move on to cleaning the pump and filter. This will ensure that my sprayer is in optimal condition for the next use.
Taking the time to clean the spray tip and guard properly will not only help me achieve flawless application but also extend the life of my spray equipment.
Clean the Pump and Filter
Once you’ve finished giving your spray tip and guard a thorough cleaning, it’s time to turn your attention to the pump and filter. Here are some steps to help you clean them effectively:
-
Use a cleaning solution alternative: Instead of using harsh chemicals, try using a mixture of warm water and mild dish soap. This will effectively break down the oil paint without damaging the pump or filter.
-
Troubleshoot common pump issues: If you notice any clogs or reduced pressure, check the pump for any debris or obstructions. Clean out the pump intake valve and ensure that all connections are secure.
-
Clean the filter: Remove the filter from the pump and rinse it with warm water. If there is stubborn paint residue, use a soft brush to gently scrub it off.
Once the pump and filter are clean, you can move on to reassembling the sprayer and getting it ready for your next project.
Reassemble the Sprayer
After completing the cleaning process, it’s time to put all the pieces back together and bring your sprayer back to life, like assembling the parts of a well-oiled machine.
Start by referring to the user manual for specific reassemble instructions, as each sprayer model may vary.
Begin by attaching the filter back onto the pump and securing it tightly.
Then, carefully reconnect the hoses and make sure they are properly fitted. Check for any loose connections or damaged parts and troubleshoot if necessary.
Once everything is in place, double-check that all the components are securely fastened and tightened. This ensures optimal performance and prevents any leaks.
With the sprayer reassembled, you’re now ready to move on to the next step: testing it to ensure it’s working properly and ready for use.
Test the Sprayer
To ensure your sprayer is in proper working condition, all that’s left is to give it a test run. Testing techniques can help identify any issues that may need to be addressed before using the sprayer for actual painting. Here are some common troubleshooting techniques you can use:
| Issue | Possible Cause | Solution |
|---|---|---|
| Low Pressure | Clogged nozzle or worn pump | Clean or replace nozzle, inspect and replace pump if necessary |
| Uneven spray pattern | Incorrect nozzle size or incorrect pressure setting | Adjust nozzle or pressure settings according to paint manufacturer’s recommendations |
| Spitting or sputtering | Paint too thick or air in the system | Thin paint to proper consistency or bleed air from the system |
By following these testing techniques and troubleshooting common issues, you can ensure your sprayer is ready for use. Now, let’s move on to the next section and learn how to properly dispose of the cleaning solution.
Properly Dispose of the Cleaning Solution
Now that we’ve tested the sprayer and ensured it’s working properly, it’s essential to focus on properly disposing of the cleaning solution. This step is crucial to minimize the environmental impact of our cleaning process.
When dealing with oil paint, it’s important to remember that it contains harmful chemicals that can be detrimental to the environment if not disposed of correctly.
To properly dispose of the cleaning solution, start by checking your local regulations and guidelines for hazardous waste disposal. Most cities have designated facilities or collection events where you can drop off hazardous materials.
Avoid pouring the cleaning solution down the drain or into the soil, as this can contaminate water sources and harm wildlife.
By taking the time to dispose of the cleaning solution properly, we can do our part in protecting the environment.
Frequently Asked Questions
How often should I clean my airless sprayer?
I clean my airless sprayer after each use to maintain its performance. The best cleaning solution for an airless sprayer is warm soapy water. Regular cleaning prevents clogs and ensures smooth operation.
Can I use any type of cleaning solution to flush the system?
Yes, you can use different types of cleaning solutions to flush the system of an airless sprayer. However, it is important to follow safety precautions, such as wearing protective gloves and goggles, and ensuring proper ventilation when using cleaning solutions with airless sprayers.
Is it necessary to remove the spray tip and guard during the cleaning process?
Should you clean the spray tip separately? Yes, it is necessary to remove the spray tip and guard during the cleaning process of an airless sprayer. This ensures a thorough cleaning and prevents clogs or damage.
Can I reuse the cleaning solution for future cleanings?
Yes, you can reuse the cleaning solution for future cleanings. However, it’s important to note that there are alternative cleaning methods available if you prefer not to reuse the solution.
What should I do if the sprayer doesn’t work properly after cleaning?
If the sprayer doesn’t work properly after cleaning, sprayer troubleshooting is necessary. Common sprayer issues include clogged nozzles, insufficient pressure, and faulty seals. Identifying and addressing these problems will help restore the sprayer’s functionality.
Conclusion
After following the steps to clean the oil paint from my airless sprayer, I was amazed at how smoothly it worked.
It was like a well-oiled machine, ready to tackle any painting project.
Just like a clean and efficient sprayer, with proper care and maintenance, we can all be ready to take on any challenge that comes our way.
Remember, cleaning your sprayer not only extends its lifespan but also ensures a professional finish every time.
So, don’t neglect this important step and keep your painting game strong!

Whether it’s a step-by-step tutorial on achieving flawless finishes or an in-depth analysis of the latest airless paint sprayer models, Joe’s ability to articulate complex ideas in a simple and engaging manner resonates with our diverse audience. His practical tips and techniques empower readers to tackle their projects with confidence.