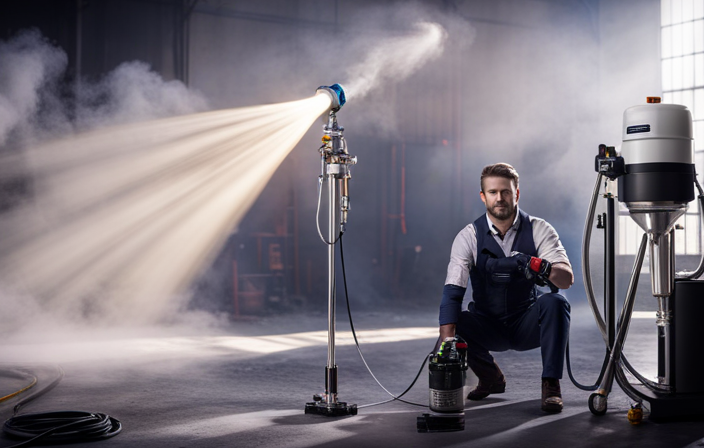
Connect with us

Airless Paint Sprayers FAQs

How To Clear Coat With Airless Electric Paint Sprayer

Published

on

An image showcasing a skilled painter wearing protective gear, effortlessly operating an airless electric paint sprayer

Imagine you’ve just finished painting a beautiful object, whether it’s a piece of furniture or a car, and you’re looking to both protect it and make it shine. That’s where a clear coat comes in. The task of applying a clear coat can appear daunting, especially if you don’t have the right equipment. This is where I come into play; I aim to assist you in navigating the process of applying a clear coat with an airless electric paint sprayer, an innovative tool for achieving an impeccable finish.

In this article, I will guide you through the step-by-step process of preparing the surface, choosing the right clear coat, setting up your paint sprayer, and achieving a professional-quality finish. We’ll cover everything from practicing on a test surface to checking for imperfections and cleaning your sprayer afterwards.

By the end, you’ll have the knowledge and confidence to tackle any clear coating project with ease.

So, let’s dive in and learn how to achieve that showroom-worthy finish you’ve always dreamed of.

Key Takeaways

  • Technique for even application: Follow recommended movement pattern, maintain consistent distance and parallel sprayer to surface, overlap each stroke by 50%.
  • Applying multiple coats: Allow each coat to dry completely before applying the next, apply additional coats for desired glossiness and durability.
  • Allowing sufficient drying time: Check manufacturer’s instructions, set up a well-ventilated area with good air circulation, avoid rushing for a smooth and professional finish.
  • Achieving desired glossiness: Apply additional coats as needed, layering paint allows for easy control of glossiness, avoid imperfections with multiple thin coats.

Prepare the Surface

Advertisement

Now it’s time to get your surface smooth and ready for a flawless clear coat, so you can feel that satisfying sense of accomplishment when you see the final result. To achieve this, proper preparation techniques are essential.

Begin by thoroughly cleaning the surface to remove any dirt, dust, or debris. Use a mild detergent and water solution, and scrub the surface with a soft brush or sponge. Rinse it thoroughly and allow it to dry completely.

Next, inspect the surface for any imperfections such as scratches or dents. Fill them in with a suitable filler and sand it down until smooth. This step is crucial for achieving a professional finish.

With the surface prepared, you can now move on to the next section about choosing the right clear coat.

Choose the Right Clear Coat

First, make sure you’ve chosen the perfect protective shield for your masterpiece. A glossy armor that will make your project shine like a diamond is what you’re looking for. Choosing the right clear coat is crucial for achieving a professional-looking finish. Here are some tips for applying clear coat effectively:

Advertisement
  • Consider the type of surface you’re working with, as different clear coats are designed for specific materials.
  • Look for a clear coat that offers UV protection to prevent fading and yellowing over time.
  • Opt for a clear coat with a fast drying time to minimize the risk of dust or debris settling on the surface.
  • Check the clear coat’s compatibility with the base coat you’ve used to ensure they work well together.
  • Read reviews and consult experts to determine the durability and long-term performance of the clear coat.

Once you’ve chosen the right clear coat, you’ll be ready to set up your paint sprayer and start creating a flawless finish.

Set Up Your Paint Sprayer

Get ready to unleash your artistic vision with the power of a high-performance paint sprayer, setting up an experience that will leave you feeling empowered and excited to transform any surface into a work of art. When it comes to achieving a smooth finish with your clear coat, there are a few tips and tricks that can make all the difference. First, make sure to properly thin your clear coat according to the manufacturer’s instructions to ensure optimal spraying. Secondly, set the air pressure on your paint sprayer to the recommended level for clear coats, usually around 40-60 PSI. Lastly, take your time and apply thin, even coats, allowing each coat to dry before applying the next. Common mistakes to avoid include spraying too quickly, which can result in drips and runs, and not cleaning your sprayer thoroughly between coats. By following these tips, you’ll be well on your way to achieving a flawless finish. Now, let’s move on to the next step and practice on a test surface to perfect your technique.

Practice on a Test Surface

Before diving into the project, it’s important to practice using the paint sprayer on a test surface.

I recommend using a scrap piece of material to get a feel for the sprayer and understand how it operates.

Advertisement

This will allow me to adjust the settings as needed to achieve the desired coverage and ensure a smooth and professional finish.

Use a scrap piece of material to get a feel for the sprayer

To really get the hang of using the airless electric paint sprayer, grab a scrap piece of material and let the fun begin! Practicing on a test surface is essential to hone your skills and become familiar with the sprayer’s behavior. By doing so, you can experiment with different techniques and troubleshoot any potential issues that may arise.

To make the most out of your practice session, I suggest using a 3 column and 5 row table to track your progress. In the first column, list the various techniques you want to try, such as horizontal strokes, vertical strokes, or circular motions. In the second column, record your observations about the spray pattern, coverage, and any difficulties you encounter. Finally, in the third column, note down any adjustments you make to the sprayer settings to improve the results.

By practicing and analyzing your results, you’ll gain valuable insights into how the airless electric paint sprayer operates and how to achieve the desired coverage. Once you feel confident with your technique, you can move on to the next step of adjusting the settings as needed to achieve the desired coverage.

Adjust the settings as needed to achieve the desired coverage

To achieve the desired coverage, you can adjust the settings as needed. Here are some tips to keep in mind when using an airless electric paint sprayer:

Advertisement
  1. Adjust the pressure: Start with a low pressure setting and gradually increase it until you achieve the desired coverage. This will help prevent excessive overspray and ensure an even coat.

  2. Control the fan width: The fan width determines the size of the spray pattern. Narrow the fan width for smaller areas or increase it for larger surfaces. Adjusting this setting allows for more precise application.

  3. Watch for uneven spraying: If you notice any unevenness in the coat, adjust the distance from the sprayer to the surface. Holding the sprayer too close can result in a concentrated spray, while holding it too far away can lead to a thin coat.

By using these adjusting techniques and troubleshooting tips, you can achieve professional results when clear coating with an airless electric paint sprayer.

Now, let’s move on to the next section and start spraying.

Start Spraying

When starting to spray with an airless electric paint sprayer, it’s crucial to hold the sprayer at a consistent distance from the surface. This ensures that the paint is evenly applied and prevents any streaks or uneven coverage.

Moving in smooth, overlapping strokes is also essential to achieve a professional finish. By following these key points, I can ensure that my paint job is precise and detailed, resulting in a smooth and even coat on the surface.

Hold the sprayer at a consistent distance from the surface

To achieve a consistent spraying technique and maintain the correct nozzle pressure, it is crucial to hold the sprayer at a steady distance from the surface. Here are four important tips to help you achieve this:

Advertisement
  1. Set the distance: Start by holding the sprayer approximately 12 inches away from the surface. Refer to the user manual for manufacturer’s recommendations on the ideal distance.

  2. Keep it steady: Once you’ve determined the ideal distance, maintain it throughout the entire application process. This ensures an even coat and prevents inconsistencies in the finish.

  3. Watch your speed: Avoid moving the sprayer too quickly or too slowly. Find a comfortable pace that allows you to cover the surface evenly without rushing or lingering in one spot for too long.

  4. Practice makes perfect: If you’re new to using an airless electric paint sprayer, practice on a scrap piece of material before starting your project. This helps you get a feel for the sprayer and refine your technique.

Now, let’s move on to the next step: moving in smooth, overlapping strokes to ensure even coverage.

Move in smooth, overlapping strokes to ensure even coverage

Gliding the sprayer in fluid, overlapping motions ensures a seamless and flawless distribution of the clear coating. To achieve a smooth application and an even finish, it is crucial to move the sprayer in a consistent and controlled manner. By following this technique, you can avoid streaks, drips, and uneven coverage.

To help you visualize the process, here is a table outlining the recommended movement pattern:

Stroke 1 Stroke 2 Stroke 3
Left to right Top to bottom Diagonal

Make sure to maintain a consistent distance from the surface and keep the sprayer parallel to it. Overlapping each stroke by about 50% will ensure that the coating is evenly distributed. This technique allows for better control and coverage, resulting in a professional-looking finish.

Now that you have achieved an even application with your first coat, let’s move on to the next step of applying multiple coats.

Advertisement

Apply Multiple Coats

When applying multiple coats of clear coat using an airless electric paint sprayer, it is important to allow each coat to dry completely before applying the next. This ensures that each layer adheres properly and prevents any issues with bubbling or peeling.

Additionally, it is recommended to apply additional coats as needed to achieve the desired level of glossiness. By following these steps, you can achieve a smooth and professional finish for your project.

Allow each coat to dry before applying the next

Once the previous coat has dried, you can proceed to apply the next coat using an airless electric paint sprayer. Allowing sufficient drying time between coats is crucial to achieving a smooth and professional-looking finish. Here are some tips for ensuring the best results:

  1. Check the manufacturer’s instructions for the recommended drying time. This can vary depending on factors such as temperature and humidity.
  2. Avoid rushing the process and give each coat ample time to dry completely. This will help prevent any issues like bubbling or peeling.
  3. If possible, set up a well-ventilated area with good air circulation to speed up the drying process.
Tips for Allowing Sufficient Drying Time
Check manufacturer’s instructions Avoid rushing Ensure good air circulation

By following these guidelines, you will ensure that each coat dries properly and creates a strong foundation for the next application. Once the desired level of glossiness is achieved, you can move on to applying additional coats as needed.

Apply additional coats as needed for the desired level of glossiness

To achieve the desired level of glossiness, apply additional coats of paint as needed. Adding more coats enhances the depth of the finish, making it appear richer and more vibrant. It also increases the durability and longevity of the finish, providing extra protection against scratches, UV rays, and other environmental factors. By carefully layering the paint, you can achieve a professional-quality shine that gives your project a polished appearance. Applying multiple thin coats allows you to easily control the glossiness level and avoid imperfections. Now, let’s move on to the next section and check for any possible flaws or imperfections in the finish.

Check for Imperfections

Inspect the surface for any flaws before proceeding to apply the clear coat with the airless electric paint sprayer. It is important to check for imperfections such as bubbles or unevenness, as these can affect the final result of your clear coat. To ensure a smooth finish, there are techniques you can use, such as sanding any rough spots and using a tack cloth to remove any dust or debris.

Advertisement

To help you understand the importance of inspecting the surface, here’s a table that highlights common imperfections and how to address them:

Imperfection Solution
Bubbles Sand the affected area lightly and reapply clear coat.
Unevenness Sand the surface evenly and apply an additional coat if necessary.
Dust or debris Use a tack cloth to remove any particles and apply clear coat carefully to avoid trapping more debris.

Once you have checked for imperfections and addressed them accordingly, you can proceed to clean and maintain your paint sprayer to ensure its longevity and optimal performance.

Clean and Maintain Your Paint Sprayer

Make sure to take good care of your trusty paint sprayer by regularly cleaning and maintaining it. Cleaning your paint sprayer is essential to ensure optimal performance and longevity.

After each use, thoroughly clean the sprayer by flushing it with water or a cleaning solution, depending on the type of paint used. Pay special attention to the nozzle, filter, and other components to remove any paint residue.

Regularly inspect and replace worn-out parts, such as seals and gaskets, to prevent leaks and maintain a proper spray pattern. Troubleshooting common issues, such as clogged nozzles or inconsistent spray, can also be resolved by cleaning or adjusting the sprayer.

Advertisement

By following these cleaning tips and regularly maintaining your paint sprayer, you can ensure it continues to deliver flawless results.

Now, let’s move on to allowing the clear coat to cure.

Allow the Clear Coat to Cure

I can’t stress enough the importance of giving the clear coat ample time to dry and cure. It may be tempting to touch or disturb the surface, but it’s crucial to resist that urge until it is fully cured.

This will ensure a flawless finish and prevent any potential damage or imperfections.

Give the clear coat ample time to dry and cure

Once you’ve applied the clear coat with your airless electric paint sprayer, it’s important to give it ample time to dry and cure. Just like waiting for a cake to bake to perfection, patience is key. Here are a few tips and methods for speeding up the drying process:

Advertisement
  1. Increase airflow: Promote air circulation by using fans or opening windows. This will help the clear coat dry faster.

  2. Use a heat source: Gently warm the clear coat with a heat gun or infrared lamp. This will accelerate the drying time.

  3. Apply thin coats: Thick layers of clear coat take longer to dry and are more prone to bubbles. To avoid this, apply multiple thin coats.

By following these methods, you can speed up the drying process and prevent clear coat bubbles. Once the clear coat is fully cured, you can proceed with the next steps without worrying about touching or disturbing the surface.

Avoid touching or disturbing the surface until it is fully cured

Be patient and resist the temptation to touch or disturb the surface until it’s fully cured. This ensures a flawless and professional finish that you’ll be proud to show off. Avoiding mistakes during the curing process is crucial for achieving a smooth and long-lasting clear coat.

Once you have applied the clear coat with your airless electric paint sprayer, let it dry undisturbed for the recommended amount of time. This typically ranges from 24 to 48 hours, but it’s always best to refer to the manufacturer’s instructions for specific guidance.

During this time, keep the area free from dust, debris, and any potential sources of damage.

By following these tips for a smooth finish, you’ll be rewarded with a professional-quality result that will make your project shine.

Advertisement

In the next section, we’ll discuss how to enjoy your professional-quality finish without any additional steps.

Enjoy Your Professional-Quality Finish

Achieve a flawless, glossy finish that will make your project look like it was done by a professional with the help of an airless electric paint sprayer.

When it comes to clear coat application techniques, it is important to follow a few key steps to ensure a professional finish.

First, make sure the surface is clean and free of any debris or dust.

Next, apply the clear coat in thin, even layers, using smooth, controlled strokes.

Advertisement

Allow each layer to dry completely before applying the next one. This will help prevent any drips or unevenness in the finish.

Finally, be patient and avoid touching or disturbing the surface until it is fully cured.

This will ensure a smooth and flawless finish that will make your project look like it was done by a professional.

Frequently Asked Questions

Can I use any type of clear coat with an airless electric paint sprayer?

Using any type of clear coat with an airless electric paint sprayer has its pros and cons. The key to achieving a smooth and even finish is to properly prepare the surface, use the right tip size, and maintain a consistent spraying technique.

How long does it take for the clear coat to cure?

The clear coat typically takes around 24 to 48 hours to dry completely. To speed up the curing process, you can increase ventilation, use a dehumidifier, or apply heat with infrared lamps or heat guns.

Advertisement

Can I apply the clear coat directly on top of the previous paint job?

Yes, you can apply the clear coat directly on top of the previous paint job. However, it is essential to prepare the surface properly by cleaning and sanding it. Additionally, ensure proper ventilation to allow the clear coat to dry and cure effectively.

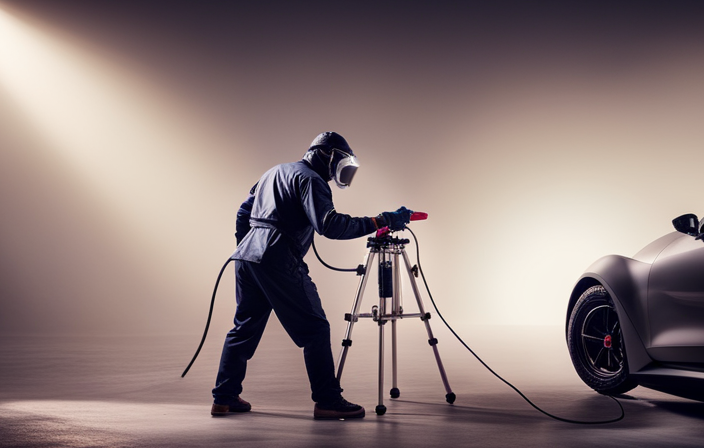
Are there any safety precautions I need to take when using an airless electric paint sprayer?

When using an airless electric paint sprayer, it is important to wear a respirator and ensure proper ventilation to protect against harmful fumes. For example, I once painted a room without proper ventilation and experienced dizziness and headaches.

How do I clean the paint sprayer after I finish using it?

To clean the paint sprayer after use, follow this cleaning process. First, disconnect the sprayer from the power source. Then, remove the paint container and rinse it thoroughly. Lastly, clean the nozzle and filter to prevent clogging. Common mistakes include not cleaning the sprayer immediately after use and neglecting to clean all parts thoroughly.

Conclusion

In conclusion, using an airless electric paint sprayer to apply a clear coat can result in a professional-quality finish for your project. With proper preparation, the right clear coat, and careful spraying technique, you can achieve a flawless and durable coating.

One interesting statistic to note is that according to a study conducted by the Paint Quality Institute, using a paint sprayer can save up to 50% of the time compared to traditional brush or roller methods.

Advertisement

So why not give it a try and experience the efficiency and precision of an airless electric paint sprayer for yourself?

With James‘ articles, you can expect comprehensive breakdowns of airless paint sprayer features, performance assessments, and expert insights into the latest industry innovations. His meticulous approach ensures that readers gain a thorough understanding of the equipment they are considering, helping them make well-informed choices.

Continue Reading
Advertisement

Airless Paint Sprayers FAQs

How To Clean A Dirty Airless Paint Sprayer

Published

on

By

An image that visually depicts the step-by-step process of cleaning a grimy airless paint sprayer

Just finished a big painting project and now you have a dirty airless paint sprayer? Don’t worry, I’m here to assist.

In this article, I will show you how to clean a dirty airless paint sprayer with ease.

Cleaning an airless paint sprayer might seem like a daunting task, but with the right tools and techniques, it can be a breeze. By following a few simple steps, you can ensure that your sprayer stays in top condition, ready for future use.

First, gather all the necessary cleaning supplies.

Then, disconnect the sprayer from the power source and release any remaining pressure.

Advertisement

Remove the spray tip and filter, and flush the sprayer with water or a cleaning solution.

Use a brush or toothpick to remove any stubborn paint residue.

Rinse the sprayer thoroughly, dry it, and reassemble it.

Finally, store it in a clean and dry area.

So let’s get started and get that dirty airless paint sprayer looking brand new again.

Advertisement

Key Takeaways

  • Pay attention to hard-to-reach areas to prevent moisture buildup
  • Thoroughly dry and reassemble the sprayer to prevent damage or malfunction
  • Carefully reassemble the sprayer after drying, ensuring snug fit of all parts
  • Regularly clean filters and nozzles to prevent clogging

Gather the necessary cleaning supplies

Now, you’re gonna wanna gather all the necessary cleaning supplies to get that airless paint sprayer sparkling clean. Cleaning techniques are important, but before you can even begin, you need to make sure you have the right tools.

Start by grabbing a bucket or container that can hold the cleaning solution. You’ll also need a clean cloth or sponge for wiping down the sprayer. Don’t forget to grab some gloves to protect your hands from the cleaning solution.

As for choosing the right cleaning solution, you want to make sure it’s compatible with the paint you were using. Look for a mild detergent or a specific cleaning solution made for airless paint sprayers.

Once you have everything you need, you can move on to the next step of disconnecting the sprayer from the power source.

Advertisement

Disconnect the sprayer from the power source

First, make sure you’ve unplugged the machine from the power source. This is an essential step in ensuring your safety while cleaning the airless paint sprayer. Cleaning precautions should always be taken to avoid any accidents or injuries.

Once the sprayer is disconnected, you can proceed with the cleaning process. It’s important to follow the manufacturer’s maintenance tips to ensure the longevity of your sprayer. Regular cleaning and maintenance will also guarantee optimal performance.

Now that the sprayer is safely disconnected, the next step is to release any remaining pressure in the sprayer. This will prevent any unexpected spray or splatter when disassembling and cleaning the different parts of the sprayer.

Release any remaining pressure in the sprayer

Advertisement

Before you proceed, make sure all pressure has been released from the sprayer to prevent any unexpected spray or splatter. To safely release pressure in an airless paint sprayer, follow these precautions:

  • Wear protective gloves and goggles to shield yourself from any accidental paint spray.
  • Position the sprayer outlet away from yourself and others to avoid any potential harm.
  • Slowly turn the pressure relief valve counterclockwise to release the pressure gradually.
  • Allow any remaining paint or fluid to drain from the sprayer before proceeding.

Double-check that the pressure gauge reads zero before continuing.

Taking these precautions will help prevent any accidents or mishaps while releasing pressure in an airless paint sprayer.

Once all the pressure has been safely released, you can move on to the next step of removing the spray tip and filter.

Remove the spray tip and filter

To safely continue, it’s time to take off the spray tip and filter. This step is crucial in the cleaning process of your airless paint sprayer.

Start by unscrewing the spray tip counterclockwise using a wrench or pliers. Be careful not to damage the tip or the threads.

Advertisement

Once the spray tip is removed, you’ll find the filter located inside the gun handle. Gently pull out the filter and inspect it for any clogs or debris. If necessary, clean the filter using water or a cleaning solution. Cleaning techniques may vary depending on the type of filter, so refer to the manufacturer’s instructions for specific maintenance tips.

With the spray tip and filter removed, we can now move on to flushing the sprayer with water or a cleaning solution.

Flush the sprayer with water or cleaning solution

Once you’ve removed the spray tip and filter, it’s time to give your sprayer a refreshing cleanse by flushing it with water or a cleaning solution. It’s just like giving your car a much-needed wash to remove all the dust and grime. Cleaning a paint sprayer can be done using either water or a cleaning solution. Using water is a more cost-effective option, as it’s readily available and easy to use. However, a cleaning solution specifically designed for paint sprayers can provide a more thorough and effective clean, removing any stubborn residue or paint buildup. The choice between water and cleaning solution ultimately depends on the level of dirt and paint on your sprayer.

Advertisement

After flushing the sprayer, it’s important to clean the filter and spray tip separately to ensure optimal performance.

Clean the filter and spray tip separately

Now, let me show you how you can give your filter and spray tip the attention they deserve to ensure flawless performance.

Cleaning the filter and spray tip is crucial for maintaining the efficiency of your airless paint sprayer. Start by removing the filter and rinsing it with water to remove any loose paint particles. For stubborn residue, you can use a cleaning solution specifically designed for airless paint sprayers. Scrub the filter gently with a brush to remove any clogs or build-up.

Next, move on to the spray tip. Unscrew it from the sprayer and soak it in a cleaning solution for a few minutes. Use a small brush to remove any paint residue that might be blocking the openings.

Rinse both the filter and spray tip thoroughly with water before reassembling them back onto the sprayer.

Advertisement

Now, let’s move on to the next section about using a brush or toothpick to remove any stubborn paint residue.

Use a brush or toothpick to remove any stubborn paint residue

Take a brush or toothpick and give those stubborn paint residues a good scrub to ensure a flawless finish. Using alternative cleaning methods can help remove any paint buildup on the sprayer.

Here are two effective techniques to try:

  1. Dampen a brush with warm water and gently scrub the spray tip. Be sure to remove any paint that may be clogging the small openings. This will help maintain a consistent spray pattern and prevent blockages during future use.

  2. Use a toothpick to carefully scrape off any dried paint from the filter. Be gentle to avoid damaging the filter mesh. Removing paint residue from the filter will improve the sprayer’s performance and extend its lifespan.

After successfully cleaning the filter and spray tip separately, it’s time to move on to the next step: rinsing the sprayer thoroughly. This will ensure all remaining paint particles are removed and the sprayer is ready for its next use.

Rinse the sprayer thoroughly

Make sure you thoroughly flush out the sprayer with water to remove any remaining particles. This step is crucial for deep cleaning your airless paint sprayer and maintaining its optimal performance.

Advertisement

Start by detaching the spray tip and guard, as well as the filter, if applicable. Then, using a hose or faucet, run water through the sprayer for several minutes. Make sure to rotate and move the sprayer in different positions to ensure all areas are thoroughly rinsed. Pay close attention to the hose, as paint residue can often accumulate there.

Once you’re confident that the sprayer is clean, you can move on to the next step of drying and reassembling the sprayer, which we’ll discuss in the following section.

Dry and reassemble the sprayer

After thoroughly rinsing the sprayer, it’s essential to ensure it’s completely dry and reassembled before moving on to the next step of the cleaning process. Start by using a clean cloth or towel to dry all the components, including the nozzle, hose, and gun.

Pay attention to any hard-to-reach areas to prevent moisture buildup. Once dry, carefully reassemble the sprayer, making sure all parts fit snugly and securely. This is also a good time to inspect the sprayer for any worn-out parts that may need replacing. Troubleshoot common issues such as leaks or clogs before proceeding.

By taking the time to thoroughly dry and reassemble the sprayer, you can prevent any potential damage or malfunction.

Advertisement

Now, let’s move on to the next step and store the sprayer in a clean and dry area for future use.

Store the sprayer in a clean and dry area for future use

Once you’ve ensured everything is dry and reassembled, find a nice, cozy spot to store your trusty sprayer for future projects. Storing your airless paint sprayer properly is essential to maintain its longevity and performance. Here are some important storing precautions and maintenance tips to keep in mind:

Storing Precautions Maintenance Tips
Store in a clean and dry area away from direct sunlight or extreme temperatures. Regularly clean the sprayer’s filters and nozzles to prevent clogging.
Protect the sprayer from dust and debris by covering it with a clean cloth or plastic bag. Lubricate the sprayer’s moving parts with a suitable lubricant to prevent rusting.
Keep the sprayer upright to prevent any leaking or damage to the internal components. Check the sprayer’s hoses and connections for any signs of wear or damage. Replace if necessary.
Avoid storing the sprayer near any flammable materials to reduce the risk of fire hazards. Always follow the manufacturer’s instructions for proper maintenance and storage.

By following these storing precautions and maintenance tips, you can ensure that your airless paint sprayer will be in optimal condition for your future painting projects.

Frequently Asked Questions

Can I use any type of cleaning solution to flush the sprayer?

Sure, any cleaning solution can be used to flush the sprayer, but it’s essential to choose the right one. While vinegar and water work well for water-based paints, mineral spirits are perfect for oil-based paints.

How often should I clean the filter and spray tip?

I recommend cleaning the filter and spray tip of your airless paint sprayer regularly to ensure optimal performance. It is important to clean them after every use to prevent clogs and maintain a consistent spray pattern.

Advertisement

Can I use a regular brush or toothpick to remove paint residue or is there a specific type of tool I should use?

To effectively remove paint residue from an airless paint sprayer, it’s important to use the right tools. While a regular brush or toothpick might work for small areas, it’s recommended to use specialized cleaning tools for better results and to prevent damage to the sprayer.

Is it necessary to dry the sprayer completely before reassembling it?

Yes, it is necessary to completely dry the sprayer before reassembling it. This ensures that there is no moisture left inside the sprayer, which can lead to clogs or damage during the reassembly process.

How often should I clean and store the sprayer if I use it frequently?

If I use the airless paint sprayer frequently, I should clean it after every use. Proper cleaning frequency ensures optimal performance. Additionally, storing the sprayer in a clean and dry place helps maintain its functionality.

Conclusion

In conclusion, cleaning a dirty airless paint sprayer is a meticulous task that requires the right tools and techniques. By following the steps outlined above, you can ensure that your sprayer is thoroughly cleaned and ready for future use.

Remember, a clean sprayer is a happy sprayer, so don’t neglect this important maintenance task. As the saying goes, "A stitch in time saves nine," taking the time to clean your sprayer now will prevent bigger issues down the road.

Advertisement

So go ahead and give your sprayer the TLC it deserves.

Continue Reading

Airless Paint Sprayers FAQs

How To Clean An Airless Paint Sprayer With Water

Published

on

By

An image of a hand holding a disassembled airless paint sprayer under a running faucet, with water flowing through the nozzle, cleansing the paint residue

Are you interested in learning the most effective method for cleaning your airless paint sprayer using only water? Look no further! This guide will provide you with a thorough, step-by-step process for cleaning your airless paint sprayer with water, ensuring that it is in top condition and ready for your next painting project.

Cleaning your airless paint sprayer is crucial to maintain its performance and prolong its lifespan. By following these instructions, you can avoid clogs, reduce paint buildup, and prevent any potential damage to your equipment.

From gathering the necessary materials to properly storing the sprayer, each step is explained in a technical and precise manner. By the end of this article, you will have a clear understanding of how to clean your airless paint sprayer, leaving it in optimal condition for your future painting endeavors.

So, let’s get started and make sure your airless paint sprayer stays in top shape!

Key Takeaways

  • Fill sprayer with water before cleaning
  • Flush sprayer with water to remove paint or debris
  • Run water and pump preservative mixture through sprayer to protect components
  • Thoroughly clean and store sprayer after use

Gather Your Materials

Advertisement

Now it’s time to gather all the materials you’ll need to clean your airless paint sprayer with just water! Before we get started, let’s talk about some cleaning solution alternatives.

If you don’t have a specific airless paint sprayer cleaner, you can use warm soapy water or a mixture of vinegar and water. These options work well in removing any leftover paint or debris from the sprayer.

Additionally, it’s essential to have some maintenance tips in mind. Make sure to wear protective gloves and goggles to avoid any accidents. You’ll also need a clean bucket or container, a soft brush or cloth, and a wrench for removing any nozzle or tip.

With all these materials in hand, let’s move on to preparing the sprayer for cleaning, ensuring it’s ready for the next painting project.

Prepare the Sprayer for Cleaning

Before you begin preparing the sprayer for maintenance, it’s important to know that 90% of paint sprayer failures are caused by improper cleaning techniques. To avoid any mishaps, there are certain precautions to take while cleaning an airless paint sprayer.

Advertisement

Firstly, make sure to wear protective gloves and goggles to prevent any contact with the cleaning solution or paint residues. Disconnect the sprayer from the power source and relieve any pressure in the system by triggering the gun into a waste container.

Next, remove the spray tip, guard, and filter, and soak them in a cleaning solution. Avoid using harsh chemicals or solvents as they can damage the sprayer components. Additionally, it’s crucial to avoid common mistakes such as neglecting to clean the intake tube or leaving any paint residues in the system.

Once the sprayer is properly prepared, it’s time to move on to the next section and flush the system with water to complete the cleaning process.

Flush the System with Water

Advertisement

Make sure you’re fully prepared to maintain your sprayer by thoroughly flushing the system with water, ensuring optimal performance and longevity. The importance of using clean water for flushing the airless paint sprayer can’t be overstated. It helps remove any leftover paint residue or debris, preventing clogs and blockages in the system. To avoid common mistakes during the water flushing process, always use fresh, clean water without any additives or chemicals.

Avoid using dirty or contaminated water, as it can cause damage to the sprayer. Additionally, be careful not to apply too much pressure when flushing the system, as it may lead to leaks or other issues.

Once the system is flushed, you can proceed to the next section to clean the spray gun and nozzles, ensuring a thorough cleaning process.

Clean the Spray Gun and Nozzles

To achieve optimal performance and longevity, it’s essential to give the spray gun and nozzles a thorough scrubbing, like giving your car a sparkling wash and wax.

Start by disassembling the spray gun and removing any remaining paint or debris. Use a cleaning solution alternative, such as warm soapy water or a mixture of water and vinegar, to soak the parts for a few minutes. Then, scrub the inside and outside of the gun with a soft brush, making sure to clean the trigger, needle, and air cap.

Advertisement

Rinse everything with clean water and dry with a lint-free cloth.

Next, check for common spray gun issues like clogs or uneven spray patterns. Troubleshoot these problems by adjusting the nozzle or cleaning the air passages.

Finally, transition into the next section about removing and cleaning the filters for a complete maintenance process.

Remove and Clean the Filters

Advertisement

Once you’ve given your spray gun a good scrub, it’s time to tackle the next step: getting those filters removed and cleaned. Properly maintaining and cleaning the filters is essential for the optimal performance of your airless paint sprayer. By regularly cleaning the filters, you can prevent clogs and ensure a smooth paint application.

To clean the filters, follow these simple steps:

  1. Start by turning off the sprayer and relieving any pressure.
  2. Locate the filters, which are usually located near the pump or at the end of the spray gun.
  3. Carefully remove the filters using a wrench or pliers, making sure not to damage them.
  4. Rinse the filters thoroughly with clean water to remove any paint residue or debris.
  5. Once the filters are clean, reassemble them back into the sprayer.

By following these cleaning techniques and maintenance tips, you can keep your airless paint sprayer in top condition. Now, let’s move on to the next section and discuss how to scrub the paint reservoir.

Scrub the Paint Reservoir

After properly maintaining and cleaning the filters, it’s time to delicately cleanse the container that holds the paint. The paint reservoir is a crucial component of an airless paint sprayer, and regular maintenance is essential to prevent paint buildup and ensure optimal performance.

To scrub the paint reservoir, start by emptying any remaining paint and wiping it clean with a damp cloth. Next, fill the reservoir with warm water and a mild detergent solution. Use a soft-bristle brush to scrub the inside of the reservoir, paying special attention to any areas with dried paint. Rinse the reservoir thoroughly with clean water to remove any residue. This step is important to ensure that the paint sprayer operates at its best.

Now that the paint reservoir is clean, it’s time to move on to the next section about rinsing and drying all components.

Advertisement

Rinse and Dry all Components

After scrubbing the paint reservoir, it’s crucial to thoroughly rinse and dry all components of the airless paint sprayer. This step ensures that no paint residue or cleaning solution is left behind, which could potentially clog the sprayer or affect the quality of future paint jobs.

To rinse the components, I recommend using clean water and a soft brush or cloth to remove any remaining debris. Pay special attention to the nooks and crannies of the sprayer, as paint can often accumulate in these hard-to-reach areas.

After rinsing, be sure to dry all components completely before reassembling the sprayer. Proper drying techniques, such as air drying or using a clean cloth, are essential to prevent any moisture from causing rust or damage to the sprayer.

Once all components are thoroughly rinsed and dried, we can proceed to the next step of reassembling the sprayer and preparing it for future use.

Reassemble the Sprayer

Now that all the components have been thoroughly rinsed and dried, it’s time to put the sprayer back together and get it ready for future use.

Advertisement

Reassembling the sprayer is a crucial step in ensuring its proper functioning. Start by carefully aligning the spray gun with the hose and securely attaching them together. Make sure all the fittings are tightened to prevent any leaks.

Next, reattach the intake valve and the pressure control knob, ensuring they’re properly aligned and securely fastened. Double-check all the connections and fittings to ensure they’re tight and secure.

If you encounter any issues during reassembly, refer to the user manual for troubleshooting tips.

Once the sprayer is reassembled, you can proceed to the next step of testing the sprayer’s performance and functionality.

Test the Sprayer

To ensure proper functionality, how can the sprayer be tested? Testing the sprayer is an important step to identify any potential issues and ensure that it is working at the desired pressure. To do this, follow these steps:

Advertisement
  1. Connect the sprayer to a power source and turn it on.
  2. Adjust the pressure settings according to the manufacturer’s instructions.
  3. Fill the sprayer with water and attach the spray gun.
  4. Hold the spray gun at a safe distance from a test surface and pull the trigger.
  5. Observe the spray pattern and check for any irregularities in pressure or clogging.

By testing the sprayer, you can troubleshoot any issues such as low pressure or uneven spray patterns. This will help you make any necessary adjustments or repairs before proceeding to properly store the sprayer.

Properly Store the Sprayer

Make sure you store the sprayer correctly to maintain its functionality and prevent any damage. Proper maintenance is essential for keeping your airless paint sprayer in good working condition.

After using the sprayer, clean it thoroughly as mentioned in the previous subtopic. Once the sprayer is clean, you need to store it properly. Start by disconnecting the sprayer from the power source and relieving any pressure in the system. Remove the spray tip and filter, and clean them separately. Store them in a clean, dry place to prevent clogs.

Next, flush the sprayer with water to remove any remaining paint or debris. After flushing, run a mixture of water and a pump preservative through the sprayer to protect its internal components.

Finally, cover the sprayer with a clean cloth or a plastic bag to keep it dust-free. By following these steps, you can ensure the longevity of your airless paint sprayer.

Frequently Asked Questions

How often should I clean my airless paint sprayer with water?

I should clean my airless paint sprayer with water after each use to ensure proper functioning and prevent clogs. This is essential for maintaining the sprayer’s performance and prolonging its lifespan.

Advertisement

Can I use any type of water to clean my airless paint sprayer?

I can use tap water or distilled water to clean my airless paint sprayer. Using improper water, such as saltwater or dirty water, can lead to clogs and damage the sprayer’s components.

Is it necessary to remove the filters for cleaning or can I clean them in place?

It is necessary to remove the filters for cleaning. Regularly replacing filters is recommended to maintain optimal performance. Water is the recommended cleaning agent for an airless paint sprayer.

What should I do if the spray gun or nozzles are clogged after cleaning?

If the spray gun or nozzles are clogged after cleaning, I recommend troubleshooting the issue by checking for any debris or residues in the nozzle or gun. Clear any obstructions and ensure proper spray gun maintenance to prevent further clogging.

How can I ensure that all components are completely dry before reassembling the sprayer?

To ensure all components are completely dry before reassembling the sprayer, use drying methods such as air-drying or using a clean cloth to remove any moisture. Additionally, follow reassembly tips provided by the manufacturer for optimal results.

Conclusion

In conclusion, cleaning an airless paint sprayer with water is a crucial step to maintaining its efficiency and longevity. By following the step-by-step process outlined in this article, you can ensure that your sprayer continues to deliver flawless results with every use.

Advertisement

Remember, regular cleaning not only extends the life of your equipment but also prevents clogs and blockages that can hinder its performance. So, don’t neglect this important maintenance task and keep your sprayer in top-notch condition. Happy painting!

Continue Reading

Airless Paint Sprayers FAQs

How To Clean Dried Paint From Airless Sprayer

Published

on

By

An image showcasing a person wearing protective gloves, using a paint scraper to delicately remove dried paint residue from the nozzle of an airless sprayer

It is commonly believed that keeping your airless sprayer properly maintained leads to a happy airless sprayer, a sentiment that I completely agree with. If you have ever experienced the frustration of dried paint clogging your sprayer, you understand the importance of keeping it in top condition. Luckily, I have some valuable tips on how to remove dried paint from your airless sprayer, and I am excited to share this information with you.

In this article, we’ll walk through the step-by-step process of restoring your sprayer to its former glory. We’ll start by gathering the necessary supplies and disconnecting the sprayer from the power source.

Then, we’ll tackle the task of removing any remaining paint, soaking the spray gun and nozzle in a cleaning solution, and scrubbing away the dried paint. We’ll also cover how to clean the filters and screens, reassemble the sprayer, and test for proper functionality.

Finally, we’ll discuss the importance of regular maintenance and provide tips for preventing future paint buildup.

So, grab your cleaning gloves and let’s get started on giving your airless sprayer the cleaning it deserves.

Advertisement

Key Takeaways

  • Thoroughly clean the airless sprayer before storing it.
  • Disassemble all components and ensure they are completely dry before storing.
  • Use protective covers to shield the sprayer from dust and debris during storage.
  • Store the airless sprayer in a controlled environment that is clean and free from moisture.

Gather the necessary supplies

First, gather all the supplies you’ll need to clean the dried paint from your airless sprayer. Start by getting cleaning solutions that are specifically designed to remove dried paint. Look for products that are safe to use on the materials of your sprayer and follow the instructions on the label.

Additionally, make sure to have proper disposal methods in place for any paint residue or cleaning solutions. This may include using a paint disposal bag or taking the waste to a local recycling center.

Once you have all the necessary supplies, you can move on to the next step of disconnecting the sprayer from the power source.

Disconnect the sprayer from the power source

Once you’ve unplugged it, you can safely move on to the next step in disconnecting your trusty painting tool from its power source.

Advertisement

Disconnecting safety measures are crucial to avoid any accidents or electrical mishaps. Make sure to switch off any switches or buttons on the sprayer itself before proceeding. Additionally, ensure that the power cord is completely detached from the outlet. This will prevent any power surges or accidental starts while you’re working on cleaning the sprayer.

Now that you’ve disconnected the sprayer from the power source, you can focus on removing any remaining paint from the sprayer.

Remove any remaining paint from the sprayer

To effectively prepare your sprayer for storage, it’s essential to ensure that all traces of paint have been thoroughly eliminated. Cleaning techniques for removing dried paint from an airless sprayer can vary, but there are a few common methods that can be effective. One option is to use a cleaning solution specifically designed for paint removal. These solutions are typically available at hardware stores and can help break down the dried paint. Alternatively, you can try using household items like vinegar or rubbing alcohol as alternative cleaning solutions. These can be effective at loosening the paint and making it easier to remove. Once all the paint has been cleaned off, it’s important to soak the spray gun and nozzle in a cleaning solution to ensure thorough cleaning. This will be discussed in the subsequent section about ‘soak the spray gun and nozzle in a cleaning solution.’

Advertisement

Soak the spray gun and nozzle in a cleaning solution

Now, it’s time to give your spray gun and nozzle a refreshing dip in a cleansing solution, like a rejuvenating soak for tired muscles after a long day. Cleaning techniques are crucial to ensure the longevity of your airless sprayer.

Here are four alternative cleaning solutions that can effectively remove dried paint:

  1. Vinegar solution: Mix equal parts of vinegar and warm water to create a natural and affordable cleaning solution.

  2. Paint thinner: Use a paint thinner specifically formulated for cleaning airless sprayers. Follow the manufacturer’s instructions for proper usage.

  3. Commercial cleaning solutions: There are various commercial cleaning solutions available in the market that are specifically designed to clean dried paint from airless sprayers.

  4. Hot soapy water: Soak the spray gun and nozzle in hot soapy water to loosen the dried paint before scrubbing.

After giving your spray gun and nozzle a good soak, it’s time to move on to the next step: using a brush or cloth to scrub away the dried paint.

Use a brush or cloth to scrub away the dried paint

Advertisement

Grab a sturdy brush or cloth and vigorously scrub away the stubborn remnants of color that cling to your trusty tool. Using solvents for removing dried paint is an effective method to tackle tough stains. Apply a suitable solvent, such as paint thinner or mineral spirits, to the brush or cloth and work it into the dried paint. Be sure to wear protective gloves and work in a well-ventilated area. The solvents will help break down the paint and make it easier to remove. As you scrub, focus on areas where paint buildup is most prominent, such as the nozzle and spray gun. By regularly cleaning your airless sprayer and preventing paint buildup, you can ensure optimal performance and extend the lifespan of your equipment. Once you’ve thoroughly scrubbed away the dried paint, it’s time to move on to the next step: rinsing the spray gun and nozzle with clean water.

Rinse the spray gun and nozzle with clean water

After vigorously scrubbing away the stubborn remnants of color, it’s time to give the spray gun and nozzle a good rinse with clear water. This step is crucial to ensure that all traces of dried paint are completely removed from the airless sprayer.

Using a pressure washer can provide a more thorough cleaning, as it effectively blasts away any remaining paint particles that may be stuck in the nozzle or gun. Additionally, using a cleaning solution specifically designed for paint removal can offer great benefits. These solutions are formulated to break down and dissolve dried paint, making it easier to rinse away.

Once the spray gun and nozzle have been thoroughly rinsed, it’s time to move on to the next step of cleaning the filters and screens, ensuring optimal performance of the airless sprayer.

Clean the filters and screens

After rinsing the spray gun and nozzle with clean water, it’s important to clean the filters and screens to ensure the airless sprayer’s proper functionality. Cleaning these components will prevent any clogs or blockages that can hinder the paint flow and affect the quality of your work. Here are some steps to follow:

Advertisement
  • Remove the filters and screens from the sprayer.
  • Rinse them thoroughly with clean water to remove any paint residue.
  • Soak them in a cleaning solution specifically designed for removing dried paint.
  • Use a soft brush or cloth to gently scrub away any remaining paint.
  • Once clean, rinse them again with water and allow them to dry completely before reassembling the sprayer.

By properly cleaning the filters and screens, you’ll ensure the sprayer operates at its best.

Now, let’s move on to reassembling the sprayer and testing for proper functionality.

Reassemble the sprayer and test for proper functionality

To ensure the proper functionality of your sprayer, you should carefully reassemble all the components and conduct a thorough test to ensure everything is working as expected. Here are some troubleshooting tips for testing the functionality of your airless sprayer:

Test Description
Pressure Test Check if the sprayer maintains the appropriate pressure.
Trigger Test Verify that the trigger is working smoothly and effectively.
Spray Pattern Test Ensure that the spray pattern is even and consistent.
Nozzle Test Confirm that the nozzle is not clogged and spraying properly.
Suction Tube Test Test the suction tube to make sure it is properly drawing paint from the container.

Once you have reassembled the sprayer and completed these tests, you can proceed to the next step of storing the sprayer in a clean and dry area.

Store the sprayer in a clean and dry area

Make sure you store your sprayer in a spot that’s both neat and free from moisture. Here are four key tips for proper storage to prevent paint clogs and ensure the longevity of your airless sprayer:

  1. Clean the sprayer thoroughly: Before storing, remove any excess paint and clean all parts of the sprayer according to the manufacturer’s instructions. This’ll prevent dried paint from building up and causing clogs.

  2. Disassemble and dry: Take apart the sprayer and allow all components to dry completely. Moisture can lead to paint clogs and damage the sprayer over time.

  3. Use protective covers: Cover the sprayer and its accessories with protective materials, like plastic bags or cloth covers, to shield them from dust, debris, and potential damage.

  4. Store in a controlled environment: Find a clean and dry area to store the sprayer. Avoid extreme temperatures and humidity, as they can affect the performance and lifespan of the sprayer.

By following these storage guidelines, you can prevent paint clogs and ensure your airless sprayer stays in excellent condition. Regularly maintain and clean your airless sprayer to prevent future paint buildup, ensuring optimal functionality.

Advertisement

Regularly maintain and clean your airless sprayer to prevent future paint buildup

Regularly maintaining and cleaning my sprayer ensures that paint buildup is prevented in the future, keeping my equipment in top-notch condition. Regular maintenance is crucial to prevent paint clogs and ensure optimal performance.

After each use, I make sure to thoroughly clean the sprayer by flushing it with water or a suitable cleaning solution. I pay special attention to the nozzle, filters, and hoses, removing any dried paint or debris that could lead to clogs.

It’s also important to inspect the sprayer for any worn or damaged parts and replace them as needed. By taking these preventative measures, I can avoid costly repairs and downtime caused by paint buildup, allowing me to efficiently complete my painting projects.

Frequently Asked Questions

How long should the spray gun and nozzle be soaked in the cleaning solution?

For best results, soak the spray gun and nozzle in a cleaning solution for at least 30 minutes. This will help loosen and remove dried paint, making it easier to clean and maintain your airless sprayer.

What type of cleaning solution is recommended for removing dried paint from the spray gun and nozzle?

I recommend using a strong solvent, like mineral spirits or paint thinner, to remove dried paint from the spray gun and nozzle. Alternatively, you can try using a commercial paint remover or warm soapy water.

Advertisement

Should I wear any protective gear while cleaning the airless sprayer?

Yes, wearing protective gear is essential when cleaning the airless sprayer. It includes gloves, goggles, and a mask. Using a suitable cleaning solution will help remove dried paint effectively while ensuring your safety.

How often should the filters and screens be cleaned?

Filters and screens should be cleaned regularly to maintain the airless sprayer’s performance. It is recommended to clean them after every use to prevent clogs and ensure optimal paint flow. Regular maintenance is essential for efficient operation.

Are there any specific maintenance steps I should follow to prevent paint buildup in the airless sprayer?

To prevent paint buildup in the airless sprayer, I recommend regularly cleaning the filters and screens and using cleaning techniques like flushing the sprayer with water or solvent. This will ensure smooth operation and prolong the sprayer’s lifespan.

Conclusion

In conclusion, cleaning a dried paint from an airless sprayer is like restoring a masterpiece. You can restore your sprayer to its former glory with the right supplies and a little elbow grease. Here are the crucial steps in this artistic endeavor:

  1. Disconnect the power source.
  2. Remove any remaining paint.
  3. Soak the gun and nozzle in a cleaning solution.
  4. Scrub away the dried paint.
  5. Don’t forget to clean the filters and screens.
  6. Reassemble the sprayer.
  7. Test it for proper functionality.

Lastly, store your sprayer in a clean and dry space to prevent future paint buildup. Remember, maintaining and cleaning your airless sprayer is the key to keeping your artistic visions flowing smoothly.

Advertisement
Continue Reading
Advertisement

Affiliate disclaimer

As an affiliate, we may earn a commission from qualifying purchases. We get commissions for purchases made through links on this website from Amazon and other third parties.

Advertisement

Trending