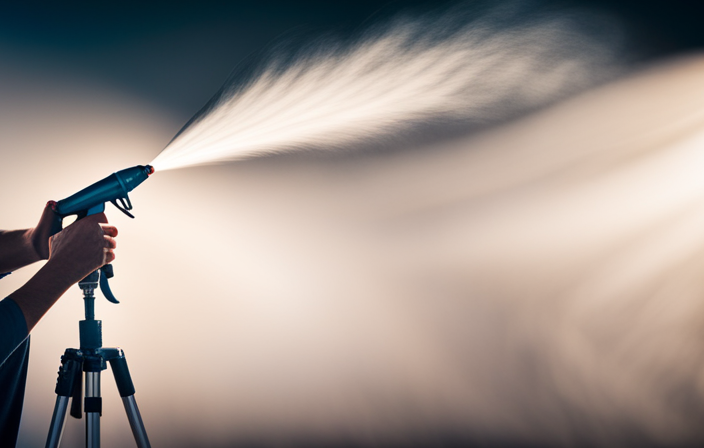
Have you ever finished painting a surface with your trusty airless paint sprayer, only to discover unsightly drips in the primer? It can be frustrating, especially after dedicating a lot of time and effort to achieve a flawless finish.
But fear not, for I have the solution to your problem. In this article, I will share with you my expert knowledge and experience on how to get rid of those pesky runs in primer.
I will guide you through a step-by-step process that will leave your surface looking perfect in no time. From identifying the areas with runs, to sanding them gently and applying a second coat of primer, I will cover it all.
So, if you’re ready to say goodbye to those unsightly runs and achieve professional-looking results, let’s dive in and get started.
Key Takeaways
- Consistency and proper technique are essential for avoiding runs in primer from an airless paint sprayer.
- Surface preparation, including cleaning and sanding, is crucial to prevent primer pooling and runs.
- Seeking professional help, whether through consultation or hiring a professional painter, can provide expert advice and assistance in correcting primer runs.
- Applying thin coats of primer, allowing proper drying time between applications, helps to reduce the risk of runs and achieve an even coverage.
Identify the Areas with Runs
Identifying the areas with runs is crucial in order to effectively address the issue. When using an airless paint sprayer, runs can occur due to a variety of reasons such as using too much pressure or applying the primer too thickly. Inspect the surface carefully and look for areas where the primer appears thicker or has dripped down. These are the areas where runs are most likely to be present.
Once you have identified the areas, take note of them and make a mental note to avoid these mistakes in future applications. It’s important to prevent runs by adjusting the pressure settings and applying the primer in thin, even coats. By identifying the causes of runs and taking necessary precautions, you can ensure a smoother application in the future.
Now, let’s move on to the next step and allow the primer to dry completely.
Allow the Primer to Dry Completely
Once the primer has dried completely, you’ll be able to envision a flawless, smooth surface free of any imperfections. To ensure the primer dries properly, follow these steps:
-
Give it time: Allow the primer to dry for at least 24 hours before inspecting for any runs. Rushing this step can lead to more issues down the line.
-
Inspect carefully: Once dry, examine the primed surface closely for any runs or drips. Use proper lighting and take your time to identify any imperfections.
-
Troubleshoot the paint sprayer: If you consistently experience runs with your airless paint sprayer, it’s essential to troubleshoot the issue. Check the nozzle, pressure settings, and paint consistency to prevent future paint drips.
By ensuring the primer is thoroughly dried, you set the foundation for a successful paint job. Once you’ve completed this step, it’s time to gently sand the runs to achieve a seamless finish.
Sand the Runs Gently
After the primer has dried completely, it’s time to gently sand away any imperfections, ensuring a seamless finish. When it comes to removing runs in primer from an airless paint sprayer, there are alternative methods to consider: scraping and sanding. While scraping can be effective for larger runs, sanding is generally the preferred method as it allows for a more even and controlled removal of the excess primer.
To begin, gather the necessary materials: a sanding block or sandpaper (200-400 grit), a clean cloth, and a dust mask to protect yourself from any airborne particles. Start by lightly sanding the runs in a back-and-forth motion, being careful not to apply too much pressure which could damage the surface. Use the sanding block or sandpaper to gradually smooth out the runs until they are flush with the surrounding area.
It’s important to note that preventing runs in the first place is always the best approach. Common causes of runs include spraying too close to the surface, applying too thick of a coat, or moving the sprayer too slowly. To prevent runs, maintain a consistent distance from the surface, apply thin and even coats, and keep the sprayer moving at a steady pace.
Once the runs have been sanded away, it’s time to move on to the next step: cleaning the surface.
Clean the Surface
To achieve a flawless finish, it’s crucial to ensure the surface is impeccably clean. Here are some preparation techniques to clean the surface before applying a second coat of primer:
-
Remove any loose debris or dust by gently wiping the surface with a clean, dry cloth.
-
Use a mild detergent or degreaser to remove any grease or oil stains. Be sure to rinse thoroughly with clean water.
-
For stubborn dirt or grime, consider using a trisodium phosphate (TSP) solution. Follow the manufacturer’s instructions and wear protective gloves and eyewear.
-
If you’re dealing with mold or mildew, use a bleach solution to kill the spores. Again, follow the instructions carefully and take necessary safety precautions.
By following these steps and using the appropriate types of cleaning agents, you’ll ensure a clean surface for the next coat of primer.
Now, let’s move on to applying a second coat of primer.
Apply a Second Coat of Primer
Now it’s time to give the surface an even more flawless finish by applying a second coat of primer. Applying multiple coats of primer is crucial for achieving a smooth and professional-looking paint job.
Before applying the second coat, make sure the first coat is completely dry. Use a sanding technique to lightly sand any imperfections or runs from the first coat. This will help create a smooth and even surface for the second coat.
After sanding, wipe away any dust or debris with a clean cloth. Then, apply the second coat of primer using the same airless paint sprayer technique as before. Make sure to apply it evenly and smoothly, avoiding any runs or drips.
Once the second coat is dry, you can move on to using a fine-tip paintbrush for touch-ups.
Use a Fine-Tip Paintbrush for Touch-Ups
For a more precise finish, grab a fine-tip paintbrush and carefully touch up any small blemishes or imperfections in the paint job. Studies have shown that attention to detail can greatly enhance the overall aesthetic appeal.
When using a paintbrush for touch-ups, it’s important to employ certain techniques to ensure a seamless result. First, make sure to choose the right paintbrush for the job. A fine-tip brush will allow for more control and precision.
Second, apply the touch-up paint in thin layers, gradually building up the coverage as needed. This will help to blend the touch-up with the surrounding area.
Finally, use short, smooth strokes and feather the edges of the touch-up paint to seamlessly integrate it with the rest of the surface. By following these paintbrush techniques, you can achieve a flawless finish.
Now, let’s transition to the next step: sanding the surface smooth.
Sand the Surface Smooth
Smooth sanding creates a velvety surface that begs to be touched. When it comes to getting rid of runs in primer from an airless paint sprayer, sanding is an essential step. But not just any sandpaper will do. Choosing the right sandpaper for a smooth surface is crucial.
Opt for a fine-grit sandpaper, such as 220-grit, to gently remove any imperfections without causing damage. Make sure to sand in the direction of the grain for optimal results.
Additionally, using a primer sealer before applying the final coat of paint can greatly improve adhesion and help smooth out any remaining roughness. This will ensure a flawless finish that will make your paint job look professional.
Now, let’s move on to the next section about how to clean and maintain your airless paint sprayer.
Clean and Maintain Your Airless Paint Sprayer
Cleaning and maintaining your airless paint sprayer is essential for prolonging its lifespan and ensuring optimal performance. Preventive maintenance is key to avoiding issues such as clogs or uneven spray patterns.
Regularly inspect the sprayer for any signs of damage or wear, and replace any worn parts promptly. To clean the sprayer, start by flushing out any remaining paint with water or a cleaning solution recommended by the manufacturer.
Disassemble the sprayer and clean each component thoroughly, paying special attention to the filters and nozzles. Troubleshooting tips include checking for proper pressure settings, ensuring the paint consistency is correct, and using the correct tip for the job.
By practicing proper technique and regularly cleaning and maintaining your airless paint sprayer, you can minimize the risk of runs in the future.
Practice Proper Technique to Avoid Runs in the Future
Mastering the art of applying paint with finesse and precision will ensure a flawless finish that leaves you feeling proud of your DIY project. When it comes to avoiding runs in your primer application, it’s important to understand the common causes.
One common cause is applying too much primer in one area, which can lead to drips and runs. Another cause is not properly preparing the surface before applying the primer, as debris or unevenness can cause the primer to pool and create runs.
To achieve a smooth and even primer coat, start by cleaning and sanding the surface to create a clean and smooth canvas. Then, apply the primer in thin, even coats, allowing each coat to dry before applying the next.
By following these tips, you can achieve a professional-looking finish. If you find yourself struggling or unsure, don’t hesitate to seek professional help.
Seek Professional Help if Needed
If you’re feeling overwhelmed or uncertain about your painting skills, don’t hesitate to seek professional help. Seeking advice or assistance from a professional can provide you with valuable guidance and solutions to address any issues you may have with runs in your primer from an airless paint sprayer.
Here are some DIY solutions to consider:
-
Consult with a professional painter or paint store representative who can offer expert advice on how to prevent runs and achieve a smooth finish.
-
Watch online tutorials or attend workshops that focus on proper painting techniques and troubleshooting common issues like runs.
-
Consider hiring a professional painter to assess the situation and provide hands-on assistance in correcting the runs in your primer.
Remember, seeking professional help can save you time, effort, and potential frustration, ensuring a successful and satisfying painting project.
Frequently Asked Questions
Can I use a regular paintbrush instead of a fine-tip paintbrush for touch-ups?
I would recommend using a fine-tip paintbrush for touch-ups instead of a regular paintbrush. The fine-tip brush allows for more precise application, resulting in a smoother finish. However, a regular paintbrush can still work for small touch-ups if you’re careful.
How long does it typically take for the primer to dry completely?
To speed up the drying process of primer, ensure proper ventilation, use a dehumidifier, and set up fans. To fix primer runs without sanding, gently scrape off excess primer and apply a thin layer to even out the surface.
What type of cleaner should I use to clean the surface?
To clean the surface, I recommend using a mild solvent such as rubbing alcohol or mineral spirits. These solvents are effective in removing any residue or dirt from the surface. It’s best to apply the solvent with a clean cloth and gently scrub the area, ensuring all the primer runs are properly cleaned.
Are there any specific maintenance tips for keeping my airless paint sprayer in good condition?
To keep your airless paint sprayer in top condition, regularly clean and lubricate the pump, check for clogs or leaks, and replace worn parts. Be proactive in addressing common issues to ensure optimal performance and longevity.
What are some common mistakes to avoid in order to prevent runs in the future?
Common causes of runs in primer from an airless paint sprayer include spraying too close to the surface, using excessive paint flow, and moving the sprayer too slowly. To fix runs, sand them down and apply another coat of primer.
Conclusion
After going through the whole process of getting rid of runs in primer from an airless paint sprayer, I can confidently say that I am quite the expert now. Who knew that sanding and cleaning could be so thrilling? But hey, at least you won’t have to worry about those pesky runs ruining your paint job anymore.
So, how do you get rid of runs in primer from an airless paint sprayer? Here’s what you need to do:
-
Start by allowing the primer to dry completely. This will make it easier to work with and prevent any further damage.
-
Once the primer is dry, carefully inspect the area where the runs are. Look for any imperfections or unevenness in the surface.
-
Use a fine-grit sandpaper to gently sand down the runs. Be careful not to sand too aggressively, as this can damage the underlying surface.
-
After sanding, wipe away any dust or debris with a clean cloth. This will ensure a smooth and clean surface for the next step.
-
Apply another coat of primer to the area. Make sure to use smooth, even strokes and avoid overloading the sprayer to prevent runs from occurring again.
-
Allow the second coat of primer to dry completely. This may take a few hours or even overnight, depending on the type of primer used.
-
Once the second coat is dry, inspect the area again. If there are any remaining runs or imperfections, repeat the sanding and priming process until the surface is smooth and even.
Remember, practice makes perfect when it comes to using an airless paint sprayer. So, don’t be discouraged if you encounter runs in your primer. With time and experience, you’ll be able to achieve a flawless paint job.
And if all else fails, don’t be afraid to call in the professionals. Sometimes, it’s best to leave the job to the experts who have the knowledge and skills to handle any painting mishaps.
Happy painting!
