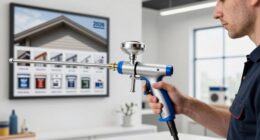
Imagine you’re an artist, about to create a masterpiece. Your canvas waits, colors mixed to perfection. Yet, one key step is left: hooking up the paint nozzle to your airless spray gun.
This simple yet essential task can make all the difference in the outcome of your project. In this article, I will guide you through the step-by-step process of installing a paint nozzle in your airless sprayer gun, ensuring that you achieve the perfect spray pattern and pressure settings for your painting needs.
I’ll also provide tips for troubleshooting common issues that may arise during the installation. So, whether you’re a professional painter or a DIY enthusiast, let’s dive in and learn how to effortlessly install a paint nozzle in your airless sprayer gun, unlocking the power to create stunning works of art.
Key Takeaways
- Adjusting the spray pattern can be done using a knob or dial on the airless sprayer gun.
- Troubleshooting pressure settings involves decreasing pressure if there is splattering and increasing pressure if surface coverage is inadequate.
- Cleaning and maintaining the paint nozzle requires removing it from the airless sprayer gun, using a brush or toothpick to remove dried paint or debris, soaking it in a paint equipment cleaning solution, and gently scrubbing it to remove any remaining paint or residue.
- When installing the paint nozzle, it is important to check for potential challenges, ensure tightness, inspect for cracks or damage, and use a wrench or penetrating oil if the nozzle is stuck.
Gather the necessary tools and materials
Get ready to transform your airless sprayer gun into a paint-spraying powerhouse by gathering all the essential tools and materials you’ll need!
To install a paint nozzle in your airless sprayer gun, you will require a few necessary tools and essential materials. First, ensure you have a wrench or pliers to remove the existing nozzle.
Additionally, you’ll need a new paint nozzle that’s compatible with your sprayer gun model. It’s crucial to have a clean cloth or rag to wipe away any debris or paint residue before installation.
Lastly, make sure you have a nozzle tightening tool to securely fasten the new paint nozzle onto the gun.
With these tools and materials on hand, you’re ready to prepare the airless sprayer gun for nozzle installation effortlessly.
Prepare the airless sprayer gun for nozzle installation
First, make sure your airless sprayer is ready for the new nozzle by following these simple steps. Begin by disconnecting the sprayer from the power source and relieving any pressure that may be present.
Next, remove the existing nozzle by twisting it counterclockwise. Take care not to damage the threads or the nozzle housing. Once the old nozzle is removed, inspect the threads and clean them if necessary.
Apply a small amount of thread sealant to the new nozzle and carefully screw it into place, making sure it’s tightened securely.
Finally, reconnect the sprayer to the power source and test for proper functionality. Remember to always wear personal protective equipment and follow all safety precautions.
Transitioning into the next section, it’s important to choose the appropriate paint nozzle for your project to achieve the desired results.
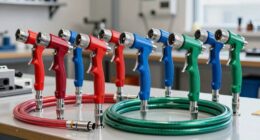
Choose the appropriate paint nozzle for your project
When embarking on your painting journey, the key to achieving your desired masterpiece lies in selecting the brush that best complements your artistic vision. In the case of an airless sprayer gun, the paint nozzle plays a crucial role in determining the quality and efficiency of your paint application.
There are different paint nozzle types available, each designed for specific purposes. To choose the appropriate paint nozzle for your project, consider the following factors:
-
Material Compatibility: Ensure that the paint nozzle is compatible with the type of paint or coating you’ll be using.
-
Spraying Technique: Different nozzle sizes and shapes are suited for various spraying techniques, such as wide patterns or fine lines.
-
Surface Area: Consider the size of the surface you’ll be painting, as this will determine the spray fan width required.
-
Desired Finish: The nozzle size also impacts the texture and thickness of the paint film, so select accordingly.
With these factors in mind, you can confidently choose the right paint nozzle for your airless sprayer gun. Now, let’s inspect the paint nozzle for any damage or clogs.
Inspect the paint nozzle for any damage or clogs
Now, let’s take a peek at the paint nozzle to see if there are any pesky clogs or damage lurking inside. Proper paint nozzle maintenance is crucial for ensuring a smooth and even spray pattern. To troubleshoot clogs, inspect the nozzle for any obstructions or debris. Here is a step-by-step guide on how to inspect the paint nozzle:
- Remove the nozzle from the sprayer gun.
- Examine the nozzle carefully for any signs of damage such as cracks or dents.
- Check for clogs by looking through the nozzle opening.
- If there are any clogs, use a cleaning brush or a small needle to remove the blockage.
- Ensure that there are no paint remnants left inside the nozzle after cleaning.
By regularly inspecting and cleaning the paint nozzle, you can prevent clogs and ensure optimal performance. Now, let’s move on to the next step and insert the paint nozzle into the gun’s nozzle housing.
Insert the paint nozzle into the gun’s nozzle housing
To complete the assembly of your painting tool, it’s time to securely place the key to your flawless finish into its designated slot, ensuring a seamless connection between the sprayer and its powerful ally.
-
Proper Alignment: Align the paint nozzle with the nozzle housing of the gun. Make sure the nozzle is straight and centered within the housing to ensure optimal functionality.
-
Insertion: Gently push the paint nozzle into the housing until it fits snugly. Avoid applying excessive force to prevent any damage.
-
Functionality Check: Once inserted, ensure the paint nozzle is securely in place by giving it a slight tug. It shouldn’t come loose or wobble.
-
Troubleshooting Issues: If the paint nozzle doesn’t fit properly or feels loose, double-check the alignment and try reinserting it. If the issue persists, inspect the nozzle and housing for any damage or debris.
Now, let’s move on to the next section about securing the paint nozzle in place.
Secure the paint nozzle in place
To continue with the installation process, I will now secure the paint nozzle in place. This step is crucial for ensuring proper paint flow and preventing any leaks from occurring. To do this, follow the steps below:
-
Take the wrench provided with your airless sprayer gun and tighten the nozzle housing by turning it clockwise. Make sure it is securely fastened to avoid any movement during operation.
-
Once the nozzle housing is tightened, check for any signs of leakage around the nozzle. If you notice any leaks, it is important to address them promptly to avoid any issues during painting.
To troubleshoot nozzle leaks, refer to the table below for possible causes and solutions:
| Issue | Solution |
|---|---|
| Loose nozzle | Tighten the nozzle housing |
| Damaged or worn O-ring | Replace the O-ring |
| Clogged nozzle | Clean or replace the nozzle |
Now that the paint nozzle is securely in place, we can move on to the next step: testing the nozzle for proper alignment and functionality.
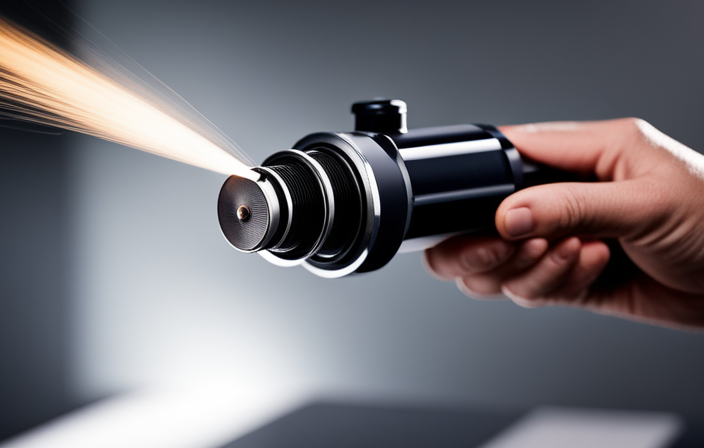
Test the nozzle for proper alignment and functionality
Make sure you’re ready to see the amazing results by testing the nozzle’s alignment and functionality. To ensure proper alignment and functionality of the paint nozzle in your airless sprayer gun, follow these testing techniques:
-
Fill the paint container with water and attach it to the sprayer gun.
-
Turn on the sprayer and trigger the gun to release water.
-
Inspect the spray pattern for any irregularities, such as dripping or uneven coverage.
-
Adjust the spray pattern and pressure settings as needed to achieve a consistent and smooth spray.
Testing the nozzle is essential for achieving optimal painting results. It allows you to identify any issues with alignment or clogging, ensuring a smooth and even application of paint. Once you’ve tested the nozzle, you can proceed to adjust the spray pattern and pressure settings as needed to achieve your desired outcome.
Adjust the spray pattern and pressure settings as needed
After testing the nozzle, you can easily fine-tune the spray pattern and pressure settings to achieve your desired outcome.
Start by adjusting the spray pattern. Most airless sprayer guns have a knob or dial that allows you to change the spray pattern from a narrow stream to a wide fan. Turn the knob or dial to the desired pattern, keeping in mind the size of the surface you’re painting.
Next, troubleshoot the pressure settings. If the paint is splattering or not coming out evenly, the pressure might be too high. Decrease the pressure gradually until you achieve a smooth and consistent flow. On the other hand, if the paint isn’t covering the surface well, the pressure might be too low. Increase the pressure gradually until you get the desired coverage.
With the spray pattern and pressure settings adjusted to your liking, you can now move on to the next section about cleaning and maintaining the paint nozzle for optimal performance.
Clean and maintain the paint nozzle for optimal performance
Ensuring the paint nozzle is well-maintained is like sharpening the blade of a chef’s knife for optimal performance. To clean and maintain the paint nozzle, follow these steps:
-
Begin by removing the nozzle from the airless sprayer gun.
-
Use a small brush or toothpick to remove any dried paint or debris from the nozzle openings.
-
Soak the nozzle in a cleaning solution specifically designed for paint equipment, ensuring all parts are submerged.
-
Gently scrub the nozzle with a soft brush to remove any remaining paint or residue.
These cleaning techniques will help keep the paint nozzle functioning properly.
Additionally, here are a few troubleshooting tips to address common issues with the paint nozzle installation.
Transition: Now that we’ve discussed how to clean and maintain the paint nozzle, let’s move on to troubleshooting common issues that may arise during the installation process.
Troubleshooting common issues with the paint nozzle installation
When troubleshooting common issues with the installation of the paint nozzle, you’ll want to be aware of potential challenges that may arise.
One common issue is paint nozzle leaks, which can result in uneven spray patterns and wasted paint. To troubleshoot this problem, start by checking if the nozzle is securely tightened onto the gun. If it’s loose, tighten it using a wrench. Additionally, inspect the nozzle for any cracks or damage that may be causing the leak. If you find any, replace the nozzle with a new one.
Another common issue is a stuck paint nozzle. To remove a stuck nozzle, use a wrench to gently loosen it counterclockwise. If it still won’t budge, try applying some penetrating oil and let it sit for a few minutes before attempting to remove it again.
Frequently Asked Questions
Can I use any nozzle with my airless sprayer gun or do I need to choose a specific one for my project?
I need to choose a specific nozzle size for my project when using an airless sprayer gun. This is important because the nozzle size affects the spray pattern and coverage. Using the right nozzle ensures optimal results and efficiency.
How often should I clean and maintain the paint nozzle for optimal performance?
To ensure optimal performance, it is important to clean and maintain the paint nozzle regularly. I recommend cleaning it after every use and inspecting for any clogs or damage. Use a nozzle cleaning solution and follow the manufacturer’s maintenance tips for best results.
What should I do if the paint nozzle gets clogged during the installation process?
If the paint nozzle gets clogged during installation, it’s crucial to troubleshoot the issue immediately. Start by removing the nozzle, soaking it in a cleaning solution, and using a small brush or needle to clear any obstructions.
How do I adjust the spray pattern and pressure settings on the airless sprayer gun?
To adjust the spray pattern on an airless sprayer gun, first, locate the spray angle adjustment knob. Turn it clockwise to narrow the pattern or counterclockwise to widen it. To troubleshoot pressure issues, check the pressure control knob and adjust as needed.
What are some common issues that can occur with the paint nozzle installation and how can I troubleshoot them?
When troubleshooting paint nozzle installation, common issues may include clogs, leaks, or improper seating. To resolve these problems, first, ensure the nozzle is clean and properly aligned. If issues persist, check for worn or damaged parts and replace as needed.
Conclusion
Well, congratulations! You’ve successfully installed the paint nozzle in your airless sprayer gun. It was a breeze, right? Who would’ve thought that something as simple as a nozzle could make such a difference in your painting project?
Now you can achieve those flawless, professional-looking finishes without breaking a sweat. Remember to clean and maintain your paint nozzle regularly to keep it performing at its best.
So go ahead, paint like a pro and leave everyone wondering how you make it look so easy!