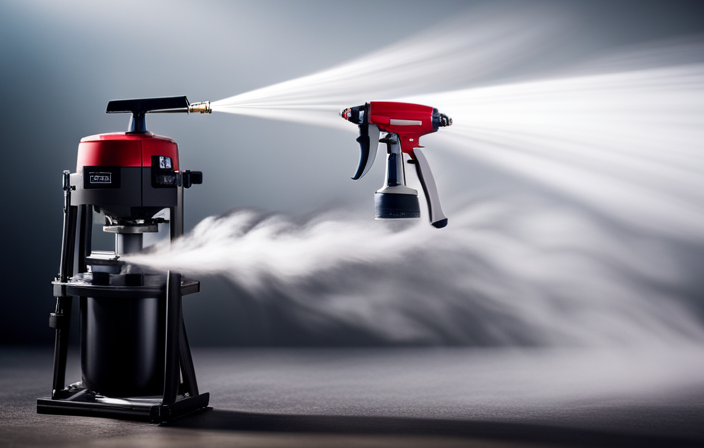

Hello there! Have you ever been in a situation where you needed a paint sprayer, but hesitated because of the high cost of professional models? Don’t worry; I have the perfect solution for you. In this article, I will guide you through creating your own DIY airless paint sprayer. Yes, you read that correctly. With just a few simple materials and some effort, you will be ready to handle any painting task that comes your way.
We’ll start by gathering the necessary materials and preparing the base for our sprayer.
Then, we’ll dive into building the pump mechanism and testing and adjusting the sprayer for optimal performance.
I’ll also walk you through the process of mixing and preparing the paint, as well as troubleshooting any common issues that may arise.
So, get ready to unleash your inner DIY enthusiast as we explore the benefits and limitations of homemade airless paint sprayers.
Plus, I’ll share some inspiring ideas for other DIY projects you can tackle.
Let’s get started!
Key Takeaways
- Troubleshooting common issues such as paint splattering or uneven coverage, clogging or blockages, and paint not spraying at all.
- Benefits of homemade airless paint sprayers include cost savings, versatility, and the potential for professional-looking results.
- Limitations of homemade airless paint sprayers include limited power and capacity, smaller paint holding capacity, and power-saving options available.
- Cost savings can be achieved through the use of homemade airless paint sprayers by reducing the cost of materials, eliminating rental fees, and making maintenance and repair easier.
Gather the Necessary Materials
Now that you’ve got all the materials ready, you can finally start bringing your DIY airless paint sprayer to life and feel the excitement building up inside you! Before you begin, it’s important to go through a few preparation steps and gather the required tools.
Firstly, make sure you have:
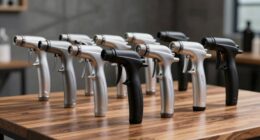
- A high-pressure airless spray gun
- An airless paint hose
- A container for the paint
You’ll also need:
- A compressor with a pressure regulator
- A paint strainer
- A stir stick
Additionally, don’t forget to have safety equipment such as:
- Goggles
- Gloves
- A mask to protect yourself
Once you have all these items in place, you can move on to the next section and prepare the base for your homemade airless paint sprayer.
Prepare the Base
To prepare the base for your homemade airless paint sprayer, follow these simple steps:
-
Clean the surface thoroughly: Remove any dirt, dust, or grease from the surface where you plan to paint. A clean surface ensures better adhesion and a smoother finish.
-
Repair any imperfections: Fill in any cracks or holes on the surface using a suitable filler. Smooth out the filler to create a seamless surface for painting.
-
Sand the surface: Use sandpaper to roughen up the surface slightly. This helps the paint adhere better and ensures a more even application.
-
Apply a primer: Before painting, apply a coat of primer to the surface. The primer helps the paint stick and provides a smooth base for the final color.
Now that the base is ready, it’s time to move on to building the pump mechanism for your homemade airless paint sprayer.
Build the Pump Mechanism
To construct the pump mechanism, I assembled the necessary components in a precise manner.
First, I cleaned and inspected the pump to ensure proper functioning and longevity. Regular pump maintenance is crucial to prevent clogs and ensure consistent paint flow.
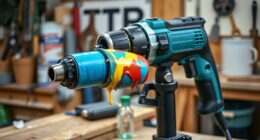
Next, I connected the pump to an alternative power source, such as a small motor or a drill, to provide the necessary force for the sprayer. This allows for a more efficient and controlled painting process. By using alternative power options, I was able to achieve a higher level of precision and save time.
With the pump mechanism built and ready, it’s time to move on to the next step of the process: testing and adjusting the sprayer to ensure optimal performance.
Test and Adjust the Sprayer
Once the pump mechanism is assembled, it’s time to put it to the test and fine-tune its performance for optimal results.
To start, adjust the spray pattern and pressure to achieve the desired coverage and finish. Turn the nozzle and adjust the pressure control knob accordingly.
If the spray pattern is uneven or the pressure is too high or low, clean the nozzle or adjust the pressure control knob until the desired results are achieved.
If the paint is not flowing smoothly or the sprayer is clogging, try thinning the paint or cleaning the filters.
These adjustment techniques and troubleshooting tips will ensure that your homemade airless paint sprayer is working effectively.
Now, let’s move on to the next section about mixing and preparing the paint.
Mixing and Preparing the Paint
When it comes to mixing and preparing the paint for spraying, I always make sure to choose the right type of paint for the job at hand.
If the paint is too thick, I dilute it with the appropriate solvent to achieve the desired consistency.
Lastly, I take the time to thoroughly mix and prepare the paint before loading it into the sprayer, ensuring smooth and even coverage.
Choosing the right paint
Selecting the perfect paint for your project is a pivotal part of achieving a polished and professional finish. When it comes to paint color selection, consider the mood you want to create and the overall aesthetic of your space. Whether you’re going for a bold statement or a subtle look, choose a color that complements your vision.
Additionally, explore the wide range of paint finish options available, from matte to glossy, to add texture and depth to your project. Remember to consider the practicality of the finish as well, such as durability and ease of cleaning.
Once you’ve chosen the ideal paint, it’s important to dilute it if necessary to achieve the desired consistency for your airless paint sprayer.
Diluting the paint if necessary
If you want your paint to flow smoothly through your tool, consider adding a small amount of water to thin it out if needed. Adjusting the paint viscosity is crucial for achieving optimal spraying results. To determine the right amount of water to add, consult the paint manufacturer’s instructions or conduct a viscosity test. Alternatively, you can use other paint thinning methods such as adding a paint thinner or using a commercial paint conditioner. These methods can help you achieve the desired consistency for your paint. It is important to note that not all paints require thinning, so always check the label or consult the manufacturer’s guidelines. Once you have adjusted the paint viscosity, you can proceed to the next step of preparing the paint for spraying.
Preparing the paint for spraying
After diluting the paint to the desired consistency, it’s time to prepare it for spraying. Mixing techniques play a crucial role in achieving a smooth and even application. To ensure a well-blended paint, I recommend using a stir stick or a paint mixer attachment for a power drill. These tools help to break up any clumps and distribute the pigments evenly.
However, it is essential to observe safety precautions during this step. Always wear protective gloves and eyewear to prevent any contact with the paint. Additionally, make sure to work in a well-ventilated area to avoid inhaling fumes.
Once the paint is thoroughly mixed and you’ve taken the necessary safety measures, you’re ready to move on to the next step: using the homemade airless paint sprayer. This tool will provide you with a quick and efficient way to apply the paint to your desired surface.
Using the Homemade Airless Paint Sprayer
Using the homemade airless paint sprayer is easy and efficient, allowing you to achieve professional-looking results. Here are some tips for using it effectively:
-
Experiment with different paint types: The homemade airless paint sprayer can handle a variety of paint types, so don’t be afraid to try different ones to see which works best for your project.
-
Use the right technique for a smooth finish: To achieve a smooth finish, hold the sprayer about 12 inches away from the surface and move it in a steady, controlled motion. Avoid spraying too much paint in one area to prevent drips or uneven coverage.
-
Adjust the pressure: Depending on the thickness of the paint, you may need to adjust the pressure on your sprayer. Start with a low pressure setting and gradually increase it until you achieve the desired coverage.
-
Clean the sprayer properly: After each use, make sure to clean the sprayer thoroughly to prevent clogs and ensure its longevity.
-
Practice makes perfect: The more you use the homemade airless paint sprayer, the better you’ll become at controlling the spray and achieving a flawless finish.
Once you’ve mastered using the homemade airless paint sprayer, it’s time to tackle any troubleshooting common issues that may arise during your painting projects.
Troubleshooting Common Issues
Having trouble with your DIY painting project? Let’s tackle some common issues that may arise while using your homemade airless paint sprayer. Troubleshooting techniques can help you overcome these problems and ensure a smooth painting process. Here are some common problems you might encounter and their possible solutions:
| Common Problem | Possible Solution |
|---|---|
| Paint splattering or uneven coverage | Check that the nozzle is clean and properly aligned. Adjust the pressure settings if needed. |
| Clogging or blockages | Clean the sprayer thoroughly and remove any debris. Use a filter to prevent clogs. |
| Paint not spraying at all | Ensure that the paint is properly mixed and at the right consistency. Check for any obstructions in the spray gun. |
By following these troubleshooting techniques, you can overcome common issues and achieve satisfactory results with your homemade airless paint sprayer. Now, let’s explore the benefits and limitations of these DIY sprayers.
Benefits and Limitations of Homemade Airless Paint Sprayers
When it comes to homemade airless paint sprayers, there are a few key points to consider.
Firstly, one of the main benefits is the potential for cost savings, as homemade sprayers can be significantly cheaper than their commercial counterparts.
Additionally, homemade sprayers offer versatility, as they can be customized to fit specific painting needs.
However, it’s important to note that homemade sprayers may have limited power and capacity compared to professional-grade equipment.
Cost savings
To save money, you can easily make a homemade airless paint sprayer using items you may already have at home. With a cost analysis, you’ll find that homemade airless paint sprayers are significantly cheaper compared to professional sprayers. Here are three reasons why making your own sprayer can save you money:
-
Cost of materials: Most of the components needed to build a homemade airless paint sprayer can be found around the house or purchased at a fraction of the price compared to buying a professional sprayer.
-
No rental fees: By making your own sprayer, you don’t have to worry about renting or buying an expensive professional sprayer, which can save you a substantial amount of money in the long run.
-
Maintenance and repair: Homemade sprayers are often easier to maintain and repair, eliminating the need for costly professional servicing.
With these cost savings in mind, let’s explore the next section about the versatility of homemade airless paint sprayers.
Versatility
One interesting statistic to consider is that homemade sprayers offer a wide range of applications, allowing you to tackle various projects with ease.
The versatility of a homemade airless paint sprayer is one of its biggest advantages. Unlike commercial sprayers that are designed for specific tasks, a homemade sprayer can handle different types of paints, stains, and finishes.
Whether you’re painting walls, furniture, or even outdoor surfaces, a homemade sprayer can adapt to your needs. This versatility saves you time and money, as you don’t need to invest in multiple sprayers for different projects.
However, it’s important to note that homemade sprayers have their limitations. While they can handle a variety of tasks, they may have limited power and capacity compared to commercial sprayers.
Nevertheless, with some adjustments and creativity, you can still achieve professional-looking results.
Now, let’s move on to the next section about limited power and capacity.
Limited power and capacity
Although they have their advantages, homemade sprayers may have limited power and capacity compared to their commercial counterparts, which can impact the efficiency and effectiveness of your projects.
When using a homemade airless paint sprayer, it’s important to consider the limitations of its power and capacity. These sprayers are often built with cost-effective alternatives in mind, which can result in reduced power output. Additionally, the smaller size of homemade sprayers means they have a limited paint holding capacity, requiring more frequent refills.
However, there are power-saving options available that can help mitigate these limitations. For example, using a smaller nozzle size can reduce the amount of paint being sprayed, conserving both power and paint. By being mindful of these limitations and utilizing power-saving options, you can still achieve satisfactory results with your homemade airless paint sprayer.
Transitioning to the next section, let’s explore some inspiration and ideas for DIY projects.
Inspiration and Ideas for DIY Projects
When it comes to finding inspiration for DIY projects, the world is your oyster and there’s no limit to what you can create. Whether you’re looking for creative DIY ideas for home decor, furniture, or even outdoor projects, there are endless possibilities to explore.
From repurposing old items to creating something entirely new, the DIY community is full of innovative and imaginative ideas that can inspire you to embark on your own projects.
Websites, social media platforms, and DIY forums are great sources to discover unique and exciting projects that can ignite your creativity.
So, if you’re ready to roll up your sleeves and dive into the world of DIY, get inspired and start creating something amazing.
Conclusion and Final Thoughts
After exploring various DIY projects for inspiration, I have come to the conclusion that making a homemade airless paint sprayer can be a cost-effective and efficient solution.
With this DIY project, you can save money on buying a commercial paint sprayer while still achieving professional-looking results.
To make your own airless paint sprayer, you will need a few essential materials: a high-pressure pump, a spray gun, and a hose. These components work together to create a powerful and efficient paint sprayer that can cover large areas quickly and evenly.
By building your own airless paint sprayer, you have the freedom to customize its features and design to suit your specific needs. Not only will this project save you money, but it will also provide you with a reliable tool for future painting projects.
So why not give it a try and unleash your creativity with this cost-effective and efficient DIY project?
Frequently Asked Questions
Can I use any type of paint with a homemade airless paint sprayer?
Yes, it is important to use the right type of paint with a homemade airless paint sprayer. Some homemade alternatives for achieving an airless paint spraying effect include using a compressed air sprayer or a high-volume, low-pressure (HVLP) sprayer.
How much paint can the homemade airless paint sprayer hold?
The homemade airless paint sprayer I made can hold an astonishing amount of paint, with a paint capacity that seems almost endless. It is also compatible with various types of paint, making it versatile and convenient.
Can I use the homemade airless paint sprayer for outdoor projects?
Yes, you can use a homemade airless paint sprayer for outdoor projects. Pros include cost savings and versatility. Cons include limited paint capacity and potential for clogging. To maintain it, clean the sprayer thoroughly after each use and regularly check for any clogs.
How long does it take to build the pump mechanism for the homemade airless paint sprayer?
Building the pump mechanism for a homemade airless paint sprayer can vary depending on your skills and available materials. However, it typically takes a few hours to assemble and test.
What safety precautions should I take when using the homemade airless paint sprayer?
When using a homemade airless paint sprayer, it’s important to take proper safety precautions. Ensure paint compatibility and don’t exceed the paint capacity. Remember, "better safe than sorry" and protect yourself from potential hazards.
Conclusion
In conclusion, making a homemade airless paint sprayer was quite the adventure.
I gathered all the necessary materials and diligently prepared the base.
Building the pump mechanism was a challenge, but with some trial and error, I finally got it working.
Testing and adjusting the sprayer was a crucial step to ensure smooth operation.
Mixing and preparing the paint was a breeze, thanks to my newfound DIY skills.
Although I encountered some common issues along the way, troubleshooting them was a great learning experience.
Overall, the benefits of having a homemade airless paint sprayer are immense, allowing me to tackle various DIY projects with ease.
However, it’s important to note the limitations and always consider safety precautions.
This journey has sparked my inspiration for future DIY projects.
In conclusion, creating my own airless paint sprayer was a rewarding endeavor that has opened up a world of possibilities for me.