Connect with us

Airless Paint Sprayers FAQs

How To Paint A Guitar With Airless Paint Sprayer

Published

on

An image showcasing a skilled guitarist wearing protective gear, expertly maneuvering an airless paint sprayer to evenly coat a sleek electric guitar in vibrant colors, as fine mist particles disperse in the air

In a world full of endless possibilities, the time is now to let your imagination run wild and turn your guitar into a one-of-a-kind masterpiece. While it is commonly said that a picture is worth a thousand words, just think about the power of being able to create a piece of art on your guitar that truly reflects your unique personality and style.

Well, look no further because I’m here to show you how to paint a guitar with an airless paint sprayer.

With this innovative tool in your hands, you’ll be able to achieve professional-looking results without breaking a sweat. From preparing your guitar for painting to choosing the perfect color and applying multiple layers for optimal coverage, I’ll guide you through each step of the process.

And don’t worry if you’re new to painting, because I’ll provide you with all the tips and techniques you need to become a pro in no time.

So, get ready to unleash your inner artist and transform your guitar into a work of art that will leave everyone in awe. Let’s dive into the world of airless paint sprayers and bring your musical masterpiece to life.

Advertisement

Key Takeaways

  • Preparing the surface is crucial for a smooth paint job and proper paint adhesion.
  • Applying multiple thin and even coats of paint ensures even coverage and a professional finish.
  • Proper ventilation is essential for safety and to achieve optimal drying and prevent imperfections.
  • Reassembling the guitar requires attention to detail and proper alignment of hardware and electronics.

Prepare Your Guitar for Painting

To prepare your guitar for painting, follow these steps:

  1. Rough up the surface: Grab your sandpaper and start roughing up the surface. This is crucial for a smooth and long-lasting paint job. Remove any existing finish or paint using sandpaper or a paint stripper. Remember to sand in the direction of the grain to avoid scratches.

  2. Use different grits of sandpaper: Start with a coarse grit and gradually move to a finer grit for a smooth surface. Sanding helps create a better adhesion for the paint.

  3. Wipe down the guitar: After sanding, wipe down the guitar with a damp cloth to remove any dust or debris. This ensures a clean surface for painting.

  4. Apply primer: Once the surface is clean and smooth, it’s time to prime the guitar. Apply a thin layer of primer to ensure that the paint adheres well and provides a solid base for the color coat.

  5. Choose the right paint and color: With the surface prepped and primed, you’re ready to choose the right paint and color for your guitar transformation. Consider factors like the type of paint (acrylic, enamel, etc.) and the color that suits your style.

Remember to take your time and follow each step carefully to achieve the best results.

Choose the Right Paint and Color

When it comes to choosing the right paint for your guitar, there are a few factors to consider.

First, you’ll want to select the type of paint that will adhere well to the guitar’s surface and provide a durable finish.

Advertisement

Additionally, picking the perfect color is an important decision that will reflect your personal style and taste.

With so many options available, it’s essential to take your time and choose a paint color that you’ll be happy with for years to come.

Selecting the Type of Paint

First, you’ll want to choose the perfect type of paint for your guitar to achieve a truly unique and vibrant look. When selecting the type of paint, consider the following:

  1. Choosing the right paint finish: The finish you choose will greatly impact the final look of your guitar. Matte finishes offer a subtle and modern appearance, while gloss finishes provide a shiny and polished look. It’s important to choose a finish that aligns with your desired aesthetic.

  2. Importance of primer: Before applying the paint, make sure to use a high-quality primer. Primer helps the paint adhere to the surface of the guitar, ensuring a smooth and long-lasting finish. It also helps to seal any imperfections on the guitar’s surface, resulting in a professional-looking paint job.

When picking the perfect color for your guitar, consider your personal style and the overall vibe you want to create. With the right paint and color, you can transform your guitar into a true work of art.

Picking the Perfect Color

To truly make your guitar a showstopper, you’ll want to choose a color that will make jaws drop and eyes widen with envy. When it comes to painting your guitar, the possibilities are endless. Don’t be afraid to think outside the box and choose unique colors that reflect your personality and style. Experimenting with different finishes can also add a touch of uniqueness to your instrument. From glossy to matte, metallic to pearlescent, the choice is yours. To help you visualize the options, here’s a table showcasing some popular colors and finishes that can transform your guitar into a work of art:

Advertisement
Color Finish
Deep Blue Metallic
Emerald Glossy
Crimson Matte
Gold Pearlescent

Now that you’ve chosen the perfect color, it’s time to mask off the areas you don’t want to paint. This will ensure a clean and professional-looking result.

Mask Off the Areas You Don’t Want to Paint

Before grabbing your airless paint sprayer, it’s important to mask off the areas you don’t want to paint. This step ensures a clean and precise canvas for your artistic masterpiece. Start by using painter’s tape to cover the fretboard, hardware, and pickups, or any other parts you want to keep untouched. Press the tape firmly to create a tight seal and prevent paint seepage.

Once you’ve finished painting, carefully remove the tape while the paint is still wet to avoid peeling or damage. With the areas properly masked off, you’re now ready to set up your airless paint sprayer and start transforming your guitar into a work of art.

Advertisement

Set Up Your Airless Paint Sprayer

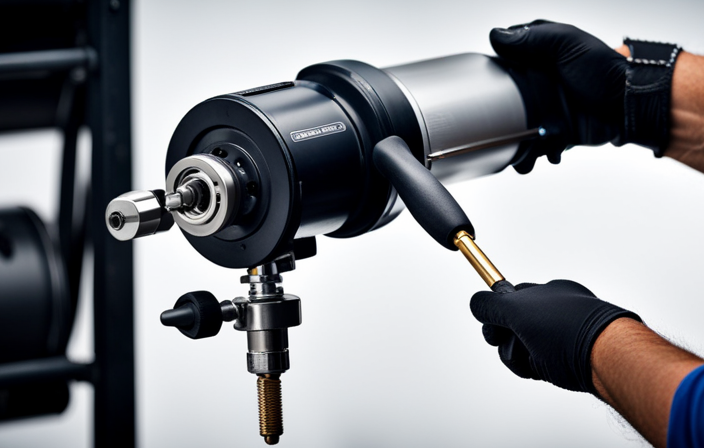
Once you’ve gathered all your supplies, it’s time to get your airless paint sprayer ready to unleash its artistic power. Setting up the sprayer is crucial for achieving a smooth and even coat of paint on your guitar.

Start by connecting the sprayer to a power source and ensuring that the nozzle is clean and free from any clogs.

Next, adjust the pressure settings according to the type of paint you’re using and the desired coverage.

It’s important to troubleshoot common issues such as leaks or uneven spray patterns before you begin.

Once everything is set up, you can practice your technique and get a feel for the sprayer’s capabilities.

Advertisement

This will help you achieve professional-looking results on your painted guitar.

Practice Your Technique

Before you start painting the guitar with the airless paint sprayer, I highly recommend testing the sprayer on a scrap surface first. This will allow you to familiarize yourself with the sprayer’s settings, adjust the pressure and nozzle size if needed, and ensure that the paint is being evenly distributed.

Additionally, it’s crucial to practice maintaining even strokes while using the sprayer. This will help you achieve a smooth and professional finish on the guitar, avoiding any streaks or uneven coverage. Remember to keep a steady hand and move the sprayer in a consistent motion for the best results.

Test the Sprayer on a Scrap Surface

To truly grab your attention, try this theory and test the sprayer on a scrap surface.

Testing techniques and troubleshooting tips are essential to ensure a smooth and successful painting process.

Advertisement

Start by assembling your airless paint sprayer and connecting it to the air compressor. Adjust the pressure settings according to the manufacturer’s instructions.

Next, fill the sprayer with the desired paint color, making sure it is properly mixed.

Now, aim the sprayer at the scrap surface and pull the trigger to release the paint. Pay attention to the spray pattern and adjust the settings if needed.

Move the sprayer in a steady and even motion, maintaining a consistent distance from the surface.

Practice maintaining even strokes will help you achieve professional-looking results.

Advertisement

Practice Maintaining Even Strokes

Get ready to master the art of smooth and flawless strokes for a jaw-dropping painting finish. To improve spray control and avoid overspray, follow these steps:

  1. Hold the airless paint sprayer firmly with both hands, maintaining a steady grip.

  2. Start the sprayer in a well-ventilated area away from the guitar, ensuring the nozzle is pointed away from you and any nearby objects.

  3. Practice maintaining even strokes by moving the sprayer in a horizontal or vertical motion, keeping a consistent distance from the surface.

By mastering these techniques, you will achieve a professional-looking paint job on your guitar.

Now, it’s time to move on to the next section and start painting your guitar with confidence and precision.

Start Painting Your Guitar

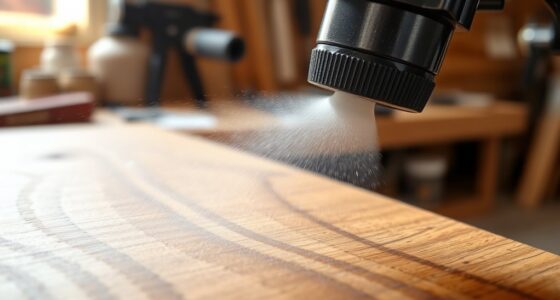
As I begin to paint my guitar, I let my creativity soar like a soaring melody. Before starting, it’s important to prepare the surface by sanding it lightly to create a smooth base.

Next, I apply a clear coat to protect the guitar and enhance the paint’s adhesion. Once the clear coat is dry, I can start painting. Using my airless paint sprayer, I apply thin and even coats of paint, making sure to cover the entire surface. It’s important to maintain a consistent distance from the guitar to ensure an even application.

Advertisement

After the first layer is dry, I can apply additional layers for the desired coverage. This will help the paint adhere better and create a more vibrant finish.

Apply Additional Layers for Desired Coverage

Now that we’ve started painting the guitar, it’s time to apply additional layers for the desired coverage. This step is crucial in achieving a smooth finish and ensuring proper paint adhesion. Here are four key tips to keep in mind while applying multiple coats:

  1. Allow each coat to dry completely before applying the next one. This prevents smudging or running.

  2. Use light, even strokes to apply the paint. This distributes the paint evenly and avoids streaks or patches.

  3. Pay attention to areas that need extra coverage and apply an additional coat if necessary. This ensures even coloring.

  4. Keep a close eye on the guitar’s overall appearance as you apply each coat. If you notice imperfections or unevenness, lightly sand the surface before applying the next coat.

By following these tips, you’ll be on your way to achieving a smooth and professional-looking finish. Now, let’s move on to the next section about letting the paint cure.

Let the Paint Cure

After applying the final coat of paint, it’s crucial to let the guitar cure for the recommended drying time. This will ensure that the paint fully adheres to the surface and becomes durable.

During this time, it’s important to keep the guitar in a well-ventilated area to allow proper airflow and aid in the drying process.

Advertisement

Follow the Recommended Drying Time

To achieve optimal results, make sure to follow the recommended drying time for your painted guitar when using an airless paint sprayer. The recommended drying time is crucial as it allows the paint to fully cure and harden, ensuring a durable and long-lasting finish.

Patience is key during this step. Rushing the process can result in a subpar outcome. It’s important to resist the temptation to handle or play your guitar before it has fully dried. Doing so can lead to smudges, fingerprints, or even damage to the paint.

Once the recommended drying time has passed, you can proceed to the next step. Keep the guitar in a well-ventilated area, allowing any residual fumes to dissipate. This ensures a safe and pleasant painting experience.

Keep the Guitar in a Well-Ventilated Area

Make sure you don’t forget to keep your masterpiece in a well-ventilated area, because who doesn’t love inhaling toxic fumes while creating art? Ventilation safety is crucial when painting a guitar with an airless paint sprayer. Here are a few reasons why:

  • Proper ventilation ensures that harmful fumes and particles are quickly removed from the air, reducing the risk of respiratory issues.
  • It helps prevent the build-up of paint vapors, which can be flammable and pose a fire hazard.
  • Adequate airflow allows the paint to dry evenly and prevents the formation of bubbles or streaks.

To ensure proper ventilation safety, make sure to:

  • Open windows or use fans to create a steady flow of fresh air.
  • Wear a respirator mask to protect yourself from inhaling any potentially harmful substances.
  • Keep all other painting equipment, such as brushes and paint cans, in a separate area to avoid contamination.

Now that your guitar is drying in a well-ventilated space, it’s time to move on to the next step of reassembling your instrument.

Reassemble Your Guitar

Now that the paint on my guitar has cured, it’s time for me to reassemble it.

Advertisement

The first step is to clean and reattach the hardware, ensuring that everything is secure and in its proper place.

Next, I will reinstall the pickups and electronics, making sure all the wires are connected correctly and the components are positioned correctly.

It’s important to be meticulous during this process to ensure that the guitar functions properly and looks great.

Clean and Reattach the Hardware

First, gather all of the hardware that you removed from the guitar and give it a thorough cleaning to remove any dirt or grime. Cleaning techniques for the hardware depend on the material it is made of. For metal hardware, use a mild soap and water solution to clean off any dirt or fingerprints. For plastic or acrylic hardware, use a non-abrasive cleaner to avoid scratching the surface. Once cleaned, dry the hardware thoroughly before reattaching it to the guitar.

Below is a table outlining the different cleaning techniques for common guitar hardware:

Advertisement
Hardware Material Cleaning Technique
Metal Mild soap and water solution
Plastic/Acrylic Non-abrasive cleaner

Now that the hardware is clean, it’s time to reattach it to the guitar. This will involve carefully aligning the pieces and securing them in place. Next, we will move on to reinstalling the pickups and electronics.

Reinstall the Pickups and Electronics

To reinstall the pickups and electronics, carefully position them back in place, ensuring correct alignment.

Replace old pickups if they’re not functioning properly or for a different sound.

Troubleshoot any electronic issues before installing.

Connect pickups and electronics according to the wiring diagram specific to your guitar model.

Advertisement

Double-check connections and test electronics for correct functionality.

With pickups and electronics securely installed, move on to finishing touches, like adding a protective clear coat for a professional look.

Finishing Touches

For an extra touch of flair, give your guitar a final coat of clear lacquer to make it shine like a rockstar’s stage presence. This step is crucial in completing the refinishing process and protecting the paint job you’ve worked hard on.

Clear lacquer not only adds a glossy finish, but it also acts as a protective layer against scratches and wear. To apply the lacquer, make sure your guitar is clean and free from dust or debris. Using an airless paint sprayer, apply thin and even coats, allowing each coat to dry before applying the next. Be careful not to apply too much lacquer at once to avoid drips or runs.

Once you’re satisfied with the finish, let the lacquer cure for the recommended time before reassembling the guitar. With this final step, your custom-designed guitar will truly shine like a masterpiece.

Advertisement

Frequently Asked Questions

Can I use any type of paint with an airless paint sprayer?

Can any paint be used with an airless paint sprayer? It’s important to use paints specifically designed for airless sprayers, such as latex or oil-based paints. To achieve a smooth finish, ensure proper thinning and adjust spray pressure accordingly.

How long does the paint need to cure before I can play the guitar again?

To speed up the paint curing process, I recommend using a heat gun or placing the guitar in a warm, dry area. To protect the guitar while the paint is curing, cover it with a cloth or place it in a dust-free environment.

What safety precautions should I take when using an airless paint sprayer?

One interesting statistic to grab your attention: According to a study, around 36% of accidents involving airless paint sprayers are due to lack of proper safety precautions. To ensure your safety, here are some best practices to follow.

Can I use an airless paint sprayer on an electric guitar with electronics?

Yes, you can use an airless paint sprayer on an electric guitar with electronics. However, it is important to take precautions to protect the electronics. I recommend using masking tape and alternative painting methods to avoid damaging the delicate components.

How do I clean and maintain my airless paint sprayer after painting my guitar?

After painting my guitar with an airless paint sprayer, I clean it thoroughly to prevent clogs. I disassemble the sprayer, wash all the parts with warm soapy water, and use a brush to remove any paint residue. Then, I reassemble and store it properly.

Advertisement

Conclusion

In conclusion, painting a guitar with an airless paint sprayer is a rewarding and creative project.

As I put the final touches on my beautifully painted instrument, a sense of accomplishment washes over me.

The smooth and even layers of paint create a mesmerizing visual rhythm, like a symphony of colors.

With each stroke, I brought new life to my guitar, transforming it into a work of art.

So grab your airless paint sprayer and let your creativity flow, turning your guitar into a masterpiece.

Advertisement

Whether it’s a step-by-step tutorial on achieving flawless finishes or an in-depth analysis of the latest airless paint sprayer models, Joe’s ability to articulate complex ideas in a simple and engaging manner resonates with our diverse audience. His practical tips and techniques empower readers to tackle their projects with confidence.

Continue Reading
Advertisement

Airless Paint Sprayers FAQs

How To Unclog Graco 360 Airless Paint Sprayer

Published

on

By

An image showcasing a step-by-step guide on unclogging a Graco 360 Airless Paint Sprayer, depicting a user removing the nozzle, flushing it with water, clearing the filter, and reassembling it meticulously

Have you ever found yourself in the middle of a painting project only to have your Graco 360 airless paint sprayer clog up on you? Dealing with a clog can be frustrating and a waste of time, but fear not! I am here to guide you through the process of unclogging your Graco 360 airless paint sprayer.

In this article, I will provide you with step-by-step instructions on how to:

  1. Identify the clog
  2. Release pressure
  3. Disassemble the sprayer
  4. Clean the spray tip and filter
  5. Reassemble the sprayer

I will also share tips on how to prevent future clogs and when it may be necessary to seek professional help.

So, grab your tools and get ready to tackle that clog head-on. By the end of this article, you’ll have your Graco 360 airless paint sprayer working like new again.

Let’s dive in and get your painting project back on track!

Key Takeaways

  • Troubleshooting tips for Graco 360 airless paint sprayer include checking power supply, priming and flushing properly, verifying paint viscosity, and inspecting for clogs or blockages.
  • To prevent future clogs, strain paint before pouring, clean filters and nozzles regularly, use appropriate paint viscosity, follow prevention techniques, and perform regular maintenance.
  • Professional help is important for complex clogs that require expertise, time constraints that necessitate professional assistance, lack of experience that can lead to accidents, situations where DIY solutions may not be effective, and to ensure efficiency and safety.
  • Signs of complex clogs include unsuccessful DIY methods, persistent clogs despite attempts, indication of more intricate issues, requirement of professional expertise, and the need to avoid potential damage or accidents.

Identify the Clog

Advertisement

To effectively troubleshoot the issue, it’s crucial to first identify the specific area where the clog is occurring within the Graco 360 airless paint sprayer. When it comes to troubleshooting common clog causes, there are a few things to keep in mind.

Start by checking the spray tip, as it is often the primary culprit. Inspect it for any debris or dried paint that may be causing the blockage.

Additionally, inspect the suction tube and filter for any obstructions. These areas can easily accumulate paint particles and cause clogs.

Once the clog is identified, it’s important to release the pressure and remove any remaining paint from the sprayer. This can be done by following the manufacturer’s instructions for releasing pressure and cleaning the system.

By taking these steps and implementing tips for preventing clogs in the future, you can ensure a smooth and efficient painting process.

Advertisement

Release Pressure and Remove Paint

First, make sure the pressure is released and all the paint is removed from the machine. To clean the Graco 360 airless paint sprayer effectively, follow these troubleshooting tips and cleaning techniques:

  • Begin by removing the spray tip and guard, using a wrench if necessary.
  • Next, detach the suction tube from the paint container, ensuring no paint remains inside.
  • Take off the prime valve and filter housing, carefully inspecting them for any clogs or debris.
  • Clean all the removed components thoroughly with warm, soapy water or a suitable cleaning solution.
  • Use a small brush or toothpick to remove any stubborn clogs from the spray tip or filter.
  • Rinse all parts with clean water, ensuring no residue remains.

By following these cleaning techniques and troubleshooting tips, you can effectively unclog your Graco 360 airless paint sprayer.

Now, let’s move on to the next section and disassemble the sprayer for further cleaning.

Disassemble the Sprayer

Now it’s time to break down the sprayer and delve into the inner workings of this powerful machine. Sprayer maintenance is crucial to ensure optimal performance and longevity.

Advertisement

To disassemble the sprayer, start by removing the spray gun from the hose.

Next, unscrew the tip guard and carefully take out the spray tip.

Use a wrench to disconnect the filter housing from the sprayer body.

Once the filter housing is removed, take out the filter and inspect it for any clogs or debris. Cleaning or replacing the filter may be necessary if it is dirty or damaged.

Troubleshooting tips for disassembling the sprayer include following the manufacturer’s instructions, wearing protective gloves, and working in a well-ventilated area.

Advertisement

With the sprayer disassembled, we can now move on to cleaning the spray tip and filter.

Clean the Spray Tip and Filter

Before you begin cleaning the spray tip and filter, it’s important to note that a clogged filter can decrease the efficiency of your sprayer by up to 50%.

To clean the spray tip:

  • Start by removing it from the sprayer gun using a wrench.
  • Once removed, inspect the tip for any clogs or debris.
  • If you notice any blockages, use a small wire brush or toothpick to carefully remove them.

To clean the filter:

  • Unscrew the housing and remove it from the sprayer.
  • Rinse the filter thoroughly with warm water to remove any paint residue or debris.
  • Gently tap the filter on a hard surface to dislodge any stubborn particles.

Finally, reassemble the spray tip and filter, ensuring they are securely tightened.

In the next section, we will discuss how to use a cleaning solution or solvent to further clean your sprayer.

Use a Cleaning Solution or Solvent

Advertisement

To ensure optimal performance, it’s important to enhance the effectiveness of your sprayer by using a cleaning solution or solvent.

When it comes to cleaning solution alternatives, there are a few options to consider. One commonly used option is a mixture of warm water and mild detergent. This mixture can effectively remove any paint residue from the sprayer.

Another alternative is using a commercial paint sprayer cleaner. These cleaners are specifically designed to break down paint and unclog the system, making them a great choice for thorough cleaning.

Whichever option you choose, it’s important to follow safety precautions. Always wear protective gloves and eyewear when handling cleaning solutions or solvents. Additionally, make sure to work in a well-ventilated area to avoid inhaling any fumes.

Advertisement

Now that you have cleaned the spray tip and filter, let’s move on to the next step: using a cleaning brush or needle.

Use a Cleaning Brush or Needle

Using a cleaning brush or needle is like giving your sprayer a thorough scrub, ensuring that every nook and cranny is free from any debris or buildup. Cleaning techniques using a brush or needle are alternative methods to unclog your Graco 360 airless paint sprayer. These tools allow you to manually remove any paint or residue that may be obstructing the spray nozzle or other components. The cleaning brush is perfect for scrubbing the larger parts of the sprayer, such as the spray tip, while the needle can be used to clean the smaller, harder-to-reach areas, like the nozzle or the filter. By using these tools, you can effectively dislodge any clogs and restore the proper functioning of your sprayer. After cleaning, you can proceed to reassemble the sprayer, ensuring all components are properly aligned and tightened.

Reassemble the Sprayer

Now that you have thoroughly cleaned all the components, it’s time to put everything back together and ensure a proper fit for your sprayer. Here are some reassemble techniques and troubleshooting tips to help you with this process:

  • Start by reattaching the spray gun to the hose, ensuring a secure connection.

  • Next, attach the hose to the pump, making sure it is tightly screwed in.

  • Reinstall the suction tube into the pump, ensuring it is properly seated.

  • Attach the spray tip guard to the spray gun, securing it in place.

  • Finally, test the trigger on the spray gun to ensure it is working smoothly.

By following these reassemble techniques and troubleshooting tips, you can ensure that your Graco 360 airless paint sprayer is properly put back together and ready for use.

Now, let’s move on to the next step and test the sprayer.

Advertisement

Test the Sprayer

Once everything is back together, it’s time for you to see the sprayer in action and put it to the test. To ensure that your Graco 360 airless paint sprayer is working properly after reassembling, follow these sprayer maintenance and troubleshooting tips.

First, check if the sprayer is priming correctly. Fill the paint container with water and turn on the sprayer. The water should flow smoothly through the nozzle without any sputtering or clogging. If there are any issues, refer back to the previous steps to troubleshoot and fix the problem.

Next, test the spray pattern by spraying water onto a test surface. The spray pattern should be even and consistent, without any splattering or uneven distribution. Adjust the spray tip if necessary to achieve the desired pattern.

Finally, check for any leaks or unusual noises during operation. If you notice any leaks, tighten the connections or replace any damaged parts. If there are unusual noises, it could indicate a problem with the motor or pump, and you may need to consult the user manual or contact Graco customer support for further assistance.

By following these troubleshooting tips, you can ensure that your Graco 360 airless paint sprayer is working efficiently. In the next section, we will discuss how to prevent future clogs and maintain the sprayer for long-lasting performance.

Advertisement

Prevent Future Clogs

To prevent future clogs in your Graco 360 airless paint sprayer, there are some important steps you can take:

  • Always strain your paint before pouring it into the sprayer. This will remove any debris or clumps that could potentially clog the nozzle.

  • Regularly clean the filters and nozzles of your sprayer to maintain optimal performance.

  • Use the appropriate paint viscosity for your sprayer. Using thicker paints can increase the risk of clogs.

By following these prevention techniques and regular maintenance tips, you can ensure that your Graco 360 airless paint sprayer stays clog-free and ready for your next project.

Remember, if you encounter persistent clogs or issues, it may be necessary to seek professional help.

Seek Professional Help if Needed

If you’re feeling overwhelmed or frustrated with persistent clogs, don’t hesitate to reach out to a professional for assistance. Knowing when to call a professional can save you time, money, and frustration. While unclogging a Graco 360 airless paint sprayer can often be done as a DIY project, there are times when it is best to seek professional help. Here are some situations where calling a professional is recommended:

  1. Complex clogs: If you’ve tried multiple DIY methods and the clog is still not resolved, it may be a sign of a more complex issue that requires professional expertise.

  2. Time constraints: If you have a tight deadline and cannot afford any delays, it’s best to let a professional handle the unclogging process to ensure efficiency and effectiveness.

  3. Lack of experience: If you’re not familiar with the inner workings of the paint sprayer or are unsure about the correct procedure, it’s safer to leave it to a professional to avoid potential damage or accidents.

Remember, while DIY solutions can work in many cases, there are times when professional help is the best choice. Don’t hesitate to call a professional if you’re unsure or experiencing difficulties.

Advertisement

Frequently Asked Questions

Can I use any cleaning solution or solvent to unclog my Graco 360 airless paint sprayer?

No, it is not recommended to use any cleaning solution or solvent for unclogging the Graco 360 Airless Paint Sprayer. It is important to follow the manufacturer’s instructions and use the recommended cleaning methods to prevent clogs.

How often should I clean the spray tip and filter to prevent clogs?

An ounce of prevention is worth a pound of cure. To prevent clogs in your paint sprayer, it’s important to regularly clean the spray tip and filter. This maintenance ensures optimal performance and avoids costly downtime.

What is the recommended method for disassembling the sprayer?

To disassemble the sprayer, follow these steps: 1) Turn off and unplug the sprayer. 2) Remove the spray tip, guard, and filter. 3) Use a wrench to loosen and remove the fluid section. Recommended tools for this process include a wrench and pliers.

Are there any specific cleaning brushes or needles that are recommended for unclogging the sprayer?

To effectively clean and unclog a Graco 360 airless paint sprayer, it is recommended to use cleaning tools such as brushes and needles specifically designed for this purpose. Regular maintenance tips should also be followed to prevent clogging issues.

What are some common signs or symptoms of a clogged Graco 360 airless paint sprayer?

Some common signs or symptoms of a clogged Graco 360 airless paint sprayer include poor spray pattern, spitting or sputtering, and reduced or uneven paint flow. Troubleshooting tips can help identify and resolve these issues.

Advertisement

Conclusion

When it comes to unclogging a Graco 360 Airless Paint Sprayer, there are a few steps you can follow. First, make sure to disconnect the sprayer from the power source and relieve any pressure in the system. Next, remove the spray tip and filter from the gun and clean them thoroughly. If the clog persists, you may need to disassemble the gun and clean the internal components. Be sure to refer to the manufacturer’s instructions for guidance on this step. Once everything is clean, reassemble the gun and test it to ensure the clog is fully cleared. Regular maintenance, such as cleaning the sprayer after each use and using the appropriate paint filters, can help prevent clogs in the future.

Continue Reading

Airless Paint Sprayers FAQs

How To Paint Underside Of Pipe Fence With Airless Sprayer

Published

on

By

An image capturing a skilled painter effortlessly coating the underside of a sturdy pipe fence with an airless sprayer
  • In my opinion, painting the lower section of a pipe fence can be challenging. However, with the right tools and techniques, it can be very rewarding.

  • That’s why I’m here to share my expertise on how to paint the underside of a pipe fence with an airless sprayer. This method not only saves time but also ensures a smooth and even finish.

  • By using an airless sprayer, you can easily reach those hard-to-access areas and achieve professional results.

  • In this article, I will guide you through the step-by-step process, from preparing your fence for painting to properly storing your equipment.

  • So, if you’re ready to transform your fence and give it a fresh new look, let’s dive in and get started!

Key Takeaways

  • Painting the underside of a pipe fence with an airless sprayer provides protection against rust, corrosion, moisture seepage, and rot, while enhancing the fence’s aesthetic appeal and property value.
  • Regular inspection and maintenance of the painted fence, including touch-ups and applying a protective clear coat, ensures durability, longevity, and the preservation of the property’s stunning feature.
  • To prevent paint overspray and equipment damage, proper painting techniques, appropriate equipment and materials, surface covering, maintaining a suitable spraying distance, and proper cleaning and storage of the equipment should be followed.
  • Using an airless sprayer for painting offers efficient and even coverage, reduced overspray and waste, faster application, the ability to reach tight or difficult areas, and suitability for various types of surfaces.

Prepare Your Fence for Painting

Now that you’ve gathered all your materials, it’s time to get your fence ready for a fresh coat of paint.

Choosing the right paint color is important for achieving the desired look and protecting the metal surface from rust. Opt for a paint that is specifically designed for use on metal, as it will provide better adhesion and durability.

Before painting, it’s crucial to prepare the surface by sanding and priming it. Sanding helps to remove any rust or loose paint, ensuring a smooth and even finish.

After sanding, apply a coat of primer to promote better paint adhesion and prevent future rusting.

Advertisement

Once the surface is prepped and primed, you’re ready to move on to the next step of gathering your materials and equipment for painting the underside of your pipe fence.

Gather Your Materials and Equipment

To start, gather all the necessary materials and equipment for the job. This includes a sturdy ladder, protective clothing, and a reliable paint application tool.

When choosing the paint color, consider the overall look you want to achieve and how it will complement your surroundings.

For hard-to-reach areas, an airless sprayer with an extended nozzle can provide even coverage. Don’t forget to have a paint shield or drop cloth to protect the ground or nearby objects from overspray.

Once you have all your materials ready, it’s time to set up a proper work area for a smooth painting process.

Advertisement

Set Up a Proper Work Area

To create a comfortable and efficient workspace, follow these steps:

  • Organize your tools: Keep your paint, sprayer, and other equipment easily accessible so you don’t waste time searching for them.

  • Lay down a drop cloth: Protect the ground from overspray and drips by covering it with a drop cloth. This will also make cleanup easier.

  • Clear any obstacles: Remove any objects that could hinder your movement or potentially get in the way while you’re painting.

  • Designing a comfortable workspace: Arrange your tools and materials in a way that allows you to move freely and comfortably around the fence.

Maximizing efficiency during the painting process is crucial to save time and effort. By setting up a proper work area, you can work more efficiently and avoid unnecessary delays.

Now, let’s talk about how to practice proper safety precautions while painting the underside of a pipe fence.

Advertisement

Practice Proper Safety Precautions

Ensure your safety while painting by following proper precautions and taking necessary steps to protect yourself.

One important safety precaution is the usage of a respirator to protect your lungs from inhaling paint fumes. Make sure to wear a properly fitted respirator that is suitable for painting tasks.

Additionally, it is crucial to practice ladder safety when working on the underside of the pipe fence. Ensure the ladder is stable and secure before climbing up. Always maintain three points of contact with the ladder, and avoid overreaching to prevent falls or accidents.

Once you have taken these safety measures, you can confidently start painting the underside of the fence, knowing that you have done everything necessary to protect yourself.

Start Painting the Underside of the Fence

Advertisement

As you start painting the underside of the fence, there are a few tips to keep in mind for a successful paint job.

First, it’s important to avoid overspray. Adjust the spray pattern and pressure on your airless sprayer according to the manufacturer’s instructions to prevent wasted paint and a messy surrounding area.

When painting hard-to-reach areas, use an extension pole or a ladder to get closer to the fence. This will provide better control and accuracy.

In the next section, we will discuss proper technique and angles to achieve a smooth and even finish.

Advertisement

Use Proper Technique and Angles

Using the right technique and angles while painting is essential for achieving a professional finish. Hold the sprayer perpendicular to the surface and maintain a consistent distance of about 12 inches. Start spraying from one end, moving in a smooth, sweeping motion. Overlap each pass by 50% to prevent streaks and ensure complete coverage.

Pay attention to the spray angle as well. Aim for a 45-degree angle to reach all the nooks and crannies of the fence. This will help ensure that every part of the fence is evenly coated.

By using proper technique and angles, you can achieve a flawless paint job that will enhance the appearance and durability of your pipe fence.

Now, let’s discuss the importance of taking breaks and allowing for proper drying time.

Take Breaks and Allow for Drying Time

Take a moment to rest and give your project the time it needs to dry properly. Proper drying time management is crucial for achieving a flawless finish and avoiding paint drips on the underside of your pipe fence. Here are some tips to help you manage the drying process effectively:

Advertisement
  • Plan your breaks strategically: Take short breaks between painting sessions to allow the paint to dry partially. This will help prevent any accidental smudging or smearing when you resume painting.

  • Allow for sufficient drying time: Don’t rush the process. Ensure that each coat of paint has ample time to dry before applying the next one. This will help the paint adhere better and reduce the risk of drips or uneven coverage.

Inspect and touch up as needed: Once the paint has fully dried, inspect the surface for any missed spots or imperfections. Touch up these areas as necessary to ensure a flawless finish.

Transitioning into the next section, it’s important to thoroughly inspect your painted pipe fence to ensure a professional-looking result.

Inspect and Touch Up as Needed

Now that we have taken breaks and allowed for drying time, it’s important to inspect and touch up the painted pipe fence as needed. This step ensures that the paint job is thorough and long-lasting. Inspect the fence carefully, looking for any missed spots or areas that may require additional attention. Use touch up techniques such as applying paint with a small brush or roller to these areas. Additionally, selecting the right paint color is crucial for achieving a seamless finish. Consider matching the color to the existing fence or choosing a complementary shade. To emphasize these touch up techniques and color selection, refer to the following table:

Touch Up Techniques Selecting the Right Paint Color
Small brush or roller Match existing fence color
Fill in missed spots Choose complementary shade

With the fence inspected and touched up, we can now move on to the next section about clean up and properly storing our equipment.

Clean Up and Properly Store Your Equipment

To ensure the longevity of your newly painted pipe fence, it’s essential to clean up and store your equipment properly. According to a study conducted by paint manufacturers, cleaning and storing painting tools can extend their lifespan by up to 50%. Here are a few tips to help with proper equipment care:

Advertisement
  • Thoroughly clean your airless sprayer by flushing it with clean water or recommended solvent for the paint type used.
  • Remove any leftover paint from hoses, filters, and nozzles to prevent clogs and ensure smooth operation in the future.
  • Store your equipment in a clean, dry place to prevent rust or damage.

By following these steps, you can prevent paint overspray and keep your equipment in excellent condition for future projects.

Now, let’s move on to the next section and admire your newly painted fence.

Admire Your Newly Painted Fence

Stand back and bask in the beauty of your freshly coated and vibrant barrier. Painting the underside of a pipe fence offers numerous benefits.

Firstly, it provides an added layer of protection against rust and corrosion, extending the lifespan of your fence.

Additionally, painting the underside prevents moisture from seeping into the metal, reducing the risk of rot and weakening.

Moreover, a well-painted fence enhances the overall aesthetic appeal of your property, adding value and curb appeal.

Advertisement

To maintain and preserve your newly painted fence, it is essential to regularly inspect for any signs of wear or damage. Touch up any chipped or scratched areas promptly to prevent further deterioration.

Additionally, consider applying a protective clear coat to further enhance the durability and longevity of your paint job.

With proper care and maintenance, your beautifully painted fence will remain a stunning feature of your property for years to come.

Frequently Asked Questions

How long does it take for the paint to dry on the underside of the fence?

To speed up the drying process of paint on the underside of the fence, try using a fan or a heat gun. These techniques can help to increase air circulation and evaporate moisture faster. Additionally, using a paint with a quick drying formula can also help.

Can I use a regular paintbrush instead of an airless sprayer?

When it comes to painting the underside of a pipe fence, using a paintbrush instead of an airless sprayer has its pros and cons. While a brush offers more control, it may take longer and require more effort to achieve a smooth and even finish. To ensure a great result, make sure to choose a high-quality brush, use long and even strokes, and apply thin coats of paint.

Advertisement

Do I need to apply a primer before painting the underside of the fence?

I recommend applying a primer before painting the underside of the fence. Using a primer helps improve adhesion and durability of the paint. However, if you prefer not to use a primer, be aware that the paint may not adhere as well.

What type of paint is recommended for painting the underside of a pipe fence?

The best paint brand for painting the underside of a pipe fence is one that is specifically designed for overhead surfaces. Some tips for painting overhead surfaces include using a roller or brush, using a paint with good coverage, and applying thin, even coats.

How often should I touch up the paint on the underside of the fence?

I recommend touching up the paint on the underside of the fence every 1-2 years to maintain its durability and appearance. Some of the best paint brands for this task include Sherwin-Williams, Behr, and Rust-Oleum.

Conclusion

There you have it! Painting the underside of a pipe fence with an airless sprayer is not as daunting as it may seem. With a little preparation, the right equipment, and some safety precautions, you can achieve a professional-looking finish.

First, make sure to clean the surface of the pipe fence thoroughly. This will ensure that the paint adheres properly and lasts longer. Use a wire brush or sandpaper to remove any rust or loose paint.

Advertisement

Next, protect the surrounding area by covering it with drop cloths or plastic sheets. This will prevent overspray and keep your work area clean.

Now, it’s time to set up your airless sprayer. Follow the manufacturer’s instructions for assembly and make sure you have the appropriate paint and nozzle size for the job. Fill the sprayer with paint and test it on a scrap piece of material to ensure it’s working properly.

When you’re ready to start painting, position yourself underneath the pipe fence and hold the sprayer about 12 inches away from the surface. Begin spraying in a smooth, sweeping motion, overlapping each pass to ensure even coverage.

Take breaks as needed and allow for drying time between coats. This will help prevent drips and ensure a professional finish. Be sure to wear protective clothing, gloves, and a mask to protect yourself from paint fumes and overspray.

Once you’ve finished painting the underside of the pipe fence, step back and inspect your work. Look for any areas that may need touch-ups or additional coats. It’s better to catch these now than to discover them later.

Advertisement

Finally, clean up your equipment according to the manufacturer’s instructions. Properly store any leftover paint and dispose of any waste materials responsibly.

Now, step back and admire your newly painted fence. You’ve done a great job!

Continue Reading

Airless Paint Sprayers FAQs

How To Remove Exterior Paint From Airless Paint Sprayer

Published

on

By

An image showcasing a hand wearing protective gloves, holding an airless paint sprayer nozzle, while pointed towards a weathered wooden surface

If you have ever had to clean exterior paint from an airless paint sprayer, you know how time-consuming and labor-intensive it can be. Trust me, I have been there.

But fear not, my fellow DIY enthusiasts, because I’m here to share with you my tried-and-true method for getting that stubborn paint off your sprayer and back to its pristine state.

In this article, I will guide you through each step of the process, from gathering the necessary materials to properly storing the sprayer for future use.

With my knowledgeable, precise, and detailed instructions, you’ll be able to tackle this daunting task with confidence and efficiency.

So, let’s dive in and say goodbye to that pesky exterior paint once and for all!

Advertisement

Key Takeaways

  • Choose suitable cleaning solutions for the type of paint being used
  • Disconnect and prepare the sprayer for paint removal by removing the nozzle and spray tip
  • Use brushes or toothpicks to remove dried paint from the sprayer
  • Flush the sprayer with water to remove excess paint and clean the components thoroughly

Gather the necessary materials

To effectively remove exterior paint from an airless paint sprayer, it is imperative to gather all the necessary materials.

First, you will need cleaning solution alternatives that are suitable for the type of paint you are removing. It is important to choose the right cleaning solution to ensure the paint is effectively stripped off the sprayer.

Additionally, you should gather the best practices for spray gun maintenance. This includes having a brush or a toothpick to remove any dried paint from the nozzle or the tip of the gun. It is also helpful to have a clean cloth or paper towels to wipe down the exterior of the sprayer.

Once you have all the materials ready, you can proceed to disconnect and prepare the sprayer for paint removal.

Disconnect and prepare the sprayer

To prepare the sprayer for use, start by disconnecting it. This is crucial for safety reasons and to prevent accidents. Make sure the sprayer is turned off and unplugged from the power source.

Next, remove the nozzle and spray tip from the sprayer and clean them thoroughly. This step is important to avoid any clogs or blockages during the paint removal process.

Advertisement

In addition, check the hose for any leaks or damages. It’s always a good idea to ensure that the equipment is in proper working condition before using it.

To protect yourself from potential paint splatters, it’s recommended to wear protective gloves and goggles. Safety should always be a priority when working with any type of equipment.

Once the sprayer is disconnected and prepared, you can proceed to the next step of removing excess paint from the sprayer.

Remove excess paint from the sprayer

Advertisement

Now, let’s tackle any leftover paint that may be lingering in your trusty sprayer.

To remove excess paint from the sprayer, there are a few cleaning techniques and maintenance tips you can follow.

First, ensure that the sprayer is disconnected from the power source and any paint supply.

Then, remove the spray tip and guard, as well as any filters or screens.

Use a clean cloth or rag to wipe away any paint residue on the exterior of the sprayer.

Advertisement

For stubborn paint, you can use a brush or toothbrush to scrub it away. Remember to be gentle to avoid damaging the sprayer.

Once you have removed all excess paint, you can proceed to the next step of flushing the sprayer with water.

Flush the sprayer with water

After disconnecting the sprayer from the power source and any paint supply, it’s time to give it a good flush with water. Flushing is an essential step in removing excess paint and preventing clogs. To effectively flush the sprayer, follow these steps:

  1. Fill a bucket with clean water.
  2. Attach the sprayer’s hose to the bucket, ensuring a secure connection.
  3. Turn on the sprayer and spray the water into a waste container until it runs clear.
  4. Release the trigger and turn off the sprayer.
  5. Disconnect the hose from the bucket and empty any remaining water.

Common mistakes to avoid while flushing an airless paint sprayer include not using enough water and not thoroughly cleaning the sprayer’s components. By properly flushing the sprayer, you can maintain its longevity and prevent paint buildup. In the next section, we will discuss how to disassemble and clean the spray gun, ensuring its optimal performance.

Disassemble and clean the spray gun

Advertisement

To properly maintain your spray gun, you’ll need to disassemble and clean it thoroughly. Here are some cleaning techniques and maintenance tips to help you with this task:

  1. Start by removing the nozzle and the tip guard from the spray gun. This will allow you to access all the internal components that need to be cleaned.

  2. Use a cleaning brush or a toothbrush to scrub off any paint residue from the spray gun body. Pay close attention to the areas around the trigger and the air inlet.

  3. Soak the disassembled parts in a bucket of warm soapy water for about 15 minutes. This will help to loosen any stubborn paint particles.

  4. Rinse all the parts thoroughly with clean water to remove any soap residue. Make sure to inspect each component for any signs of damage or wear.

Now that the spray gun is clean, let’s move on to the next step of the process: cleaning the filters and nozzles.

Clean the filters and nozzles

After disassembling and cleaning the spray gun, it’s important to clean the filters and nozzles of your airless paint sprayer. These components play a crucial role in ensuring a smooth and consistent paint flow.

To clean the filters, remove them from the sprayer and rinse them thoroughly with water. Use a soft brush to gently scrub away any paint residue or debris.

For the nozzles, soak them in a bucket filled with warm soapy water for about 15 minutes. Then, use a small brush to remove any remaining paint or clogs. Rinse the nozzles with clean water and ensure they are completely dry before reassembling the sprayer.

Advertisement

These cleaning techniques and maintenance tips will help maintain the performance and longevity of your airless paint sprayer.

Moving on to the next section, let’s discuss how to use a cleaning solution for stubborn paint.

Use a cleaning solution for stubborn paint

If stubborn paint is giving you trouble, try using a cleaning solution to easily tackle the problem. Cleaning solutions are a great alternative to remove exterior paint from airless paint sprayers. They are specially formulated to break down and dissolve paint, making it easier to remove.

Here are three cleaning solution alternatives that can help you get the job done effectively and efficiently:

  • Acetone: This powerful solvent can quickly dissolve paint buildup and leave your sprayer clean and ready for use.
  • Vinegar: A natural and cost-effective option, vinegar can help prevent paint buildup and keep your sprayer in good condition.
  • Paint thinner: This versatile solution can effectively remove stubborn paint and restore your sprayer to its optimal performance.

By regularly using these cleaning solutions, you can prevent paint buildup and ensure the longevity of your airless paint sprayer. Once you have successfully cleaned the filters and nozzles, it’s time to move on to the next step: rinse and dry the sprayer components.

Rinse and dry the sprayer components

To ensure optimal performance and prevent potential damage, it is important to thoroughly rinse and dry all the components of your sprayer. Properly cleaning and maintaining your sprayer can increase its lifespan by up to 50%. Rinsing and drying the components is a crucial step in airless paint sprayer maintenance. After using a cleaning solution to remove stubborn paint, it is important to rinse off any residue to prevent clogs in the sprayer. Thoroughly rinse all the parts, including the spray gun, hose, and filters, using clean water. Once rinsed, make sure to dry each component thoroughly before reassembling the sprayer. This will help prevent any moisture-related issues and ensure that your sprayer functions at its best. Now, let’s move on to how to reassemble the sprayer and get it ready for your next painting project.

Advertisement

Reassemble the sprayer

To reassemble the sprayer, carefully fit the cleaned and dried components together like puzzle pieces, ensuring a snug and secure fit. Here are some important steps to follow in the reassembly process:

  • Start by reattaching the spray gun to the hose, making sure the connection is tight.
  • Next, insert the suction tube into the paint container, ensuring it is securely in place.
  • Attach the pump housing to the sprayer body, aligning the tabs and locking it into position.
  • Once the pump housing is secured, reattach the power cord to the sprayer.
  • Finally, double-check all connections to ensure they are tight and secure before testing the sprayer.

If you encounter any issues during the reassembly process, refer to the troubleshooting tips provided in the sprayer’s instruction manual.

Now that the sprayer is reassembled, let’s move on to how to properly store it for future use.

Properly store the sprayer for future use

After reassembling the sprayer, it’s time to store it properly for future use.

Properly cleaning the sprayer after each use is crucial to ensure its longevity and effectiveness.

First, I recommend flushing the sprayer with water or a cleaning solution to remove any leftover paint residue. This will prevent clogging and maintain the sprayer’s performance.

Advertisement

Next, disassemble the nozzle and clean it thoroughly, removing any dried paint or debris.

It’s also important to lubricate the sprayer’s moving parts to prevent rust and keep them in good working condition.

Regular maintenance is key to prolonging the life of your airless paint sprayer.

By following these steps and storing the sprayer in a clean, dry place, you’ll be ready for your next painting project with a sprayer that’s in top-notch shape.

Frequently Asked Questions

Can I use any type of cleaning solution to remove stubborn paint from the sprayer?

Sure, you can use a variety of cleaning solutions to tackle stubborn paint on your sprayer. Options like vinegar, rubbing alcohol, or paint thinner can be effective alternatives. Just be sure to follow safety precautions and test a small area first.

Advertisement

How often should I clean the filters and nozzles of the airless paint sprayer?

To keep your airless paint sprayer in optimal condition, it is important to clean the filters and nozzles regularly. This helps prevent clogs and ensures a smooth painting process. Troubleshoot common issues by checking for debris or worn-out parts.

Is it necessary to disassemble the spray gun in order to clean it properly?

To properly clean the spray gun, it is necessary to disassemble it. This allows for a thorough cleaning of all the components. There are also alternative cleaning solutions available that can help remove paint effectively.

Can I use a pressure washer to flush the sprayer with water?

I wouldn’t recommend using a pressure washer to flush an airless paint sprayer with water. It could damage the delicate parts. Instead, use a garden hose or consider alternative methods like using paint thinner or specialized cleaning solutions.

What is the best way to store the airless paint sprayer for future use?

Storing an airless paint sprayer properly is crucial for its future use. To ensure the best paint sprayer maintenance, clean the sprayer thoroughly, lubricate the parts, and store it in a dry, temperature-controlled environment. Preventing clogs in the airless paint sprayer is essential and can be achieved by using the right filters, strainers, and properly thinning the paint.

Conclusion

In conclusion, removing exterior paint from an airless paint sprayer requires careful preparation and thorough cleaning. By following the steps outlined in this article, you can ensure the longevity and efficiency of your sprayer.

Advertisement

Remember the old saying, ‘A clean tool is a happy tool.’ So, take the time to disassemble, clean, and reassemble your sprayer properly.

With regular maintenance and proper storage, your sprayer will be ready for future painting projects. Happy painting!

Continue Reading
Advertisement

Affiliate disclaimer

As an affiliate, we may earn a commission from qualifying purchases. We get commissions for purchases made through links on this website from Amazon and other third parties.

Advertisement

Trending