Painting the eaves of a home is like adding the final touches to a masterpiece. It brings everything together and gives the exterior a fresh, polished look. When it comes to painting eaves, using an airless sprayer is the preferred method.
Hi, I’m here to guide you through the process of painting your house eaves with an airless sprayer, step by step.
In this article, I’ll show you how to properly prepare the area, clean and prime the surface, mix and dilute the paint, set up and adjust the sprayer, and maintain a consistent technique for flawless results.
We’ll also cover how to clean up and store the sprayer, inspect and touch up any areas that need it, and finally, step back and enjoy the finished product – your freshly painted eaves.
So, let’s get started and transform your house into a work of art!
Key Takeaways
- Choose a paint color that complements the rest of the house
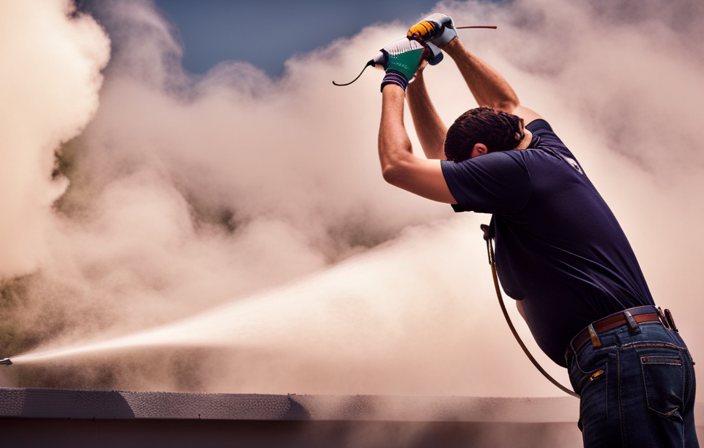
- Hold the sprayer about 12 inches away from the surface and move it in a steady back-and-forth motion
- Clean and store the sprayer properly after each use
- Inspect the painted surface for missed spots or imperfections and touch up as needed
Prepare the Area and Gather Materials
Before you can begin painting, make sure to clear away any debris and cover nearby plants and furniture with tarps to protect them from overspray. This step is crucial in preparing the area and ensuring a clean and smooth paint job.
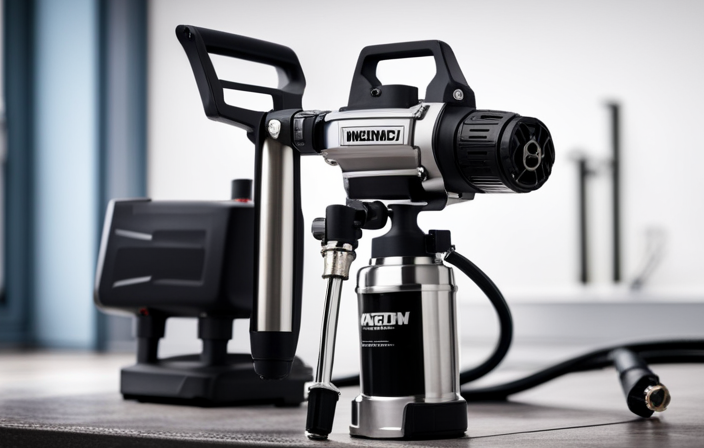
Next, gather all the necessary materials for the task. You’ll need an airless sprayer, paint, primer (if needed), masking tape, drop cloths, and a ladder. It’s important to choose the right materials to achieve the best results. The airless sprayer will provide an even and professional finish, while the primer will help the paint adhere better to the surface.
Once you’ve prepared the area and gathered all the materials, you can move on to the next step of cleaning and prepping the surface.
Clean and Prep the Surface
To ensure a flawless finish, it’s crucial to thoroughly clean and prepare the surface of your home’s architectural overhang. Proper surface preparation is essential for the paint to adhere properly and create a long-lasting result.
Start by removing any loose or peeling paint using a scraper or wire brush. Next, wash the eaves with a cleaning solution that’s appropriate for the material, such as a mild detergent or a specialized cleaner. Be sure to rinse thoroughly to remove any residue.
If there’s any mold or mildew present, use a mixture of bleach and water to eliminate it. Once the surface is clean and dry, you can proceed to prime the eaves, which’ll provide a smooth and even base for the paint to adhere to.
Prime the Eaves
When priming the eaves of a house, it’s important to choose the appropriate primer for the surface. I apply the primer evenly using an airless sprayer, making sure to cover all areas thoroughly.
After applying the primer, I allow it to dry completely before moving on to the next step of the painting process.
Choose the appropriate primer
For a flawless finish on your house eaves, you’ll need to select the perfect primer that will make your paint job stand out like never before! Choosing the right primer is crucial as it ensures proper adhesion and enhances the durability of your paint. Before applying primer, it’s important to prepare the surface by cleaning it thoroughly and removing any loose paint or debris. This will help the primer adhere better and create a smooth surface for painting.
To help you choose the appropriate primer, consider the following factors:
| Primer Type | Advantages | Disadvantages |
|---|---|---|
| Oil-based | Excellent adhesion, high durability | Strong odor, longer drying time |
| Latex | Quick drying, easy cleanup | Not as durable as oil-based |
| Shellac | Excellent stain-blocking properties | Limited surface compatibility |
Once you’ve selected the right primer, apply it evenly to the surface using an airless sprayer or a brush. This will ensure that your eaves are properly prepared for the final paint application.
Apply primer evenly to the surface
Achieving a flawless finish on your home’s exterior is like adding the final touch of magic to your masterpiece. To ensure a smooth and professional-looking paint job, here are three tips for applying primer evenly to the surface using an airless sprayer:
-
Start with a clean surface: Before applying the primer, make sure to thoroughly clean the eaves to remove any dirt, dust, or loose paint. This will help the primer adhere better and provide a more even finish.
-
Apply in thin, even coats: When using an airless sprayer, it’s important to apply the primer in thin and even coats. This will prevent drips and ensure a smooth finish. Move the sprayer in a steady motion, overlapping each stroke slightly for complete coverage.
-
Consider a second coat: After the first coat of primer has dried, inspect the surface for any missed spots or uneven areas. If necessary, apply a second coat for optimal coverage and a flawless finish.
Once the primer is applied, allow it to dry completely before proceeding with the next step of painting your eaves.
Allow primer to dry completely
To ensure a flawless and professional finish, it is imperative to allow the primer on your home’s exterior surface to fully dry before proceeding. Complete drying time for primer can vary depending on factors such as temperature and humidity. Rushing this step can lead to potential issues such as poor adhesion, uneven coverage, and a compromised final result. To help you understand the importance of allowing the primer to dry completely, consider the following table:
| Potential Issues | Causes |
|---|---|
| Poor adhesion | Insufficient drying time can prevent the primer from bonding properly to the surface. |
| Uneven coverage | Inadequate drying can result in streaks or patches of primer that haven’t dried fully. |
| Compromised final result | If the primer hasn’t dried completely, the subsequent layers of paint may not adhere properly, leading to a subpar finish. |
By ensuring that the primer is fully dry, you set the stage for a successful painting process. Now, let’s move on to the next step of the process: mixing and diluting the paint.
Mix and Dilute the Paint
Don’t be a paint-diluting amateur, grab that airless sprayer and mix that paint like a pro! When it comes to mixing and diluting the paint for your house eaves, it’s important to use the right techniques to achieve the perfect consistency.
Here are some key points to keep in mind:
- Measure accurately: Use a measuring cup or scale to ensure precise measurements of paint and solvent.
- Gradually add solvent: Start by adding a small amount of solvent to the paint and mix thoroughly. Continue adding solvent until you reach the desired consistency.
- Test the consistency: Dip a viscosity cup into the mixture and observe how quickly the paint flows. Adjust the paint or solvent as needed to achieve the ideal consistency.
- Strain the paint: Before pouring the mixture into the sprayer, strain it through a fine mesh to remove any impurities.
Now that your paint is properly mixed and diluted, it’s time to move on to setting up and adjusting the sprayer for a flawless paint job.
Set Up and Adjust the Sprayer
Get ready to transform your space with a flawless paint job by setting up and adjusting your trusty sprayer! Before you start, make sure to familiarize yourself with the manufacturer’s instructions for your specific airless sprayer model. To achieve the desired spray pattern, adjust the spray tip accordingly. A wider spray pattern is ideal for large areas, while a narrower pattern works best for detailed work. If you encounter common sprayer issues such as clogging or uneven spray, refer to the troubleshooting section of the manual. Additionally, ensure that the sprayer is properly cleaned and maintained to prevent any potential problems. Now that you have properly set up and adjusted your sprayer, you are ready to move on to the next section and start painting your house eaves flawlessly.
Start Painting
Begin your journey of transforming your space into a work of art by picking up the paintbrush and letting your creativity flow like a river, bringing life and color to every stroke.
When it comes to painting the house eaves with an airless sprayer, it’s important to utilize proper painting techniques for optimal results.
Start by choosing the right paint color that complements the overall aesthetic of your home. Consider factors such as the style of your house, existing colors, and personal preference.
Once you have the perfect color, it’s time to start painting. Hold the sprayer about 12 inches away from the surface and move it in a steady, back-and-forth motion.
Maintain a consistent technique to ensure an even coat of paint. Transitioning into the subsequent section about maintaining a consistent technique, it’s crucial to avoid overlapping or spraying too much in one area.
Maintain a Consistent Technique
Now that we’ve started painting, it’s crucial to maintain a consistent technique to achieve a professional finish. To do this, I make sure to keep the sprayer at a consistent distance from the eaves and move it smoothly across the surface. This helps to avoid overspray and drips, which can ruin the overall look of the paint job.
By maintaining a steady hand and a consistent spraying motion, I’m able to evenly cover the eaves with a smooth coat of paint.
Once the eaves are completely painted, it’s time to move on to the next step: clean up and store the sprayer. This ensures that the sprayer stays in good condition for future use and prevents any paint from drying inside the machine.
Clean Up and Store the Sprayer
After completing the final coat, it’s essential to properly clean and store the sprayer to maintain its longevity. Proper sprayer maintenance is crucial to ensure its continued performance.
The first step in cleaning the sprayer is to flush out any remaining paint by running water through it until the water runs clear. Next, disassemble the sprayer and clean each part thoroughly using a brush and soapy water. Be sure to remove any paint residue or debris that may have accumulated.
Once all the parts are clean, allow them to dry completely before reassembling the sprayer. When it comes to storage, it’s best to keep the sprayer in a cool, dry place, away from direct sunlight. This will help prevent any damage to the sprayer and ensure its longevity.
Inspect and touch up any areas that may need attention before moving on to the next step.
Inspect and Touch Up
Now that the paint has dried completely, it’s time to inspect the eaves for any missed spots or imperfections.
I carefully examine every inch of the painted surface to ensure a flawless finish.
If I find any areas that need touching up, I take the time to fix them, ensuring a perfect result.
Allow the paint to dry completely
Once the paint has dried completely, you can proudly admire your freshly painted eaves. The importance of proper drying time for paint on eaves can’t be overstated. It ensures a long-lasting finish that’ll withstand weather conditions and maintain its vibrant color.
To ensure complete drying of paint on eaves, here are some tips:
-
Allow sufficient time: Make sure to wait for the recommended drying time mentioned on the paint can. This’ll vary depending on the type of paint used.
-
Optimal weather conditions: Choose a dry and warm day to paint your eaves. Humidity and low temperatures can significantly slow down the drying process.
-
Adequate ventilation: Ensure good airflow around the painted eaves by opening windows or using fans. This helps the paint dry faster and evenly.
Once the paint has dried, it’s time to inspect the eaves for missed spots or imperfections.
Inspect the eaves for missed spots or imperfections
Take a close look at the eaves to ensure that every nook and cranny has received a thorough coat of paint, just like inspecting a meticulously frosted cake to ensure that every inch is covered in delicious icing. This step is crucial in achieving a flawless finish for your house eaves.
Look carefully for any missed spots or imperfections that might have occurred during the painting process. Pay attention to corners, edges, and hard-to-reach areas. To ensure thorough inspection, use a bright light source and move around the eaves from different angles.
If you spot any missed spots or imperfections, mark them with a small piece of tape or make a mental note. This will help you when it’s time to touch up any areas as needed in the subsequent section about ‘touch up any areas as needed’.
Touch up any areas as needed
To achieve a flawless finish, make sure you go back and fix any areas that need a little extra attention. Here are some touch-up techniques to ensure your eaves look perfect:
-
Inspect the eaves: Carefully examine the painted surface for any missed spots or imperfections. Look for areas where the paint may have dripped or pooled.
-
Sand and clean: Use sandpaper to smooth out any rough spots or drips. Clean the surface with a mild detergent and water to remove any dirt or debris.
-
Patch and fill: If there are any holes or cracks, use a patching compound to fill them in. Smooth it out with a putty knife and let it dry before painting over it.
-
Feather the edges: When touching up, feather the edges of the new paint into the existing paint to create a seamless blend.
Avoid these common mistakes in touch-up: overapplying paint, not blending the edges, or using mismatched paint colors.
With these touch-up techniques, your eaves will look flawless. Now, enjoy your freshly painted eaves and admire the transformation.
Enjoy Your Freshly Painted Eaves
Now that I’ve finished painting my house eaves with an airless sprayer, it’s time to sit back and admire the vibrant transformation. The eaves look fresh and clean, thanks to the efficient and even application of paint using the airless sprayer.
Choosing the right paint color was important to ensure that it complements the rest of the house. I followed some tips for selecting the perfect shade, considering the architectural style and the surrounding environment.
Additionally, proper cleaning of paint brushes is essential to maintain their quality and prolong their lifespan. I made sure to clean them thoroughly with warm soapy water, removing any excess paint and allowing them to dry completely before storing them away.
Now, I can enjoy my freshly painted eaves and take pride in a job well done.
Frequently Asked Questions
What type of paint is best for painting house eaves with an airless sprayer?
The best paint brands for painting house eaves with an airless sprayer are Sherwin-Williams and Behr. To achieve a smooth finish, make sure to properly prepare the surface, use a high-quality paint, and apply multiple thin coats.
How long does it take for the paint to dry on house eaves after using an airless sprayer?
To speed up paint drying on house eaves after using an airless sprayer, ensure proper ventilation and temperature control. The type of paint can affect drying time, with some formulations drying faster than others.
Can an airless sprayer be used to paint house eaves that have existing paint?
Yes, an airless sprayer can be used to paint house eaves with existing paint. The pros of using an airless sprayer for this task are faster coverage and a smoother finish. However, it is important to properly prepare the surface and use the correct painting techniques.
Is it necessary to wear protective gear while using an airless sprayer to paint house eaves?
Yes, wearing protective gear is necessary when using an airless sprayer to paint house eaves. Safety precautions such as goggles, gloves, and a respirator should be taken to prevent any potential harm or accidents.
Are there any specific safety precautions that need to be taken when using an airless sprayer to paint house eaves?
When using an airless sprayer to paint house eaves, it is important to take safety measures. This includes wearing protective gear, such as goggles and a mask, and using proper technique to avoid accidents.
Conclusion
In conclusion, painting your house eaves with an airless sprayer is a simple and efficient way to give your home a fresh new look. By preparing the area, cleaning and priming the surface, mixing and diluting the paint, and setting up and adjusting the sprayer, you can achieve professional-looking results.
Remember to maintain a consistent technique and clean up and store the sprayer properly. With a final inspection and touch up, you’ll be able to enjoy your newly painted eaves and admire the improved curb appeal of your home. Happy painting!