
Positioned in front of my aged stucco residence in Florida, I was consumed by a powerful longing for a refreshed look. Years of constant exposure to the sun and rain had taken their toll, leaving the exterior dull and faded.
But I knew that with the right tools and techniques, I could transform my home into a vibrant and inviting oasis once again. That’s when I discovered the power of an airless paint sprayer. This remarkable tool, coupled with the right preparation and a little bit of elbow grease, can breathe new life into any stucco surface.
In this article, I will guide you through the step-by-step process of painting a stucco house in Florida using an airless paint sprayer. So grab your sprayer and let’s embark on this transformative journey together.
Key Takeaways
- Properly prepare the stucco surface by cleaning and removing loose dirt or debris
- Use the airless paint sprayer with the right distance, speed, and pressure for consistent and even coverage
- Allow sufficient drying time between coats and maintain proper ventilation for better adhesion
- Regularly clean and maintain the airless paint sprayer for optimal performance and longevity
Prepare Your Stucco Surface
Now it’s time to roll up your sleeves and get that stucco surface prepped for a flawless paint job – trust me, you won’t believe the stunning transformation that’s about to take place!
Start by cleaning the stucco surface thoroughly. Remove any loose dirt, debris, and mildew using a pressure washer or a stiff brush. Pay special attention to any cracks or holes in the stucco and patch them up using a stucco patching compound.
Once the surface is clean and patched, it’s time to apply a primer coat. This helps the paint adhere better and ensures a smooth and long-lasting finish. Use a high-quality acrylic primer and apply it evenly with a roller or brush. Allow the primer to dry completely before moving on.
With the stucco surface cleaned and primed, you’re now ready to gather your materials and equipment for the next phase of the painting process.
Gather Your Materials and Equipment
First, make sure you’ve got all the necessary gear and tools to tackle this massive stucco project in the scorching heat of the Sunshine State.
Choosing the right paint color is crucial for achieving the desired look for your stucco house. Opt for lighter shades that’ll reflect sunlight and prevent heat absorption. Additionally, consider using paint with built-in UV protection to prevent fading and damage caused by the intense Florida sun.
When painting in hot weather, it’s important to work efficiently to avoid the paint drying too quickly. Start early in the morning or late in the afternoon when temperatures are cooler. Keep your paint and equipment in a shaded area to prevent overheating.
Now, let’s move on to preparing the paint and sprayer for the next step.
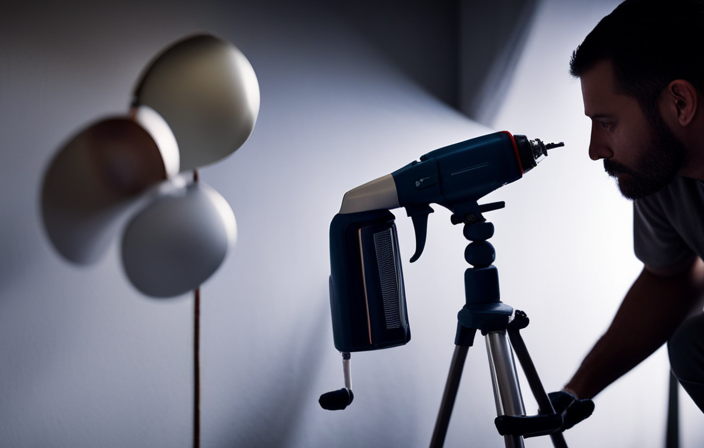
Prepare the Paint and Sprayer
Before starting the painting process, I need to ensure that the paint is properly prepared. If the paint is too thick, I’ll dilute it according to the manufacturer’s instructions.
Once the paint is ready, I’ll set up the airless paint sprayer, making sure all the necessary components are properly connected.
To ensure that the sprayer is functioning correctly, I’ll test it by spraying a small amount of paint onto a test surface and adjusting the pressure as needed.
Dilute the Paint if Necessary
If you want your stucco house in Florida to have a flawless finish, you might need to dilute the paint just a touch. Diluting the paint helps it adhere better to the stucco surface and ensures a smooth and even application.
The dilution ratio will depend on the specific paint brand you’re using, so it’s important to follow the manufacturer’s instructions. Some of the best paint brands for stucco houses in Florida include Behr, Sherwin-Williams, and Benjamin Moore. These brands offer high-quality paints that are formulated to withstand the Florida climate.
Once you’ve determined the correct dilution ratio, mix the paint thoroughly to ensure an even consistency. With the paint properly diluted, you can now move on to setting up and testing the airless paint sprayer for your stucco house in Florida.
Set Up and Test the Airless Paint Sprayer
Now it’s time to get your airless paint sprayer set up and ready to go for a flawless finish on your stucco home in sunny Florida! Before you start painting, it’s important to test the paint sprayer and troubleshoot any issues that may arise. To ensure a smooth process, follow these steps:
| Step | Instructions |
|---|---|
| 1 | Connect the paint sprayer to a power source and ensure it is turned off. |
| 2 | Attach the spray tip to the sprayer gun and tighten it securely. |
| 3 | Fill the paint container with the diluted paint, making sure not to overfill. |
| 4 | Turn on the sprayer and adjust the pressure settings according to the manufacturer’s instructions. |
By testing the paint sprayer beforehand, you can identify and fix any problems, such as clogs or uneven spray patterns. Once you are satisfied with the performance, you are ready to start painting and transform your stucco house into a work of art.
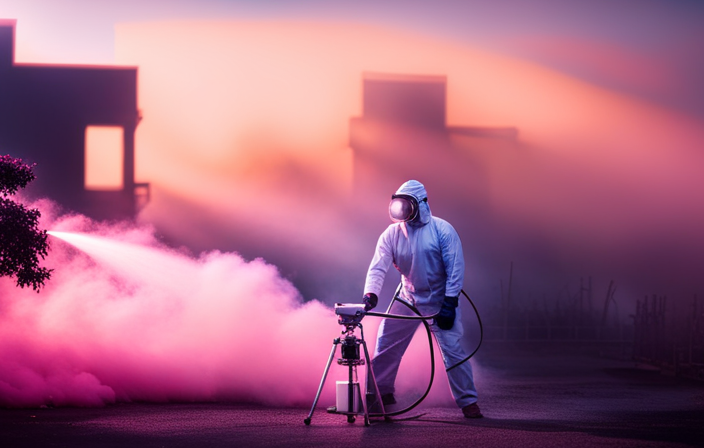
Start Painting
To start painting the stucco house in Florida with an airless paint sprayer, it’s important to ensure that you have enough paint for the job. Did you know that on average, a gallon of paint can cover approximately 350 square feet of stucco surface?
This is an important tip to keep in mind to achieve a smooth paint finish. Another tip is to avoid common mistakes while painting stucco surfaces, such as applying too much paint at once, which can lead to drips and uneven coverage. It’s also important to maintain a consistent distance and speed while spraying to ensure an even coat.
Now that you have your paint ready and know some key tips, let’s move on to the next step of working in sections for better control and coverage.
Work in Sections
When painting a stucco house in Florida with an airless paint sprayer, it’s important to work in sections. By dividing the stucco into manageable sections, it becomes easier to focus on one area at a time and ensure a thorough and even coat of paint.
I recommend starting at the top and working your way down, painting one section at a time, to avoid any streaks or drips.
Divide the Stucco into Manageable Sections
First, start by dividing the stucco into smaller, more manageable sections for a smooth and efficient painting process. By breaking the job into sections, you can better manage your time and ensure that you don’t overspray onto areas that have already been painted. To help visualize this process, use the following table:
| Section | Dimensions | Prep Work |
|---|---|---|
| Front | 10ft x 15ft | Clean, Repair Cracks |
| Left Side | 8ft x 20ft | Cover Windows, Mask Trim |
| Back | 12ft x 12ft | Pressure Wash, Remove Loose Stucco |
| Right Side | 8ft x 20ft | Cover Windows, Mask Trim |
| Top | 20ft x 30ft | Clean, Repair Cracks |
By dividing the stucco into manageable sections, you can focus on one area at a time, ensuring that each section is painted properly before moving on. This method allows for a more efficient and thorough paint job.
Paint One Section at a Time
With each brushstroke, the colors dance across the stucco canvas, transforming the house into a vibrant masterpiece. When painting a stucco house in Florida, it’s important to work efficiently and avoid overspray.
To do this, I recommend painting one section at a time. By focusing on smaller areas, you can ensure a more even and thorough application of paint. Start by applying a thin coat of primer, working from the top down. Once the primer’s dry, move on to the topcoat, using smooth and steady strokes. Take care to overlap each stroke slightly to prevent any missed spots.
By working in manageable sections, you can maintain control over the paint sprayer, reducing the risk of overspray and achieving a professional finish.
Now, let’s move on to the next section and discuss the importance of using proper technique.
Use Proper Technique
When using an airless paint sprayer to paint a stucco house in Florida, it’s important to use proper technique.
Firstly, hold the sprayer at the right distance from the surface, typically around 12 inches. This ensures an even and consistent application of paint.
Secondly, maintain a consistent speed and pressure while spraying to achieve a smooth and professional finish.
By following these key points, you can ensure a successful painting project with your airless paint sprayer.
Hold the Sprayer at the Right Distance
For a flawless finish, make sure you’re holding the sprayer at the perfect distance from the stucco – you’ll be amazed at the stunning transformation! To achieve optimal results, it is crucial to maintain the right distance between the sprayer and the stucco surface. Holding the sprayer too close can lead to an uneven application and excessive paint buildup, while holding it too far away can result in a thin and patchy coat. The ideal distance for spraying stucco with an airless paint sprayer is typically around 12 to 18 inches. To help you visualize the correct distance, refer to the table below:
| Distance from Sprayer to Stucco |
|---|
| 12-14 inches |
| 15-17 inches |
| 18-20 inches |
By maintaining the proper distance, you ensure a smooth and consistent coverage. Now, let’s move on to the next step and learn how to maintain a consistent speed and pressure.
Maintain a Consistent Speed and Pressure
To achieve a flawless finish, it’s crucial to maintain a consistent speed and pressure while operating the sprayer, just like a skilled musician playing a delicate instrument. Here are some key tips to help you maintain that consistency:
-
Start with a practice run: Before you begin painting, do a few test sprays on a scrap surface to get a feel for the speed and pressure needed.
-
Find your rhythm: Once you start painting, try to maintain a steady pace. Avoid speeding up or slowing down, as it can result in an uneven application.
-
Adjust pressure as needed: Depending on the texture of the stucco and the thickness of the paint, you may need to adjust the pressure settings on the sprayer. Test and make adjustments as necessary.
-
Keep your arm steady: Hold the sprayer with a firm grip and keep your arm steady as you move it across the surface. This will help ensure a consistent application.
-
Practice overlapping strokes: To avoid streaks or missed spots, overlap each stroke by about 50% with the previous one.
Now that you know how to maintain a consistent speed and pressure, let’s move on to the next step: applying multiple coats if necessary.
Apply Multiple Coats if Necessary
When applying multiple coats of paint to a stucco house in Florida using an airless paint sprayer, it’s essential to allow sufficient drying time between each coat.
This will ensure that the paint adheres properly and prevents any potential issues such as peeling or bubbling.
Additionally, it’s important to check for even coverage after each coat to ensure a smooth and uniform finish.
By following these steps, you can achieve a professional-looking paint job that will withstand the Florida climate.
Allow Sufficient Drying Time Between Coats
Make sure you give each coat of paint enough time to dry, so your stucco house can soak up the color like a thirsty desert flower. Here are some suggested discussion ideas to keep in mind while allowing for sufficient drying time between coats:
-
Importance of proper ventilation during the drying process: Good air circulation helps the paint dry faster and ensures an even finish. Open windows, use fans, or consider using dehumidifiers in humid Florida weather.
-
Tips for determining the ideal drying time between coats for different weather conditions in Florida: Factors like temperature and humidity can affect drying time. Generally, wait at least 4-6 hours between coats, but check the paint can for specific recommendations.
-
Avoid rushing the process: It’s tempting to apply the next coat quickly, but allowing ample drying time ensures better adhesion and a longer-lasting finish.
-
Patience pays off: Don’t be in a hurry to finish. Giving each coat enough time to dry thoroughly will result in a more professional-looking paint job.
Now, let’s move on to the next section and check for even coverage.
Check for Even Coverage
Ensure that you carefully inspect the surface, checking for any areas that may require additional touch-ups or a second coat to achieve a smooth and flawless finish. Achieving even coverage is crucial for a professional-looking paint job on your stucco house.
To ensure even coverage, start by using the correct technique when spraying. Hold the sprayer at a consistent distance from the surface and move it in a steady, overlapping motion. Pay extra attention to corners, edges, and areas that may be difficult to reach. If you notice any areas with uneven coverage, troubleshoot the issue by adjusting the sprayer’s pressure or adjusting your technique.
Additionally, make sure to check for any drips or runs and fix them immediately. With proper even coverage techniques, your stucco house will have a beautiful, uniform finish.
Now, let’s move on to the next section on how to clean and maintain your sprayer.
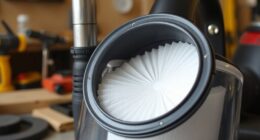
Clean and Maintain Your Sprayer
To keep your sprayer in top shape, don’t forget to regularly clean and maintain it so you can continue enjoying the smooth and efficient painting process. Here are some important steps to follow for cleaning and troubleshooting your sprayer:
-
Flush the sprayer with water after each use to remove any leftover paint or debris.
-
Use a cleaning solution specifically designed for airless sprayers to thoroughly clean the system.
-
Check and clean the filters regularly to ensure proper paint flow and prevent clogging.
-
Inspect the spray tip for any signs of wear or damage and replace if necessary.
-
Lubricate the piston and packings to keep them functioning smoothly.
By properly cleaning and maintaining your sprayer, you can prevent any issues during the painting process and ensure a professional finish.
Now, let’s move on to the finishing touches to complete your stucco house painting project.
Finishing Touches
When finishing up the painting process, it’s important to pay attention to any missed spots and touch them up with a brush or roller. This will ensure a seamless and professional-looking finish.
Additionally, it’s essential to remove any masking or protection that was used during the painting process, such as plastic sheets or tape, to reveal the full beauty of the freshly painted stucco surface.
Touch Up any Missed Spots
Don’t worry if you missed any spots while painting your stucco house in Florida with an airless paint sprayer because there’s an easy way to touch them up.
One of the most common touch-up mistakes is not having enough paint on the brush or roller, resulting in uneven coverage. To avoid this, make sure to load the brush or roller with enough paint and apply it in thin, even coats.
Another mistake is not blending the touch-up spots with the existing paint. To achieve a seamless finish, feather the edges of the touch-up spots by lightly blending them into the surrounding painted areas. This will help to smooth out any noticeable lines or color variations.
Once you’ve touched up any missed spots, you can move on to the next step of removing any masking or protection.
Remove any Masking or Protection
Now it’s time to uncover your beautifully transformed masterpiece and reveal the true potential of your hard work. Before you can fully admire your newly painted stucco house, it’s important to remove any masking or protection that was put in place during the painting process. Here are some safety precautions to keep in mind while doing this:
- Wear gloves and safety goggles to protect your hands and eyes from any paint residue.
- Use a scraper or a putty knife to gently remove any tape or plastic sheeting from windows, doors, and other surfaces.
- Be careful not to damage the freshly painted stucco while removing the masking materials.
- Dispose of the used tape and plastic properly to avoid any environmental hazards.
- Finally, inspect the entire house for any remaining paint residue and use a damp cloth or sponge to remove it.
Now that you’ve removed all the masking and protection, it’s time to enjoy your newly painted stucco house and bask in the satisfaction of a job well done.
Enjoy Your Newly Painted Stucco House
Remember to take a step back and admire your beautifully painted stucco house in Florida! Choosing the right paint color for your stucco house is crucial in achieving the desired look. Opt for light colors to reflect the sun’s rays and keep your house cooler in the hot Florida climate.
Before painting, it’s essential to properly clean the stucco surface to ensure a smooth and long-lasting finish. Start by removing any loose dirt or debris using a pressure washer or a stiff brush. Then, mix a solution of water and mild detergent, scrubbing the surface gently to remove any mold or mildew. Rinse thoroughly and allow it to dry completely before applying the paint.
Following these steps will help you achieve a stunning and durable paint job for your stucco house in Florida.
Frequently Asked Questions
How long does it typically take to paint a stucco house in Florida with an airless paint sprayer?
On average, it takes about 3-4 days to paint a stucco house in Florida with an airless paint sprayer. However, with a few tips and tricks, like proper surface preparation and efficient spraying techniques, you can finish the job even faster.
Can I use a regular paint brush or roller instead of an airless paint sprayer to paint my stucco house in Florida?
I cannot use a regular paint brush or roller instead of an airless paint sprayer for my stucco house in Florida. The airless paint sprayer is necessary for an even and efficient application on the textured surface.
What type of paint is best for painting a stucco house in the Florida climate?
In the hot Florida climate, I’ve found that the best paint brands for stucco houses are those with high durability and weather resistance. To prepare the stucco surface, clean it thoroughly and repair any cracks before applying the paint.
Is it necessary to apply a primer before painting a stucco house with an airless paint sprayer?
Applying primer before painting a stucco house is not necessary but can provide better adhesion and durability. Pros of using an airless paint sprayer include faster and more even coverage, while cons include overspray and the need for proper technique.
How often should I clean and maintain my airless paint sprayer when painting a stucco house in Florida?
Cleaning my airless paint sprayer for my stucco house in Florida is as crucial as breathing! I recommend cleaning it thoroughly after each use, and conducting regular maintenance like checking filters, lubricating parts, and inspecting for any damages.
Conclusion
After following the steps outlined in this guide, I can confidently say that painting a stucco house in Florida with an airless paint sprayer isn’t as daunting as it may seem.
By properly preparing the surface, gathering the necessary materials, and using the sprayer effectively, you can achieve a professional-looking finish.
Remember to work in sections and apply multiple coats if needed for optimal coverage. Don’t forget to clean and maintain your sprayer for future use.
Now, sit back and admire your coincidental masterpiece!