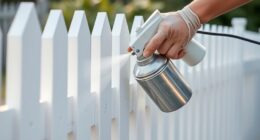
I enter the kitchen, noticing the tired cabinets that are showing signs of age. It’s time for a new beginning, a renovation to revitalize this area. And I have the perfect tool for the job – an airless sprayer.
In this article, I’ll guide you through the process of painting cabinets with this powerful and efficient device.
With a few simple steps, we’ll turn those dull and outdated cabinets into stunning features that will make your kitchen shine. I’ll show you how to:
- Gather the necessary supplies
- Prepare your workspace
- Disassemble the cabinets for a thorough cleaning
We’ll then move on to:
- Priming
- Painting
Ensuring a smooth and professional finish.
But it doesn’t stop there. I’ll also share tips and tricks to help you maintain your airless sprayer and keep it in top shape.
So, join me on this journey as we transform your cabinets and create a kitchen you’ll be proud of. Let’s get started!
Key Takeaways
- Proper preparation is crucial for a successful cabinet painting project, including gathering supplies and preparing the workspace.
- Disassembling and cleaning the cabinets thoroughly before painting is important for achieving a smooth and flawless finish.
- Using a high-quality primer and applying it evenly with an airless sprayer will help create a solid base for the paint and ensure a professional result.
- Allowing the cabinets to dry completely before reassembling them and checking for proper alignment and functionality is essential for a finished look that both looks great and functions properly.
Gather Your Supplies
Before you dive into painting your cabinets with an airless sprayer, make sure you’ve got all your supplies ready to go. To achieve a professional-looking finish, it’s important to have the right tools and materials. For cabinet painting techniques, you’ll need an airless sprayer, sandpaper, painter’s tape, a drop cloth, and a paintbrush for any touch-ups.
As for the best paint colors for cabinets, neutrals like white, gray, or beige are popular choices as they can easily match different kitchen styles. Once you have all your supplies, you can move on to preparing your workspace, ensuring a clean and well-organized area for painting. This will help you achieve the best results and make the process easier.
Prepare Your Workspace
Prepare your workspace by clearing the clutter and setting the stage for your cabinet transformation. Organize your workspace to ensure easy access to all necessary tools and materials. Remove unnecessary items from the area to create a clean and clutter-free environment.
Next, prepare the surface of your cabinets by cleaning them thoroughly. Use a mild detergent and warm water to remove dirt, grease, or grime. Dry the cabinets completely before moving on to the next step.
Now that your workspace is organized and the cabinets are clean, you are ready to disassemble and clean the cabinets in preparation for painting.
Disassemble and Clean the Cabinets
To achieve a flawless finish, it’s crucial to break down and thoroughly cleanse your cabinetry. Here are some cleaning techniques and steps to follow before painting your cabinets:
-
Start by removing all hardware, such as handles, knobs, and hinges, to ensure a smooth painting process.
-
Use a mild detergent or a degreaser to clean the cabinets thoroughly, removing any built-up grease or dirt.
-
Scrub the surfaces gently with a soft brush or sponge, paying extra attention to areas that may have accumulated grime over time.
-
Rinse the cabinets with clean water and allow them to dry completely before moving on to the next step.
-
For a more thorough cleaning, you can also use a mixture of vinegar and water to remove any stubborn stains or residue.
Once your cabinets are disassembled and cleaned, you can proceed to prime them for painting.
Prime the Cabinets
After disassembling and cleaning the cabinets, it’s essential to prime them before painting. This step is crucial because it improves the paint’s adherence and durability.
To begin priming, choose a high-quality primer specifically designed for cabinets. Apply the primer evenly using an airless sprayer, making sure to cover all surfaces thoroughly. Depending on the primer and your desired finish, you may need to apply multiple coats. Consider recoat options recommended by the manufacturer for optimal results.
As for drying time, it’s best to follow the instructions provided on the primer’s packaging. Typically, the primer should dry within a few hours, but it’s always a good idea to allow for extra drying time to ensure a smooth and flawless finish.
Once the cabinets are primed, it’s time to move on to the next step: painting the cabinets.
Paint the Cabinets
Now it’s time for you to give your cabinets a fresh new look by applying a beautiful coat of paint. When painting cabinets with an airless sprayer, it’s important to use proper painting techniques to achieve a smooth and professional finish. Start by choosing the right paint color that complements your kitchen or bathroom decor. Consider the overall color scheme and style of the room to make a cohesive choice. To engage the audience, here’s a helpful table to compare different paint colors:
| Paint Color | Description |
|---|---|
| White | Classic and timeless |
| Gray | Modern and sophisticated |
| Blue | Calming and serene |
| Green | Fresh and vibrant |
Once you’ve chosen your paint color, follow the manufacturer’s instructions to properly thin the paint and adjust the sprayer settings. Apply the paint using smooth and even strokes, overlapping each pass for consistent coverage. After painting, let the cabinets dry before moving on to the next step of the process.
Let the Cabinets Dry
As the fresh coat of paint settles on the cabinets, a transformation begins to take shape, revealing a rejuvenated and stylish space. Now comes the crucial step of letting the cabinets dry properly.
Cabinet drying time is essential to ensure a flawless finish and to prevent any smudging or damage. The drying time can vary depending on factors such as humidity and the type of paint used. It is recommended to allow at least 24 hours for the cabinets to dry completely.
To speed up the drying process, you can use various techniques such as using fans, opening windows for ventilation, or using a dehumidifier.
Once the cabinets are thoroughly dry, you can proceed to the next step of reassembling them, bringing your newly painted cabinets back to life.
Reassemble the Cabinets
Now that the cabinets are dry, it’s time to reassemble them.
Start by reattaching the cabinet doors, drawers, and hardware, making sure they are properly aligned and functional.
Once everything is back in place, give the cabinets a final cleaning and polish to achieve a finished look.
Reattach Cabinet Doors, Drawers, and Hardware
First, carefully align the cabinet doors, drawers, and hardware, making sure they fit snugly into place, like puzzle pieces coming together to complete a beautiful picture.
When reattaching cabinet doors, it’s important to choose the right hardware for your cabinets. Consider the style, size, and material of the hardware to ensure it matches the overall aesthetic of your cabinets.
Additionally, here are some tips for reattaching cabinet doors smoothly:
- Check for any damages or loose screws.
- Use a level to make sure the doors are straight.
- Adjust the hinges if needed.
Once the doors are securely attached, move on to the drawers and hardware. Ensure proper alignment and functionality by testing the doors and drawers, making any necessary adjustments. This will guarantee a finished product that not only looks great but functions properly as well.
Ensure Proper Alignment and Functionality
To ensure your newly reattached cabinet doors and drawers function properly, it is important to take the necessary steps to ensure proper alignment and functionality.
First, check if the doors and drawers are aligned with the surrounding cabinets. If they are not, adjust the hinges or slides accordingly to achieve a seamless look.
Next, test the functionality of the doors and drawers by opening and closing them multiple times. This will help you determine if they open smoothly and close securely.
If you encounter any issues during this process, such as sticking or misalignment, it is important to address them promptly. Proper maintenance is crucial in ensuring the long-term functionality of your cabinets.
Common issues can often be resolved by tightening loose screws, lubricating hinges, or adjusting slides. Troubleshoot these problems to ensure that your cabinets not only look visually appealing but also function properly.
Once you have addressed any alignment or functionality issues, you can move on to the next step: cleaning and polishing the cabinets for a finished look.
Clean and Polish the Cabinets for a Finished Look
Enhance the captivating allure of your cabinets by giving them a radiant makeover through a meticulous cleaning and polishing process. To achieve a professional finish, follow these steps:
- Gather the necessary cleaning tools, such as a mild detergent, microfiber cloths, and a soft brush.
- Remove any dirt, grease, or grime from the cabinets using the detergent and a damp cloth.
- Pay special attention to the corners, edges, and intricate details of the cabinets.
Once the cabinets are clean, use a dry microfiber cloth to remove any excess moisture and allow them to air dry completely.
Finally, apply a protective finish, such as a wax or polish, to restore the cabinets’ shine and protect them from future damage.
With the cabinets now clean and polished, it’s important to shift our focus to the proper maintenance of your airless sprayer.
[Transition into next section]Clean and Maintain Your Airless Sprayer
When it comes to cleaning and maintaining your airless sprayer, there are three key points to keep in mind.
First, make sure to flush the sprayer with water or a cleaning solution after each use to remove any leftover paint.
Second, check for and remove any clogs or buildup in the sprayer to ensure proper functioning.
Lastly, store the sprayer properly for future use to prevent damage and extend its lifespan.
By following these steps, you can keep your airless sprayer in great condition and ready for your next painting project.
Flush the Sprayer with Water or Cleaning Solution
After you’ve finished painting your cabinets with the airless sprayer, it’s time to flush out any remaining paint by running water or a cleaning solution through the sprayer. This step is crucial to ensure that your sprayer stays in good condition and ready for future use.
Here are some alternative cleaning solutions you can use if you don’t have a specific sprayer cleaner on hand: a mixture of warm water and dish soap, vinegar and water solution, or rubbing alcohol.
By flushing the sprayer with water or a cleaning solution, you can prevent clogs and buildup that may affect the performance of your sprayer.
In the next section, we will discuss how to remove any clogs or buildup that may have occurred during the painting process.
Remove any Clogs or Buildup
To ensure a seamless spraying experience and keep your equipment running smoothly, it’s important to remove any clogs or buildup that may have accumulated during the painting process. Follow these steps to prevent clogs or residue:
- Check the nozzle and filter for debris and clean them thoroughly.
- Inspect the hose for kinks or obstructions and straighten it out if necessary.
- If you notice any clogs, remove the spray tip and clean it with a brush or soak it in a cleaning solution.
- Clean the gun assembly and all other parts regularly to prevent buildup.
- Troubleshoot common issues by adjusting pressure settings and using the correct paint viscosity.
By following these steps, you can maintain the performance of your airless sprayer and achieve professional results.
Moving on to storing the sprayer properly for future use…
Store the Sprayer Properly for Future Use
Properly storing your equipment ensures its longevity and readiness for future projects. When it comes to airless sprayers, proper storage is crucial to maintain their functionality. Here are some maintenance tips for storing your sprayer:
-
Clean the sprayer thoroughly after each use to remove any leftover paint or residue. This will prevent clogs and buildup that can damage the sprayer over time.
-
Store the sprayer in a cool, dry place to avoid any moisture or extreme temperatures that can affect its performance.
-
Use a protective cover or case to shield the sprayer from dust, dirt, and potential damage.
-
Check the sprayer regularly for any signs of wear or damage, and address any issues before storing it.
By following these proper storage and maintenance tips, you can ensure that your airless sprayer remains in excellent condition for future cabinet painting projects. Now, let’s move on to the next section and admire your newly painted cabinets.
Admire Your Newly Painted Cabinets
Take a step back and marvel at the beauty of your freshly painted cabinets, as if they were a masterpiece hanging in a prestigious art gallery. Choosing the right cabinet paint colors was crucial in achieving this stunning transformation.
It’s important to consider the overall aesthetic of your kitchen and select colors that complement the existing decor.
Additionally, don’t forget to think about the longevity of your freshly painted cabinets. To maintain their beauty, use gentle cleaning products and avoid harsh chemicals that could damage the paint. Regularly inspect your cabinets for any signs of wear and touch up any chips or scratches as needed.
With these tips in mind, you can ensure that your cabinets will continue to impress for years to come.
Now, let’s move on to additional tips and tricks to further enhance the beauty of your newly painted cabinets.
Additional Tips and Tricks
Choosing the right paint colors is crucial in achieving the desired look for your cabinets. Opt for colors that complement your kitchen’s overall theme and style. Neutral shades like white, gray, or beige are popular choices as they create a timeless and versatile appeal.
Additionally, avoid common painting mistakes by properly prepping your cabinets before painting. Clean them thoroughly to remove any grease or dirt, and sand them to create a smooth surface for the paint to adhere to. Use high-quality paint and apply multiple thin coats for a flawless finish.
Lastly, allow sufficient drying time between coats to ensure a durable and long-lasting result. With these additional tips and tricks, your cabinets will be the envy of every visitor.
Frequently Asked Questions
Can I use an airless sprayer to paint cabinets made of different materials like laminate or metal?
Using an airless sprayer for cabinet painting can be effective, but it may not be suitable for all materials. While it works well on wood cabinets, it may not provide the best results on laminate or metal due to adhesion issues.
How long should I let the cabinets dry before reassembling them?
I recommend letting the cabinets dry completely before reassembling them. The drying time will depend on the type of paint used and the humidity level. It’s important to ensure the paint is fully cured to avoid any damage during the reassembly process.
Is it necessary to sand the cabinets before priming them when using an airless sprayer?
Yes, it is necessary to sand the cabinets before priming them when using an airless sprayer. Sanding ensures a smooth surface for the primer to adhere to, resulting in a professional and long-lasting finish.
Can I use water-based paint with an airless sprayer for cabinet painting?
Yes, you can use water-based paint with an airless sprayer for cabinet painting. It’s important to properly maintain the sprayer for optimal performance. Water-based paint has advantages such as easy clean-up and low VOC emissions.
What should I do if the paint clogs the airless sprayer nozzle during the painting process?
If the paint clogs the airless sprayer nozzle during the painting process, it can be frustrating. To clean a clogged nozzle, first turn off the sprayer and disconnect the tip. Then, use a nozzle cleaning tool or a small brush to remove any dried paint. To prevent clogs in the future, strain the paint before pouring it into the sprayer and make sure to use the correct tip size for the paint being used.
Conclusion
In conclusion, painting cabinets with an airless sprayer is a game-changer. It saves time, delivers a smooth finish, and gives your cabinets a professional look.
With a little preparation and the right supplies, you can transform your kitchen or bathroom without breaking the bank. So go ahead, grab that sprayer, and let your creativity flow like a river.
Trust me, the end result will be like a breath of fresh air in your home. Happy painting!
