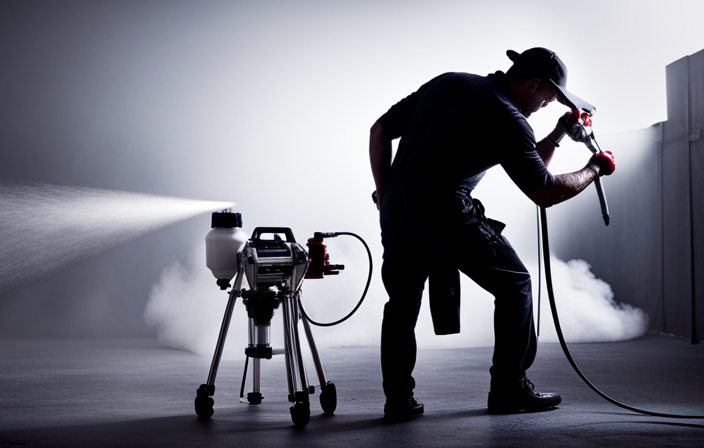
Did you know that using an airless sprayer to paint cabinets can save you half the time compared to using a brush or roller? If you want to give your cabinets a fresh look, using an airless sprayer is the way to go. In this article, I will guide you through the process of painting cabinets with an airless sprayer, from preparing your supplies to admiring your beautifully painted cabinets.
First, we’ll start by gathering all the necessary materials and prepping the area to ensure a smooth painting process.
Then, we’ll remove the cabinet hardware and clean the surfaces to create a pristine canvas.
Next, we’ll sand the cabinets to achieve a smooth finish, followed by priming for better adhesion.
Once everything is set up, I’ll show you how to properly use the airless sprayer.
By the end of this article, you’ll have all the knowledge and expertise needed to transform your cabinets using an airless sprayer. Let’s get started!
Key Takeaways
- Cabinet preparation is essential for achieving a smooth and professional finish.
- Using an airless sprayer saves time and provides an even coverage, making it ideal for cabinets with intricate details.
- Multiple thin coats of paint should be applied, allowing each coat to dry before applying the next.
- Choosing the right paint, considering factors such as durability and low VOC, is important for achieving the desired result.
Gather Your Materials and Prep the Area
Now that you’ve got your airless sprayer ready to go, it’s time to gather all the materials you’ll need and prep the area for an epic cabinet transformation.
Preparing the cabinets is crucial for a smooth and long-lasting finish. Start by removing all cabinet hardware, such as knobs and handles, using a screwdriver or drill. This will ensure that the paint covers the entire surface evenly.
Next, clean the surfaces thoroughly to remove any dirt, grease, or grime. A mixture of warm water and mild dish soap works well for this task.
Once the cabinets are clean, it’s time to choose the right paint color. Consider the style and theme of your kitchen, as well as any color trends you may want to incorporate.
Now, let’s move on to removing cabinet hardware and cleaning the surfaces, ensuring a flawless paint application.
Remove Cabinet Hardware and Clean the Surfaces
First, take a moment to appreciate the gleaming hardware on your cabinets. Gently remove each knob or pull, revealing the pristine surfaces beneath.
Before diving into the painting process, it’s crucial to prepare the cabinets properly. Start by gathering your cleaning supplies, such as a mild detergent and warm water. Use a sponge or cloth to wipe down the cabinet surfaces, ensuring they are free from grease, grime, and any residual dust.
For stubborn dirt or grease, you may need to use a stronger cleaner specifically designed for removing paint.
Once the surfaces are clean and dry, you can move on to the next step of sanding the cabinets for a smooth finish.
Sand the Cabinets for a Smooth Finish
To achieve a flawlessly sleek appearance, grab a sanding block and gently glide it over the cabinets. This will smooth out any imperfections in the surface. Smooth sanding is essential for a professional finish on your cabinets. Here are a few sanding techniques to help you achieve the best results:
- Start with a medium-grit sandpaper to remove roughness or raised edges.
- Use a fine-grit sandpaper to further smooth the surface and create a perfect base for painting.
- Remember to sand in the direction of the wood grain to avoid visible scratches.
By employing these smooth sanding techniques, you’ll create a flawless canvas for your paint. Once you’ve achieved a smooth surface, it’s time to move on to the next step: priming the cabinets for better adhesion.
Prime the Cabinets for Better Adhesion
Before moving on to the next step, it’s important to ask yourself, ‘How can I ensure better adhesion when priming the cabinets?’
Improving paint durability starts with a good primer. To achieve a smooth and long-lasting finish, consider using an oil-based primer. This type of primer provides excellent adhesion and helps seal the wood, preventing any bleed-through or discoloration.
However, if you prefer an alternative method, there are water-based primers available that offer good adhesion as well. Whichever primer you choose, make sure to apply it evenly and thoroughly to all surfaces of the cabinets. This will create a solid foundation for the paint to adhere to, ensuring a professional-looking result.
Now that the cabinets are properly primed, let’s move on to the next section and discuss how to set up and use the airless sprayer.
Set Up and Use the Airless Sprayer
Now, let’s dive into how you can easily get the airless sprayer set up and start using it for a professional-looking finish on your cabinets.
To ensure the airless sprayer is in optimal condition, it’s essential to perform regular maintenance. This includes cleaning the filters, checking for any clogs or blockages, and lubricating the moving parts. By keeping your sprayer well-maintained, you’ll avoid any issues during the painting process.
When setting up the airless sprayer, follow these steps for a smooth operation:
- Fill the paint container with the desired paint color, making sure to strain the paint to remove any impurities.
- Connect the sprayer to a power source and adjust the pressure according to the manufacturer’s instructions.
- Test the sprayer on a piece of scrap material to ensure it’s spraying evenly and at the desired consistency.
- Once everything is set up correctly, you’re ready to start spraying your cabinets.
With the airless sprayer set up and ready to go, it’s time to move on to applying the first coat of paint, ensuring a flawless finish.
Apply the First Coat of Paint
Once you’ve got everything set up and ready to go, it’s time for you to dive into the transformative process of applying that first coat of beautiful, silky smooth paint onto your cabinets.
To achieve a flawless finish, it is crucial to choose the right paint color. Consider the overall aesthetic of your kitchen and select a color that complements it perfectly. Lighter shades can make your space feel more open and airy, while darker hues add depth and sophistication.
When applying the paint, make sure to maintain a consistent spraying distance and keep your strokes even and smooth. This will help prevent any streaks or uneven coverage. Take your time and be thorough, ensuring that every inch of the cabinet surface is evenly coated.
As you apply the first coat, envision the end result and the stunning transformation that awaits. Once the paint is dry, you can assess the coverage and determine if any touch-ups are needed.
Allow the Paint to Dry and Assess the Coverage
After applying the first coat of paint to your cabinets, it is essential to allow the paint to dry thoroughly before assessing the coverage.
This step is crucial in determining the quality of the paint job and ensuring that you achieve the desired results.
As an experienced painter, I recommend waiting at least 24 hours for the paint to fully dry.
During this time, take the opportunity to assess the coverage by examining the cabinets from different angles and lighting conditions.
Look for any areas that may require touch-ups or additional coats.
Assessing the paint quality and coverage will help you determine if any further work is needed before proceeding.
Once you are satisfied with the outcome, you can confidently move on to the next step of applying additional coats as needed.
Apply Additional Coats as Needed
Don’t be afraid to add more layers if you want your cabinets to look flawless and professionally done! Applying multiple layers is key to achieving even coverage and a smooth, polished finish. With each additional coat, the color will deepen, and any imperfections or unevenness will be corrected. Remember to wait for each coat to dry completely before applying the next one. This will ensure that the paint adheres properly and prevents any smudging or smearing. As you apply the additional coats, use long, even strokes with the airless sprayer to create a seamless finish. Take your time and be patient, as rushing through this step can result in a less-than-perfect outcome. Once you are satisfied with the coverage, you can move on to the next step of reinstalling the cabinet hardware and cleaning up any messes.
Reinstall Cabinet Hardware and Clean Up
Now that you’ve got your cabinets looking flawless, it’s time to put the finishing touches on by reinstalling the hardware and tidying up any messes. Reinstalling the cabinet hardware is a straightforward process that can greatly enhance the overall appearance of your cabinets. Make sure to carefully align the hinges, handles, and knobs, ensuring they are securely fastened.
Once the hardware is in place, it’s time to clean up. Use a mild detergent and warm water to wipe down any surfaces that may have become dirty during the painting process. Pay special attention to removing any paint drips or splatters.
Finally, step back and admire your newly painted cabinets. They are sure to bring a fresh and updated look to your space!
Enjoy Your Newly Painted Cabinets!
Take a moment to appreciate the transformation and savor the satisfaction of having beautifully refreshed cabinets that will make your kitchen feel like a brand new space.
Painting cabinets with an airless sprayer opens up a world of new color options, allowing you to completely change the look and feel of your kitchen. Whether you opt for a trendy gray or a classic white, the possibilities are endless.
To maintain the beauty of your freshly painted cabinets, there are a few tips to keep in mind. Avoid using harsh chemicals or abrasive cleaners that can damage the paint. Instead, opt for gentle cleaners and soft cloths.
Regularly dust and wipe down the cabinets to prevent dirt and grime buildup. With proper care, your newly painted cabinets will continue to look stunning for years to come.
Frequently Asked Questions
What type of paint should I use for painting cabinets with an airless sprayer?
For painting cabinets with an airless sprayer, I recommend using a high-quality paint finish like enamel or acrylic. Primer is essential to ensure adhesion and durability, although it may add extra steps to the process.
Can I skip sanding the cabinets before painting with an airless sprayer?
Skipping the sanding process before painting cabinets with an airless sprayer? Absolutely not! It may seem tempting, but trust me, it’s not worth it. Sanding ensures proper adhesion and a smooth finish. And yes, using primer is necessary for a professional-looking result.
How long does the paint need to dry before I can apply additional coats?
The drying time between coats of paint varies depending on the type of paint being used. In general, it is recommended to wait at least 2-4 hours before applying additional coats to ensure proper adhesion and a smooth finish.
Do I need to wear a mask or protective gear when using an airless sprayer?
Absolutely, wearing a mask and protective gear is crucial when using an airless sprayer. The fine spray particles can be harmful if inhaled or come into contact with your skin. Safety first!
Can I use an airless sprayer for painting cabinets with intricate designs or molding?
Yes, an airless sprayer can be used to paint cabinets with intricate designs or molding. To achieve a professional finish, use techniques such as adjusting the spray pattern, using a smaller tip size, and practicing proper masking techniques.
Conclusion
As I stand back and admire my newly painted cabinets, I can’t help but feel like a master artist who has just unveiled a masterpiece. The airless sprayer was my brush, effortlessly transforming the dull and outdated cabinets into stunning works of art.
With each stroke of the sprayer, I breathed new life into my kitchen, creating a space that is not only beautiful but also a reflection of my personal style.
It’s amazing how a simple tool can make such a profound difference. So, if you’re ready to unleash your inner artist and transform your cabinets, grab an airless sprayer and let the magic begin.

