I take pride in revitalizing a room with a new paint job. Seeing the colors pop and witnessing the space take on a whole new vibe is incredibly satisfying. If you share this sentiment, you know the importance of achieving a high-quality finish. In order to do so, an airless sprayer can be a valuable tool.
In this article, I’ll walk you through the steps of painting interior rooms using an airless sprayer. From gathering your materials and prepping the room to achieving a smooth finish, I’ll provide you with all the tips and tricks you need for successful painting.
We’ll also cover common issues you may encounter and important safety precautions to keep in mind. So, grab your sprayer and let’s get started on transforming your space into something truly remarkable.
Key Takeaways
- Regular maintenance of the airless sprayer is essential for optimal performance
- Proper surface preparation, including sanding and priming, is crucial for achieving a flawless finish
- Choosing the right paint for the surface type and desired finish is important
- Following safety precautions, such as wearing a respirator and using drop cloths, is necessary for a safe painting process
Gather Your Materials and Prep the Room
To gather your materials and prep the room, follow these steps:
-
Clear out the furniture or move it to the center of the room. Cover it with plastic sheets to protect it from paint overspray.
-
Lay down drop cloths or plastic covers to protect the floor from spills or splatters.
-
Prepare the walls for painting by removing any nails, screws, or wall hangings. Fill in any holes or cracks with spackling paste and sand them smooth once dry.
-
Use painter’s tape to mask off any areas that you don’t want to be painted, such as trim, windows, or doors.
-
Clean the walls thoroughly to remove any dirt, dust, or grease. Use a mild detergent and warm water solution, and allow the walls to dry completely before proceeding.
-
Finally, gather your painting supplies, including paint brushes, rollers, paint trays, and the desired paint color. Make sure you have enough paint to cover the entire room.
Once you have gathered your materials and prepped the room, you’ll be ready to start painting with confidence.
Prepare the Walls for Painting
Before starting to paint, it’s important to prepare the walls properly.
The first step is to clean the walls and patch any imperfections, like holes or cracks. You can do this by using a putty knife and spackle.
Next, you need to sand and smooth the surface to ensure a smooth and even finish. You can achieve this by using sandpaper or a sanding block.
Clean and Patch any Imperfections
Fix up any flaws in the walls of your room to achieve a smooth and flawless finish. Start by inspecting the walls for cracks, holes, or dents. Use a drywall repair kit to fill in these flaws and let it dry completely. Sand the repaired areas and the rest of the walls for a smooth surface. Remove dust or debris using a damp cloth or vacuum cleaner. Patch any remaining imperfections with spackling compound and let it dry. Inspect the walls for missed spots and touch them up as needed. Now, sand and smooth the surface for the perfect canvas for your airless sprayer.
Sand and Smooth the Surface
Once you’ve patched any imperfections, it’s time to sand and smooth the surface, creating a flawless canvas for your next step.
Surface preparation is crucial for achieving a professional-looking paint job. Start by thoroughly cleaning the walls to remove any dirt or grease.
Next, use a sanding block or sandpaper to smooth out any rough areas or uneven patches. Pay special attention to corners and edges, as they tend to collect more imperfections. When sanding, use light to medium pressure and work in a circular or back-and-forth motion. Be sure to wear a dust mask to protect yourself from inhaling fine particles.
Once the surface is smooth and free of blemishes, you’re ready to move on to setting up the airless sprayer and applying the paint.
Set Up the Airless Sprayer
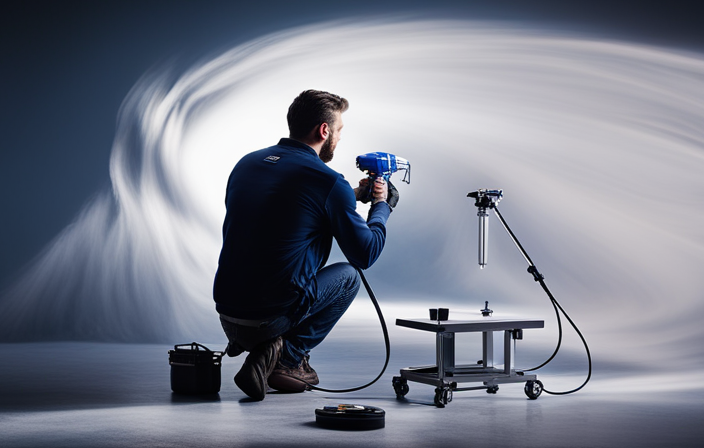
To set up the airless sprayer, start by grabbing it and positioning it in the center of the room. Get ready to unleash your inner Picasso. Adjusting the spray pressure is important, so follow these tips:
- Turn off the sprayer and set the pressure control knob to the lowest setting.
- Gradually increase the pressure until you achieve the desired spray pattern and coverage.
When it comes to choosing the right paint for an airless sprayer, latex and acrylic paints are recommended. They can be easily atomized for a smooth finish. Oil-based paints can also be used, but they may need to be thinned.
Now that your sprayer is all set up, it’s time to start painting.
Start Painting
Now, let’s dive right into unleashing your artistic side as you pick up the brush and begin transforming your space with a burst of color.
Before you start painting, it’s important to familiarize yourself with some touch-up techniques to ensure a professional-looking result.
First, make sure to have a small container of touch-up paint handy for any areas that may need extra attention. Gently dab the paint onto the surface using a small brush or sponge, blending it seamlessly with the surrounding area.
Additionally, choosing the right paint colors is crucial for creating the desired atmosphere in your room. Consider the lighting, furniture, and overall style of the space when making your selection.
With these touch-up techniques and carefully chosen paint colors, you’ll be well on your way to achieving a smooth finish that will truly enhance your interior.
Achieve a Smooth Finish
To achieve a smooth finish, I’ve found that it’s important to apply multiple coats if needed. This ensures that the paint is evenly distributed and any imperfections are covered.
Additionally, I’d recommend using a brush or roller for touch-ups to blend any areas that may require extra attention.
These techniques have helped me achieve a professional-looking finish in my interior painting projects.
Apply Multiple Coats if Needed
You may find yourself needing to add a few extra coats of paint to ensure your walls are as smooth and flawless as a glassy lake on a calm summer day.
When applying primer, make sure it is fully dry before moving on to the next coat. This will help the paint adhere properly and provide a solid base for the subsequent layers.
Additionally, choosing the right paint is crucial. Opt for a high-quality paint that is specifically designed for airless sprayers to achieve the best results.
Finally, apply each coat evenly and in a consistent manner, making sure to overlap each pass slightly for complete coverage.
Once you have achieved the desired smoothness and color intensity, you can move on to touch-ups using a brush or roller. This will allow you to fine-tune any areas that may have been missed or need some extra attention.
Use a Brush or Roller for Touch-Ups
For a more precise finish, it’s recommended to employ a brush or roller for any necessary touch-ups once the desired smoothness and color intensity have been achieved. While an airless sprayer is great for covering large areas quickly, it may not provide the same level of accuracy when it comes to smaller touch-up areas. Using a brush or roller allows for better control and ensures that the touch-up blends seamlessly with the rest of the painted surface.
When deciding between a brush and a roller for touch-ups, consider the pros and cons of each method. A brush is ideal for small areas and detailed work, providing better precision and the ability to feather the paint for a more natural look. On the other hand, a roller is great for larger touch-up areas, as it covers more surface area in a shorter amount of time. However, it may not offer the same level of control as a brush.
| Method | Pros | Cons |
|---|---|---|
| Brush | Precise, feathering ability | Time-consuming for larger areas |
| Roller | Coverage, efficiency | Less control, may not work well for small areas |
Transitioning into the next section on clean up and maintenance, it’s important to properly clean your brush or roller after each use to maintain their effectiveness and prolong their lifespan.
Clean Up and Maintenance
After the paint has been sprayed, it’s crucial to give the airless sprayer a thorough cleaning to ensure its longevity and optimal performance. To clean the sprayer, gather the necessary cleaning supplies, including a bucket, water, and a cleaning solution specifically designed for airless sprayers.
Start by removing the spray tip and filter, and soak them in the cleaning solution. Next, flush out any remaining paint from the sprayer by running water through it. Use a brush to scrub away any stubborn paint residue.
Once the sprayer is clean, reassemble the parts and perform a final rinse. Proper maintenance, such as regular cleaning and inspection of the sprayer’s components, will help prevent clogs and ensure smooth operation.
With a clean and well-maintained sprayer, you’ll be ready to tackle your next painting project with confidence.
Tips and Tricks for Successful Painting
To achieve a flawless finish, it’s essential to carefully prepare the surface by sanding and priming before applying the first coat of paint. This ensures that the paint adheres properly and provides a smooth and long-lasting result.
When it comes to painting techniques, there are a few tips and tricks that can make a big difference. Firstly, use long, even strokes with the airless sprayer to avoid streaks and lines.
Secondly, choose the right paint for your project, considering factors such as the type of surface, the desired finish, and any specific requirements like stain resistance or washability.
Lastly, pay attention to the recommended drying times and apply multiple thin coats rather than one thick coat for better results.
With these painting techniques and the right paint, you’ll be able to achieve a professional-looking finish.
Now, let’s move on to troubleshooting common issues.
Troubleshooting Common Issues
If you’re experiencing issues with your painting project, troubleshooting common problems can help you achieve a professional-looking finish. Did you know that 60% of painting problems are caused by improper surface preparation? It’s important to address these issues before they become major roadblocks in your painting process. Two common problems that can occur when using an airless sprayer are paint clogs and an incorrect spray pattern. To troubleshoot paint clogs, you can refer to the table below for some possible causes and solutions. Adjusting the spray pattern can be done by manipulating the spray tip or adjusting the pressure on the sprayer. By addressing these common issues, you can ensure a smoother painting process. Now, let’s move on to the next section where we will discuss important safety precautions to take during your painting project.
Safety Precautions
When ensuring a professional finish, it’s important to prioritize safety precautions during your painting project. To protect your health, make sure to wear a respirator specifically designed for painting. This will prevent inhalation of harmful fumes and particles.
Proper ventilation is crucial to maintain a safe environment. Open windows and use fans to circulate fresh air throughout the room.
Here are four key safety precautions to remember:
- Cover your skin with protective clothing, such as long sleeves and pants, to avoid contact with paint.
- Use drop cloths to protect floors and furniture from accidental spills or splatters.
- Keep the sprayer nozzle pointed away from yourself and others at all times.
- Avoid smoking or open flames near the paint area to prevent fire hazards.
By following these safety precautions, you can ensure a smooth and worry-free painting experience.
Now, enjoy your newly painted room!
Enjoy Your Newly Painted Room!
Now that your room is freshly painted, it’s time to sit back, relax, and enjoy the vibrant new atmosphere.
Imagine coming home after a long day of work, sinking into your favorite chair, and basking in the soothing colors that surround you.
To make the most of your newly painted room, here are a few tips for choosing the right paint color:
-
Consider the mood you want to create in the room and choose colors that evoke that feeling.
-
Don’t be afraid to get samples and test them on the walls before committing.
-
It’s also important to properly store any leftover paint. Make sure the lids are tightly sealed to prevent drying out, and store them in a cool, dry place away from direct sunlight.
By following these tips, you can fully enjoy and maintain the beauty of your freshly painted room.
Frequently Asked Questions
Can I use an airless sprayer to paint ceilings?
Yes, an airless sprayer can be used to paint ceilings. Compared to a traditional roller, it can provide a smoother finish. To achieve this, ensure proper technique, use a suitable nozzle, and apply thin coats for even coverage.
Should I sand the walls before using an airless sprayer?
I remember the first time I painted without sanding the walls. The paint didn’t adhere properly, leaving a streaky finish. To avoid this, yes, you should sand the walls before using an airless sprayer. Additionally, you should use primer before using the sprayer and properly thin the paint.
How do I prevent overspray when using an airless sprayer?
To prevent overspray when using an airless sprayer, I control the paint flow by adjusting the pressure settings and using a smaller nozzle size. This helps me keep the paint contained and achieve a precise and even application.
Can I use an airless sprayer to paint textured walls?
Using an airless sprayer for textured walls is a game-changer! It provides seamless coverage, saving time and effort. The advantages include a smooth finish, even on rough surfaces. Alternative methods like brushes or rollers can’t compare.
How do I clean an airless sprayer after using oil-based paint?
To clean an airless sprayer after using oil-based paint, I recommend following these best practices for cleaning techniques. First, flush the sprayer with a solvent like mineral spirits. Then, disassemble and clean the individual parts thoroughly before reassembling and storing.
Conclusion
In conclusion, I hope this guide has provided you with the necessary information and steps to successfully paint your interior rooms using an airless sprayer.
Remember to gather all your materials, properly prepare the walls, and set up the sprayer before starting the painting process.
Achieving a smooth finish is possible with the right techniques and practice.
Now, here’s an interesting statistic: Did you know that using an airless sprayer can save you up to 50% of your painting time compared to using a traditional brush and roller?
This means you can enjoy your newly painted room in no time!


