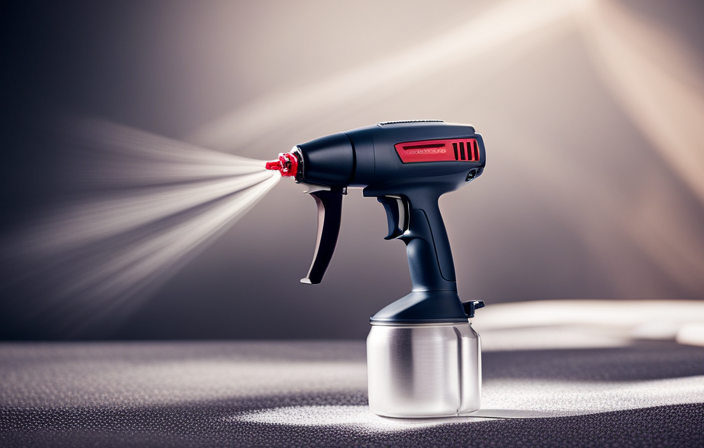
Connect with us

Airless Paint Sprayers FAQs

How To Paint Interiors With Airless Sprayer Without Over Spray

Published

on

An image showcasing a professional painter effortlessly coating a room's walls with an airless sprayer, while perfectly masking surrounding surfaces with precision, avoiding any stray paint particles

Ever wished to refresh the inside of your house with paint but dread the mess from overspray? Search no more! This article will walk you through using an airless sprayer to paint your home’s interior while keeping overspray to a minimum.

First things first, it is important to properly prepare your painting area. This includes covering furniture and flooring, as well as taping off any areas you do not want to paint. Once your area is prepped, it’s time to choose the right paint and equipment.

Next, you’ll want to practice proper spraying technique to ensure an even coat. Adjusting the sprayer settings is crucial for controlling the amount of paint being released. Starting with a primer coat is also recommended to achieve a smooth finish.

Lastly, always remember to clean the sprayer properly after use and protect yourself and your surroundings. And don’t forget, patience is key! Take breaks when needed to maintain focus and precision.

So, let’s get started on transforming your interiors with an airless sprayer, without the worry of overspray!

Advertisement

Key Takeaways

  • Thoroughly prepare the surface and use a primer to achieve a flawless end result.
  • Apply paint in thin, even coats to achieve a smooth and even finish.
  • Use a smaller tip or brush attachment to control overspray, especially in corners and edges.
  • Practice patience, precision, and proper cleaning techniques for professional results and a safe painting environment.

Prepare your painting area

Get ready to transform your space by prepping the painting area with these easy steps! Before you start spraying, it is crucial to prepare your surfaces properly.

  1. Clean the walls thoroughly to remove any dirt or grease that could affect the paint’s adhesion.
  2. Repair any cracks or holes and sand them smooth.

Next, cover floors, furniture, and fixtures with plastic drop cloths to protect them from overspray. Use painter’s tape to mask off areas that you don’t want to be painted.

Now that your surfaces are prepped, it’s time to choose the right paint and equipment.

  1. Select high-quality paint that is suitable for your interior walls and consider the color scheme you desire.
  2. Additionally, invest in a good airless sprayer that will provide a fine finish without excessive overspray.

Choose the right paint and equipment

Make sure you’ve got the correct type of paint and the right equipment to achieve a flawless finish when you’re tackling your interior project with an airless sprayer; it’s like finding the missing piece of the puzzle for a picture-perfect result. When it comes to painting techniques, using the right paint and equipment is crucial. The table below provides a comparison of different types of paint and their characteristics, as well as the recommended equipment for each type:

Paint Type Characteristics Recommended Equipment
Latex Water-based Airless sprayer
Oil-based Durable Airless sprayer
Enamel Glossy finish Airless sprayer

Safety precautions are also important when using an airless sprayer. Always wear protective clothing, including goggles and a respirator, to prevent any paint from getting on your skin or in your eyes. Additionally, make sure to ventilate the area properly to avoid inhaling any fumes. Practice proper spraying technique is essential to prevent overspray and achieve an even coat.

Practice proper spraying technique

Advertisement

Mastering the art of proper spraying technique is the key to achieving a flawlessly smooth finish that will leave you feeling accomplished and proud of your painting project. To improve spraying efficiency and minimize paint wastage, there are a few techniques to keep in mind.

First, maintain a consistent distance of around 12 inches from the surface you are painting. This will ensure an even application without excessive overspray.

Additionally, move your arm in a fluid motion, keeping it parallel to the surface. Avoid stopping or hesitating in one spot, as this can result in uneven coverage.

Finally, overlap each pass by about 50% to ensure complete coverage. By practicing these techniques, you will be able to achieve professional-quality results.

Advertisement

Now, let’s move on to adjusting the sprayer settings.

Adjust the sprayer settings

Before starting to paint with an airless sprayer, it’s important to adjust the pressure and flow rate for optimal results. This will ensure that the paint is evenly distributed and there’s no over spray.

I always recommend testing the spray pattern on a scrap surface before starting the actual painting. This allows me to make any necessary adjustments and ensures a smooth and professional finish.

Adjust the pressure and flow rate for optimal results

Achieving flawless results with your airless sprayer is as simple as adjusting the pressure and flow rate just right. Properly adjusting the pressure ensures that the paint atomizes correctly, while maintaining the flow rate ensures a consistent application. To adjust the pressure, refer to the manufacturer’s guidelines and gradually increase or decrease it until you achieve the desired result. Similarly, adjusting the flow rate will depend on the type of paint used and the surface being painted. A higher flow rate may be needed for thicker paints or larger surfaces, while a lower flow rate may be necessary for more delicate work. By finding the perfect balance between pressure and flow rate, you can minimize overspray and achieve a professional finish. Now that you have the pressure and flow rate adjusted, it’s time to test the spray pattern on a scrap surface before starting the actual painting process.

Test the spray pattern on a scrap surface before starting

To ensure a flawless finish, it is important to test the spray pattern on a scrap surface before beginning. This allows you to adjust any settings if needed. Here are some testing techniques and troubleshooting tips to help you achieve the best results:

Advertisement
  1. Distance: Hold the sprayer at a consistent distance from the surface, usually around 12-18 inches. This ensures an even spray pattern.

  2. Overlap: Keep a consistent overlap of about 50% between each pass. This helps to avoid uneven coverage.

  3. Speed: Move the sprayer at a steady speed. This maintains a consistent spray pattern and prevents over spray.

By testing the spray pattern on a scrap surface, you can identify any issues and make necessary adjustments before starting the actual painting process. Once you are satisfied with the results, you can confidently proceed with applying the primer coat.

Start with a primer coat

When painting interiors with an airless sprayer, it’s essential to start with a primer coat. Applying a primer helps create a smooth and even base for the paint, ensuring better adhesion and durability.

It’s crucial to allow the primer to dry thoroughly before proceeding with the paint application. This will help achieve a flawless finish.

Apply a primer to create a smooth base for the paint

To create a smooth base for the paint, start by preparing the surface with a primer. This will ensure a flawless foundation for the paint when using an airless sprayer.

To achieve a smooth surface and promote paint adhesion, follow these steps:

Advertisement
  • Clean the surface: Remove any dirt, grease, or loose paint using a mild detergent and a scrub brush.

  • Repair imperfections: Fill in any holes, cracks, or dents with a suitable filler and sand the surface smooth.

  • Protect adjacent areas: Use painter’s tape and plastic sheeting to cover areas that you don’t want to paint.

  • Apply the primer: Using an airless sprayer, apply a thin and even coat of primer to the surface, working in overlapping passes.

  • Allow the primer to dry thoroughly before painting: This will ensure proper bonding and a professional finish.

Once the primer has dried, you’re ready to move on to the next step of painting the interior with an airless sprayer without over spray.

Allow the primer to dry thoroughly before painting

Make sure you give the primer enough time to dry thoroughly before you move on to the exciting part of transforming your space with a fresh coat of vibrant color. Proper ventilation is crucial during the drying process to ensure the primer cures properly and creates a strong bond with the surface. Open windows or use fans to circulate air and help expedite the drying time.

Once the primer is dry, it’s important to properly sand and prepare the primed surface before painting. Use a fine-grit sandpaper to smooth out any imperfections and create a smooth base for the paint. Wipe away any dust or debris with a clean cloth before you begin painting.

By allowing the primer to dry thoroughly and preparing the surface properly, you ensure a flawless end result. Now, let’s move on to the next step of applying the paint in thin, even coats.

Apply the paint in thin, even coats

To achieve a flawless finish, it’s crucial to apply the paint in thin, even coats using an airless sprayer. This method allows for better control over paint application and helps to avoid overspray. By using an airless sprayer, you can achieve a smooth and even coat of paint on your interior surfaces.

Advertisement

To further enhance your painting skills, consider the following tips:

  1. Adjust the pressure: Set the airless sprayer to a lower pressure to minimize overspray and achieve better control.

  2. Maintain the right distance: Keep the sprayer nozzle approximately 12-18 inches away from the surface being painted to ensure an even application.

  3. Overlap strokes: In a systematic and organized manner, overlap each stroke by about 50% to avoid leaving gaps or streaks.

  4. Practice on a test surface: Before starting on the actual walls, practice your technique on a scrap piece of material to get a feel for the sprayer and adjust your settings if needed.

By following these guidelines, you can achieve professional-looking results without the worry of overspray. Next, let’s discuss how to pay attention to corners and edges for a seamless finish.

Pay attention to corners and edges

When it comes to painting corners and edges, I find it helpful to use a smaller tip or brush attachment for more precise painting. This allows me to have better control and avoid any accidental smudges or overlaps.

Additionally, I make sure to take my time in these tight areas, ensuring thorough coverage and a seamless finish.

Use a smaller tip or brush attachment for precise painting

For a more precise painting experience, grab a smaller tip or brush attachment for your airless sprayer. Using a smaller tip can reduce overspray by up to 50%. Precision painting techniques are essential for professional-looking results.

Advertisement

Airless sprayers offer many advantages but can create overspray if not used correctly. By using a smaller tip or brush attachment, you can have more control over the paint flow and target specific areas with accuracy. This is especially useful for corners and edges where overspray is more likely to occur.

Taking the time to ensure thorough coverage in tight areas is crucial for a flawless finish. So, let’s move on to the next section and learn how to take your time and achieve the best results in those hard-to-reach spots.

Take your time to ensure thorough coverage in tight areas

When using an airless sprayer to paint interiors, it is essential to take your time and employ thorough coverage techniques to avoid paint buildup in tight areas. Start by using a smaller tip or brush attachment for better precision. This allows you to reach into corners and edges without worrying about excessive overspray.

Move the sprayer in a controlled manner, ensuring that each area receives an even coat of paint. Pay close attention to hard-to-reach spots, such as behind furniture or around light fixtures. By being meticulous in your approach, you can achieve a professional-looking result without any unsightly buildup.

Once you have completed the painting process, it is crucial to clean the sprayer properly to maintain its performance and longevity.

Advertisement

Clean the sprayer properly after use

To ensure a flawless finish, make sure you clean the sprayer thoroughly after each use, so that you can avoid any potential over spray issues. Proper cleaning techniques and maintenance tips are essential for the longevity of your airless sprayer and to ensure it performs at its best. Here are some steps you can follow to clean your sprayer effectively:

Step Cleaning Task
1 Disconnect the sprayer from the power source and relieve any built-up pressure.
2 Remove the spray tip, filter, and guard, and clean them with warm, soapy water.
3 Flush the sprayer with a cleaning solution recommended by the manufacturer.
4 Use a brush or cloth to remove any paint residue from the sprayer’s components.
5 Rinse the sprayer thoroughly with clean water and reassemble all the parts.

By following these cleaning techniques and maintenance tips, you can ensure your sprayer remains in optimal condition, allowing you to achieve professional results without over spray. Now, let’s move on to the next section on how to protect yourself and your surroundings.

Protect yourself and your surroundings

To protect yourself and your surroundings while using the sprayer, it is important to take the necessary precautions. First and foremost, wear the appropriate protective clothing, such as goggles, gloves, and a respirator mask. These items will shield you from any potential harm.

Additionally, ensure that the area you are working in has proper ventilation. This will help minimize the inhalation of fumes. You can achieve this by opening windows and doors or using fans to circulate fresh air.

It is also crucial to cover nearby furniture, floors, and fixtures with drop cloths or plastic sheets. This will prevent any accidental overspray and protect your belongings.

Advertisement

By taking these measures, you can create a safe and controlled environment for your painting project. Remember to practice patience and take breaks when needed to maintain a steady hand and a focused mind throughout the process.

Practice patience and take breaks

After taking the necessary precautions to protect myself and my surroundings, I have learned that practicing patience and taking breaks during the process of painting interiors with an airless sprayer is crucial.

Not only does this allow me to maintain my focus and precision, but it also helps me avoid over spray.

Patience benefits me in several ways. It allows me to carefully control the spray pattern and pressure, ensuring an even coat without wastage or splatters.

By taking breaks, I can step back and assess the progress, making any necessary adjustments before continuing. This methodical approach reduces the risk of over spray and ensures a smooth, professional finish.

Advertisement

So, even though it may be tempting to rush through the job, I remind myself that patience truly pays off in the end.

Frequently Asked Questions

What are the potential risks or hazards of using an airless sprayer?

The potential risks and hazards of using an airless sprayer include exposure to toxic fumes, eye and skin irritation, and the risk of injury due to high pressure. Proper safety precautions and protective gear should always be used.

Can an airless sprayer be used for both interior and exterior painting projects?

Yes, an airless sprayer can be used for both interior and exterior painting projects. It offers several benefits for interior projects, such as faster application, even coverage, and the ability to handle a variety of coatings.

Are there any specific safety precautions that need to be taken when using an airless sprayer?

When using an airless sprayer, it is important to take specific safety precautions to avoid over spray. This includes wearing protective clothing, using a respirator, and ensuring proper ventilation in the workspace.

How do you properly clean and maintain an airless sprayer to ensure its longevity?

To clean and maintain an airless sprayer, I recommend thoroughly flushing the system with water or cleaning solution after each use. Regularly inspect and replace worn parts, and store the sprayer in a clean, dry place. Proper maintenance ensures longevity.

Advertisement

What are some common mistakes to avoid when using an airless sprayer for interior painting?

When using an airless sprayer for interior painting, it’s crucial to avoid common mistakes that can lead to overspray. Proper technique, adjusting pressure, and using the right nozzle size are key to achieving a clean and precise finish.

Conclusion

In conclusion, painting interiors with an airless sprayer requires careful preparation, the right equipment, and a steady hand.

By adjusting the sprayer settings and practicing proper technique, you can achieve a flawless finish without any overspray.

Remember to pay attention to corners and edges, as they can be easily missed.

Cleaning the sprayer thoroughly after use is essential for its longevity.

Advertisement

Lastly, protect yourself and your surroundings, and don’t forget to practice patience and take breaks when needed.

As the saying goes, ‘Rome wasn’t built in a day,’ and neither is a perfectly painted interior.

With James‘ articles, you can expect comprehensive breakdowns of airless paint sprayer features, performance assessments, and expert insights into the latest industry innovations. His meticulous approach ensures that readers gain a thorough understanding of the equipment they are considering, helping them make well-informed choices.

Continue Reading
Advertisement

Airless Paint Sprayers FAQs

Airless Paint Sprayer How To Use Do You Have To Backroll

Published

on

By

An image showcasing a step-by-step guide on using an airless paint sprayer

I’ve always been mesmerized by the efficiency of an airless paint sprayer. It’s incredible how it makes any painting task easier and more streamlined. Yet, a frequent question arises: is backrolling required?

In this article, I’ll guide you through the process of using an airless paint sprayer and answer that burning question. We’ll explore the benefits of this tool, understand its functionality, and learn how to properly prepare your surface for painting.

I’ll also share the proper technique for using an airless paint sprayer and explain the role of backrolling in achieving a smooth finish. Plus, I’ll provide tips for backrolling effectively and offer alternatives to consider.

By avoiding common mistakes and following the right steps, you’ll be able to achieve a professional finish with your airless paint sprayer. So, let’s dive in and master the art of using an airless paint sprayer!

Key Takeaways

  • Proper backrolling techniques are essential for achieving a smooth and even paint application.
  • Utilizing pressure control on an airless paint sprayer can eliminate the need for backrolling and save time and effort.
  • Avoid common mistakes such as improper surface preparation, using the wrong tip size, and rushing the painting process.
  • An airless paint sprayer offers efficiency, versatility, control, and cost savings, while providing professional results when used correctly.

The Benefits of Using an Airless Paint Sprayer

Advertisement

Using an airless paint sprayer has numerous benefits that make it a game-changer for your painting projects. One major advantage is its efficiency. Unlike using a brush or roller, an airless paint sprayer allows you to cover large surfaces in a fraction of the time. This is because the sprayer atomizes the paint, creating a fine mist that evenly coats the surface, resulting in a smooth and professional finish.

In addition to its efficiency, airless paint sprayers are also highly versatile. They can be used for both indoor and outdoor projects, making them a great investment for any painter. Furthermore, these sprayers are particularly effective for painting uneven surfaces, such as stucco or brick. Their powerful spray can easily reach into crevices and provide an even coverage, ensuring a high-quality result.

To achieve the best results with an airless paint sprayer, it is important to understand its functionality. By familiarizing yourself with how the sprayer works and adjusting the settings accordingly, you can ensure a flawless finish every time. So, if you want to save time and achieve professional-looking results, using an airless paint sprayer is definitely the way to go.

Understanding the Functionality of an Airless Paint Sprayer

To properly apply paint with an airless sprayer, it’s important to understand how the device functions and the necessity of a complementary technique. When using an airless sprayer, it’s beneficial to ensure an even coat by backrolling the painted surface with a roller. This technique not only improves the overall finish but also helps to eliminate any streaks or unevenness.

Here are four reasons why understanding the functionality of an airless paint sprayer is essential:

Advertisement
  1. Efficiency: With its high-pressure system, an airless sprayer allows for quick and efficient paint application, saving you time and effort.

  2. Versatility: Airless sprayers can handle a wide range of paint materials, including thick and textured coatings, making them suitable for various projects.

  3. Smooth and Professional Results: The high-pressure spray ensures a smooth and consistent finish, giving your surfaces a professional look.

  4. Cost-Effective: Airless sprayers minimize overspray, reducing paint wastage and saving you money.

Understanding airless paint sprayer maintenance and troubleshooting common issues is crucial for optimal performance. Now, let’s transition into the subsequent section about preparing your surface for painting.

Preparing Your Surface for Painting

Preparing your surface properly is essential for achieving a flawless and long-lasting paint job. Before you begin painting, make sure to thoroughly clean the surface to remove any dirt, dust, or grease. You can use a mild detergent or a degreaser for this step.

Next, inspect the surface for any cracks, holes, or imperfections. Fill them in with a suitable filler and sand it smooth once it’s dry.

Advertisement

Additionally, it’s important to choose the right paint color for your project. Consider the lighting in the room and the overall aesthetic you’re trying to achieve.

Once your surface is clean, smooth, and ready, you can move on to the next step of properly using an airless paint sprayer.

Proper Technique for Using an Airless Paint Sprayer

Once the surface is properly prepared, it is important to use the correct technique when using an airless paint sprayer. To ensure safety, always wear protective gear such as goggles, gloves, and a respirator.

Start by testing the sprayer on a scrap surface to adjust the pressure and spray pattern. This will help you determine the right settings for your specific project.

When you are ready to paint, hold the sprayer perpendicular to the surface and maintain a consistent distance of 12 to 18 inches. This will ensure even coverage and prevent any streaks or drips.

Advertisement

Use long, overlapping strokes to avoid uneven coverage. This technique will help you achieve a smooth and professional finish.

If the sprayer clogs, check the filter and clean it if necessary. This will prevent any interruptions in the paint flow and ensure a consistent spray.

If you find that the paint appears too thin or thick, adjust the pressure accordingly. This will help you achieve the desired consistency and coverage.

Remember to take breaks and release pressure before changing tips or refilling the paint. This will prevent any accidents or spills and ensure a smooth painting process.

Now that you are familiar with the proper technique for using an airless paint sprayer, let’s explore the role of backrolling in achieving a smooth finish.

Advertisement

The Role of Backrolling in Achieving a Smooth Finish

Achieving a smooth, professional finish can be easily accomplished by incorporating the technique of backrolling into your painting process.

Backrolling refers to using a roller immediately after using an airless paint sprayer to ensure an even distribution of paint and eliminate any streaks or lines that may have been left behind.

This step is crucial in achieving a flawless finish, especially when using an airless paint sprayer. By backrolling, you can smooth out any inconsistencies and create a uniform appearance on your walls or surfaces.

Advertisement

Additionally, backrolling helps to push the paint into the surface, ensuring better adhesion and durability. It also helps to eliminate any bubbles or trapped air that may have formed during the spraying process.

When backrolling is necessary, it ensures a seamless and professional result, leaving your surfaces looking perfectly painted and polished.

When Backrolling is Necessary

When it comes to achieving a smooth finish with an airless paint sprayer, backrolling plays a crucial role. It helps to even out the paint, remove any excess and create a seamless look. However, backrolling is not always necessary. It is typically required when dealing with rough or uneven surfaces, such as textured walls or exterior surfaces with imperfections.

To determine when to backroll, you should consider the condition of the surface you are painting and the type of paint you are using. If you notice that the paint is not adhering properly or if there are visible lines or streaks, it is a good indication that backrolling is necessary.

When backrolling, it is important to use the right technique. Begin by applying the paint with the sprayer in smooth, even strokes. Then, immediately follow up with a roller to evenly distribute the paint and smooth out any imperfections. This combination of spraying and backrolling ensures a professional finish.

Advertisement

Now, let’s move on to the next section where I will share some tips for backrolling effectively.

Tips for Backrolling Effectively

To ensure a flawless finish, it’s crucial to master the art of backrolling. Here are some tips to help you roll like a pro:

  • Use a high-quality roller cover to ensure even application and avoid lint or debris.

  • Start by loading the roller with an appropriate amount of paint, ensuring it’s evenly distributed.

  • Apply the paint in vertical sections, overlapping each stroke slightly to create a consistent finish.

  • Maintain a steady pressure while rolling to prevent streaks or uneven coverage.

  • Avoid applying too much pressure, as it can cause the paint to splatter.

  • Keep a wet edge by frequently reloading the roller with paint and blending each stroke into the previous one.

  • Check for any drips or excess paint and smooth them out immediately.

  • Finally, be patient and allow the paint to dry completely before evaluating the final result.

By following these tips for proper backrolling and avoiding common mistakes, you’ll achieve a professional-looking finish with your airless paint sprayer.

In the next section, we’ll explore alternatives to backrolling with an airless paint sprayer.

Alternatives to Backrolling with an Airless Paint Sprayer

If you really want to take your painting skills to the next level, there’s a nifty trick you can try instead of backrolling with an airless paint sprayer.

Advertisement

It involves utilizing pressure control to achieve a smooth and even paint application. By adjusting the pressure on your airless paint sprayer, you can control the flow rate of the paint and ensure a consistent coverage.

Start by testing different pressure settings on a scrap piece of material to find the optimal pressure for your desired finish. Once you’ve found the right pressure, apply the paint in even strokes, overlapping each pass slightly.

This technique eliminates the need for backrolling and saves you time and effort.

Now, let’s move on to the next section and discuss common mistakes to avoid when using an airless paint sprayer.

Common Mistakes to Avoid When Using an Airless Paint Sprayer

Avoid these common mistakes and achieve professional-looking results with your paint job using an airless paint sprayer.

Advertisement

One common mistake is not properly preparing the surface before starting. Make sure to clean and sand the surface to ensure proper adhesion.

Another mistake is using the wrong tip size for the paint being used. Using the wrong tip can lead to uneven coverage and a rough finish.

Additionally, not maintaining the correct spray distance can result in overspray or a spotty finish. It is important to keep the sprayer at the recommended distance from the surface for a smooth application.

Lastly, rushing the process can lead to mistakes such as drips and runs. Take your time and apply multiple thin coats for the best results.

By avoiding these common mistakes, you can achieve a professional finish with an airless paint sprayer and move on to the next section about achieving a professional finish.

Advertisement

Achieving a Professional Finish with an Airless Paint Sprayer

Create a flawless masterpiece with your magical wand of color, as you glide across the canvas with the grace of an artist’s brushstroke. Achieving a professional finish with an airless paint sprayer is easier than you might think. Here are some tips to help you get the most out of your tool:

Efficiency: An airless paint sprayer allows for faster coverage and a more even finish, saving you time and effort.

Versatility: Whether you’re painting walls, ceilings, or furniture, an airless paint sprayer can handle it all.

Control: With proper technique, you can achieve smooth, consistent coats without drips or streaks.

Cost savings: Using an airless paint sprayer can help you save money by reducing wasted paint and minimizing the need for touch-ups.

Advertisement

Mistakes to avoid: Remember to always clean your sprayer thoroughly after each use and follow the manufacturer’s instructions for proper maintenance.

By following these tips and avoiding common mistakes, you can enjoy the benefits of using an airless paint sprayer and create professional-looking results every time.

Frequently Asked Questions

Can I achieve a professional finish without using backrolling with an airless paint sprayer?

Yes, achieving professional results with an airless paint sprayer is possible without backrolling. However, it is recommended to backroll for a smoother finish and better adhesion. Here are some tips for using an airless paint sprayer effectively.

What are the alternatives to backrolling when using an airless paint sprayer?

When using an airless paint sprayer, there are alternatives to backrolling. Some backrolling techniques include cross-rolling and feathering. These techniques help ensure a smooth and even finish without the need for backrolling.

Are there any common mistakes to avoid when using an airless paint sprayer?

When using an airless paint sprayer, it’s important to avoid common mistakes such as not properly cleaning the sprayer or using the wrong spray tip size. To use it effectively, make sure to maintain the correct spraying distance and apply even coats.

Advertisement

How can I achieve a smooth finish without backrolling?

To achieve a smooth finish without backrolling, I rely on airless paint sprayer techniques. By mastering the right spraying distance, speed, and overlapping strokes, I create a flawless coat that glides on like silk.

Is backrolling necessary for all types of surfaces when using an airless paint sprayer?

Backrolling is necessary for textured surfaces when using an airless paint sprayer to ensure even coverage and smooth results. However, it can be skipped when using the sprayer on smooth surfaces for a more efficient painting process.

Conclusion

In conclusion, using an airless paint sprayer can truly revolutionize your painting experience. With its powerful functionality and ability to achieve a smooth finish, it is a game-changer in the world of painting.

By properly preparing your surface and using the correct technique, you can achieve professional results that will leave you in awe. And remember, backrolling is the key to that flawless finish, like a gentle stroke of an artist’s brush on a canvas.

So grab your airless paint sprayer, unleash your creativity, and let the magic unfold on your walls.

Advertisement
Continue Reading

Airless Paint Sprayers FAQs

How To Operate An Airless Paint Sprayer

Published

on

By

An image showing a person wearing safety goggles, holding an airless paint sprayer, with a paint can nearby

Venturing into the world of airless paint sprayers evokes the sentiment, ‘Before me stretches an untouched canvas, awaiting the touch of my brush.’ With each movement, I hold the power to transform an ordinary area into a masterpiece. Yet, embarking on this creative journey necessitates a fundamental understanding of how to operate an airless paint sprayer.

This powerful tool, with its high-pressure system, allows me to achieve smooth and even coverage in a fraction of the time it takes with a brush or roller. In this article, I will guide you through the process of understanding the components, choosing the right paint, familiarizing yourself with the settings, and honing your technique.

We will also explore safety precautions, maintenance, troubleshooting, and proper clean-up and storage. So, let us dive into this world of possibilities and unlock the true potential of the airless paint sprayer.

Key Takeaways

  • Check for loose fittings or worn seals before using the sprayer
  • Adjust the spray pattern and pressure according to the surface being painted
  • Apply paint in light mist coats followed by even, overlapping strokes
  • Clean the sprayer thoroughly after use and store it properly to maintain longevity

Understand the Components of an Airless Paint Sprayer

The airless paint sprayer’s components, such as the pump, hose, and nozzle, work in harmony to provide a high-pressure paint application method. This allows for efficient and precise coverage. Understanding these components is essential for proper operation and maintenance of the sprayer.

Advertisement

Sprayer maintenance is crucial to ensure its longevity and optimal performance. Regularly clean the pump filters, check for any clogs or blockages in the hose, and inspect the nozzle for wear and tear.

Troubleshooting tips include checking the power supply, ensuring proper priming, and adjusting the pressure settings. These steps will help resolve common issues and ensure a smooth painting process.

Once you have a good grasp of the sprayer’s components and maintenance, it’s time to move on to the next section: choosing the right paint and preparation.

Choose the Right Paint and Preparation

To ensure optimal results, it’s crucial to select the appropriate type of paint and properly prepare the surface before using an airless paint sprayer.

Paint selection is important because different types of paint have different viscosities and drying times. For example, latex paint is commonly used for interior walls, while oil-based paint is better suited for exterior surfaces.

Advertisement

Additionally, it’s essential to prepare the surface by cleaning it thoroughly, removing any dirt, grease, or loose paint. This can be done using a pressure washer or a scrub brush and detergent.

Sanding the surface may also be necessary to create a smooth and even finish.

By selecting the right paint and preparing the surface adequately, you will be able to achieve professional-looking results with your airless paint sprayer.

Now, let’s move on to familiarizing yourself with the sprayer’s settings and operation.

Familiarize Yourself with the Sprayer’s Settings

Advertisement

Get ready to acquaint yourself with the settings of this magical painting tool, so you can unleash its power and transform your surfaces with a simple flick of a switch. Familiarizing yourself with the sprayer’s settings is crucial for achieving the desired results and avoiding any mishaps along the way.

Here are three key settings you need to know:

  1. Pressure Control: Adjusting the pressure determines the spray pattern and coverage. Start with a low pressure setting and gradually increase it until you achieve the desired finish.

  2. Tip Size: The size of the spray tip affects the flow rate and the thickness of the paint. Choose the appropriate tip size based on the type of paint and the surface you’re working on.

  3. Filter Check: Regular sprayer maintenance is essential for optimal performance. Check and clean the filters regularly to prevent clogging and ensure a smooth flow of paint.

By familiarizing yourself with these settings, you’ll be able to troubleshoot any issues that may arise during your painting project. Now, let’s move on to the next section and learn how to practice proper technique for flawless results.

Practice Proper Technique

Now let’s dive into honing your skills and perfecting the art of using this incredible painting tool by practicing proper technique.

Advertisement

To achieve optimal results with an airless paint sprayer, it’s crucial to maintain a proper stance. Stand with your feet shoulder-width apart, ensuring stability and balance while operating the sprayer. This will allow for better control and precision as you move the sprayer across the surface you’re painting.

Additionally, don’t forget about sprayer maintenance. Regularly clean and inspect the sprayer for any clogs or damage. Proper maintenance will ensure that the sprayer operates smoothly and efficiently, allowing you to focus on achieving a flawless finish.

As we move forward, it’s important to take safety precautions when using an airless paint sprayer, ensuring a secure and hazard-free painting experience.

Take Safety Precautions

Advertisement

When using this powerful tool, it’s crucial to prioritize safety and create a hazard-free painting experience, just like a captain guiding their ship through treacherous waters.

To ensure your safety, always wear the appropriate safety gear, such as goggles, gloves, and a respirator, to protect yourself from potential hazards like paint fumes and overspray.

Additionally, make sure to work in a well-ventilated area or use a ventilation system to minimize inhalation of harmful particles. Keep in mind that airless paint sprayers operate at high pressure, so it’s important to never point the spray gun at yourself or others.

Lastly, be mindful of your surroundings and cover or remove any objects that could be damaged by paint.

With these safety precautions in place, you can confidently move on to the next step of starting your painting project.

Advertisement

Start Painting

Begin the painting process with confidence, as you’ll bring your vision to life with the powerful strokes of your brush.

When using an airless paint sprayer, it’s important to use proper painting techniques to achieve the best results. Start by holding the sprayer at a distance of 12 to 16 inches from the surface, moving your arm in a steady back-and-forth motion. This will ensure an even coat of paint and prevent drips or streaks.

Another important factor to consider is avoiding common painting mistakes, such as overloading the sprayer with too much paint or using excessive pressure. These mistakes can lead to uneven coverage and wasted paint.

Remember to maintain a consistent speed and pressure throughout the painting process. By mastering these techniques and avoiding common mistakes, you’ll achieve professional-looking results.

Transitioning into the next section, let’s now discuss how to properly maintain the sprayer.

Advertisement

Maintain the Sprayer

Maintain the sprayer

Keep your sprayer in top-notch condition by regularly performing maintenance tasks. Proper sprayer maintenance is essential for optimal performance and longevity.

After each use, thoroughly clean the sprayer by flushing it with water or the appropriate cleaning solution. Pay close attention to the nozzle and filters, as they can easily get clogged with paint residue.

Check for any signs of wear or damage on the hoses, seals, and gaskets, and replace them if necessary. Additionally, lubricate the moving parts to ensure smooth operation.

Regularly inspect the sprayer for any leaks or inconsistencies in pressure, and address them promptly. By following these sprayer maintenance tips, you can prevent issues and ensure your sprayer operates at its best.

Advertisement

Transitioning into troubleshooting, let’s now address common problems that may arise during operation.

Troubleshoot Issues

Now that we’ve covered how to maintain your airless paint sprayer, let’s move on to troubleshooting any issues that may arise during operation. It’s important to be aware of common problems that can occur when using an airless paint sprayer and to have some troubleshooting tips in your arsenal.

One common problem is clogging, which can be resolved by cleaning the nozzle or using a filter. Another issue could be uneven spray patterns, which can be fixed by adjusting the pressure or the spray tip. If you experience leaks, check for loose fittings or worn seals.

By addressing these common problems with some simple troubleshooting tips, you can ensure a smooth and efficient painting process. Now, let’s move on to the next section and learn how to finish the job effectively.

Finish the Job

To complete your project successfully, make sure to apply the final coat of paint with precision, leaving behind a flawless and professional finish.

Advertisement

Here are some tips for achieving a smooth finish with an airless paint sprayer. First, make sure the paint is mixed thoroughly and strain it to remove any impurities. Adjust the spray pattern and pressure according to the surface you’re painting. Start with a light mist coat to seal the surface, then follow with even, overlapping strokes.

Avoid overspray by maintaining the correct distance from the surface and using a steady hand. Common mistakes to avoid include spraying too close, applying too thick of a coat, and not allowing sufficient drying time between coats. With these tips in mind, you can achieve a beautiful finish.

Moving on to the next section about clean up and storage, it’s important to properly clean the sprayer after use to maintain its longevity.

Clean Up and Storage

After you’ve finished your project, it’s time to tidy up and find a safe spot to stow away your trusty paint-spraying companion. Cleaning the airless paint sprayer is an essential part of the post-painting process. Start by removing any leftover paint from the sprayer and its components.

Use a cleaning solution recommended by the manufacturer and follow their instructions for a thorough clean. Pay special attention to the nozzle, filters, and hoses to ensure they’re free from any residue.

Advertisement

Once the sprayer is clean, it’s important to store it properly. Make sure to release any pressure, disconnect the power source, and store it in a cool, dry place. It’s also a good idea to protect the sprayer from dust and debris by covering it with a cloth or a plastic bag.

By following these cleaning process and storing tips, you’ll keep your airless paint sprayer in top condition for future projects.

Frequently Asked Questions

How do I choose the right paint for my airless paint sprayer?

To choose the right paint for my airless paint sprayer, I consider compatibility with the sprayer and the project requirements. It’s important to select a paint that is specifically designed for airless spraying to ensure optimal results.

What are the safety precautions I should take while operating an airless paint sprayer?

Paint sprayer safety precautions are crucial to prevent accidents. Always wear proper protective gear, such as goggles, gloves, and a respirator. Maintain a safe distance from the spray, and ensure proper ventilation in the workspace.

Can I use an airless paint sprayer for both interior and exterior painting projects?

Yes, you can absolutely use an airless paint sprayer for both interior and exterior painting projects. It offers the advantage of quick and efficient coverage, making it ideal for large areas and achieving a smooth finish.

Advertisement

How often should I clean and maintain my airless paint sprayer?

I recommend cleaning and maintaining your airless paint sprayer after each use to ensure optimal performance. Some tips for cleaning and maintaining include flushing the system with water or solvent and inspecting and replacing worn or damaged parts.

What are some common issues or troubleshooting tips for using an airless paint sprayer?

Some common issues when using an airless paint sprayer include clogged spray tips, uneven spray patterns, and paint overspray. To troubleshoot, clean the spray tips, adjust the pressure, and practice proper technique to avoid overspray.

Conclusion

In conclusion, operating an airless paint sprayer requires attention to detail and a steady hand. By understanding the components and settings, choosing the right paint, and practicing proper technique, you can achieve a smooth and professional finish.

Remember to take safety precautions and maintain the sprayer for optimal performance. Troubleshoot any issues that may arise and finish the job with confidence. Lastly, clean up and store the sprayer properly to ensure its longevity.

With these tips, you’ll paint like a pro, leaving a trail of vibrant colors in your wake.

Advertisement
Continue Reading

Airless Paint Sprayers FAQs

How To Use Wagner Control Pro 130 Airless Paint Sprayer

Published

on

By

An image showcasing a skilled hand effortlessly maneuvering the Wagner Control Pro 130 Airless Paint Sprayer, as vibrant paint effortlessly transforms a dull wall into a stunning masterpiece

I’ve always believed that a fresh coat of paint can transform any space entirely. Whether it’s revitalizing your living room or adding a pop of color to your furniture, the Wagner Control Pro 130 Airless Paint Sprayer is the must-have tool for this task.

In this article, I’ll be sharing my knowledge and expertise on how to use this fantastic paint sprayer effectively.

First things first, we’ll dive into unboxing and setting up the Wagner Control Pro 130.

Then, I’ll guide you through the process of preparing your paint for spraying, adjusting the spray pattern and pressure, and mastering the proper technique for holding and moving the sprayer.

We’ll also explore spraying different surfaces such as walls, ceilings, and furniture.

Advertisement

If you encounter any issues along the way, don’t worry! I’ve got troubleshooting tips to help you out.

Additionally, I’ll share some invaluable advice on achieving a smooth and even finish, as well as safety precautions and the necessary protective gear.

Get ready to unleash your creativity and transform your space with the Wagner Control Pro 130 Airless Paint Sprayer.

Let’s get started!

Key Takeaways

  • Preparing the surface is crucial for a successful paint job.
  • Maintaining a consistent distance and steady motion while using the Control Pro 130 ensures a seamless finish.
  • Prioritizing safety by wearing goggles, mask, and gloves is essential.
  • The Control Pro 130 saves time, handles various materials, and achieves a professional finish, but considerations should be made regarding overspray, cost, and learning curve.

Unboxing and Setting Up the Wagner Control Pro 130

Advertisement

Let’s dive right into unboxing and setting up the Wagner Control Pro 130, so you can start transforming your space with ease!

The first thing you’ll want to do is unbox the paint sprayer and familiarize yourself with its components. Make sure to read the instruction manual thoroughly, as it’ll provide important information about paint sprayer maintenance and troubleshooting tips.

Once you’ve done that, it’s time to set up the sprayer. Start by attaching the hose to the sprayer and the gun to the hose. Make sure everything is securely connected.

Next, fill the paint container with your desired paint color and attach it to the sprayer.

Lastly, adjust the pressure settings according to the type of paint you’re using.

Advertisement

Now that we have the sprayer set up, let’s move on to preparing the paint for spraying.

Preparing the Paint for Spraying

Get your paint party started by mixing up the perfect color concoction for your masterpiece with the Wagner Control Pro 130 airless paint sprayer. Proper paint preparation is essential to ensure a smooth and even application. Before pouring the paint into the sprayer, it is important to check its viscosity. This refers to the thickness or consistency of the paint. Different types of paints require different viscosities for optimal spraying. To determine the viscosity, use a viscosity cup and follow the manufacturer’s instructions. Once you have the correct viscosity, pour the paint into the sprayer’s container. Remember to strain the paint to remove any impurities that could clog the sprayer. With the paint prepared, move on to the next step of adjusting the spray pattern and pressure for the perfect finish.

Adjusting the Spray Pattern and Pressure

After preparing the paint, it’s time to fine-tune the spray pattern and pressure for a flawless finish.

Advertisement

To adjust the spray pattern, start by loosening the nozzle guard and rotating it to the desired position. A wider pattern is ideal for larger surfaces, while a narrower pattern is better for detailed areas. Once the pattern is set, tighten the nozzle guard to secure it in place.

Now, let’s talk about controlling overspray. To minimize overspray, adjust the pressure of the sprayer. Lowering the pressure will reduce overspray, while increasing the pressure will provide more coverage. It’s important to find the right balance to achieve the desired results.

With the spray pattern and pressure adjusted, we’re ready to move on to the next section about the proper technique for holding and moving the sprayer.

Proper Technique for Holding and Moving the Sprayer

Mastering the art of holding and maneuvering the sprayer is crucial for achieving professional results with your paint job. To ensure proper technique, follow these steps:

  1. Grip: Hold the sprayer firmly with both hands, keeping a comfortable yet secure grip. This’ll provide stability and control throughout the painting process.

  2. Stance: Stand with your feet shoulder-width apart and position your body in the direction you wanna paint. This’ll allow for smooth and consistent movement.

  3. Movement: Keep the sprayer parallel to the surface and move it in a steady, side-to-side motion. Overlap each pass by about 50% to ensure even coverage.

By mastering these holding and movement techniques, you’ll be able to paint walls, ceilings, and furniture with ease.

Advertisement

Transitioning into the next section, let’s explore how to spray different surfaces for optimal results.

Spraying Different Surfaces: Walls, Ceilings, and Furniture

Once you’ve got a firm grip and a steady stance, it’s time to unleash the sprayer’s magic on walls, ceilings, and furniture, transforming them into works of art. Spraying on uneven surfaces can be a challenge, but with the Wagner Control Pro 130, achieving a professional finish is within reach. This versatile sprayer allows you to adjust the pressure and flow rate, ensuring even coverage and minimizing drips. Whether you’re tackling textured walls, popcorn ceilings, or intricate furniture, the Control Pro 130 delivers a smooth and consistent coat of paint. To give you an idea of the sprayer’s capabilities, here’s a table showcasing the recommended settings for different surfaces:

Surface Pressure (PSI) Flow Rate (GPM)
Walls 1500 0.3
Ceilings 1000 0.2
Furniture 2000 0.4

With these guidelines, you can achieve professional results every time. Now, let’s move on to cleaning and maintaining the Wagner Control Pro 130, ensuring its longevity and peak performance.

Advertisement

Cleaning and Maintaining the Wagner Control Pro 130

To keep your Wagner Control Pro 130 in top shape, it’s important to properly clean and maintain it. Cleaning the equipment after each use is essential to prevent clogs and ensure optimal performance.

Start by disconnecting the sprayer from the power source and relieving any pressure in the system. Remove the spray tip and filter, and rinse them thoroughly with clean water. Use a brush to remove any paint residue from the gun and hose.

It’s also important to clean the suction tube and prime valve. Regularly inspect the sprayer for any signs of damage or wear, and replace any worn-out parts.

By following these cleaning and maintenance steps, you can prolong the lifespan of your Wagner Control Pro 130 and avoid potential issues.

Now, let’s move on to troubleshooting common problems you may encounter with your paint sprayer.

Advertisement

Troubleshooting Common Issues

Wow, encountering problems with your paint sprayer can feel like a complete nightmare! However, with a few troubleshooting tips, you can quickly get your Wagner Control Pro 130 back in working order.

Here are a few common issues and how to solve them:

  • Clogging: If you notice the paint isn’t spraying properly or is coming out in uneven patterns, the nozzle may be clogged. To fix this, remove the nozzle and clean it thoroughly with warm, soapy water. Make sure to remove any dried paint or debris.

  • Low Pressure: If the paint isn’t coming out with enough force, check the pump pressure. Adjust the pressure setting on the sprayer to ensure it’s at the appropriate level for the paint you’re using.

  • Leaking: If you notice paint leaking from the sprayer, check all the connections and seals for any signs of damage or wear. Replace any faulty parts and ensure all connections are tight.

By following these troubleshooting tips, you can resolve common issues with your Wagner Control Pro 130 and achieve a smooth and even finish in your paint projects.

Tips for Achieving a Smooth and Even Finish

Achieving a smooth and even finish on your projects with the Wagner Control Pro 130 is made possible by implementing these helpful tips.

To achieve a smooth finish, it’s important to start with a clean and properly prepared surface. Remove any dust, dirt, or debris before beginning the painting process.

Advertisement

Additionally, make sure the paint is properly mixed and free of any lumps or clumps.

When using the Control Pro 130, it’s essential to maintain a consistent distance from the surface to avoid overspray. A distance of 6-8 inches is usually recommended.

Move the sprayer in a steady, controlled motion to ensure even coverage.

Lastly, be mindful of overlapping each pass to achieve a seamless finish.

By following these tips, you can achieve a professional-looking result.

Advertisement

Now, let’s move on to the next section on safety precautions and protective gear.

Safety Precautions and Protective Gear

To achieve a smooth and even finish with the Wagner Control Pro 130 airless paint sprayer, it is essential to follow safety precautions and wear the appropriate protective gear. Safety should always be a priority when using any paint sprayer, as it involves handling chemicals and potentially hazardous materials. Adhering to safety guidelines not only protects you from harm, but also ensures a successful painting project.

When using the Wagner Control Pro 130, it is recommended to wear protective equipment such as safety goggles, a respirator mask, and gloves to shield yourself from potential paint overspray and fumes. These items create a barrier between you and the paint, minimizing any risks involved.

To summarize, safety precautions and protective gear are vital when operating the Wagner Control Pro 130 airless paint sprayer. By following these guidelines and using the appropriate equipment, you can ensure a safe and successful painting experience.

Now, let’s move on to discussing the pros and cons of using the Wagner Control Pro 130 airless paint sprayer.

Advertisement

Pros and Cons of Using the Wagner Control Pro 130 Airless Paint Sprayer

One must consider the advantages and disadvantages of employing the Wagner Control Pro 130 airless paint sprayer. Here are the pros and cons of using this paint sprayer:

  1. Advantages:

    • Time-saving: The airless technology allows for faster coverage and less time spent on painting projects.
    • Versatility: The Control Pro 130 can handle a variety of materials, including latex, stains, and sealers.
    • Professional finish: The high-pressure system ensures a smooth and even coat, resulting in a professional-looking finish.
    • Easy to clean: The detachable parts and simple design make cleaning the sprayer a breeze.
  2. Disadvantages:

    • Overspray: Due to the high-pressure system, there is a risk of overspray, which can lead to wasted paint and potential damage to surrounding areas.
    • Cost: The Wagner Control Pro 130 is more expensive compared to traditional paintbrushes or rollers.
    • Learning curve: It may take some practice to master the technique of using an airless paint sprayer effectively.
    • Maintenance: Regular maintenance, such as cleaning and replacing parts, is necessary to keep the sprayer in optimal condition.

Considering these pros and cons can help you decide if the Wagner Control Pro 130 airless paint sprayer is the right choice for your painting needs.

Frequently Asked Questions

Can the Wagner Control Pro 130 be used for outdoor painting projects?

Yes, the Wagner Control Pro 130 can be used for outdoor painting projects. It is designed to withstand various weather conditions and provides excellent weather resistance, making it a reliable choice for outdoor painting tasks.

How long does it typically take for the paint to dry when using the Wagner Control Pro 130?

How long does it typically take for paint to dry? To speed up drying time, ensure proper ventilation and use a dehumidifier. To prevent paint from drying too quickly, add a paint extender or keep a wet edge.

Can the Wagner Control Pro 130 be used with different types of paint, such as latex or oil-based?

Yes, the Wagner Control Pro 130 can be used with different types of paint, including latex and oil-based. It is suitable for a variety of surfaces such as walls, ceilings, fences, and furniture. To clean and maintain the sprayer, follow the manufacturer’s instructions for proper cleaning and storage.

Does the Wagner Control Pro 130 come with any additional accessories or attachments?

Yes, the Wagner Control Pro 130 comes with additional accessories and attachments. These include a 25-foot hose, a spray gun, and a reversible spray tip. It is perfect for outdoor painting projects and reduces paint drying time. The noise level is also relatively low.

Advertisement

How loud is the Wagner Control Pro 130 while in operation?

The Wagner Control Pro 130 has a noise level of around 65 decibels, which is relatively quiet for an airless paint sprayer. It is suitable for indoor painting projects, providing efficient and precise coverage.

Conclusion

In conclusion, the Wagner Control Pro 130 airless paint sprayer is a reliable and efficient tool for all your painting needs. It’s easy to set up and has an adjustable spray pattern, allowing you to achieve a smooth and even finish on various surfaces.

However, it’s important to follow safety precautions and wear protective gear while using the sprayer. Remember, just like a skilled artist uses their brush to create a masterpiece, the Wagner Control Pro 130 lets you unleash your creativity and transform any space with a stroke of paint.

Continue Reading
Advertisement

Affiliate disclaimer

As an affiliate, we may earn a commission from qualifying purchases. We get commissions for purchases made through links on this website from Amazon and other third parties.

Advertisement

Trending