Tired of spending too much time manually painting stencils? Don’t worry, I have an innovative solution for you – using an airless sprayer for your stencil projects! Trust me, once you try this technique, you’ll wonder how you ever did without it.
In this article, I’ll walk you through the step-by-step process of using an airless sprayer to paint stencils. From gathering your materials to sealing the design, I’ll provide you with all the information you need to achieve flawless results.
But before we dive in, let me assure you that this method is not only quick and efficient, but it also allows for precise and professional-looking designs. So, whether you’re a seasoned DIY enthusiast or just starting out, get ready to take your stencil game to the next level.
Prepare to be amazed as we explore the world of painting stencils using an airless sprayer. Let’s get started!
Key Takeaways
- Touch up imperfections using a fine brush to fix paint bleed or smudges and achieve a flawless finish.
- Seal the stencil design with a clear coat to protect and enhance its longevity, using either spray-on or brush-on clear coat.
- Clean up the airless sprayer tools and brushes properly using appropriate solvents and water to maintain their longevity.
- Choose the right stencil design that suits your personal style and space, secure it firmly, and maintain a consistent distance while spraying for clean lines and even coverage.
Gather Your Materials
Now that you’ve got your airless sprayer ready, it’s time to gather all the materials you’ll need to create stunning stenciled designs.
Choosing the right paint colors is crucial for achieving the desired effect. Opt for colors that contrast well and complement your overall design. Consider using high-quality acrylic or latex paints as they work best with airless sprayers.
To create intricate stencil designs, make sure to choose stencils that are detailed and precise. Look for stencils with sharp edges and clear lines. Additionally, having a stencil adhesive spray can help keep your stencil in place and prevent paint from bleeding underneath.
Once you have all your materials, you can move on to preparing your surface for painting.
Prepare Your Surface
First, make sure you’ve got a surface as smooth as glass to achieve flawless stencil results with your handy airless sprayer. Surface preparation is crucial for ensuring the paint adheres smoothly and evenly.
Start by cleaning the surface thoroughly, removing any dirt, dust, or debris. Use a scraper or sandpaper to smooth out any rough patches or imperfections.
Next, apply a primer to create a solid base for the paint. This will help the paint adhere better and prevent any peeling or chipping. Choose a primer that is suitable for your surface material, whether it’s wood, metal, or concrete. Follow the manufacturer’s instructions for application and drying time.
Once the surface is primed and ready, you can move on to choosing your stencil design.
Choose Your Stencil Design
Once you’ve prepared your surface, it’s time to select the perfect stencil design for you. Stencil design trends are constantly evolving, so it’s important to choose a design that reflects your personal style and fits the overall aesthetic of your project. You can find a wide variety of stencil designs online or at your local craft store. When choosing a stencil, consider the size of your project and the area you want to cover. It’s important to choose the right stencil size to ensure that your design fits perfectly and looks professional. To help you decide, here’s a 2 column and 5 row table showcasing popular stencil design trends and their recommended sizes:
| Design Trend | Recommended Size |
|---|---|
| Geometric Patterns | 12" x 12" |
| Floral Motifs | 18" x 18" |
| Nautical Themes | 24" x 24" |
| Typography | 8" x 10" |
| Animal Prints | 16" x 16" |
Once you’ve chosen your stencil design, you’re ready to move on to the next step: mix and load your paint.
Mix and Load Your Paint
Get ready to unleash your creativity by mixing and loading your paint for a truly captivating and immersive DIY experience! When it comes to paint mixing techniques for stencils, it’s important to choose the right paint consistency.
You want a paint that is not too thick or too thin, as this can affect the final outcome of your stencil design. To achieve the perfect consistency, start by pouring your paint into a mixing container and adding a small amount of water or paint thinner. Mix it well until you achieve a smooth and creamy texture that flows easily through the airless sprayer.
Once your paint is mixed and ready, load it into the sprayer according to the manufacturer’s instructions. Now that you have your paint ready, it’s time to practice your technique for flawless stencil painting.
Practice Your Technique
Hone your skills and perfect your craft by mastering the art of stencil painting with a flawless technique that will leave your audience in awe! Practice is the key to becoming an expert in using an airless sprayer for stenciling. Here are some practice tips to help you improve your technique:
| Practice Tip | Common Mistakes |
|---|---|
| Start with small stencils | Applying too much pressure |
| Maintain a consistent distance | Overspraying or underspraying |
| Use slow and steady strokes | Uneven coverage |
| Experiment with different paint thicknesses | Paint bleeding under stencil |
| Practice on different surfaces | Not securing stencil properly |
By following these practice tips, you will gain more control over your sprayer, resulting in clean and precise stencil designs. Once you feel confident in your technique, you can move on to the next section and start painting your desired stencils without hesitation.
Start Painting
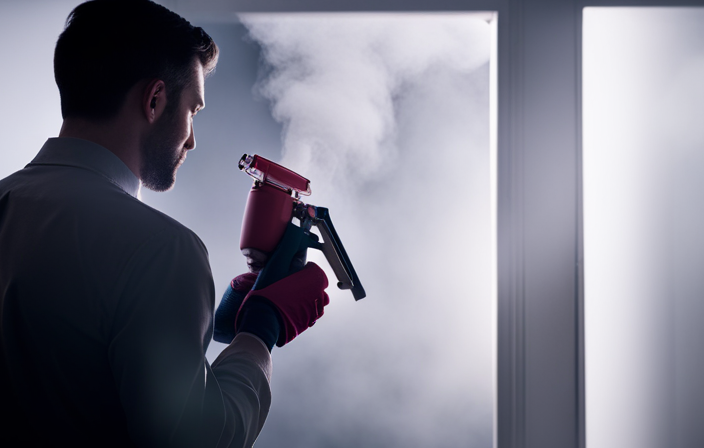
When starting to paint with an airless sprayer, it’s important to hold the sprayer at a 45-degree angle to the surface. This will ensure that the paint is evenly distributed and prevents any drips or uneven coverage.
As I move steadily across the stencil, I apply an even coat of paint. I make sure to maintain a consistent speed and distance from the surface.
This technique helps to achieve a smooth and professional finish.
Hold the sprayer at a 45-degree angle to the surface
To achieve a flawless stencil design, angle the sprayer at a precise 45-degree tilt, allowing the paint to gracefully dance across the surface. This angle is crucial for achieving even coverage and preventing any paint from seeping under the stencil.
Before starting, ensure that your sprayer is well-maintained, with no clogs or leaks that could affect the paint flow. Once you have positioned the stencil securely on the surface, hold the sprayer about 12 to 18 inches away.
Begin spraying, moving steadily across the stencil in a smooth, controlled motion. Be sure to maintain the 45-degree angle throughout the process to achieve consistent results.
As you complete this step, you can transition smoothly into applying an even coat of paint, moving steadily across the stencil.
Apply an even coat of paint, moving steadily across the stencil
Once you’ve got the sprayer angled just right, smoothly glide across the stencil, applying an even coat of paint. To ensure a successful stencil painting, follow these steps:
-
Stencil Placement: Make sure the stencil is securely taped or weighted down to prevent shifting during spraying. This will help you achieve precise and clean lines.
-
Moving Steadily: Maintain a steady pace as you move across the stencil, ensuring the paint is applied evenly. Avoid rushing or lingering in one spot, as this can lead to drips or uneven coverage.
-
Stencil Care: After each use, clean the stencil thoroughly to remove any dried paint. This will help prolong its lifespan and prevent any unwanted residue from transferring onto your next project.
With the stencil expertly painted and the surface covered in a flawless coat of paint, it’s time to move on to the next step: removing the stencil.
Remove the Stencil
To remove the stencil, carefully peel it off to reveal your masterpiece. Take your time to avoid damaging the painted surface. If there is any stencil residue, gently wipe it away with a damp cloth or sponge. For stubborn residue, try using a mild solvent or paint thinner, but be cautious not to damage the painted surface. You can also use a stencil adhesive remover designed for this purpose.
Once the stencil is removed and any residue is cleaned up, it’s time to move on to the next step: touch up any imperfections. This will ensure that your finished project looks flawless and professional.
Touch up any Imperfections
Now it’s time to give your masterpiece the finishing touches, ensuring that every tiny flaw is expertly corrected and that your project truly shines. To fix any mistakes or imperfections in the stencil, follow these steps:
- Use a fine brush to touch up any areas where the paint may have bled or smudged.
- Blend colors seamlessly by lightly layering additional paint to create a smooth transition between shades.
- Pay attention to details and make sure all edges are crisp and defined.
- Step back periodically to assess the overall look and make any necessary adjustments.
By following these steps, you can ensure that your stencil painting is flawless and visually appealing.
In the next section, we will discuss how to seal the design to protect it and enhance its longevity.
Seal the Design
To protect and enhance the longevity of your stencil painting, you should seal the design with a clear coat. Applying a clear coat can increase the lifespan of the artwork by up to 50%.
When it comes to sealing the design, there are various techniques you can use. One popular method is using a spray-on clear coat specifically designed for artwork. This creates a durable and protective layer over the stencil, preventing fading, chipping, and other damages.
Another alternative is using a brush-on clear coat, which allows for more precise application and control. Additionally, there are alternative sealants available, such as varnishes or polyurethane, that can also provide excellent protection for your stencil painting.
Once the design is sealed, you can proceed to the next step of clean up and enjoy your finished project.
Clean Up and Enjoy Your Finished Project
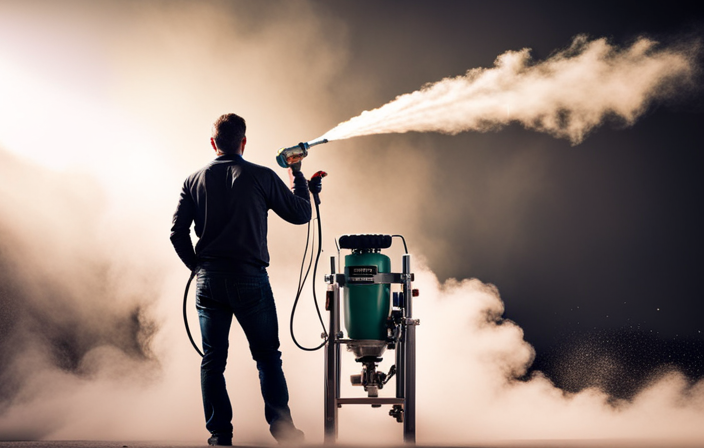
After completing the stencil painting project, it’s important to clean the airless sprayer and other tools properly using appropriate solvents. This will help maintain the equipment and ensure its longevity.
Once the clean-up is done, take a step back and admire the beautifully painted stencil design. Appreciate the hard work and effort put into creating it.
Clean the airless sprayer and other tools with appropriate solvents
First, make sure to clean the airless sprayer and other tools with appropriate solvents. This will ensure a pristine surface for your stenciling project.
Here are some best practices for cleaning tools:
-
Flush the airless sprayer with water to remove any remaining paint residue.
-
Use a solvent, such as mineral spirits or paint thinner, to clean the sprayer’s filters and nozzles.
-
Wipe down all other tools with a clean cloth soaked in the appropriate solvent to remove any paint or debris.
-
Don’t forget to clean your brushes and rollers thoroughly to maintain their lifespan.
Once your tools are clean and ready, you can step back and admire your beautifully painted stencil design.
Transitioning to the next section, take a moment to appreciate the artistic outcome of your hard work.
Step back and admire your beautifully painted stencil design
After cleaning the airless sprayer and other tools with appropriate solvents, it’s time to step back and admire your beautifully painted stencil design.
Choosing the right stencil design is crucial for a successful outcome. My advice is to opt for a design that suits your personal style and complements the space you’re working on. If you’re unsure, start with simpler designs and gradually work your way up to more intricate ones.
To achieve clean lines, make sure the stencil is firmly secured to the surface, using tape if necessary. When spraying, maintain a consistent distance between the sprayer and the surface to ensure even coverage. Move the sprayer smoothly and steadily across the stencil, avoiding any sudden stops or jerky movements.
By following these tips, you’ll be able to create stunning stencil designs with crisp, clean lines.
Frequently Asked Questions
How do I choose the right airless sprayer for stencil painting?
To choose the right airless sprayer for stencil painting, consider factors such as nozzle size, pressure control, and portability. Regular airless sprayer maintenance ensures optimal performance. The benefits of using an airless sprayer include faster application, even coverage, and reduced overspray.
Can I reuse stencils after painting?
After painting with an airless sprayer, stencils can be reused by carefully cleaning them with water and a brush. If you prefer alternatives, you can use adhesive vinyl or stencil paper for a similar effect.
What types of surfaces are suitable for stencil painting with an airless sprayer?
To achieve clean and crisp stencil designs with an airless sprayer, prepare the surface by cleaning and smoothing it. Use tape or adhesive to secure the stencil tightly, and consider using a primer for better adhesion.
How long does it take for the paint to dry on the stencil design?
To prevent paint from smudging on a stencil design, allow it to dry completely before removing the stencil. Tips for achieving a crisp and clean stencil design include using high-quality stencils and applying light, even coats of paint.
Can I use different colors of paint for each layer of the stencil design?
Yes, you can use different colors of paint for each layer of the stencil design. It is important to mix paint colors properly and use the proper technique for stencil painting to achieve the desired result.
Conclusion
In the end, painting stencils using an airless sprayer is like breathing life into your creativity.
With each stroke, you create a masterpiece that speaks volumes without uttering a word.
The power of colors and patterns intertwines, leaving a lasting impression on your soul.
As you step back and admire your work, a sense of fulfillment washes over you, reminding you of the beauty that lies within your artistic spirit.
So go forth and paint, for the world is waiting to be adorned with your unique vision.