Many people believe that giving a home a fresh coat of paint can really transform its appearance. When it comes to painting the outside of a stucco house, using an airless sprayer can make the job much easier and more efficient.
Hi, I’m here to guide you through the process of painting your stucco house using an airless sprayer, step by step.
In this article, you’ll learn how to properly prepare the surface, choose the right paint and equipment, and mask and protect surrounding areas.
I’ll show you how to:
- Prime the stucco surface
- Set up and adjust the airless sprayer
- Pay attention to the important details
Plus, I’ll provide tips on applying multiple coats if needed and cleaning and maintaining the sprayer for future use.
By the end of this article, you’ll have all the knowledge and confidence to tackle the task of painting your stucco house with an airless sprayer.
So let’s get started and transform your home with a fresh, vibrant look!
Key Takeaways
- Multiple coats of paint are necessary for proper adherence and even drying.
- Allowing sufficient drying time between coats improves longevity and durability.
- Checking for uniform coverage after each coat helps avoid issues like peeling, cracking, or uneven coverage.
- Regularly cleaning and maintaining the sprayer is essential to prevent clogs and ensure a professional finish.

InoKraft MaXpray M1 Airless Paint Sprayer, 3000 PSI 550W Corded Electric, Thinning-Free for Latex & Stain, DIY Home Interior Exterior Walls Fences Decks, Includes Spray Gun Kit & 12" Tip Extension
5X FASTER THAN ROLLING, 12X FASTER THAN BRUSHING - The 550W motor delivers up to 3000 PSI and...
As an affiliate, we earn on qualifying purchases.
Prepare the Exterior Surface
Before you start slapping on that fresh coat of paint, make sure to properly clean and prime the exterior surface of your stucco house. Surface preparation is crucial for a successful and long-lasting paint job.
Start by removing any loose or peeling paint using a scraper or wire brush. This will ensure that the new paint adheres properly to the surface.
Next, thoroughly clean the stucco using a pressure washer or a mixture of water and mild detergent. This will remove dirt, debris, and any mold or mildew that may have accumulated over time.
Once the surface is clean and dry, apply a layer of primer to seal the stucco and create a smooth base for the paint.
With the surface prepared, it’s time to move on to choosing the right paint and equipment for the job.

InoKraft NEO Airless Paint Sprayer Kit for House Painting, DIY Beginners' Choice with Accessories Storage Space, Lightweight Design, Quick Clean for Home Interior and Exterior Furniture and Fences
【Your DIY Partner】Upgrade your DIY projects with the NEO airless paint sprayer-significantly faster than handheld electric HVLP paint...
As an affiliate, we earn on qualifying purchases.
Choose the Right Paint and Equipment
To get started, it’s crucial to pick the perfect color and gather all the necessary gear for the job. When choosing the right paint color, consider the architectural style of your stucco house and the surrounding environment. Opt for a color that complements the overall aesthetic and blends well with the neighborhood.
Here are some tips for achieving a smooth finish:
- Select a high-quality acrylic or elastomeric paint that is specifically formulated for exterior surfaces.
- Use a paint sprayer with a variable pressure control to ensure an even application.
- Start by applying a thin coat of primer to seal the surface and enhance paint adhesion.
- Apply the paint in overlapping vertical or horizontal strokes, working in small sections to prevent streaks or drips.
By following these tips, you can achieve a professional-looking paint job.
Moving on to the next section, it’s important to mask and protect surrounding areas to avoid any accidental paint splatters.

Toolrhino Airless Paint Sprayer for House Painting, DIY Beginners' Choice with Accessories Storage Space, Lightweight Design, Thinning-Free & Quick Clean for 5 Gallon DIY Painting Projects
Your DIY Partner - Upgrade your DIY projects with the Toolrhino airless paint sprayer-significantly faster than handheld electric...
As an affiliate, we earn on qualifying purchases.
Mask and Protect Surrounding Areas
In order to ensure a clean and professional-looking paint job, it’s important to take the necessary steps to mask and protect the surrounding areas of your stucco home.
Start by covering furniture and other items near the house with drop cloths or plastic sheets to prevent any accidental paint splatters or drips.
Use painter’s tape to protect windows, door frames, and any other areas that you want to keep paint-free. Make sure the tape is securely pressed down to create a tight seal.
Additionally, consider using plastic or cardboard to cover the ground and any plants or landscaping that may be in close proximity to the house.
By taking these precautions, you can minimize the risk of paint damage and achieve a smoother painting process.
Once everything is properly protected, you can move on to priming the stucco surface.
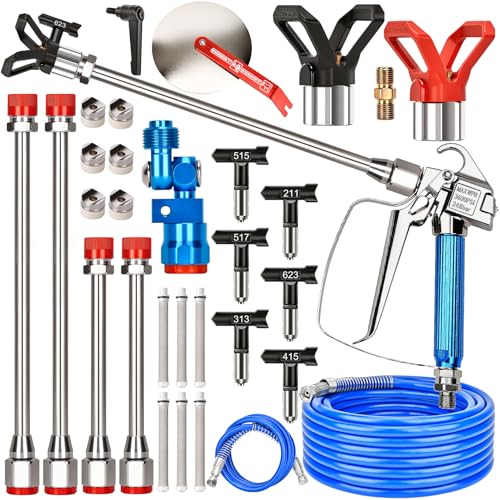
25PCS Airless Paint Sprayer Gun Kit, 3600PSI Airless Spray Gun with 50Ft and 4.92Ft High Pressure Hose, 6PCS Reversible Spray Tips & 6PCS Filters & 4PCS Extension Rod & Guide Tool & 2PCS Nozzle Seat
Smooth, Clog-Free Sprayer: Precision filters and reversible carbide tips minimize clogs in airless paint sprayers, providing a smooth,...
As an affiliate, we earn on qualifying purchases.
Prime the Stucco Surface
Once you’ve properly masked and protected the surrounding areas, it’s time to prime the stucco surface to ensure a smooth and durable paint finish. To achieve professional results, follow these stucco painting techniques:
-
Clean the surface: Remove any loose debris or dirt from the stucco using a pressure washer or a stiff brush. This step is crucial for proper adhesion of the primer.
-
Repair any damage: Inspect the stucco for cracks or holes and repair them using a stucco patching compound. Smooth out the patch with a trowel and let it dry completely before moving forward.
-
Apply the primer: Use a high-quality acrylic primer designed for stucco surfaces. Apply it evenly using a roller or sprayer, covering the entire surface. The primer will help seal the stucco and enhance the durability of the paint.
By following these stucco painting techniques and troubleshooting any issues that may arise during the priming process, you’ll be ready to set up and adjust the airless sprayer for the next step.
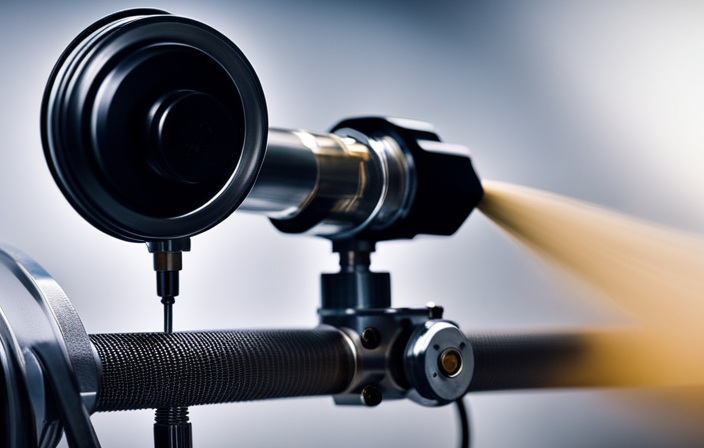
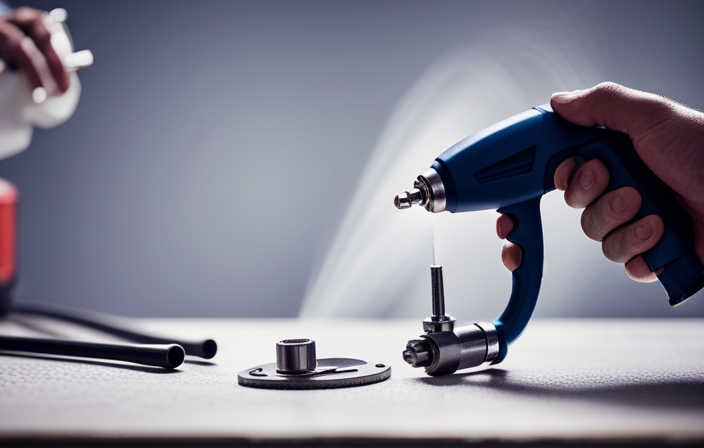
Set Up and Adjust the Airless Sprayer
Before starting to spray the stucco, it is important to set up and adjust the airless sprayer for optimal performance. Begin by following the manufacturer’s instructions to adjust the spray pattern on the sprayer. This will ensure that the paint is applied evenly and consistently on the stucco surface.
Next, check the pressure settings on the sprayer and make any necessary adjustments to achieve the desired flow rate. This will help you control the amount of paint being sprayed onto the surface.
During the setup process, it is also important to troubleshoot any common issues that may arise. For example, if the sprayer is clogging or producing an uneven spray pattern, check for any obstructions in the nozzle or hose. Clean or replace any parts as needed to ensure smooth operation.
Additionally, make sure that the sprayer is properly calibrated to prevent overspray or drips. This will help you achieve a clean and professional finish on the stucco surface.
Once the airless sprayer is properly set up and adjusted, you are now ready to move on to the next step of starting to spray the stucco.
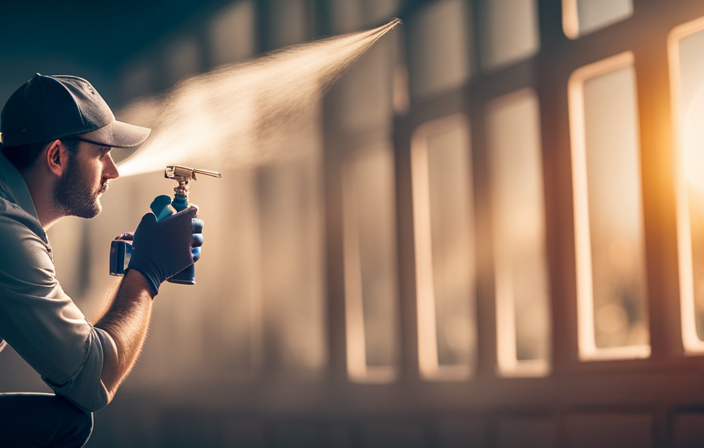
Start Spraying the Stucco
Now it’s time to unleash the power of the sprayer and bring your stucco project to life! Here are some tips for achieving a smooth finish and troubleshooting common spraying issues:
-
First, make sure you have the correct spray tip size for your stucco. A larger tip will allow for a thicker coating, while a smaller tip will provide a finer finish.
-
Keep the sprayer moving at a consistent speed to avoid uneven coverage or drips. Start at one end of the wall and work your way across in smooth, overlapping strokes.
-
If you notice any areas with excessive overspray or heavy build-up, use a brush or roller to even it out before it dries.
-
If the stucco starts to dry too quickly, adjust the pressure on the sprayer to increase the flow of paint.
-
Finally, pay attention to details such as edges, corners, and trim. These areas may require additional care and attention to ensure a professional-looking finish.
By following these tips, you can achieve a smooth and flawless finish on your stucco exterior.
In the next section, we will discuss the importance of paying attention to details in order to achieve the best results.
Pay Attention to Details
Take the time to meticulously attend to the finer points of your project, such as edges, corners, and trim, in order to achieve a truly polished and professional outcome. Paying attention to these details is crucial to avoid mistakes and ensure a flawless finish. Here is a handy table to help you keep track of the areas that require special attention:
| Area | Tips for Attention to Detail |
|---|---|
| Edges | Use a brush to carefully paint along the edges, ensuring full coverage. |
| Corners | Take extra care to reach into corners and ensure they are fully coated. |
| Trim | Apply a steady and even coat of paint to the trim, avoiding drips and runs. |
| Texture | Pay attention to the texture of the stucco and adjust the sprayer settings accordingly for an even application. |
By paying attention to these details, you can achieve a professional-looking paint job. Once you have completed this step, you can move on to the next section about applying multiple coats if needed.
Apply Multiple Coats if Needed
When applying multiple coats of paint to the exterior of a stucco house with an airless sprayer, it’s important to allow sufficient drying time between coats. This will ensure that each coat properly adheres to the surface and prevents any potential issues with the paint not drying evenly.
Additionally, it’s crucial to check for uniform coverage after each coat. This will help ensure that the paint is being applied evenly and consistently across the entire surface of the house.
Apply multiple coats if needed.
Allow Sufficient Drying Time Between Coats
To ensure a professional finish, you should allow sufficient drying time between coats of paint; did you know that a recent study found that allowing at least 24 hours between coats can significantly improve the longevity of your paint job? Giving each coat enough time to dry properly allows the paint to cure and adhere to the surface more effectively, resulting in a more durable and long-lasting finish. It also helps to avoid issues such as peeling, cracking, or uneven coverage.
To help you keep track of the drying time between coats, here’s a simple table:
| Coat | Drying Time |
|---|---|
| 1st | 24 hours |
| 2nd | 24 hours |
| 3rd | 24 hours |
| 4th | 24 hours |
By following this recommended drying time, you can ensure the best paint quality and achieve a professional-looking exterior for your stucco house. Once each coat is dry, you can move on to the next step of checking for uniform coverage.
Check for Uniform Coverage
To ensure uniform and flawless coverage on your freshly painted stucco, it is important to step back and inspect the surface. Here are the steps to check for even application:
-
Stand at a distance and examine the entire surface. Look for any areas that appear lighter or darker than the rest.
-
Check for any spots where the paint may have pooled or dripped, indicating an uneven application.
-
Pay attention to corners, edges, and hard-to-reach areas, as they are more prone to uneven coverage.
-
If you notice any issues, address them immediately by lightly sanding or touching up those areas.
Checking for uniform coverage is crucial to achieving a professional-looking finish. It allows you to troubleshoot common spray issues and ensure that the paint is applied evenly across the entire stucco surface.
Once you have confirmed the coverage is satisfactory, it’s time to move on to the next step of cleaning and maintaining the sprayer.
Clean and Maintain the Sprayer
Maintaining the sprayer ensures a flawless paint job and saves you from potential frustration. To clean the sprayer, start by flushing out any remaining paint with water or a cleaning solution recommended by the manufacturer. Remove the spray tip, filter, and guard, and clean them thoroughly to prevent clogs. Inspect the hose for any signs of wear or damage and replace if necessary. Troubleshoot any issues by checking the pressure settings, ensuring the power source is connected properly, and verifying that the paint is mixed correctly. Regularly inspect and clean the sprayer to prevent buildup and prolong its lifespan. By properly maintaining the sprayer, you can avoid costly repairs and achieve professional-looking results. Now, with your sprayer clean and ready, you can move on to enjoying your newly painted stucco house.
Enjoy Your Newly Painted Stucco House
Now that your stucco home is transformed, kick back and savor the fruits of your labor with a refreshing glass of lemonade on the porch. It’s time to appreciate the beauty of your newly painted exterior. But before you do, here are some new techniques to keep in mind for future projects:
- Use an airless sprayer for a smooth and even application.
- Start from the top and work your way down to avoid drips and streaks.
- Apply multiple thin coats rather than one thick coat to prevent cracking.
- Don’t forget to cover windows, doors, and other areas you don’t want to paint.
- Clean your sprayer thoroughly after each use to maintain its performance.
By following these tips, you can ensure a professional-looking finish and avoid common mistakes.
So sit back, relax, and enjoy the transformation of your stucco house!
Frequently Asked Questions
How long does it typically take to paint the exterior of a stucco house with an airless sprayer?
It typically takes a few days to paint the exterior of a stucco house with an airless sprayer. Before painting, it’s important to prepare the stucco surface by cleaning, repairing any damage, and applying a primer. The best type of paint to use with an airless sprayer is a high-quality acrylic or elastomeric paint.
Can I use an airless sprayer to paint other surfaces besides stucco?
Absolutely! An airless sprayer is a versatile tool that can be used to paint a variety of surfaces, not just stucco. From wood to metal, the right painting techniques can be applied with different types of sprayers.
What type of mask should I wear when using an airless sprayer?
When using an airless sprayer, it is important to wear a respirator mask to protect against paint fumes and particles. The benefits of using an airless sprayer include faster application and a smoother finish compared to other painting methods.
Do I need to sand the stucco surface before priming it?
Yes, you should sand the stucco surface before priming it. Sanding helps create a smooth and even surface for the primer to adhere to, ensuring better paint adhesion and a longer-lasting finish.
How often should I clean the airless sprayer while painting?
I clean the airless sprayer every 4-6 hours while painting to ensure optimal performance. Regular maintenance is crucial for the sprayer’s longevity. Some maintenance tips include flushing the system, inspecting the filters, and lubricating the pump.
Conclusion
In conclusion, painting the exterior of a stucco house with an airless sprayer is a cost-effective and efficient way to transform the appearance of your home.
Did you know that using an airless sprayer can save you up to 50% of the time compared to using traditional painting methods?
With this powerful tool, you can achieve a smooth and professional finish in no time.
So why wait? Grab your airless sprayer and give your stucco house a fresh new look today.