
-
In my opinion, painting the lower section of a pipe fence can be challenging. However, with the right tools and techniques, it can be very rewarding.
-
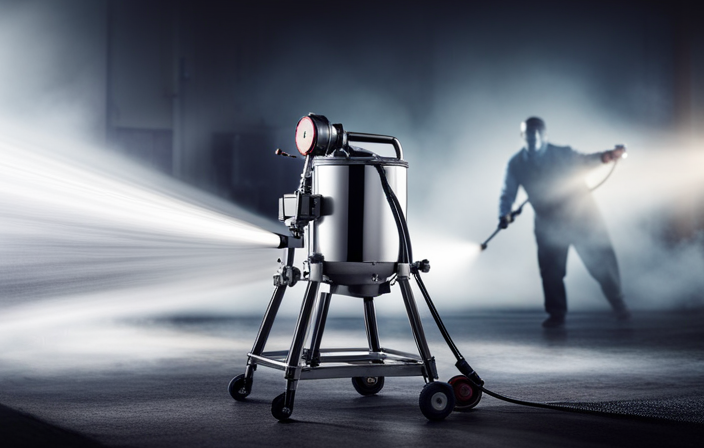
That’s why I’m here to share my expertise on how to paint the underside of a pipe fence with an airless sprayer. This method not only saves time but also ensures a smooth and even finish.
-
By using an airless sprayer, you can easily reach those hard-to-access areas and achieve professional results.
-
In this article, I will guide you through the step-by-step process, from preparing your fence for painting to properly storing your equipment.
-
So, if you’re ready to transform your fence and give it a fresh new look, let’s dive in and get started!
Key Takeaways
- Painting the underside of a pipe fence with an airless sprayer provides protection against rust, corrosion, moisture seepage, and rot, while enhancing the fence’s aesthetic appeal and property value.
- Regular inspection and maintenance of the painted fence, including touch-ups and applying a protective clear coat, ensures durability, longevity, and the preservation of the property’s stunning feature.
- To prevent paint overspray and equipment damage, proper painting techniques, appropriate equipment and materials, surface covering, maintaining a suitable spraying distance, and proper cleaning and storage of the equipment should be followed.
- Using an airless sprayer for painting offers efficient and even coverage, reduced overspray and waste, faster application, the ability to reach tight or difficult areas, and suitability for various types of surfaces.
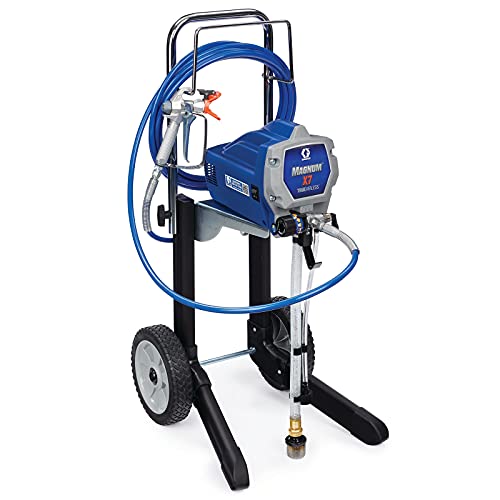
Graco Magnum 262805 X7 Cart Airless Paint Sprayer, Gray
CONTROL PAINT FLOW: Fully adjustable pressure to give you ultimate control of paint flow for any project size;...
As an affiliate, we earn on qualifying purchases.
Prepare Your Fence for Painting
Now that you’ve gathered all your materials, it’s time to get your fence ready for a fresh coat of paint.
Choosing the right paint color is important for achieving the desired look and protecting the metal surface from rust. Opt for a paint that is specifically designed for use on metal, as it will provide better adhesion and durability.
Before painting, it’s crucial to prepare the surface by sanding and priming it. Sanding helps to remove any rust or loose paint, ensuring a smooth and even finish.
After sanding, apply a coat of primer to promote better paint adhesion and prevent future rusting.
Once the surface is prepped and primed, you’re ready to move on to the next step of gathering your materials and equipment for painting the underside of your pipe fence.

Wagner Spraytech 2435698 Control Pro 130 Paint Sprayer with T2 Gun, High Efficiency Airless Sprayer with Low Overspray, Yellow
WAGNER AIRLESS PAINT SPRAYER: The Control Pro 130 Power Tank applies coatings 3X faster than a roller with...
As an affiliate, we earn on qualifying purchases.
Gather Your Materials and Equipment
To start, gather all the necessary materials and equipment for the job. This includes a sturdy ladder, protective clothing, and a reliable paint application tool.
When choosing the paint color, consider the overall look you want to achieve and how it will complement your surroundings.
For hard-to-reach areas, an airless sprayer with an extended nozzle can provide even coverage. Don’t forget to have a paint shield or drop cloth to protect the ground or nearby objects from overspray.
Once you have all your materials ready, it’s time to set up a proper work area for a smooth painting process.

VEVOR Stand Airless Paint Sprayer, 650W, 3000PSI High Pressure Airless Sprayer with Cart, Cleaning Brush, Hose, Extension Rod, Nozzles, Electric Spray Paint Machine for House Exterior and Interior
Efficient Coating: The 650W motor, 0.31 GPM flow, and 3000 PSI pressure deliver spraying speeds 5x faster than...
As an affiliate, we earn on qualifying purchases.
Set Up a Proper Work Area
To create a comfortable and efficient workspace, follow these steps:
-
Organize your tools: Keep your paint, sprayer, and other equipment easily accessible so you don’t waste time searching for them.
-
Lay down a drop cloth: Protect the ground from overspray and drips by covering it with a drop cloth. This will also make cleanup easier.
-
Clear any obstacles: Remove any objects that could hinder your movement or potentially get in the way while you’re painting.
-
Designing a comfortable workspace: Arrange your tools and materials in a way that allows you to move freely and comfortably around the fence.
Maximizing efficiency during the painting process is crucial to save time and effort. By setting up a proper work area, you can work more efficiently and avoid unnecessary delays.
Now, let’s talk about how to practice proper safety precautions while painting the underside of a pipe fence.

MaXpray M1 Airless Paint Sprayer, Highly Efficient Thinning-Free Minimal Overspray for Up to 10 Gallon DIY Painting Projects Home Interior & House Exterior, Comes with Sprayer Accessories
Your DIY Partner - All DIY Homeowners, upgrade your DIY game with the MaXpray M1 airless paint sprayer—far...
As an affiliate, we earn on qualifying purchases.
Practice Proper Safety Precautions
Ensure your safety while painting by following proper precautions and taking necessary steps to protect yourself.
One important safety precaution is the usage of a respirator to protect your lungs from inhaling paint fumes. Make sure to wear a properly fitted respirator that is suitable for painting tasks.
Additionally, it is crucial to practice ladder safety when working on the underside of the pipe fence. Ensure the ladder is stable and secure before climbing up. Always maintain three points of contact with the ladder, and avoid overreaching to prevent falls or accidents.
Once you have taken these safety measures, you can confidently start painting the underside of the fence, knowing that you have done everything necessary to protect yourself.
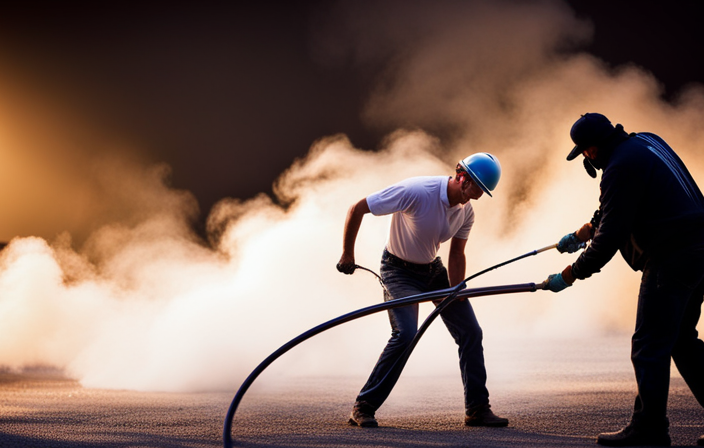
Start Painting the Underside of the Fence
As you start painting the underside of the fence, there are a few tips to keep in mind for a successful paint job.
First, it’s important to avoid overspray. Adjust the spray pattern and pressure on your airless sprayer according to the manufacturer’s instructions to prevent wasted paint and a messy surrounding area.
When painting hard-to-reach areas, use an extension pole or a ladder to get closer to the fence. This will provide better control and accuracy.
In the next section, we will discuss proper technique and angles to achieve a smooth and even finish.
Use Proper Technique and Angles
Using the right technique and angles while painting is essential for achieving a professional finish. Hold the sprayer perpendicular to the surface and maintain a consistent distance of about 12 inches. Start spraying from one end, moving in a smooth, sweeping motion. Overlap each pass by 50% to prevent streaks and ensure complete coverage.
Pay attention to the spray angle as well. Aim for a 45-degree angle to reach all the nooks and crannies of the fence. This will help ensure that every part of the fence is evenly coated.
By using proper technique and angles, you can achieve a flawless paint job that will enhance the appearance and durability of your pipe fence.
Now, let’s discuss the importance of taking breaks and allowing for proper drying time.
Take Breaks and Allow for Drying Time
Take a moment to rest and give your project the time it needs to dry properly. Proper drying time management is crucial for achieving a flawless finish and avoiding paint drips on the underside of your pipe fence. Here are some tips to help you manage the drying process effectively:
-
Plan your breaks strategically: Take short breaks between painting sessions to allow the paint to dry partially. This will help prevent any accidental smudging or smearing when you resume painting.
-
Allow for sufficient drying time: Don’t rush the process. Ensure that each coat of paint has ample time to dry before applying the next one. This will help the paint adhere better and reduce the risk of drips or uneven coverage.
Inspect and touch up as needed: Once the paint has fully dried, inspect the surface for any missed spots or imperfections. Touch up these areas as necessary to ensure a flawless finish.
Transitioning into the next section, it’s important to thoroughly inspect your painted pipe fence to ensure a professional-looking result.
Inspect and Touch Up as Needed
Now that we have taken breaks and allowed for drying time, it’s important to inspect and touch up the painted pipe fence as needed. This step ensures that the paint job is thorough and long-lasting. Inspect the fence carefully, looking for any missed spots or areas that may require additional attention. Use touch up techniques such as applying paint with a small brush or roller to these areas. Additionally, selecting the right paint color is crucial for achieving a seamless finish. Consider matching the color to the existing fence or choosing a complementary shade. To emphasize these touch up techniques and color selection, refer to the following table:
| Touch Up Techniques | Selecting the Right Paint Color |
|---|---|
| Small brush or roller | Match existing fence color |
| Fill in missed spots | Choose complementary shade |
With the fence inspected and touched up, we can now move on to the next section about clean up and properly storing our equipment.
Clean Up and Properly Store Your Equipment
To ensure the longevity of your newly painted pipe fence, it’s essential to clean up and store your equipment properly. According to a study conducted by paint manufacturers, cleaning and storing painting tools can extend their lifespan by up to 50%. Here are a few tips to help with proper equipment care:
- Thoroughly clean your airless sprayer by flushing it with clean water or recommended solvent for the paint type used.
- Remove any leftover paint from hoses, filters, and nozzles to prevent clogs and ensure smooth operation in the future.
- Store your equipment in a clean, dry place to prevent rust or damage.
By following these steps, you can prevent paint overspray and keep your equipment in excellent condition for future projects.
Now, let’s move on to the next section and admire your newly painted fence.
Admire Your Newly Painted Fence
Stand back and bask in the beauty of your freshly coated and vibrant barrier. Painting the underside of a pipe fence offers numerous benefits.
Firstly, it provides an added layer of protection against rust and corrosion, extending the lifespan of your fence.
Additionally, painting the underside prevents moisture from seeping into the metal, reducing the risk of rot and weakening.
Moreover, a well-painted fence enhances the overall aesthetic appeal of your property, adding value and curb appeal.
To maintain and preserve your newly painted fence, it is essential to regularly inspect for any signs of wear or damage. Touch up any chipped or scratched areas promptly to prevent further deterioration.
Additionally, consider applying a protective clear coat to further enhance the durability and longevity of your paint job.
With proper care and maintenance, your beautifully painted fence will remain a stunning feature of your property for years to come.
Frequently Asked Questions
How long does it take for the paint to dry on the underside of the fence?
To speed up the drying process of paint on the underside of the fence, try using a fan or a heat gun. These techniques can help to increase air circulation and evaporate moisture faster. Additionally, using a paint with a quick drying formula can also help.
Can I use a regular paintbrush instead of an airless sprayer?
When it comes to painting the underside of a pipe fence, using a paintbrush instead of an airless sprayer has its pros and cons. While a brush offers more control, it may take longer and require more effort to achieve a smooth and even finish. To ensure a great result, make sure to choose a high-quality brush, use long and even strokes, and apply thin coats of paint.
Do I need to apply a primer before painting the underside of the fence?
I recommend applying a primer before painting the underside of the fence. Using a primer helps improve adhesion and durability of the paint. However, if you prefer not to use a primer, be aware that the paint may not adhere as well.
What type of paint is recommended for painting the underside of a pipe fence?
The best paint brand for painting the underside of a pipe fence is one that is specifically designed for overhead surfaces. Some tips for painting overhead surfaces include using a roller or brush, using a paint with good coverage, and applying thin, even coats.
How often should I touch up the paint on the underside of the fence?
I recommend touching up the paint on the underside of the fence every 1-2 years to maintain its durability and appearance. Some of the best paint brands for this task include Sherwin-Williams, Behr, and Rust-Oleum.
Conclusion
There you have it! Painting the underside of a pipe fence with an airless sprayer is not as daunting as it may seem. With a little preparation, the right equipment, and some safety precautions, you can achieve a professional-looking finish.
First, make sure to clean the surface of the pipe fence thoroughly. This will ensure that the paint adheres properly and lasts longer. Use a wire brush or sandpaper to remove any rust or loose paint.
Next, protect the surrounding area by covering it with drop cloths or plastic sheets. This will prevent overspray and keep your work area clean.
Now, it’s time to set up your airless sprayer. Follow the manufacturer’s instructions for assembly and make sure you have the appropriate paint and nozzle size for the job. Fill the sprayer with paint and test it on a scrap piece of material to ensure it’s working properly.
When you’re ready to start painting, position yourself underneath the pipe fence and hold the sprayer about 12 inches away from the surface. Begin spraying in a smooth, sweeping motion, overlapping each pass to ensure even coverage.
Take breaks as needed and allow for drying time between coats. This will help prevent drips and ensure a professional finish. Be sure to wear protective clothing, gloves, and a mask to protect yourself from paint fumes and overspray.
Once you’ve finished painting the underside of the pipe fence, step back and inspect your work. Look for any areas that may need touch-ups or additional coats. It’s better to catch these now than to discover them later.
Finally, clean up your equipment according to the manufacturer’s instructions. Properly store any leftover paint and dispose of any waste materials responsibly.
Now, step back and admire your newly painted fence. You’ve done a great job!