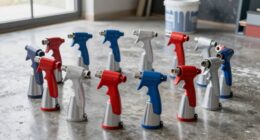
Painting your kitchen cabinets with a new coat of paint can completely change the appearance of your space, giving it a fresh new look. However, the idea of painting each door by hand may feel overwhelming.
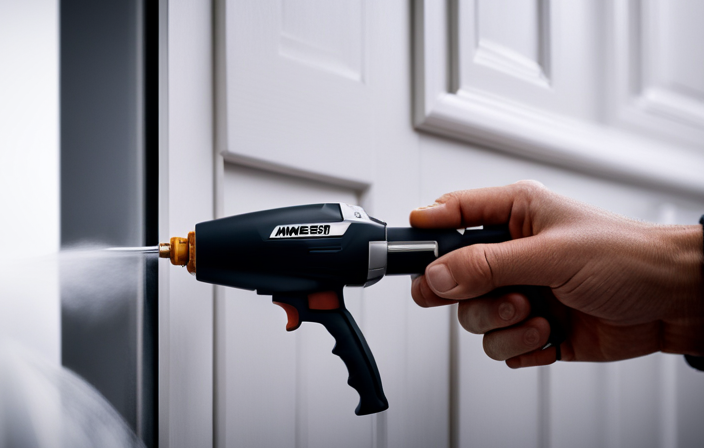
That’s where a small Wagner airless sprayer comes in handy. With its precision and efficiency, you can achieve a professional-looking finish in no time.
In this article, I’ll guide you through the step-by-step process of how to paint your cabinet doors using a small Wagner airless sprayer. We’ll cover everything from gathering supplies to reattaching hardware and reinstalling your doors.
So, grab your sprayer and let’s get started on this transformative journey. Get ready to admire your newly painted cabinets and bask in the satisfaction of a job well done.
Key Takeaways
- Thoroughly clean and sand the cabinet doors before painting.
- Apply a primer designed for metal surfaces to ensure a smooth and durable finish.
- Realign and adjust the hinges for a perfect fit when reinstalling the cabinet doors.
- Properly clean and store the sprayer to maintain its condition and prevent clogging.
Gather Your Supplies
Gather all of your supplies, such as the paint, primer, drop cloth, and the small Wagner airless sprayer. Get ready to transform your cabinet doors. When it comes to painting cabinet doors, using the best paint brands can make all the difference. Look for brands that offer durability and a smooth finish, such as Benjamin Moore Advance or Sherwin Williams ProClassic. These paints are specifically designed for cabinets and will give you a professional-looking result.
In addition to using the right paint, it’s important to follow some tips for achieving a smooth finish with your airless sprayer. Make sure to thin the paint according to the manufacturer’s instructions and test the spray pattern on a piece of cardboard before starting on your cabinets. Keep the sprayer moving in a steady, even motion to avoid drips and streaks.
With your supplies ready and these tips in mind, you’re now prepared to move on to the next step of preparing your cabinet doors for painting.
Prepare Your Cabinet Doors
Start by carefully removing the cabinet doors from their hinges, ensuring a clean and open workspace. To prepare your cabinet doors for painting, follow these steps:
-
Clean the surfaces: Use a mild detergent and water to remove any dirt, grease, or grime from the doors. Rinse them thoroughly and let them dry completely.
-
Sand the doors: Lightly sand the surfaces to create a smooth and even base for the paint. This will also help the new paint adhere better to the doors.
-
Fill any imperfections: If there are any holes, dents, or scratches on the doors, use wood filler to fill them in. Allow the filler to dry and then sand it smooth.
-
Choose the right paint color: Consider the overall style and color scheme of your kitchen before selecting a paint color for your cabinet doors. Test the color on a small area first to ensure you are happy with the result.
Now that your cabinet doors are prepped and ready, it’s time to set up your sprayer and start painting.
Set Up Your Sprayer
Once you have finished preparing your cabinet doors, it’s time to unleash the power of your magical paint wand, also known as the sprayer, to transform your kitchen into a masterpiece. Before you start spraying, it’s crucial to ensure that your sprayer is in good working condition. Sprayer maintenance plays a vital role in achieving a flawless finish. Check the sprayer’s manual for specific instructions on cleaning and maintenance. This will help prevent clogs and ensure smooth paint flow. Additionally, troubleshoot common issues such as uneven spray patterns or leaking nozzles. Refer to the table below for quick solutions to common problems:
| Common Issues | Possible Solutions |
|---|---|
| Uneven spray pattern | Adjust nozzle settings or check for clogs |
| Leaking nozzle | Tighten or replace the nozzle |
With your sprayer set up and in prime condition, you’re now ready to start spraying and bring your cabinet doors to life.
Start Spraying
Get ready to unleash the power of your magical paint wand and bring your kitchen cabinets to life with a flawless spray finish. To achieve professional results, it’s crucial to master proper spraying technique and choose the right paint for your cabinets.
When it comes to technique, start by holding the sprayer about 12 inches away from the door’s surface, moving in a smooth, sweeping motion. Keep the sprayer perpendicular to the door and overlap each pass by about 50% to ensure even coverage.
As for paint selection, opt for a high-quality, water-based paint specifically formulated for cabinets. This type of paint offers excellent adhesion, durability, and easy clean-up.
Now that you’re ready to spray, let’s move on to the next step and allow the paint to dry completely.
Let the Paint Dry
Now that you’ve unleashed the power of your magical paint wand, it’s time to sit back and let the paint dry.
The drying process is crucial for achieving a smooth and flawless finish on your cabinet doors. To ensure optimal drying, it’s important to follow a few tips.
First, find a well-ventilated area where the doors can dry undisturbed for at least 24 hours. Avoid touching or moving the doors during this time to prevent any smudging or marks.
Additionally, try to maintain a consistent temperature and humidity level in the drying area. This will help the paint dry evenly and reduce the risk of cracking or peeling.
Once the doors are completely dry, it’s time to flip them over and spray the front, which we’ll cover in the next section.
Flip and Spray the Front
Don’t forget to grab your trusty magical paint wand and give the front of those cabinet doors a good flip and spray. It’s time to bring out your painting skills and master the art of spray techniques.
Start by positioning yourself about 8-12 inches away from the surface, ensuring even coverage. Move your wand in long, sweeping motions, overlapping each pass by 50%. Remember to maintain a consistent speed and pressure to avoid uneven application.
If you encounter any drips or runs, adjust your speed or pressure accordingly. Troubleshooting tip: if the paint is too thin or too thick, adjust the nozzle or thin the paint with the appropriate solvent.
Once you’re done spraying, gently place the doors back in their original position and check for any imperfections. Now, let’s move on to the next step and make sure everything is perfect.
Check for Any Imperfections
Make sure to carefully inspect the front of your freshly painted cabinets for any imperfections that may have occurred during the spraying process. Checking for flaws is an essential step in achieving a professional-looking finish.
Look for any drips, runs, or uneven coverage on the surface. If you notice any imperfections, don’t worry, they can be easily fixed. Use a fine-grit sandpaper to gently sand down any rough areas or drips. Once you have smoothed out the imperfections, wipe the surface clean with a damp cloth.
This will ensure that your cabinet doors are smooth and ready for the next step. Now that you have checked and fixed any imperfections, you are ready to move on to reattaching hardware and reinstalling the cabinet doors.
Reattach Hardware and Reinstall
To complete the painting process of your cabinet doors with a small Wagner airless sprayer, it’s important to clean and reattach the cabinet hardware. This step ensures that the hardware looks its best and functions properly.
Once the hardware is clean and reattached, you can then reinstall the cabinet doors, bringing the project to its final stage.
Clean and Reattach Cabinet Hardware
First, take a moment to appreciate the hidden beauty within your cabinet hardware, letting it shine like a diamond in the rough.
Before reattaching your cabinet hardware, it’s important to clean them thoroughly. Start by removing any dirt or grime using a mild soap and water solution. For stubborn stains or grease buildup, you can use a mixture of vinegar and water. Gently scrub the hardware with a soft brush or sponge, making sure to get into all the nooks and crevices.
Once cleaned, dry them thoroughly before reattaching.
Now that your hardware is clean and ready, it’s time to choose the right paint. Look for a high-quality paint that is specifically designed for metal surfaces. This will ensure a smooth and durable finish.
With your clean and painted hardware in hand, you’re now ready to reinstall the cabinet doors, bringing your project one step closer to completion.
Reinstall the Cabinet Doors
Now that you have all your clean and beautifully painted cabinet hardware, it’s time to bring your cabinets back to life by reinstalling the doors.
Start by realigning the hinges to ensure that the doors fit perfectly. Use a screwdriver to adjust the hinges, moving them up, down, left, or right as needed.
Once the hinges are properly aligned, carefully lift the door and slot it back onto the hinges. Make sure the door is level and flush with the cabinet frame. Check for any gaps or unevenness and make further adjustments if necessary.
Once all the doors are back in place, step back and admire your newly painted cabinets.
Now, it’s time to clean up your sprayer and prepare for the next project.
Clean Up Your Sprayer
When it comes to cleaning up your sprayer after painting, there are two key points to keep in mind.
First, you’ll want to flush out any remaining paint and clean the nozzle thoroughly to prevent clogging. This can be done by running a cleaning solution through the sprayer and wiping down the nozzle with a clean cloth.
Second, it’s important to store the sprayer properly to keep it in good working condition. This may involve disassembling certain parts, storing them in a clean and dry place, and ensuring that the sprayer is protected from dust and debris.
Flush out the Paint and Clean the Nozzle
To achieve a flawless finish on your paint cabinet doors with a small Wagner airless sprayer, it’s time to flush out the paint and give the nozzle a thorough cleaning. Here are some cleaning tips and troubleshooting common issues to ensure optimal performance:
- Start by removing the paint container and empty any remaining paint.
- Fill a bucket with warm water and attach it to the sprayer.
- Turn on the sprayer and let the water run through the system for a few minutes to flush out any remaining paint.
- Remove the nozzle and clean it with a soft brush or toothbrush to remove any clogs or residue.
By following these cleaning steps, you’ll prevent paint buildup and ensure a smooth painting process.
Now, it’s time to store the sprayer properly for future use.
Store the Sprayer Properly
To ensure optimal condition for future use, it is important to store the sprayer properly. This will prevent damage and maintain its performance. After cleaning, ensure the sprayer is completely dry before storage. Store it in a clean, dry area, away from extreme temperatures or moisture. To avoid leaks or spills, store the sprayer in an upright position. Regularly inspect the sprayer for signs of wear or damage and address them promptly. Following these maintenance tips will keep your sprayer in good working condition for years to come. Now that your sprayer is safely stored, take a moment to admire your newly painted cabinets.
Admire Your Newly Painted Cabinets
Stand back and let out a gasp of delight as you admire your newly painted cabinets. The hard work and attention to detail have paid off, and now you can enjoy the beauty of your freshly painted cabinets.
To maintain the durability of your painted cabinets, there are a few things you can do. First, avoid using harsh chemicals or abrasive cleaners that can strip away the paint. Instead, opt for gentle cleaners that won’t damage the finish.
Second, be mindful of how you handle the cabinets – avoid slamming doors or drawers, as this can chip or scratch the paint.
When it comes to choosing the perfect paint color for your cabinets, consider the style and color scheme of your kitchen. Opt for a color that complements the overall design and creates a cohesive look. Additionally, consider the lighting in your kitchen, as it can affect how the color appears. Take samples home and test them out in different lighting conditions before making a final decision.
Enjoy your newly transformed cabinets and the fresh new look they bring to your kitchen!
Frequently Asked Questions
Can I use a different type of paint sprayer instead of a Wagner airless sprayer?
Yes, you can use different types of paint sprayers instead of a Wagner airless sprayer. Other options include HVLP sprayers and compressed air sprayers. Each type has its pros and cons, so consider your specific needs before choosing.
How long should I let the paint dry before flipping and spraying the front of the cabinet doors?
To minimize drying time and achieve a smooth finish on cabinet doors, wait until the paint is completely dry on one side before flipping and spraying the front. This technique ensures efficient and flawless painting.
Are there any specific safety precautions I should take when using the sprayer?
When using the sprayer, it is important to take specific safety precautions and follow proper usage techniques. This includes wearing protective clothing and eyewear, ensuring proper ventilation, and reading the manufacturer’s instructions carefully.
What should I do if I notice any imperfections in the paint after it has dried?
If you notice imperfections in the paint after it has dried, don’t worry! Touching up paint is a common practice. By using a small brush or roller, you can easily fix any areas that need attention, preventing imperfections from standing out.
Can I use the same sprayer for different colors of paint, or do I need to clean it between each color?
Yes, it’s important to clean the sprayer between each color to prevent color mixing and ensure a smooth finish. Different types of paint sprayers may have different cleaning methods, so refer to the manufacturer’s instructions for proper cleaning techniques.
Conclusion
In conclusion, painting my cabinet doors with the small Wagner airless sprayer was like unleashing a symphony of color onto a blank canvas. The paint effortlessly flowed from the sprayer, transforming my cabinets into masterpieces. Each stroke breathed life into the room.
With careful attention to detail and a touch of finesse, the process was a breeze. Now, as I stand back and admire my newly painted cabinets, I feel a sense of accomplishment and pride. I know that I have created a work of art in my own home.
