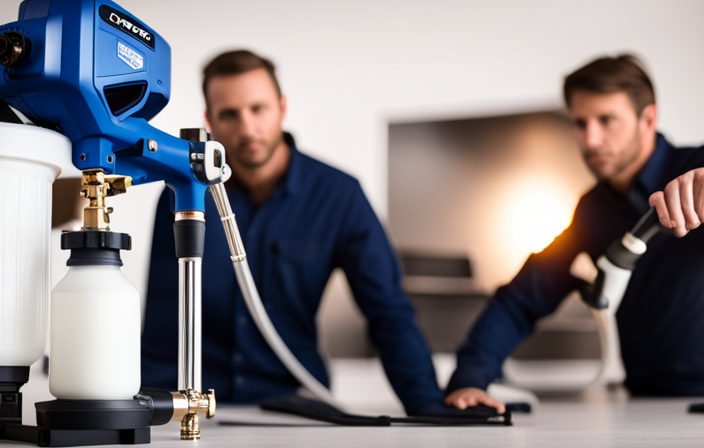
Connect with us

Airless Paint Sprayers FAQs

How To Plans For Airless Paint Sprayer Cart

Published

on

An image showcasing a sturdy, wooden cart with built-in compartments and hooks specifically designed to hold an airless paint sprayer

Are you fed up with carrying cumbersome paint cans and perpetually hunting for your brushes and instruments? Well, I’ve got just the thing for you: an airless paint sprayer cart. This brilliant device will transform the way you paint, streamlining the process, keeping everything neat and in order, and might I add, making it a whole lot more fun.

In this article, I will guide you through the process of planning and building your very own airless paint sprayer cart. From assessing your needs and gathering materials, to designing and measuring, I will leave no stone unturned.

We’ll then dive into the nitty-gritty of building the frame, adding storage and accessories, and finally, painting or finishing the cart.

But it doesn’t end there. I’ll also walk you through testing and adjusting your cart, as well as provide tips for its maintenance and care.

So, get ready to take your painting game to the next level and enjoy the countless benefits of your very own airless paint sprayer cart. Let’s get started!

Advertisement

Key Takeaways

  • Reinforcement techniques such as corner braces, diagonal bracing, and gussets are essential for a sturdy cart on rough surfaces.
  • Consider storage and accessories such as compartments, shelves, trays, and holders to organize tools, paint cans, brushes, and spray tips.
  • Securely attach durable wheels with high weight capacity for shock absorption and maneuverability.
  • Clean and sand the cart surface, use a primer, and choose a durable, weather-resistant finish for a smooth and glossy appearance.

Assess Your Needs and Requirements

Before diving into the exciting world of airless paint sprayer carts, take a moment to assess your needs and requirements, so you can confidently embark on this painting journey.

Researching the benefits of using an airless paint sprayer cart is crucial. These carts provide a portable and efficient solution for your painting projects. They allow you to move freely without the hassle of carrying heavy equipment. Additionally, airless paint sprayers provide a smooth and even finish, saving you time and effort.

Determining your budget is another important step. Prices for airless paint sprayer carts vary depending on their features and quality. Consider how often you will be using the cart and the scale of your projects to make an informed decision.

Once you have completed your research and gathered the necessary materials, you can move on to the next section about ‘research and gather materials’.

Advertisement

Research and Gather Materials

When researching and gathering materials for my airless paint sprayer cart, I made sure to look for sturdy and durable options. It was important to find materials that would be able to withstand the weight of the paint sprayer and any other tools that I may need to transport.

Additionally, I made sure to find wheels that were suitable for the terrain of my workspace, as this would ensure smooth and easy maneuverability.

Look for sturdy and durable materials for the cart

To create a cart for your airless paint sprayer that can withstand even the toughest of DIY projects, envision a sturdy and durable structure fashioned from materials that Hercules himself would approve of. When choosing the right materials, it is crucial to ensure durability and stability.

Here are three options that fit the bill:

  • Steel: Known for its strength and resistance to wear and tear, steel is an excellent choice for constructing the frame of your cart. Its robustness will ensure the cart can handle heavy loads and rough handling.

  • Plywood: Opt for high-quality plywood to create the shelves and sides of the cart. Plywood is known for its stability and ability to withstand pressure, making it ideal for supporting the weight of your airless paint sprayer and other tools.

  • Rubber: Using rubber as padding or lining for certain parts of the cart will enhance its durability and protect it from scratches and dings.

Now that you have chosen the materials, it’s time to find wheels that are suitable for the terrain of your workspace, ensuring easy maneuverability and stability.

Advertisement

Find wheels that are suitable for the terrain of your workspace

Finding suitable wheels for the terrain of your workspace is crucial for easy maneuverability and stability of your airless paint sprayer cart. Consider the type of terrain you will be working on and choose wheels that are compatible with it.

If you work on rough or uneven surfaces, opt for wheels with larger diameters and thick treads to provide better traction and stability.

On the other hand, if your workspace has smooth and flat terrain, smaller wheels with smoother treads will be sufficient.

Additionally, ensure that the wheels are made of durable materials such as rubber or polyurethane to withstand the wear and tear of everyday use.

With suitable wheels in place, you can now move on to the next section about designing and taking measurements for your cart.

Advertisement

Design and Measurements

When designing an airless paint sprayer cart, it’s crucial to sketch out a design that caters to your specific requirements. Consider factors such as the size and weight of your paint sprayer, as well as any additional accessories you may need to store.

Taking accurate measurements is essential to ensure a proper fit for your paint sprayer and prevent any potential accidents or damage during transportation.

Sketch out a design that suits your specific needs

Imagine yourself standing in your garage, paint sprayer in hand, ready to tackle a big project. As you survey the space, you realize that a custom-designed airless paint sprayer cart would be the perfect solution to make your painting endeavors more efficient and enjoyable. When sketching out a design for your cart, there are several design considerations and customization options to keep in mind.

Advertisement

First, consider the size and weight of your paint sprayer. You’ll want to ensure that the cart can securely hold and transport your specific model. Additionally, think about the additional storage space you may need for paint cans, brushes, or other painting accessories.

To make your design process easier, here is a 3 column and 4 row table to help you organize your thoughts:

Column 1 Column 2 Column 3
Size Weight Storage

Once you have sketched out a design that suits your specific needs, you can move on to taking accurate measurements to ensure a proper fit for your paint sprayer. This will be discussed in the next section.

Take accurate measurements to ensure a proper fit for your paint sprayer

To ensure a proper fit for your paint sprayer, it is important to take accurate measurements. This includes measuring the dimensions and weight of your equipment. For airless paint sprayer carts, measuring techniques are crucial for achieving a secure fit.

Start by measuring the length, width, and height of your paint sprayer. Take into account any protruding parts or accessories. Use a measuring tape or ruler to obtain precise measurements.

Advertisement

In addition to measuring dimensions, determine the weight of your equipment. This will ensure that the cart can adequately support it.

Once you have gathered these measurements, you can proceed with building the frame for your airless paint sprayer cart. By accurately measuring and considering the dimensions and weight of your paint sprayer, you can create a cart that provides a secure and stable base for your equipment.

Build the Frame

To build the frame for the airless paint sprayer cart, I’ll first cut and assemble the frame using the materials I’ve chosen. I’ll ensure that strong joints and reinforcements are used throughout the frame to guarantee stability and durability. This will ensure that the cart can support the weight of the paint sprayer and other equipment without any issues.

Cut and assemble the frame using the chosen materials

To assemble the frame using the chosen materials, start by cutting them to the desired dimensions. Make sure to measure twice and cut once for accuracy. Consider using alternative materials like plywood or metal if they offer better durability or weight distribution.

Once the pieces are cut, align them carefully and secure them together using screws, nails, or brackets. Use a level to ensure the frame is square and make any necessary adjustments.

Advertisement

To ensure stability, use strong joints and reinforcements such as corner braces or additional cross supports. These additions will prevent wobbling or tipping when the cart is in use.

By following these steps, you can create a solid frame that serves as a reliable base for your airless paint sprayer cart. This will ensure stability throughout its use.

Use strong joints and reinforcements to ensure stability

To ensure stability, it is crucial to use strong joints and reinforcements in your frame. This will prevent any wobbling or tipping concerns, allowing you to confidently navigate rough surfaces. There are several reinforcement techniques you can employ for this purpose.

One effective method is using corner braces. These braces provide additional support at the corners of the frame. You can attach them using screws or bolts to enhance the strength of the joints.

Another option is to use diagonal bracing. This involves adding angled supports across the frame. By doing so, you can distribute the weight evenly and prevent any potential twisting or bending.

Advertisement

Additionally, consider using gussets. These triangular-shaped pieces of material provide extra stability at the joints. They can significantly enhance the overall strength of the frame.

By employing these reinforcement techniques, you can ensure a sturdy and reliable airless paint sprayer cart that will withstand any rugged terrain.

Moving on to the next section about ‘add storage and accessories’, it is important to consider the additional functionality and convenience these features provide.

Add Storage and Accessories

With the addition of storage compartments and useful accessories, you’ll be amazed at how much time and effort you’ll save during your painting projects.

Did you know that having easy access to your tools can increase productivity by 15%?

Advertisement

When it comes to storage organization, it is important to consider the size and shape of your airless paint sprayer cart. Look for compartments and shelves that can accommodate your paint cans, brushes, and other necessary tools.

Additionally, selecting the right accessories can make a world of difference. Attachable trays and holders can keep your paint cups and spray tips within reach, while hooks and clips can secure your hoses and extension cords.

By keeping everything organized and easily accessible, your painting process will become smoother and more efficient.

Now, let’s move on to the next step and attach the wheels.

Attach the Wheels

Attach the wheels to the bottom of the cart using strong bolts or screws. Make sure to securely fasten them to ensure stability and prevent any accidents. Choose wheels that are durable, have a high weight capacity, and are suitable for the terrain you’ll be working on. Pneumatic wheels or heavy-duty casters are excellent options as they offer great shock absorption and maneuverability. Once the wheels are securely attached, you’ll have the freedom to effortlessly move your cart around your workspace, making your painting projects more efficient. With the wheels in place, it’s time to move on to the next step and paint or finish the cart.

Advertisement

Paint or Finish the Cart

Now it’s time to give your cart a vibrant splash of color or a sleek finish. Here are some painting techniques and tips to help you achieve professional-looking results:

  1. Prep the surface: Clean the cart thoroughly and sand any rough spots. Use a primer if needed to ensure better adhesion and a smoother finish.

  2. Choose the right finish: Consider the environment where the cart will be used. For outdoor use, opt for a durable, weather-resistant finish like an oil-based paint or an enamel. For indoor use, water-based paints or lacquers can provide a smooth and glossy finish.

  3. Apply the paint: Use a high-quality paint sprayer for even coverage. Start with light coats and allow each coat to dry before applying the next. Avoid over spraying to prevent drips and runs.

  4. Finishing touches: Once the paint is dry, you can add any additional details or decals to personalize your cart.

Now that your cart is looking fabulous, let’s move on to the next step of testing and adjusting.

Test and Adjust

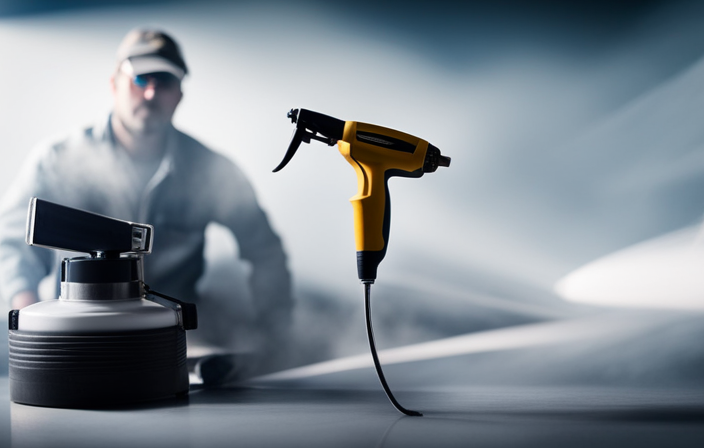
To test and adjust the paint sprayer cart, I loaded my sprayer onto the cart and ensured it was securely fastened.

I then tested the functionality of the sprayer, checking for any leaks or malfunctions. If any issues were detected, I made the necessary adjustments or modifications to ensure optimal performance.

Once all adjustments were made, I retested the sprayer to ensure it was functioning properly.

Advertisement

Load your paint sprayer onto the cart and test its functionality

To load your paint sprayer onto the cart and test its functionality, follow these steps:

  1. Securely attach the sprayer to the cart using provided brackets or straps.
  2. Connect the sprayer to a power source and turn it on to ensure it starts up without any issues.
  3. Test the spray pattern by applying a small amount of paint to a test surface, checking for even and consistent coverage.
  4. Adjust the spray pressure as needed, following the manufacturer’s instructions.
  5. Inspect the sprayer’s hoses and nozzles for any leaks or clogs.
  6. Troubleshooting tips: If the sprayer doesn’t start, check the power connection and ensure it is properly plugged in. For any leaks or clogs, clean or replace the affected parts.

After testing the functionality of the paint sprayer, you can proceed to the next section to make any necessary adjustments or modifications for optimal performance.

Make any necessary adjustments or modifications for optimal performance

Once you’ve ensured that your paint sprayer is in good working order, it’s time to fine-tune its performance for optimal results. To achieve the best performance from your airless paint sprayer cart, there are some adjustment techniques and performance optimization tips you should follow.

  • Adjust the pressure settings on the sprayer to match the type of paint and surface you will be working with. This will help you achieve a consistent and even spray pattern.

  • Inspect the spray nozzle and ensure it is clean and free from any clogs or obstructions. A clogged nozzle can lead to uneven spraying and poor coverage.

  • Consider using different nozzle sizes for different applications to achieve the desired outcome.

  • Test the sprayer on a scrap surface to make any final adjustments before starting your project.

With these adjustment techniques and performance optimization tips, you can achieve professional-quality results with your airless paint sprayer cart.

Moving on to the next section about maintenance and care, it’s important to regularly clean the sprayer and store it properly to ensure its longevity and functionality.

Maintenance and Care

Taking good care of your airless paint sprayer cart is essential to ensure its long-lasting performance and reliability. Here are some maintenance tips and a troubleshooting guide to keep your cart running smoothly:

Advertisement
  • Regularly clean the cart and remove any paint residue or debris that may clog the sprayer.
  • Check the hoses and connections for any leaks or damage, and replace them if necessary.
  • Lubricate the moving parts of the cart, such as the wheels and handle, to prevent rust and ensure smooth operation.

If you encounter any issues with your airless paint sprayer cart, here are some troubleshooting steps you can take:

  • Check the power source and make sure it is properly connected.
  • Inspect the sprayer nozzle for any clogs or blockages and clean it if necessary.
  • If the cart is not spraying paint evenly, adjust the pressure settings and test again.

By following these maintenance tips and troubleshooting guide, you can enjoy the benefits of your airless paint sprayer cart for years to come.

Enjoy the Benefits of Your Airless Paint Sprayer Cart

Now that you’ve learned about the importance of maintenance and care for your airless paint sprayer cart, let’s explore the exciting part – enjoying the benefits of using an airless paint sprayer and maximizing efficiency.

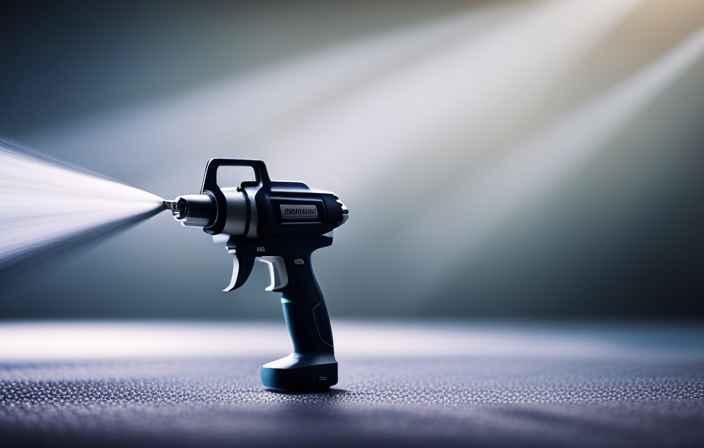
An airless paint sprayer offers numerous advantages compared to traditional painting methods. Firstly, it provides a smooth and uniform finish, eliminating brush marks or roller lines.

Additionally, it allows for faster application, saving you valuable time and effort. To maximize efficiency, start by choosing the appropriate nozzle size for your project. A smaller nozzle will give you more control and precision, while a larger one will cover larger areas quickly.

It is also crucial to maintain the correct spraying distance and keep your sprayer clean to prevent clogs and ensure consistent performance.

By following these tips, you’ll be able to achieve professional-quality results in a fraction of the time.

Advertisement

Frequently Asked Questions

How much paint can an airless paint sprayer cart hold?

The paint capacity of an airless paint sprayer cart depends on various factors such as nozzle size, pressure settings, and the type of paint being used. These factors affect the amount of paint that can be held and sprayed efficiently.

Can the airless paint sprayer cart be easily transported up and down stairs?

Transporting the airless paint sprayer cart up and down stairs can pose transportation challenges. However, there are alternative storage options available, such as using a lift or disassembling the cart for easier transportation.

Are there any specific safety precautions to keep in mind while using the airless paint sprayer cart?

There are several safety precautions to keep in mind when using the airless paint sprayer cart. It is important to wear protective gear, maintain a safe distance from the spray, and follow proper usage instructions to prevent accidents or injuries.

Can the airless paint sprayer cart be used for other painting projects besides walls and ceilings?

Yes, the airless paint sprayer cart can be used for other painting projects such as furniture, fences, and decks. The benefits include faster application and a smooth finish. However, drawbacks include overspray and the need for proper ventilation.

Is it possible to customize the design of the airless paint sprayer cart to fit specific paint supplies or tools?

Yes, the airless paint sprayer cart can be customized to fit specific paint supplies or tools. This allows for greater convenience and efficiency during painting projects. The customization options enhance the benefits of using an airless paint sprayer cart.

Advertisement

Conclusion

In conclusion, building an airless paint sprayer cart is a practical and efficient solution for any painting project. By carefully assessing your needs and requirements, researching and gathering the right materials, and designing and measuring the cart, you can create a customized cart that suits your specific needs.

Adding storage and accessories will further enhance its functionality. By properly maintaining and caring for your cart, you can ensure its longevity and continue to enjoy the benefits it offers.

So, why wait? Start building your airless paint sprayer cart today and streamline your painting process like never before!

Jule’s attention to detail, editorial prowess, and commitment to delivering high-quality content ensure that every article and review on our website is polished and reader-friendly. Jule’s vision for the website as a one-stop destination for paint sprayer enthusiasts has been instrumental in shaping the platform into what it is today.

Continue Reading
Advertisement

Airless Paint Sprayers FAQs

How To Unclog Graco 360 Airless Paint Sprayer

Published

on

By

An image showcasing a step-by-step guide on unclogging a Graco 360 Airless Paint Sprayer, depicting a user removing the nozzle, flushing it with water, clearing the filter, and reassembling it meticulously

Have you ever found yourself in the middle of a painting project only to have your Graco 360 airless paint sprayer clog up on you? Dealing with a clog can be frustrating and a waste of time, but fear not! I am here to guide you through the process of unclogging your Graco 360 airless paint sprayer.

In this article, I will provide you with step-by-step instructions on how to:

  1. Identify the clog
  2. Release pressure
  3. Disassemble the sprayer
  4. Clean the spray tip and filter
  5. Reassemble the sprayer

I will also share tips on how to prevent future clogs and when it may be necessary to seek professional help.

So, grab your tools and get ready to tackle that clog head-on. By the end of this article, you’ll have your Graco 360 airless paint sprayer working like new again.

Let’s dive in and get your painting project back on track!

Key Takeaways

  • Troubleshooting tips for Graco 360 airless paint sprayer include checking power supply, priming and flushing properly, verifying paint viscosity, and inspecting for clogs or blockages.
  • To prevent future clogs, strain paint before pouring, clean filters and nozzles regularly, use appropriate paint viscosity, follow prevention techniques, and perform regular maintenance.
  • Professional help is important for complex clogs that require expertise, time constraints that necessitate professional assistance, lack of experience that can lead to accidents, situations where DIY solutions may not be effective, and to ensure efficiency and safety.
  • Signs of complex clogs include unsuccessful DIY methods, persistent clogs despite attempts, indication of more intricate issues, requirement of professional expertise, and the need to avoid potential damage or accidents.

Identify the Clog

Advertisement

To effectively troubleshoot the issue, it’s crucial to first identify the specific area where the clog is occurring within the Graco 360 airless paint sprayer. When it comes to troubleshooting common clog causes, there are a few things to keep in mind.

Start by checking the spray tip, as it is often the primary culprit. Inspect it for any debris or dried paint that may be causing the blockage.

Additionally, inspect the suction tube and filter for any obstructions. These areas can easily accumulate paint particles and cause clogs.

Once the clog is identified, it’s important to release the pressure and remove any remaining paint from the sprayer. This can be done by following the manufacturer’s instructions for releasing pressure and cleaning the system.

By taking these steps and implementing tips for preventing clogs in the future, you can ensure a smooth and efficient painting process.

Advertisement

Release Pressure and Remove Paint

First, make sure the pressure is released and all the paint is removed from the machine. To clean the Graco 360 airless paint sprayer effectively, follow these troubleshooting tips and cleaning techniques:

  • Begin by removing the spray tip and guard, using a wrench if necessary.
  • Next, detach the suction tube from the paint container, ensuring no paint remains inside.
  • Take off the prime valve and filter housing, carefully inspecting them for any clogs or debris.
  • Clean all the removed components thoroughly with warm, soapy water or a suitable cleaning solution.
  • Use a small brush or toothpick to remove any stubborn clogs from the spray tip or filter.
  • Rinse all parts with clean water, ensuring no residue remains.

By following these cleaning techniques and troubleshooting tips, you can effectively unclog your Graco 360 airless paint sprayer.

Now, let’s move on to the next section and disassemble the sprayer for further cleaning.

Disassemble the Sprayer

Now it’s time to break down the sprayer and delve into the inner workings of this powerful machine. Sprayer maintenance is crucial to ensure optimal performance and longevity.

Advertisement

To disassemble the sprayer, start by removing the spray gun from the hose.

Next, unscrew the tip guard and carefully take out the spray tip.

Use a wrench to disconnect the filter housing from the sprayer body.

Once the filter housing is removed, take out the filter and inspect it for any clogs or debris. Cleaning or replacing the filter may be necessary if it is dirty or damaged.

Troubleshooting tips for disassembling the sprayer include following the manufacturer’s instructions, wearing protective gloves, and working in a well-ventilated area.

Advertisement

With the sprayer disassembled, we can now move on to cleaning the spray tip and filter.

Clean the Spray Tip and Filter

Before you begin cleaning the spray tip and filter, it’s important to note that a clogged filter can decrease the efficiency of your sprayer by up to 50%.

To clean the spray tip:

  • Start by removing it from the sprayer gun using a wrench.
  • Once removed, inspect the tip for any clogs or debris.
  • If you notice any blockages, use a small wire brush or toothpick to carefully remove them.

To clean the filter:

  • Unscrew the housing and remove it from the sprayer.
  • Rinse the filter thoroughly with warm water to remove any paint residue or debris.
  • Gently tap the filter on a hard surface to dislodge any stubborn particles.

Finally, reassemble the spray tip and filter, ensuring they are securely tightened.

In the next section, we will discuss how to use a cleaning solution or solvent to further clean your sprayer.

Use a Cleaning Solution or Solvent

Advertisement

To ensure optimal performance, it’s important to enhance the effectiveness of your sprayer by using a cleaning solution or solvent.

When it comes to cleaning solution alternatives, there are a few options to consider. One commonly used option is a mixture of warm water and mild detergent. This mixture can effectively remove any paint residue from the sprayer.

Another alternative is using a commercial paint sprayer cleaner. These cleaners are specifically designed to break down paint and unclog the system, making them a great choice for thorough cleaning.

Whichever option you choose, it’s important to follow safety precautions. Always wear protective gloves and eyewear when handling cleaning solutions or solvents. Additionally, make sure to work in a well-ventilated area to avoid inhaling any fumes.

Advertisement

Now that you have cleaned the spray tip and filter, let’s move on to the next step: using a cleaning brush or needle.

Use a Cleaning Brush or Needle

Using a cleaning brush or needle is like giving your sprayer a thorough scrub, ensuring that every nook and cranny is free from any debris or buildup. Cleaning techniques using a brush or needle are alternative methods to unclog your Graco 360 airless paint sprayer. These tools allow you to manually remove any paint or residue that may be obstructing the spray nozzle or other components. The cleaning brush is perfect for scrubbing the larger parts of the sprayer, such as the spray tip, while the needle can be used to clean the smaller, harder-to-reach areas, like the nozzle or the filter. By using these tools, you can effectively dislodge any clogs and restore the proper functioning of your sprayer. After cleaning, you can proceed to reassemble the sprayer, ensuring all components are properly aligned and tightened.

Reassemble the Sprayer

Now that you have thoroughly cleaned all the components, it’s time to put everything back together and ensure a proper fit for your sprayer. Here are some reassemble techniques and troubleshooting tips to help you with this process:

  • Start by reattaching the spray gun to the hose, ensuring a secure connection.

  • Next, attach the hose to the pump, making sure it is tightly screwed in.

  • Reinstall the suction tube into the pump, ensuring it is properly seated.

  • Attach the spray tip guard to the spray gun, securing it in place.

  • Finally, test the trigger on the spray gun to ensure it is working smoothly.

By following these reassemble techniques and troubleshooting tips, you can ensure that your Graco 360 airless paint sprayer is properly put back together and ready for use.

Now, let’s move on to the next step and test the sprayer.

Advertisement

Test the Sprayer

Once everything is back together, it’s time for you to see the sprayer in action and put it to the test. To ensure that your Graco 360 airless paint sprayer is working properly after reassembling, follow these sprayer maintenance and troubleshooting tips.

First, check if the sprayer is priming correctly. Fill the paint container with water and turn on the sprayer. The water should flow smoothly through the nozzle without any sputtering or clogging. If there are any issues, refer back to the previous steps to troubleshoot and fix the problem.

Next, test the spray pattern by spraying water onto a test surface. The spray pattern should be even and consistent, without any splattering or uneven distribution. Adjust the spray tip if necessary to achieve the desired pattern.

Finally, check for any leaks or unusual noises during operation. If you notice any leaks, tighten the connections or replace any damaged parts. If there are unusual noises, it could indicate a problem with the motor or pump, and you may need to consult the user manual or contact Graco customer support for further assistance.

By following these troubleshooting tips, you can ensure that your Graco 360 airless paint sprayer is working efficiently. In the next section, we will discuss how to prevent future clogs and maintain the sprayer for long-lasting performance.

Advertisement

Prevent Future Clogs

To prevent future clogs in your Graco 360 airless paint sprayer, there are some important steps you can take:

  • Always strain your paint before pouring it into the sprayer. This will remove any debris or clumps that could potentially clog the nozzle.

  • Regularly clean the filters and nozzles of your sprayer to maintain optimal performance.

  • Use the appropriate paint viscosity for your sprayer. Using thicker paints can increase the risk of clogs.

By following these prevention techniques and regular maintenance tips, you can ensure that your Graco 360 airless paint sprayer stays clog-free and ready for your next project.

Remember, if you encounter persistent clogs or issues, it may be necessary to seek professional help.

Seek Professional Help if Needed

If you’re feeling overwhelmed or frustrated with persistent clogs, don’t hesitate to reach out to a professional for assistance. Knowing when to call a professional can save you time, money, and frustration. While unclogging a Graco 360 airless paint sprayer can often be done as a DIY project, there are times when it is best to seek professional help. Here are some situations where calling a professional is recommended:

  1. Complex clogs: If you’ve tried multiple DIY methods and the clog is still not resolved, it may be a sign of a more complex issue that requires professional expertise.

  2. Time constraints: If you have a tight deadline and cannot afford any delays, it’s best to let a professional handle the unclogging process to ensure efficiency and effectiveness.

  3. Lack of experience: If you’re not familiar with the inner workings of the paint sprayer or are unsure about the correct procedure, it’s safer to leave it to a professional to avoid potential damage or accidents.

Remember, while DIY solutions can work in many cases, there are times when professional help is the best choice. Don’t hesitate to call a professional if you’re unsure or experiencing difficulties.

Advertisement

Frequently Asked Questions

Can I use any cleaning solution or solvent to unclog my Graco 360 airless paint sprayer?

No, it is not recommended to use any cleaning solution or solvent for unclogging the Graco 360 Airless Paint Sprayer. It is important to follow the manufacturer’s instructions and use the recommended cleaning methods to prevent clogs.

How often should I clean the spray tip and filter to prevent clogs?

An ounce of prevention is worth a pound of cure. To prevent clogs in your paint sprayer, it’s important to regularly clean the spray tip and filter. This maintenance ensures optimal performance and avoids costly downtime.

What is the recommended method for disassembling the sprayer?

To disassemble the sprayer, follow these steps: 1) Turn off and unplug the sprayer. 2) Remove the spray tip, guard, and filter. 3) Use a wrench to loosen and remove the fluid section. Recommended tools for this process include a wrench and pliers.

Are there any specific cleaning brushes or needles that are recommended for unclogging the sprayer?

To effectively clean and unclog a Graco 360 airless paint sprayer, it is recommended to use cleaning tools such as brushes and needles specifically designed for this purpose. Regular maintenance tips should also be followed to prevent clogging issues.

What are some common signs or symptoms of a clogged Graco 360 airless paint sprayer?

Some common signs or symptoms of a clogged Graco 360 airless paint sprayer include poor spray pattern, spitting or sputtering, and reduced or uneven paint flow. Troubleshooting tips can help identify and resolve these issues.

Advertisement

Conclusion

When it comes to unclogging a Graco 360 Airless Paint Sprayer, there are a few steps you can follow. First, make sure to disconnect the sprayer from the power source and relieve any pressure in the system. Next, remove the spray tip and filter from the gun and clean them thoroughly. If the clog persists, you may need to disassemble the gun and clean the internal components. Be sure to refer to the manufacturer’s instructions for guidance on this step. Once everything is clean, reassemble the gun and test it to ensure the clog is fully cleared. Regular maintenance, such as cleaning the sprayer after each use and using the appropriate paint filters, can help prevent clogs in the future.

Continue Reading

Airless Paint Sprayers FAQs

How To Paint Underside Of Pipe Fence With Airless Sprayer

Published

on

By

An image capturing a skilled painter effortlessly coating the underside of a sturdy pipe fence with an airless sprayer
  • In my opinion, painting the lower section of a pipe fence can be challenging. However, with the right tools and techniques, it can be very rewarding.

  • That’s why I’m here to share my expertise on how to paint the underside of a pipe fence with an airless sprayer. This method not only saves time but also ensures a smooth and even finish.

  • By using an airless sprayer, you can easily reach those hard-to-access areas and achieve professional results.

  • In this article, I will guide you through the step-by-step process, from preparing your fence for painting to properly storing your equipment.

  • So, if you’re ready to transform your fence and give it a fresh new look, let’s dive in and get started!

Key Takeaways

  • Painting the underside of a pipe fence with an airless sprayer provides protection against rust, corrosion, moisture seepage, and rot, while enhancing the fence’s aesthetic appeal and property value.
  • Regular inspection and maintenance of the painted fence, including touch-ups and applying a protective clear coat, ensures durability, longevity, and the preservation of the property’s stunning feature.
  • To prevent paint overspray and equipment damage, proper painting techniques, appropriate equipment and materials, surface covering, maintaining a suitable spraying distance, and proper cleaning and storage of the equipment should be followed.
  • Using an airless sprayer for painting offers efficient and even coverage, reduced overspray and waste, faster application, the ability to reach tight or difficult areas, and suitability for various types of surfaces.

Prepare Your Fence for Painting

Now that you’ve gathered all your materials, it’s time to get your fence ready for a fresh coat of paint.

Choosing the right paint color is important for achieving the desired look and protecting the metal surface from rust. Opt for a paint that is specifically designed for use on metal, as it will provide better adhesion and durability.

Before painting, it’s crucial to prepare the surface by sanding and priming it. Sanding helps to remove any rust or loose paint, ensuring a smooth and even finish.

After sanding, apply a coat of primer to promote better paint adhesion and prevent future rusting.

Advertisement

Once the surface is prepped and primed, you’re ready to move on to the next step of gathering your materials and equipment for painting the underside of your pipe fence.

Gather Your Materials and Equipment

To start, gather all the necessary materials and equipment for the job. This includes a sturdy ladder, protective clothing, and a reliable paint application tool.

When choosing the paint color, consider the overall look you want to achieve and how it will complement your surroundings.

For hard-to-reach areas, an airless sprayer with an extended nozzle can provide even coverage. Don’t forget to have a paint shield or drop cloth to protect the ground or nearby objects from overspray.

Once you have all your materials ready, it’s time to set up a proper work area for a smooth painting process.

Advertisement

Set Up a Proper Work Area

To create a comfortable and efficient workspace, follow these steps:

  • Organize your tools: Keep your paint, sprayer, and other equipment easily accessible so you don’t waste time searching for them.

  • Lay down a drop cloth: Protect the ground from overspray and drips by covering it with a drop cloth. This will also make cleanup easier.

  • Clear any obstacles: Remove any objects that could hinder your movement or potentially get in the way while you’re painting.

  • Designing a comfortable workspace: Arrange your tools and materials in a way that allows you to move freely and comfortably around the fence.

Maximizing efficiency during the painting process is crucial to save time and effort. By setting up a proper work area, you can work more efficiently and avoid unnecessary delays.

Now, let’s talk about how to practice proper safety precautions while painting the underside of a pipe fence.

Advertisement

Practice Proper Safety Precautions

Ensure your safety while painting by following proper precautions and taking necessary steps to protect yourself.

One important safety precaution is the usage of a respirator to protect your lungs from inhaling paint fumes. Make sure to wear a properly fitted respirator that is suitable for painting tasks.

Additionally, it is crucial to practice ladder safety when working on the underside of the pipe fence. Ensure the ladder is stable and secure before climbing up. Always maintain three points of contact with the ladder, and avoid overreaching to prevent falls or accidents.

Once you have taken these safety measures, you can confidently start painting the underside of the fence, knowing that you have done everything necessary to protect yourself.

Start Painting the Underside of the Fence

Advertisement

As you start painting the underside of the fence, there are a few tips to keep in mind for a successful paint job.

First, it’s important to avoid overspray. Adjust the spray pattern and pressure on your airless sprayer according to the manufacturer’s instructions to prevent wasted paint and a messy surrounding area.

When painting hard-to-reach areas, use an extension pole or a ladder to get closer to the fence. This will provide better control and accuracy.

In the next section, we will discuss proper technique and angles to achieve a smooth and even finish.

Advertisement

Use Proper Technique and Angles

Using the right technique and angles while painting is essential for achieving a professional finish. Hold the sprayer perpendicular to the surface and maintain a consistent distance of about 12 inches. Start spraying from one end, moving in a smooth, sweeping motion. Overlap each pass by 50% to prevent streaks and ensure complete coverage.

Pay attention to the spray angle as well. Aim for a 45-degree angle to reach all the nooks and crannies of the fence. This will help ensure that every part of the fence is evenly coated.

By using proper technique and angles, you can achieve a flawless paint job that will enhance the appearance and durability of your pipe fence.

Now, let’s discuss the importance of taking breaks and allowing for proper drying time.

Take Breaks and Allow for Drying Time

Take a moment to rest and give your project the time it needs to dry properly. Proper drying time management is crucial for achieving a flawless finish and avoiding paint drips on the underside of your pipe fence. Here are some tips to help you manage the drying process effectively:

Advertisement
  • Plan your breaks strategically: Take short breaks between painting sessions to allow the paint to dry partially. This will help prevent any accidental smudging or smearing when you resume painting.

  • Allow for sufficient drying time: Don’t rush the process. Ensure that each coat of paint has ample time to dry before applying the next one. This will help the paint adhere better and reduce the risk of drips or uneven coverage.

Inspect and touch up as needed: Once the paint has fully dried, inspect the surface for any missed spots or imperfections. Touch up these areas as necessary to ensure a flawless finish.

Transitioning into the next section, it’s important to thoroughly inspect your painted pipe fence to ensure a professional-looking result.

Inspect and Touch Up as Needed

Now that we have taken breaks and allowed for drying time, it’s important to inspect and touch up the painted pipe fence as needed. This step ensures that the paint job is thorough and long-lasting. Inspect the fence carefully, looking for any missed spots or areas that may require additional attention. Use touch up techniques such as applying paint with a small brush or roller to these areas. Additionally, selecting the right paint color is crucial for achieving a seamless finish. Consider matching the color to the existing fence or choosing a complementary shade. To emphasize these touch up techniques and color selection, refer to the following table:

Touch Up Techniques Selecting the Right Paint Color
Small brush or roller Match existing fence color
Fill in missed spots Choose complementary shade

With the fence inspected and touched up, we can now move on to the next section about clean up and properly storing our equipment.

Clean Up and Properly Store Your Equipment

To ensure the longevity of your newly painted pipe fence, it’s essential to clean up and store your equipment properly. According to a study conducted by paint manufacturers, cleaning and storing painting tools can extend their lifespan by up to 50%. Here are a few tips to help with proper equipment care:

Advertisement
  • Thoroughly clean your airless sprayer by flushing it with clean water or recommended solvent for the paint type used.
  • Remove any leftover paint from hoses, filters, and nozzles to prevent clogs and ensure smooth operation in the future.
  • Store your equipment in a clean, dry place to prevent rust or damage.

By following these steps, you can prevent paint overspray and keep your equipment in excellent condition for future projects.

Now, let’s move on to the next section and admire your newly painted fence.

Admire Your Newly Painted Fence

Stand back and bask in the beauty of your freshly coated and vibrant barrier. Painting the underside of a pipe fence offers numerous benefits.

Firstly, it provides an added layer of protection against rust and corrosion, extending the lifespan of your fence.

Additionally, painting the underside prevents moisture from seeping into the metal, reducing the risk of rot and weakening.

Moreover, a well-painted fence enhances the overall aesthetic appeal of your property, adding value and curb appeal.

Advertisement

To maintain and preserve your newly painted fence, it is essential to regularly inspect for any signs of wear or damage. Touch up any chipped or scratched areas promptly to prevent further deterioration.

Additionally, consider applying a protective clear coat to further enhance the durability and longevity of your paint job.

With proper care and maintenance, your beautifully painted fence will remain a stunning feature of your property for years to come.

Frequently Asked Questions

How long does it take for the paint to dry on the underside of the fence?

To speed up the drying process of paint on the underside of the fence, try using a fan or a heat gun. These techniques can help to increase air circulation and evaporate moisture faster. Additionally, using a paint with a quick drying formula can also help.

Can I use a regular paintbrush instead of an airless sprayer?

When it comes to painting the underside of a pipe fence, using a paintbrush instead of an airless sprayer has its pros and cons. While a brush offers more control, it may take longer and require more effort to achieve a smooth and even finish. To ensure a great result, make sure to choose a high-quality brush, use long and even strokes, and apply thin coats of paint.

Advertisement

Do I need to apply a primer before painting the underside of the fence?

I recommend applying a primer before painting the underside of the fence. Using a primer helps improve adhesion and durability of the paint. However, if you prefer not to use a primer, be aware that the paint may not adhere as well.

What type of paint is recommended for painting the underside of a pipe fence?

The best paint brand for painting the underside of a pipe fence is one that is specifically designed for overhead surfaces. Some tips for painting overhead surfaces include using a roller or brush, using a paint with good coverage, and applying thin, even coats.

How often should I touch up the paint on the underside of the fence?

I recommend touching up the paint on the underside of the fence every 1-2 years to maintain its durability and appearance. Some of the best paint brands for this task include Sherwin-Williams, Behr, and Rust-Oleum.

Conclusion

There you have it! Painting the underside of a pipe fence with an airless sprayer is not as daunting as it may seem. With a little preparation, the right equipment, and some safety precautions, you can achieve a professional-looking finish.

First, make sure to clean the surface of the pipe fence thoroughly. This will ensure that the paint adheres properly and lasts longer. Use a wire brush or sandpaper to remove any rust or loose paint.

Advertisement

Next, protect the surrounding area by covering it with drop cloths or plastic sheets. This will prevent overspray and keep your work area clean.

Now, it’s time to set up your airless sprayer. Follow the manufacturer’s instructions for assembly and make sure you have the appropriate paint and nozzle size for the job. Fill the sprayer with paint and test it on a scrap piece of material to ensure it’s working properly.

When you’re ready to start painting, position yourself underneath the pipe fence and hold the sprayer about 12 inches away from the surface. Begin spraying in a smooth, sweeping motion, overlapping each pass to ensure even coverage.

Take breaks as needed and allow for drying time between coats. This will help prevent drips and ensure a professional finish. Be sure to wear protective clothing, gloves, and a mask to protect yourself from paint fumes and overspray.

Once you’ve finished painting the underside of the pipe fence, step back and inspect your work. Look for any areas that may need touch-ups or additional coats. It’s better to catch these now than to discover them later.

Advertisement

Finally, clean up your equipment according to the manufacturer’s instructions. Properly store any leftover paint and dispose of any waste materials responsibly.

Now, step back and admire your newly painted fence. You’ve done a great job!

Continue Reading

Airless Paint Sprayers FAQs

How To Remove Exterior Paint From Airless Paint Sprayer

Published

on

By

An image showcasing a hand wearing protective gloves, holding an airless paint sprayer nozzle, while pointed towards a weathered wooden surface

If you have ever had to clean exterior paint from an airless paint sprayer, you know how time-consuming and labor-intensive it can be. Trust me, I have been there.

But fear not, my fellow DIY enthusiasts, because I’m here to share with you my tried-and-true method for getting that stubborn paint off your sprayer and back to its pristine state.

In this article, I will guide you through each step of the process, from gathering the necessary materials to properly storing the sprayer for future use.

With my knowledgeable, precise, and detailed instructions, you’ll be able to tackle this daunting task with confidence and efficiency.

So, let’s dive in and say goodbye to that pesky exterior paint once and for all!

Advertisement

Key Takeaways

  • Choose suitable cleaning solutions for the type of paint being used
  • Disconnect and prepare the sprayer for paint removal by removing the nozzle and spray tip
  • Use brushes or toothpicks to remove dried paint from the sprayer
  • Flush the sprayer with water to remove excess paint and clean the components thoroughly

Gather the necessary materials

To effectively remove exterior paint from an airless paint sprayer, it is imperative to gather all the necessary materials.

First, you will need cleaning solution alternatives that are suitable for the type of paint you are removing. It is important to choose the right cleaning solution to ensure the paint is effectively stripped off the sprayer.

Additionally, you should gather the best practices for spray gun maintenance. This includes having a brush or a toothpick to remove any dried paint from the nozzle or the tip of the gun. It is also helpful to have a clean cloth or paper towels to wipe down the exterior of the sprayer.

Once you have all the materials ready, you can proceed to disconnect and prepare the sprayer for paint removal.

Disconnect and prepare the sprayer

To prepare the sprayer for use, start by disconnecting it. This is crucial for safety reasons and to prevent accidents. Make sure the sprayer is turned off and unplugged from the power source.

Next, remove the nozzle and spray tip from the sprayer and clean them thoroughly. This step is important to avoid any clogs or blockages during the paint removal process.

Advertisement

In addition, check the hose for any leaks or damages. It’s always a good idea to ensure that the equipment is in proper working condition before using it.

To protect yourself from potential paint splatters, it’s recommended to wear protective gloves and goggles. Safety should always be a priority when working with any type of equipment.

Once the sprayer is disconnected and prepared, you can proceed to the next step of removing excess paint from the sprayer.

Remove excess paint from the sprayer

Advertisement

Now, let’s tackle any leftover paint that may be lingering in your trusty sprayer.

To remove excess paint from the sprayer, there are a few cleaning techniques and maintenance tips you can follow.

First, ensure that the sprayer is disconnected from the power source and any paint supply.

Then, remove the spray tip and guard, as well as any filters or screens.

Use a clean cloth or rag to wipe away any paint residue on the exterior of the sprayer.

Advertisement

For stubborn paint, you can use a brush or toothbrush to scrub it away. Remember to be gentle to avoid damaging the sprayer.

Once you have removed all excess paint, you can proceed to the next step of flushing the sprayer with water.

Flush the sprayer with water

After disconnecting the sprayer from the power source and any paint supply, it’s time to give it a good flush with water. Flushing is an essential step in removing excess paint and preventing clogs. To effectively flush the sprayer, follow these steps:

  1. Fill a bucket with clean water.
  2. Attach the sprayer’s hose to the bucket, ensuring a secure connection.
  3. Turn on the sprayer and spray the water into a waste container until it runs clear.
  4. Release the trigger and turn off the sprayer.
  5. Disconnect the hose from the bucket and empty any remaining water.

Common mistakes to avoid while flushing an airless paint sprayer include not using enough water and not thoroughly cleaning the sprayer’s components. By properly flushing the sprayer, you can maintain its longevity and prevent paint buildup. In the next section, we will discuss how to disassemble and clean the spray gun, ensuring its optimal performance.

Disassemble and clean the spray gun

Advertisement

To properly maintain your spray gun, you’ll need to disassemble and clean it thoroughly. Here are some cleaning techniques and maintenance tips to help you with this task:

  1. Start by removing the nozzle and the tip guard from the spray gun. This will allow you to access all the internal components that need to be cleaned.

  2. Use a cleaning brush or a toothbrush to scrub off any paint residue from the spray gun body. Pay close attention to the areas around the trigger and the air inlet.

  3. Soak the disassembled parts in a bucket of warm soapy water for about 15 minutes. This will help to loosen any stubborn paint particles.

  4. Rinse all the parts thoroughly with clean water to remove any soap residue. Make sure to inspect each component for any signs of damage or wear.

Now that the spray gun is clean, let’s move on to the next step of the process: cleaning the filters and nozzles.

Clean the filters and nozzles

After disassembling and cleaning the spray gun, it’s important to clean the filters and nozzles of your airless paint sprayer. These components play a crucial role in ensuring a smooth and consistent paint flow.

To clean the filters, remove them from the sprayer and rinse them thoroughly with water. Use a soft brush to gently scrub away any paint residue or debris.

For the nozzles, soak them in a bucket filled with warm soapy water for about 15 minutes. Then, use a small brush to remove any remaining paint or clogs. Rinse the nozzles with clean water and ensure they are completely dry before reassembling the sprayer.

Advertisement

These cleaning techniques and maintenance tips will help maintain the performance and longevity of your airless paint sprayer.

Moving on to the next section, let’s discuss how to use a cleaning solution for stubborn paint.

Use a cleaning solution for stubborn paint

If stubborn paint is giving you trouble, try using a cleaning solution to easily tackle the problem. Cleaning solutions are a great alternative to remove exterior paint from airless paint sprayers. They are specially formulated to break down and dissolve paint, making it easier to remove.

Here are three cleaning solution alternatives that can help you get the job done effectively and efficiently:

  • Acetone: This powerful solvent can quickly dissolve paint buildup and leave your sprayer clean and ready for use.
  • Vinegar: A natural and cost-effective option, vinegar can help prevent paint buildup and keep your sprayer in good condition.
  • Paint thinner: This versatile solution can effectively remove stubborn paint and restore your sprayer to its optimal performance.

By regularly using these cleaning solutions, you can prevent paint buildup and ensure the longevity of your airless paint sprayer. Once you have successfully cleaned the filters and nozzles, it’s time to move on to the next step: rinse and dry the sprayer components.

Rinse and dry the sprayer components

To ensure optimal performance and prevent potential damage, it is important to thoroughly rinse and dry all the components of your sprayer. Properly cleaning and maintaining your sprayer can increase its lifespan by up to 50%. Rinsing and drying the components is a crucial step in airless paint sprayer maintenance. After using a cleaning solution to remove stubborn paint, it is important to rinse off any residue to prevent clogs in the sprayer. Thoroughly rinse all the parts, including the spray gun, hose, and filters, using clean water. Once rinsed, make sure to dry each component thoroughly before reassembling the sprayer. This will help prevent any moisture-related issues and ensure that your sprayer functions at its best. Now, let’s move on to how to reassemble the sprayer and get it ready for your next painting project.

Advertisement

Reassemble the sprayer

To reassemble the sprayer, carefully fit the cleaned and dried components together like puzzle pieces, ensuring a snug and secure fit. Here are some important steps to follow in the reassembly process:

  • Start by reattaching the spray gun to the hose, making sure the connection is tight.
  • Next, insert the suction tube into the paint container, ensuring it is securely in place.
  • Attach the pump housing to the sprayer body, aligning the tabs and locking it into position.
  • Once the pump housing is secured, reattach the power cord to the sprayer.
  • Finally, double-check all connections to ensure they are tight and secure before testing the sprayer.

If you encounter any issues during the reassembly process, refer to the troubleshooting tips provided in the sprayer’s instruction manual.

Now that the sprayer is reassembled, let’s move on to how to properly store it for future use.

Properly store the sprayer for future use

After reassembling the sprayer, it’s time to store it properly for future use.

Properly cleaning the sprayer after each use is crucial to ensure its longevity and effectiveness.

First, I recommend flushing the sprayer with water or a cleaning solution to remove any leftover paint residue. This will prevent clogging and maintain the sprayer’s performance.

Advertisement

Next, disassemble the nozzle and clean it thoroughly, removing any dried paint or debris.

It’s also important to lubricate the sprayer’s moving parts to prevent rust and keep them in good working condition.

Regular maintenance is key to prolonging the life of your airless paint sprayer.

By following these steps and storing the sprayer in a clean, dry place, you’ll be ready for your next painting project with a sprayer that’s in top-notch shape.

Frequently Asked Questions

Can I use any type of cleaning solution to remove stubborn paint from the sprayer?

Sure, you can use a variety of cleaning solutions to tackle stubborn paint on your sprayer. Options like vinegar, rubbing alcohol, or paint thinner can be effective alternatives. Just be sure to follow safety precautions and test a small area first.

Advertisement

How often should I clean the filters and nozzles of the airless paint sprayer?

To keep your airless paint sprayer in optimal condition, it is important to clean the filters and nozzles regularly. This helps prevent clogs and ensures a smooth painting process. Troubleshoot common issues by checking for debris or worn-out parts.

Is it necessary to disassemble the spray gun in order to clean it properly?

To properly clean the spray gun, it is necessary to disassemble it. This allows for a thorough cleaning of all the components. There are also alternative cleaning solutions available that can help remove paint effectively.

Can I use a pressure washer to flush the sprayer with water?

I wouldn’t recommend using a pressure washer to flush an airless paint sprayer with water. It could damage the delicate parts. Instead, use a garden hose or consider alternative methods like using paint thinner or specialized cleaning solutions.

What is the best way to store the airless paint sprayer for future use?

Storing an airless paint sprayer properly is crucial for its future use. To ensure the best paint sprayer maintenance, clean the sprayer thoroughly, lubricate the parts, and store it in a dry, temperature-controlled environment. Preventing clogs in the airless paint sprayer is essential and can be achieved by using the right filters, strainers, and properly thinning the paint.

Conclusion

In conclusion, removing exterior paint from an airless paint sprayer requires careful preparation and thorough cleaning. By following the steps outlined in this article, you can ensure the longevity and efficiency of your sprayer.

Advertisement

Remember the old saying, ‘A clean tool is a happy tool.’ So, take the time to disassemble, clean, and reassemble your sprayer properly.

With regular maintenance and proper storage, your sprayer will be ready for future painting projects. Happy painting!

Continue Reading
Advertisement

Affiliate disclaimer

As an affiliate, we may earn a commission from qualifying purchases. We get commissions for purchases made through links on this website from Amazon and other third parties.

Advertisement

Trending