Connect with us

Airless Paint Sprayers FAQs

How To Spray Kilz W Airless Paint Sprayer

Published

on

-up shot of an airless paint sprayer in action, with a steady stream of Kilz primer being sprayed onto a wall

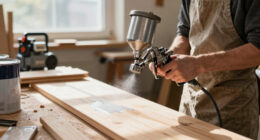
If you are getting ready to take on a painting project and thinking about using an airless paint sprayer for a smooth and efficient application, you have come to the right spot. I am here to give you all the essential tips and methods for effectively applying Kilz with an airless paint sprayer.

In this article, I’ll walk you through the necessary materials you’ll need, how to prepare the surface properly, and even how to dilute and load the Kilz paint for optimal results.

We’ll also cover adjusting the sprayer settings, starting the spraying process, and evaluating the coverage to ensure a smooth and even finish.

Once we’re done painting, I’ll show you how to remove the masking tape and drop cloths, as well as how to clean and store your tools properly.

So get ready to transform your walls with Kilz and an airless paint sprayer, and enjoy the satisfaction of a job well done!

Advertisement

Key Takeaways

  • Proper safety equipment and surface preparation are essential for a successful Kilz paint spraying project.
  • Diluting the paint and loading it into the sprayer correctly are crucial for achieving a smooth and even application.
  • Adjusting the sprayer settings, testing the spray pattern, and choosing the appropriate nozzle size are important for optimal performance.
  • Mastering spray techniques, such as maintaining a consistent distance, applying thin coats, and overlapping each pass, will result in a professional finish.

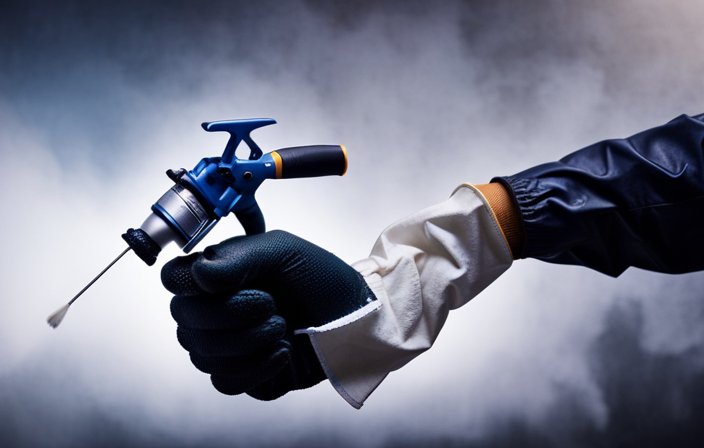
Gather the Necessary Materials

Now that you’ve got your airless paint sprayer ready to go, it’s time to gather all the materials you’ll need for the job.

First, make sure you have the necessary safety equipment, such as goggles, a respirator, and gloves, to protect yourself while using the sprayer.

Additionally, gather the paint you’ll be using, as well as any primer or sealer if needed.

Don’t forget to have enough drop cloths or plastic sheeting to cover the surrounding area and protect it from overspray.

Advertisement

It’s also a good idea to have a few extra sprayer tips on hand in case one gets clogged or damaged during the job.

Now that you have all your materials ready, we can move on to preparing the surface for painting.

Prepare the Surface

Before you begin, have you properly prepped the surface? Surface preparation techniques are crucial for achieving a flawless finish when using an airless paint sprayer with Kilz.

Start by cleaning the surface thoroughly to remove any dirt, dust, or grease. Sanding is also important to ensure a smooth and even surface. Fill any cracks or holes with a suitable filler and allow it to dry completely before proceeding.

Additionally, it’s recommended to use a primer before applying Kilz with an airless paint sprayer. This will help the paint adhere better and provide a more durable finish. Remember to follow the manufacturer’s instructions for the specific primer and Kilz product you’re using.

Advertisement

With a properly prepared surface, you can now move on to diluting and loading the Kilz paint.

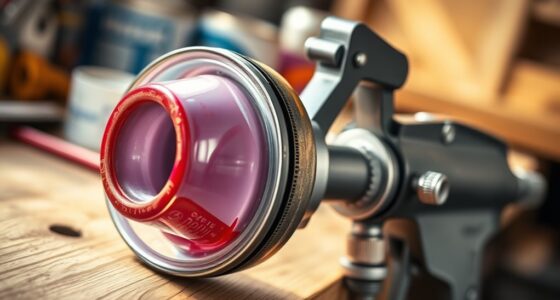
Dilute and Load the Kilz Paint

Before starting to spray Kilz paint with an airless paint sprayer, it’s important to read the instructions carefully. If necessary, dilute the paint according to the manufacturer’s recommendations.

Once the paint is ready, load it into the sprayer and make sure to stir it thoroughly to ensure an even consistency. Lastly, it’s advisable to use a paint strainer to prevent any debris or clumps from clogging the sprayer nozzle.

Advertisement

Read the instructions

First things first, make sure you give those instructions a good read before diving into spraying Kilz with your airless paint sprayer. Following the instructions is crucial when using an airless paint sprayer to ensure safety and avoid potential risks.

Here are three common mistakes people make when using an airless paint sprayer and how to avoid them:

  1. Neglecting to wear proper protective gear can result in health hazards. Always wear goggles, a mask, and gloves to protect yourself from paint fumes and potential overspray.

  2. Failing to prepare the surface properly can lead to poor paint adhesion and a subpar finish. Clean the surface thoroughly and remove any loose paint or debris before spraying Kilz.

  3. Overlooking the recommended pressure settings can cause uneven coverage or paint splattering. Adjust the pressure according to the manufacturer’s instructions for optimal results.

Now that you understand the importance of following instructions, let’s move on to the next step: diluting the paint if necessary.

Dilute the paint if necessary

Now, let’s dive into the next crucial step: if needed, you’ll want to dilute your paint to achieve the perfect consistency for smooth and even application. Diluting the paint is important because it ensures that the paint flows smoothly through the airless paint sprayer without clogging or splattering.

The dilution ratio will depend on the type of paint you’re using, so be sure to check the instructions or the paint can for the recommended ratio. Typically, you’ll mix water or a paint thinner with the paint until you reach the desired consistency. This will help you achieve better coverage and avoid streaks or unevenness on the surface.

Advertisement

Once you’ve achieved the right paint consistency, you can now move on to the next step of loading the paint into the sprayer, ensuring a seamless painting process.

Load the paint into the sprayer

To ensure a seamless painting process, it’s essential to fill the sprayer with the prepared paint mixture. Start by checking the manufacturer’s instructions for your specific paint sprayer techniques. Some sprayers may require you to remove the paint container and fill it separately, while others allow you to load the paint directly into the sprayer.

Make sure to pour the paint slowly and avoid overfilling, as this can cause clogs or uneven spraying. If you encounter any issues, such as paint not flowing properly or inconsistent spray patterns, refer to the troubleshooting section in the sprayer’s manual.

Once the paint is loaded, it’s time to stir the paint thoroughly to ensure an even consistency throughout. This will help achieve a professional-looking finish.

Stir the paint thoroughly

Ensure a smooth and even paint application by thoroughly stirring the mixture, achieving a consistent color and texture. Proper stirring techniques are essential to prevent clumps and ensure that the paint is evenly mixed.

Advertisement

Start by using a stirring stick or a paint mixer attachment for your drill. Insert the stick or attachment into the paint container and mix in a circular motion, making sure to scrape the sides and bottom to incorporate any settled pigment. Continue stirring until the paint is smooth and free of lumps.

Common mistakes include not stirring enough or stirring too vigorously, which can introduce air bubbles into the paint. These bubbles can create an uneven finish on the surface.

Once the paint is well mixed, transition into the subsequent section about using a paint strainer to ensure a flawless application.

Use a paint strainer

Don’t forget to strain your paint using a paint strainer, like a sieve for your creativity, to remove any impurities and ensure a smooth and flawless application. Using a paint strainer offers several benefits. Firstly, it helps to eliminate any lumps, debris, or dried paint particles that may have formed during storage. This ensures that your paint flows smoothly through the sprayer, preventing clogs and ensuring an even distribution of color. Secondly, a paint strainer helps to remove any foreign particles that could mar the finish of your project, such as dirt or dust. When choosing a paint strainer, consider the type of paint you will be using and the desired finish. Mesh strainers are ideal for latex paints, while paper strainers are better suited for oil-based paints. Once you have strained your paint, it’s time to adjust the sprayer settings for optimal performance.

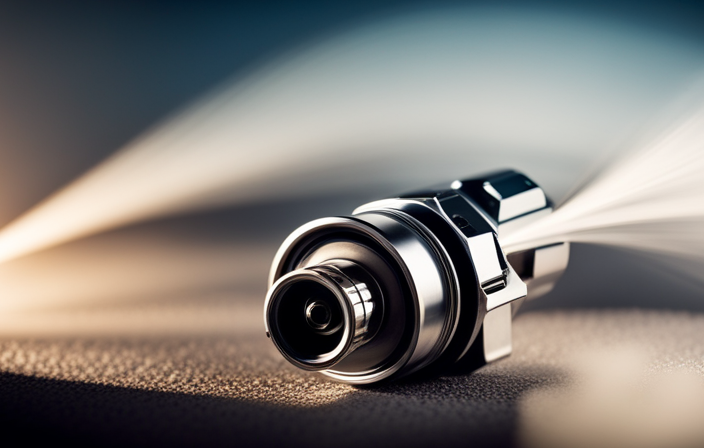
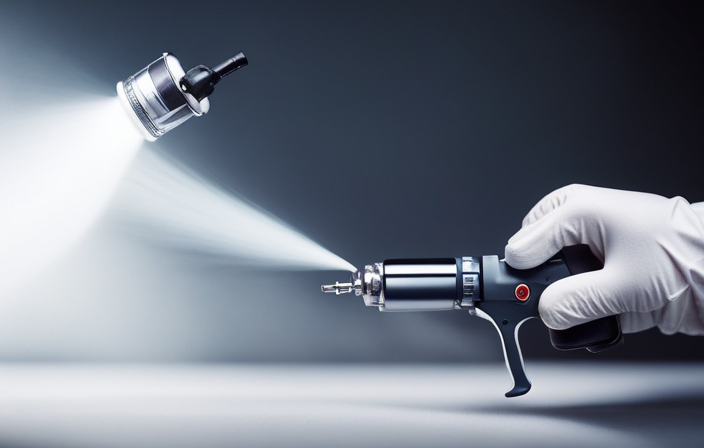
Adjust the Sprayer Settings

To adjust the sprayer settings, I first set the pressure to the recommended level for the Kilz paint. This ensures that the paint will atomize properly and provide a smooth finish.

Advertisement

Next, I choose the spray pattern that best suits the surface I’m painting. Whether it’s a wide fan pattern for large areas or a narrow round pattern for detailed work, selecting the right pattern is crucial for achieving the desired results.

Finally, before starting the actual painting, I always test the spray on a scrap surface to make sure the settings are correct and the paint is spraying evenly. This allows me to make any necessary adjustments before applying the paint to the actual project.

Set the pressure

Adjust the pressure on your airless paint sprayer until it feels just right, allowing you to effortlessly coat your surfaces with Kilz. Adjusting the pressure is crucial for achieving optimal paint application and troubleshooting any issues you may encounter.

If the pressure is too high, the paint may atomize too much, leading to overspray and a thin coat. On the other hand, if the pressure is too low, the paint may not atomize properly, resulting in a heavy and uneven application.

Start by setting the pressure at the manufacturer’s recommended level, and then adjust it gradually as needed. Test the spray pattern on a scrap surface and make small adjustments until you achieve a consistent and even coat.

Advertisement

With the pressure set correctly, it’s time to move on to choosing the spray pattern for your Kilz application.

Choose the spray pattern

After setting the pressure on the airless paint sprayer, it’s time to choose the spray pattern that will achieve the desired results. There are various spray pattern techniques to consider, such as horizontal, vertical, round, and wide fan patterns.

Each pattern offers a different coverage and finish, so it’s important to choose the one that suits your project best. To achieve the desired pattern, you need to select the right nozzle size. Smaller nozzles create a narrower pattern, while larger ones provide a wider coverage.

Take into account the surface you’re spraying and the type of paint you’re using to make the right choice. Once you’ve chosen the spray pattern and nozzle, it’s time to test the spray on a scrap surface to ensure it’s delivering the desired coverage and finish.

Test the spray on a scrap surface

First, make sure you have a scrap surface ready to test the spray – can you afford to skip this step and risk ruining your project? Testing the spray on a scrap surface is an essential technique when using an airless paint sprayer with Kilz. It allows you to adjust the spray pattern and ensure the paint is flowing smoothly before starting your actual project.

Advertisement

Choose a scrap surface that is similar to the one you will be painting, such as a piece of cardboard or an old board. Hold the sprayer at a distance of 12-18 inches and apply the paint in a consistent, even motion. Pay attention to the coverage and any potential clogs or drips.

Once you are satisfied with the test spray, you can confidently move on to start spraying your project.

Start Spraying

When starting to spray with an airless paint sprayer, it’s important to hold the sprayer correctly to ensure control and accuracy.

Maintaining a consistent distance from the surface being sprayed helps to achieve an even coat and avoid drips or blobs.

Applying thin coats allows for better adhesion and reduces the risk of runs, while overlapping each pass ensures full coverage.

Advertisement

It’s also important to take breaks to avoid over-spraying and allow the paint to dry properly.

Hold the sprayer correctly

Ensure you’re gripping the airless paint sprayer properly to achieve flawless results and unleash your inner painting maestro. Here are three key tips to ensure a proper grip and wrist alignment:

  1. Hold the sprayer with a firm grip, but not too tight, allowing for control and maneuverability.
  2. Keep your wrist in a straight and neutral position to prevent strain and fatigue.
  3. Position your hand towards the middle of the sprayer for better balance and stability.

By following these guidelines, you’ll have better control over the sprayer and avoid any unnecessary accidents.

Now that you have the proper grip, let’s move on to the next section about maintaining a consistent distance for a professional finish.

Maintain a consistent distance

Now that you’ve got a good grip on the sprayer, let’s talk about how to maintain a consistent distance for a pro-level finish. To achieve a flawless result, it’s crucial to maintain proper technique and avoid overspraying. By keeping a consistent distance from the surface you’re painting, you’ll ensure an even application and minimize the risk of drips or runs.

To help you visualize the ideal distance, refer to the table below:

Advertisement
Distance from Surface Result
12 inches Light coat
10 inches Medium coat
8 inches Heavy coat

Remember to adjust the distance based on the specific requirements of your project. By maintaining a consistent distance, you’ll achieve a smooth and professional-looking finish. Now, let’s move on to the next section and learn how to apply thin and even coats without wasting any time.

Apply thin and even coats

To achieve a professional-level finish, it’s important to apply thin and even coats. This can be visually represented by the ideal distances mentioned earlier – 12 inches for a light coat, 10 inches for a medium coat, and 8 inches for a heavy coat. Applying multiple coats ensures complete coverage and helps achieve professional results. Here are some tips to apply thin and even coats:

  • Start by spraying in a horizontal motion, moving from left to right.
  • Keep the sprayer moving at a consistent speed to avoid pooling or dripping.
  • Overlap each pass by about 50% to ensure even coverage.
  • Maintain a steady hand and avoid excessive pressure on the sprayer trigger.

By following these guidelines, you can achieve a smooth and flawless finish.

Now, let’s move on to the next step: overlapping each pass for seamless results.

Overlap each pass

To achieve a seamless and polished result, it’s recommended that you carefully overlap each stroke as you apply the coats. This technique ensures achieving even coverage and avoids streaks on your surface.

When using an airless paint sprayer, it’s important to maintain a consistent speed and distance from the surface. As you move the sprayer back and forth, make sure to slightly overlap each pass with the previous one. This overlapping technique ensures that the paint is evenly distributed and eliminates any gaps or uneven spots. By consistently overlapping, you’ll achieve a smooth and professional finish.

Advertisement

Now, let’s move on to the next section about taking breaks to avoid over-spraying and ensure the best results.

Take breaks to avoid over-spraying

Taking breaks throughout the painting process is crucial in order to prevent excessive spraying and achieve the best possible results. Here are four reasons why taking breaks is important when using an airless paint sprayer:

  1. Avoid over-spraying: Pausing periodically allows you to assess the coverage and make adjustments if needed, preventing over-spraying and wasting paint.

  2. Prevent drips and runs: Giving the paint time to settle and dry between coats reduces the chances of drips and runs, ensuring a smooth and even finish.

  3. Reduce fatigue: Taking short breaks helps prevent muscle fatigue and allows you to maintain a steady hand, resulting in more precise and controlled spraying.

  4. Maintain equipment performance: Resting the sprayer periodically prevents overheating and prolongs the lifespan of the equipment, ensuring consistent performance throughout the project.

By taking breaks, you can achieve better control, prevent over-spraying, and ultimately achieve a professional-looking paint job.

Now, let’s move on to the next step, cleaning the sprayer.

Clean the Sprayer

To clean the sprayer, the first step is to empty the paint reservoir completely.

Advertisement

Next, I flush the sprayer with water or solvent to remove any remaining paint residue.

Then, I disassemble and clean the nozzle thoroughly using a brush or cloth.

Finally, I make sure to dry the sprayer completely and store it properly to prevent any damage or clogging.

Empty the paint reservoir

Once the paint reservoir is emptied, a whole new world of painting possibilities will open up before you.

To refill the paint reservoir, follow these steps:

Advertisement
  1. Ensure that the sprayer is turned off and unplugged.
  2. Then, remove the paint container from the sprayer and carefully pour any leftover paint back into the original paint can or a suitable container.
  3. Next, clean the container thoroughly with a rag or paper towel to remove any remaining paint residue.
  4. Once the container is clean, refill it with the desired paint color or type.
  5. If you encounter any issues during this process, such as clogging or leaking, refer to the troubleshooting guide provided by the manufacturer.

With the paint reservoir refilled, we can now move on to the next step: flushing the sprayer with water or solvent.

Flush the sprayer with water or solvent

As you unplug the sprayer, a rush of anticipation fills the air, knowing that the next step is to flush the paint-splattered tool with water or solvent. Proper sprayer maintenance is crucial for optimal performance and longevity.

Flushing the sprayer not only removes any remaining paint residue but also helps prevent clogs and ensures smooth operation. To flush the sprayer, fill the paint reservoir with water or solvent, then attach the spray gun and hose. Start by spraying the solution onto a waste surface until the liquid runs clear. Pay close attention to the nozzle and ensure that any debris is thoroughly flushed out. This step is essential for troubleshooting and avoiding any potential issues.

Transitioning into the subsequent section about disassembling and cleaning the nozzle, it is important to keep the sprayer clean and free of any remaining paint particles.

Disassemble and clean the nozzle

Get ready to dive into the next step of maintaining your sprayer – it’s time to disassemble and give that nozzle a thorough cleaning! Cleaning techniques for the nozzle may vary depending on the type of sprayer you have, so refer to the manufacturer’s instructions for specific guidance.

Generally, you’ll need to remove the nozzle from the sprayer and soak it in a cleaning solution or use a small brush to scrub away any paint residue. Pay close attention to any clogs or buildup and use troubleshooting tips, such as using a wire or toothpick to gently remove any obstructions.

Advertisement

Once the nozzle is clean, rinse it with water and reassemble it back onto the sprayer. With the nozzle sparkling clean, it’s time to move on to the next section about how to dry and store the sprayer properly.

Dry and store the sprayer properly

To ensure the longevity of your sprayer, it’s essential to properly dry and store it after each use so that it’s ready for your next project. Follow these steps for proper maintenance and to prevent clogs:

  1. Disconnect the sprayer from the power source and remove the spray tip and guard.

  2. Use a clean cloth or paper towel to wipe off any excess paint from the sprayer.

  3. Run clean water through the sprayer until it runs clear to remove any remaining paint residue.

  4. Allow all the components to air dry completely before reassembling and storing the sprayer.

By properly drying and storing your sprayer, you can prevent paint build-up and ensure its optimal performance.

Once you’ve completed these steps, you can now move on to the next section and evaluate the coverage of the Kilz paint using your airless paint sprayer.

Evaluate the Coverage

Assess the extent of coverage by spraying Kilz with an airless paint sprayer. This step is crucial to ensure that all desired surfaces are adequately coated.

Advertisement

To evaluate the durability of the coverage, examine if the Kilz has evenly adhered to the surface without any thin or bare spots. Analyze the drying time of the Kilz to determine if it has fully dried and cured. Keep in mind that the drying time may vary depending on factors such as humidity and temperature.

Once you’re satisfied with the coverage and drying time, it’s time to move on to the next step.

Remove the masking tape and drop cloths, revealing the freshly painted surface and preparing it for the next stage of the painting process.

Remove the Masking Tape and Drop Cloths

When removing the masking tape, I make sure to do it carefully to avoid any damage to the freshly painted surface.

After removing the tape, I fold up the drop cloths and dispose of them properly to prevent any paint from spreading.

Advertisement

Lastly, I thoroughly clean up any paint spills or drips to leave the area looking neat and tidy.

Carefully remove the tape

Gently peel off the tape, revealing clean edges and a precise paint job. Removing the tape properly is crucial to avoid any paint seepage and maintain the professional finish you desire. Here’s how to do it right:

  1. Start at a corner and pull the tape back slowly, making sure to keep it at a 45-degree angle to prevent any tearing or damage to the painted surface.
  2. If you encounter any resistance, use a utility knife to score along the edge of the tape before pulling it off.
  3. Check for any areas where the paint has bled through. If you find any, use a small brush to touch up those spots before moving on.

Now that the tape is removed, it’s time to fold and dispose of the drop cloths, ensuring a clean and efficient cleanup process.

Fold and dispose of the drop cloths

To efficiently clean up your work area, start by folding and disposing of the drop cloths. But have you considered how this step can save you time and effort in the long run?

When folding the drop cloths, use a technique that allows you to contain any paint residue and prevent it from spreading. Begin by folding the cloth in half, ensuring that any paint-covered areas are facing inward. Then, fold it in half again, repeating until you have a compact square. This folding technique not only makes disposal easier but also minimizes the chances of paint spills or drips.

Once the drop cloths are folded, carefully place them in a garbage bag or designated disposal container.

Advertisement

Now, let’s move on to the next section about cleaning up any paint spills or drips.

Clean up any paint spills or drips

Now it’s time for you to tackle any paint spills or drips that may have occurred during your project. Cleaning up these spills is essential to achieve a professional finish.

Here are some effective cleaning techniques to help you get rid of paint spills:

  • Blot the spill immediately with a clean cloth or paper towel to absorb as much paint as possible.
  • Use a mild detergent mixed with warm water to gently scrub the affected area.
  • For stubborn spills, you can try using a paint thinner or solvent, but be cautious and follow the manufacturer’s instructions.

Preventing paint spills is also important. Make sure to secure the paint can lid tightly and avoid overfilling your paint tray or container. Additionally, take your time and be mindful of your movements while spraying to minimize the chances of drips and spills.

Once you’ve cleaned up any paint spills, you can move on to the next step of cleaning and storing the tools.

Clean and Store the Tools

When it comes to clean up after using an airless paint sprayer, there are a few key points to remember.

Advertisement

First, make sure to thoroughly clean the paint tray and stirrer to remove any leftover paint.

Next, dispose of or clean the paint strainer to ensure it’s ready for future use.

Finally, wash and dry the brushes properly and store the sprayer and other tools in a safe and organized manner.

By following these steps, you can ensure that your tools are ready to go for your next project.

Clean the paint tray and stirrer

First, grab a rag and give the paint tray and stirrer a thorough wipe-down, removing any lingering residue like a magician making a stubborn stain disappear. Cleaning tools and maintaining equipment is crucial to ensure the best performance of your airless paint sprayer. To make the cleaning process easier, you can use a 3 column and 5 row table to organize the steps:

Advertisement
Step Actions
1. Remove excess paint from the tray and stirrer.
2. Rinse the tray and stirrer with warm water.
3. Use a mild detergent to wash away any remaining paint.
4. Scrub the tray and stirrer gently with a sponge or brush.
5. Rinse thoroughly and dry with a clean cloth.

Once the paint tray and stirrer are clean, you can move on to the next step – disposing of or cleaning the paint strainer.

Dispose of or clean the paint strainer

To properly dispose of or clean the paint strainer, you’ll want to follow these simple steps:

  • Remove the paint strainer from the sprayer and examine it for any large clumps of paint.
  • If the strainer is clogged with paint, carefully scrape off the excess using a putty knife or old brush.

Dispose of the paint strainer in accordance with your local regulations for hazardous waste.

  • If the strainer is still in good condition and can be reused, rinse it thoroughly with warm water until all the paint residue is removed.

Now that you’ve taken care of the paint strainer, it’s time to move on to the next step: washing and drying the brushes.

Wash and dry the brushes

After properly disposing of or cleaning the paint strainer, it’s time to wash and dry the brushes. Proper brush cleaning techniques are essential for maintaining the quality and lifespan of your brushes.

Start by rinsing the brushes in warm water to remove any excess paint. Use a mild soap or brush cleaner to gently scrub the bristles, making sure to remove all paint residue. Pay special attention to the base of the bristles where paint can accumulate.

Rinse the brushes thoroughly to ensure all soap is removed. Next, gently pat the brushes dry with a clean cloth or paper towel. Avoid using excessive force, as this can damage the bristles.

Advertisement

Finally, allow the brushes to air dry completely before storing them. Proper brush maintenance is crucial for achieving a smooth and even spray with your airless paint sprayer. With the brushes clean and dry, we can now move on to properly storing the sprayer and other tools.

Properly store the sprayer and other tools

After washing and drying the brushes, it is essential to properly store the sprayer and other tools to ensure their longevity and prevent any damage. To properly maintain the airless paint sprayer, follow these steps:

  1. Clean the sprayer thoroughly: Remove any leftover paint by flushing the system with water or a cleaning solution recommended by the manufacturer.

  2. Disassemble and clean the nozzle: Remove the nozzle and soak it in a cleaning solution to remove any dried paint or debris that could cause clogs.

  3. Lubricate moving parts: Apply a small amount of lubricant to the sprayer’s moving parts to keep them running smoothly.

By following these steps, you can prevent clogs in the sprayer nozzle and ensure it remains in good working condition for future use. Now, with your tools properly stored, you can move on to the next section and enjoy your newly painted walls!

Enjoy Your Newly Painted Walls!

I can’t help but admire the smooth finish on my newly painted walls.
It’s amazing how a fresh coat of paint can transform a room.
I appreciate the time and effort I saved by using an airless paint sprayer, making the process quick and efficient.
Now, I can’t wait to share my success with others and show off my beautifully painted walls.

Admire the smooth finish

Take a moment to appreciate the flawlessly sleek finish that’ll leave you in awe. Achieving a smooth finish has numerous benefits, including professional-looking results that can elevate the overall aesthetic of your space.

Advertisement

Here are four key reasons why a smooth finish is worth the effort:

  1. Enhanced Durability: A smooth finish ensures better adhesion, making your walls more resistant to chipping, peeling, or cracking.

  2. Timeless Appeal: The smooth texture adds a touch of elegance and sophistication, creating a timeless look that never goes out of style.

  3. Easy to Clean: Smooth surfaces are easier to wipe down and maintain, making it simple to keep your walls looking fresh and new.

  4. Professional Finish: With an airless paint sprayer and Kilz, you can achieve an even, professional-quality finish that rivals the work of a seasoned painter.

Now that you’ve admired the smooth finish, you’ll appreciate the time and effort saved when it comes to the next steps.

Appreciate the time and effort saved

Imagine the hours of backbreaking work you’ll save by simply appreciating the time and effort saved with a smooth finish! Using an airless paint sprayer like Kilz can significantly reduce your painting time. The high-pressure system allows for quick and even coverage, eliminating the need for multiple coats.

With this time-saving technique, you can tackle larger projects in a fraction of the time it would take with traditional methods. Not only does it save you time, but it also ensures a professional-looking finish. The airless sprayer evenly distributes the paint, resulting in a smooth and flawless surface. No more brush marks or roller streaks to worry about!

So, when you’re finished, step back and admire the time and effort you’ve saved, knowing that your project is completed with precision and efficiency. Now, you can move on to the next step and share your success with others.

Advertisement

Share your success with others

Share your success with others by showcasing the flawless finish achieved with this efficient time-saving technique.

Sharing experiences and learning from others is an important part of any DIY project. By sharing your success, you not only inspire and motivate others to try the same technique but also create a community of like-minded individuals who can exchange tips and tricks.

Whether it’s through social media platforms, online forums, or local meetups, there are numerous ways to share your achievements. By doing so, you not only contribute to the DIY community but also have the opportunity to learn from others and improve your own skills.

So don’t hesitate to share your experience and help others achieve the same level of success with spraying Kilz using an airless paint sprayer.

Frequently Asked Questions

Can I use Kilz paint with a brush or roller instead of an airless paint sprayer?

Using a brush or roller with Kilz paint is a viable alternative to an airless sprayer. Pros of using an airless sprayer include faster application and smoother finish, but using a brush or roller allows for more control and precision.

Advertisement

How long does it take for Kilz paint to dry after it has been sprayed on?

Kilz paint typically takes about 1-2 hours to dry. To speed up drying time, ensure proper ventilation, use a dehumidifier, or use fans to circulate air. Avoid applying thick coats as they may take longer to dry.

Can I use Kilz paint on outdoor surfaces, such as fences or decks?

Sure, you can use Kilz paint on outdoor surfaces like fences or decks. It’s one of the best outdoor paints for these projects. Before painting, make sure to clean and prep the surfaces properly for better adhesion and durability.

How many coats of Kilz paint should I apply for optimal coverage?

For optimal coverage with Kilz paint, it is recommended to apply two coats. Allow the first coat to dry completely before applying the second coat. Wait at least 1 hour between coats for best results.

Can I use Kilz paint on surfaces that have already been painted with a different brand of paint?

Yes, Kilz paint can be used as a primer for a different brand of paint. It is also suitable for use on unpainted surfaces. Kilz provides excellent adhesion and helps create a smooth, long-lasting finish.

Conclusion

After following these steps, I must say that spraying Kilz with an airless paint sprayer was a breeze! The paint went on smoothly and evenly, covering the surface flawlessly.

Advertisement

It was like watching a gentle rain shower, transforming dull walls into a vibrant masterpiece. The process was straightforward, and with the right tools and preparation, anyone can achieve professional-looking results.

So go ahead, grab your sprayer and unleash your creativity. It’s time to enjoy the beauty of your newly painted walls!

Jule’s attention to detail, editorial prowess, and commitment to delivering high-quality content ensure that every article and review on our website is polished and reader-friendly. Jule’s vision for the website as a one-stop destination for paint sprayer enthusiasts has been instrumental in shaping the platform into what it is today.

Continue Reading
Advertisement

Airless Paint Sprayers FAQs

How To Unclog Graco 360 Airless Paint Sprayer

Published

on

By

An image showcasing a step-by-step guide on unclogging a Graco 360 Airless Paint Sprayer, depicting a user removing the nozzle, flushing it with water, clearing the filter, and reassembling it meticulously

Have you ever found yourself in the middle of a painting project only to have your Graco 360 airless paint sprayer clog up on you? Dealing with a clog can be frustrating and a waste of time, but fear not! I am here to guide you through the process of unclogging your Graco 360 airless paint sprayer.

In this article, I will provide you with step-by-step instructions on how to:

  1. Identify the clog
  2. Release pressure
  3. Disassemble the sprayer
  4. Clean the spray tip and filter
  5. Reassemble the sprayer

I will also share tips on how to prevent future clogs and when it may be necessary to seek professional help.

So, grab your tools and get ready to tackle that clog head-on. By the end of this article, you’ll have your Graco 360 airless paint sprayer working like new again.

Let’s dive in and get your painting project back on track!

Key Takeaways

  • Troubleshooting tips for Graco 360 airless paint sprayer include checking power supply, priming and flushing properly, verifying paint viscosity, and inspecting for clogs or blockages.
  • To prevent future clogs, strain paint before pouring, clean filters and nozzles regularly, use appropriate paint viscosity, follow prevention techniques, and perform regular maintenance.
  • Professional help is important for complex clogs that require expertise, time constraints that necessitate professional assistance, lack of experience that can lead to accidents, situations where DIY solutions may not be effective, and to ensure efficiency and safety.
  • Signs of complex clogs include unsuccessful DIY methods, persistent clogs despite attempts, indication of more intricate issues, requirement of professional expertise, and the need to avoid potential damage or accidents.

Identify the Clog

Advertisement

To effectively troubleshoot the issue, it’s crucial to first identify the specific area where the clog is occurring within the Graco 360 airless paint sprayer. When it comes to troubleshooting common clog causes, there are a few things to keep in mind.

Start by checking the spray tip, as it is often the primary culprit. Inspect it for any debris or dried paint that may be causing the blockage.

Additionally, inspect the suction tube and filter for any obstructions. These areas can easily accumulate paint particles and cause clogs.

Once the clog is identified, it’s important to release the pressure and remove any remaining paint from the sprayer. This can be done by following the manufacturer’s instructions for releasing pressure and cleaning the system.

By taking these steps and implementing tips for preventing clogs in the future, you can ensure a smooth and efficient painting process.

Advertisement

Release Pressure and Remove Paint

First, make sure the pressure is released and all the paint is removed from the machine. To clean the Graco 360 airless paint sprayer effectively, follow these troubleshooting tips and cleaning techniques:

  • Begin by removing the spray tip and guard, using a wrench if necessary.
  • Next, detach the suction tube from the paint container, ensuring no paint remains inside.
  • Take off the prime valve and filter housing, carefully inspecting them for any clogs or debris.
  • Clean all the removed components thoroughly with warm, soapy water or a suitable cleaning solution.
  • Use a small brush or toothpick to remove any stubborn clogs from the spray tip or filter.
  • Rinse all parts with clean water, ensuring no residue remains.

By following these cleaning techniques and troubleshooting tips, you can effectively unclog your Graco 360 airless paint sprayer.

Now, let’s move on to the next section and disassemble the sprayer for further cleaning.

Disassemble the Sprayer

Now it’s time to break down the sprayer and delve into the inner workings of this powerful machine. Sprayer maintenance is crucial to ensure optimal performance and longevity.

Advertisement

To disassemble the sprayer, start by removing the spray gun from the hose.

Next, unscrew the tip guard and carefully take out the spray tip.

Use a wrench to disconnect the filter housing from the sprayer body.

Once the filter housing is removed, take out the filter and inspect it for any clogs or debris. Cleaning or replacing the filter may be necessary if it is dirty or damaged.

Troubleshooting tips for disassembling the sprayer include following the manufacturer’s instructions, wearing protective gloves, and working in a well-ventilated area.

Advertisement

With the sprayer disassembled, we can now move on to cleaning the spray tip and filter.

Clean the Spray Tip and Filter

Before you begin cleaning the spray tip and filter, it’s important to note that a clogged filter can decrease the efficiency of your sprayer by up to 50%.

To clean the spray tip:

  • Start by removing it from the sprayer gun using a wrench.
  • Once removed, inspect the tip for any clogs or debris.
  • If you notice any blockages, use a small wire brush or toothpick to carefully remove them.

To clean the filter:

  • Unscrew the housing and remove it from the sprayer.
  • Rinse the filter thoroughly with warm water to remove any paint residue or debris.
  • Gently tap the filter on a hard surface to dislodge any stubborn particles.

Finally, reassemble the spray tip and filter, ensuring they are securely tightened.

In the next section, we will discuss how to use a cleaning solution or solvent to further clean your sprayer.

Use a Cleaning Solution or Solvent

Advertisement

To ensure optimal performance, it’s important to enhance the effectiveness of your sprayer by using a cleaning solution or solvent.

When it comes to cleaning solution alternatives, there are a few options to consider. One commonly used option is a mixture of warm water and mild detergent. This mixture can effectively remove any paint residue from the sprayer.

Another alternative is using a commercial paint sprayer cleaner. These cleaners are specifically designed to break down paint and unclog the system, making them a great choice for thorough cleaning.

Whichever option you choose, it’s important to follow safety precautions. Always wear protective gloves and eyewear when handling cleaning solutions or solvents. Additionally, make sure to work in a well-ventilated area to avoid inhaling any fumes.

Advertisement

Now that you have cleaned the spray tip and filter, let’s move on to the next step: using a cleaning brush or needle.

Use a Cleaning Brush or Needle

Using a cleaning brush or needle is like giving your sprayer a thorough scrub, ensuring that every nook and cranny is free from any debris or buildup. Cleaning techniques using a brush or needle are alternative methods to unclog your Graco 360 airless paint sprayer. These tools allow you to manually remove any paint or residue that may be obstructing the spray nozzle or other components. The cleaning brush is perfect for scrubbing the larger parts of the sprayer, such as the spray tip, while the needle can be used to clean the smaller, harder-to-reach areas, like the nozzle or the filter. By using these tools, you can effectively dislodge any clogs and restore the proper functioning of your sprayer. After cleaning, you can proceed to reassemble the sprayer, ensuring all components are properly aligned and tightened.

Reassemble the Sprayer

Now that you have thoroughly cleaned all the components, it’s time to put everything back together and ensure a proper fit for your sprayer. Here are some reassemble techniques and troubleshooting tips to help you with this process:

  • Start by reattaching the spray gun to the hose, ensuring a secure connection.

  • Next, attach the hose to the pump, making sure it is tightly screwed in.

  • Reinstall the suction tube into the pump, ensuring it is properly seated.

  • Attach the spray tip guard to the spray gun, securing it in place.

  • Finally, test the trigger on the spray gun to ensure it is working smoothly.

By following these reassemble techniques and troubleshooting tips, you can ensure that your Graco 360 airless paint sprayer is properly put back together and ready for use.

Now, let’s move on to the next step and test the sprayer.

Advertisement

Test the Sprayer

Once everything is back together, it’s time for you to see the sprayer in action and put it to the test. To ensure that your Graco 360 airless paint sprayer is working properly after reassembling, follow these sprayer maintenance and troubleshooting tips.

First, check if the sprayer is priming correctly. Fill the paint container with water and turn on the sprayer. The water should flow smoothly through the nozzle without any sputtering or clogging. If there are any issues, refer back to the previous steps to troubleshoot and fix the problem.

Next, test the spray pattern by spraying water onto a test surface. The spray pattern should be even and consistent, without any splattering or uneven distribution. Adjust the spray tip if necessary to achieve the desired pattern.

Finally, check for any leaks or unusual noises during operation. If you notice any leaks, tighten the connections or replace any damaged parts. If there are unusual noises, it could indicate a problem with the motor or pump, and you may need to consult the user manual or contact Graco customer support for further assistance.

By following these troubleshooting tips, you can ensure that your Graco 360 airless paint sprayer is working efficiently. In the next section, we will discuss how to prevent future clogs and maintain the sprayer for long-lasting performance.

Advertisement

Prevent Future Clogs

To prevent future clogs in your Graco 360 airless paint sprayer, there are some important steps you can take:

  • Always strain your paint before pouring it into the sprayer. This will remove any debris or clumps that could potentially clog the nozzle.

  • Regularly clean the filters and nozzles of your sprayer to maintain optimal performance.

  • Use the appropriate paint viscosity for your sprayer. Using thicker paints can increase the risk of clogs.

By following these prevention techniques and regular maintenance tips, you can ensure that your Graco 360 airless paint sprayer stays clog-free and ready for your next project.

Remember, if you encounter persistent clogs or issues, it may be necessary to seek professional help.

Seek Professional Help if Needed

If you’re feeling overwhelmed or frustrated with persistent clogs, don’t hesitate to reach out to a professional for assistance. Knowing when to call a professional can save you time, money, and frustration. While unclogging a Graco 360 airless paint sprayer can often be done as a DIY project, there are times when it is best to seek professional help. Here are some situations where calling a professional is recommended:

  1. Complex clogs: If you’ve tried multiple DIY methods and the clog is still not resolved, it may be a sign of a more complex issue that requires professional expertise.

  2. Time constraints: If you have a tight deadline and cannot afford any delays, it’s best to let a professional handle the unclogging process to ensure efficiency and effectiveness.

  3. Lack of experience: If you’re not familiar with the inner workings of the paint sprayer or are unsure about the correct procedure, it’s safer to leave it to a professional to avoid potential damage or accidents.

Remember, while DIY solutions can work in many cases, there are times when professional help is the best choice. Don’t hesitate to call a professional if you’re unsure or experiencing difficulties.

Advertisement

Frequently Asked Questions

Can I use any cleaning solution or solvent to unclog my Graco 360 airless paint sprayer?

No, it is not recommended to use any cleaning solution or solvent for unclogging the Graco 360 Airless Paint Sprayer. It is important to follow the manufacturer’s instructions and use the recommended cleaning methods to prevent clogs.

How often should I clean the spray tip and filter to prevent clogs?

An ounce of prevention is worth a pound of cure. To prevent clogs in your paint sprayer, it’s important to regularly clean the spray tip and filter. This maintenance ensures optimal performance and avoids costly downtime.

What is the recommended method for disassembling the sprayer?

To disassemble the sprayer, follow these steps: 1) Turn off and unplug the sprayer. 2) Remove the spray tip, guard, and filter. 3) Use a wrench to loosen and remove the fluid section. Recommended tools for this process include a wrench and pliers.

Are there any specific cleaning brushes or needles that are recommended for unclogging the sprayer?

To effectively clean and unclog a Graco 360 airless paint sprayer, it is recommended to use cleaning tools such as brushes and needles specifically designed for this purpose. Regular maintenance tips should also be followed to prevent clogging issues.

What are some common signs or symptoms of a clogged Graco 360 airless paint sprayer?

Some common signs or symptoms of a clogged Graco 360 airless paint sprayer include poor spray pattern, spitting or sputtering, and reduced or uneven paint flow. Troubleshooting tips can help identify and resolve these issues.

Advertisement

Conclusion

When it comes to unclogging a Graco 360 Airless Paint Sprayer, there are a few steps you can follow. First, make sure to disconnect the sprayer from the power source and relieve any pressure in the system. Next, remove the spray tip and filter from the gun and clean them thoroughly. If the clog persists, you may need to disassemble the gun and clean the internal components. Be sure to refer to the manufacturer’s instructions for guidance on this step. Once everything is clean, reassemble the gun and test it to ensure the clog is fully cleared. Regular maintenance, such as cleaning the sprayer after each use and using the appropriate paint filters, can help prevent clogs in the future.

Continue Reading

Airless Paint Sprayers FAQs

How To Paint Underside Of Pipe Fence With Airless Sprayer

Published

on

By

An image capturing a skilled painter effortlessly coating the underside of a sturdy pipe fence with an airless sprayer
  • In my opinion, painting the lower section of a pipe fence can be challenging. However, with the right tools and techniques, it can be very rewarding.

  • That’s why I’m here to share my expertise on how to paint the underside of a pipe fence with an airless sprayer. This method not only saves time but also ensures a smooth and even finish.

  • By using an airless sprayer, you can easily reach those hard-to-access areas and achieve professional results.

  • In this article, I will guide you through the step-by-step process, from preparing your fence for painting to properly storing your equipment.

  • So, if you’re ready to transform your fence and give it a fresh new look, let’s dive in and get started!

Key Takeaways

  • Painting the underside of a pipe fence with an airless sprayer provides protection against rust, corrosion, moisture seepage, and rot, while enhancing the fence’s aesthetic appeal and property value.
  • Regular inspection and maintenance of the painted fence, including touch-ups and applying a protective clear coat, ensures durability, longevity, and the preservation of the property’s stunning feature.
  • To prevent paint overspray and equipment damage, proper painting techniques, appropriate equipment and materials, surface covering, maintaining a suitable spraying distance, and proper cleaning and storage of the equipment should be followed.
  • Using an airless sprayer for painting offers efficient and even coverage, reduced overspray and waste, faster application, the ability to reach tight or difficult areas, and suitability for various types of surfaces.

Prepare Your Fence for Painting

Now that you’ve gathered all your materials, it’s time to get your fence ready for a fresh coat of paint.

Choosing the right paint color is important for achieving the desired look and protecting the metal surface from rust. Opt for a paint that is specifically designed for use on metal, as it will provide better adhesion and durability.

Before painting, it’s crucial to prepare the surface by sanding and priming it. Sanding helps to remove any rust or loose paint, ensuring a smooth and even finish.

After sanding, apply a coat of primer to promote better paint adhesion and prevent future rusting.

Advertisement

Once the surface is prepped and primed, you’re ready to move on to the next step of gathering your materials and equipment for painting the underside of your pipe fence.

Gather Your Materials and Equipment

To start, gather all the necessary materials and equipment for the job. This includes a sturdy ladder, protective clothing, and a reliable paint application tool.

When choosing the paint color, consider the overall look you want to achieve and how it will complement your surroundings.

For hard-to-reach areas, an airless sprayer with an extended nozzle can provide even coverage. Don’t forget to have a paint shield or drop cloth to protect the ground or nearby objects from overspray.

Once you have all your materials ready, it’s time to set up a proper work area for a smooth painting process.

Advertisement

Set Up a Proper Work Area

To create a comfortable and efficient workspace, follow these steps:

  • Organize your tools: Keep your paint, sprayer, and other equipment easily accessible so you don’t waste time searching for them.

  • Lay down a drop cloth: Protect the ground from overspray and drips by covering it with a drop cloth. This will also make cleanup easier.

  • Clear any obstacles: Remove any objects that could hinder your movement or potentially get in the way while you’re painting.

  • Designing a comfortable workspace: Arrange your tools and materials in a way that allows you to move freely and comfortably around the fence.

Maximizing efficiency during the painting process is crucial to save time and effort. By setting up a proper work area, you can work more efficiently and avoid unnecessary delays.

Now, let’s talk about how to practice proper safety precautions while painting the underside of a pipe fence.

Advertisement

Practice Proper Safety Precautions

Ensure your safety while painting by following proper precautions and taking necessary steps to protect yourself.

One important safety precaution is the usage of a respirator to protect your lungs from inhaling paint fumes. Make sure to wear a properly fitted respirator that is suitable for painting tasks.

Additionally, it is crucial to practice ladder safety when working on the underside of the pipe fence. Ensure the ladder is stable and secure before climbing up. Always maintain three points of contact with the ladder, and avoid overreaching to prevent falls or accidents.

Once you have taken these safety measures, you can confidently start painting the underside of the fence, knowing that you have done everything necessary to protect yourself.

Start Painting the Underside of the Fence

Advertisement

As you start painting the underside of the fence, there are a few tips to keep in mind for a successful paint job.

First, it’s important to avoid overspray. Adjust the spray pattern and pressure on your airless sprayer according to the manufacturer’s instructions to prevent wasted paint and a messy surrounding area.

When painting hard-to-reach areas, use an extension pole or a ladder to get closer to the fence. This will provide better control and accuracy.

In the next section, we will discuss proper technique and angles to achieve a smooth and even finish.

Advertisement

Use Proper Technique and Angles

Using the right technique and angles while painting is essential for achieving a professional finish. Hold the sprayer perpendicular to the surface and maintain a consistent distance of about 12 inches. Start spraying from one end, moving in a smooth, sweeping motion. Overlap each pass by 50% to prevent streaks and ensure complete coverage.

Pay attention to the spray angle as well. Aim for a 45-degree angle to reach all the nooks and crannies of the fence. This will help ensure that every part of the fence is evenly coated.

By using proper technique and angles, you can achieve a flawless paint job that will enhance the appearance and durability of your pipe fence.

Now, let’s discuss the importance of taking breaks and allowing for proper drying time.

Take Breaks and Allow for Drying Time

Take a moment to rest and give your project the time it needs to dry properly. Proper drying time management is crucial for achieving a flawless finish and avoiding paint drips on the underside of your pipe fence. Here are some tips to help you manage the drying process effectively:

Advertisement
  • Plan your breaks strategically: Take short breaks between painting sessions to allow the paint to dry partially. This will help prevent any accidental smudging or smearing when you resume painting.

  • Allow for sufficient drying time: Don’t rush the process. Ensure that each coat of paint has ample time to dry before applying the next one. This will help the paint adhere better and reduce the risk of drips or uneven coverage.

Inspect and touch up as needed: Once the paint has fully dried, inspect the surface for any missed spots or imperfections. Touch up these areas as necessary to ensure a flawless finish.

Transitioning into the next section, it’s important to thoroughly inspect your painted pipe fence to ensure a professional-looking result.

Inspect and Touch Up as Needed

Now that we have taken breaks and allowed for drying time, it’s important to inspect and touch up the painted pipe fence as needed. This step ensures that the paint job is thorough and long-lasting. Inspect the fence carefully, looking for any missed spots or areas that may require additional attention. Use touch up techniques such as applying paint with a small brush or roller to these areas. Additionally, selecting the right paint color is crucial for achieving a seamless finish. Consider matching the color to the existing fence or choosing a complementary shade. To emphasize these touch up techniques and color selection, refer to the following table:

Touch Up Techniques Selecting the Right Paint Color
Small brush or roller Match existing fence color
Fill in missed spots Choose complementary shade

With the fence inspected and touched up, we can now move on to the next section about clean up and properly storing our equipment.

Clean Up and Properly Store Your Equipment

To ensure the longevity of your newly painted pipe fence, it’s essential to clean up and store your equipment properly. According to a study conducted by paint manufacturers, cleaning and storing painting tools can extend their lifespan by up to 50%. Here are a few tips to help with proper equipment care:

Advertisement
  • Thoroughly clean your airless sprayer by flushing it with clean water or recommended solvent for the paint type used.
  • Remove any leftover paint from hoses, filters, and nozzles to prevent clogs and ensure smooth operation in the future.
  • Store your equipment in a clean, dry place to prevent rust or damage.

By following these steps, you can prevent paint overspray and keep your equipment in excellent condition for future projects.

Now, let’s move on to the next section and admire your newly painted fence.

Admire Your Newly Painted Fence

Stand back and bask in the beauty of your freshly coated and vibrant barrier. Painting the underside of a pipe fence offers numerous benefits.

Firstly, it provides an added layer of protection against rust and corrosion, extending the lifespan of your fence.

Additionally, painting the underside prevents moisture from seeping into the metal, reducing the risk of rot and weakening.

Moreover, a well-painted fence enhances the overall aesthetic appeal of your property, adding value and curb appeal.

Advertisement

To maintain and preserve your newly painted fence, it is essential to regularly inspect for any signs of wear or damage. Touch up any chipped or scratched areas promptly to prevent further deterioration.

Additionally, consider applying a protective clear coat to further enhance the durability and longevity of your paint job.

With proper care and maintenance, your beautifully painted fence will remain a stunning feature of your property for years to come.

Frequently Asked Questions

How long does it take for the paint to dry on the underside of the fence?

To speed up the drying process of paint on the underside of the fence, try using a fan or a heat gun. These techniques can help to increase air circulation and evaporate moisture faster. Additionally, using a paint with a quick drying formula can also help.

Can I use a regular paintbrush instead of an airless sprayer?

When it comes to painting the underside of a pipe fence, using a paintbrush instead of an airless sprayer has its pros and cons. While a brush offers more control, it may take longer and require more effort to achieve a smooth and even finish. To ensure a great result, make sure to choose a high-quality brush, use long and even strokes, and apply thin coats of paint.

Advertisement

Do I need to apply a primer before painting the underside of the fence?

I recommend applying a primer before painting the underside of the fence. Using a primer helps improve adhesion and durability of the paint. However, if you prefer not to use a primer, be aware that the paint may not adhere as well.

What type of paint is recommended for painting the underside of a pipe fence?

The best paint brand for painting the underside of a pipe fence is one that is specifically designed for overhead surfaces. Some tips for painting overhead surfaces include using a roller or brush, using a paint with good coverage, and applying thin, even coats.

How often should I touch up the paint on the underside of the fence?

I recommend touching up the paint on the underside of the fence every 1-2 years to maintain its durability and appearance. Some of the best paint brands for this task include Sherwin-Williams, Behr, and Rust-Oleum.

Conclusion

There you have it! Painting the underside of a pipe fence with an airless sprayer is not as daunting as it may seem. With a little preparation, the right equipment, and some safety precautions, you can achieve a professional-looking finish.

First, make sure to clean the surface of the pipe fence thoroughly. This will ensure that the paint adheres properly and lasts longer. Use a wire brush or sandpaper to remove any rust or loose paint.

Advertisement

Next, protect the surrounding area by covering it with drop cloths or plastic sheets. This will prevent overspray and keep your work area clean.

Now, it’s time to set up your airless sprayer. Follow the manufacturer’s instructions for assembly and make sure you have the appropriate paint and nozzle size for the job. Fill the sprayer with paint and test it on a scrap piece of material to ensure it’s working properly.

When you’re ready to start painting, position yourself underneath the pipe fence and hold the sprayer about 12 inches away from the surface. Begin spraying in a smooth, sweeping motion, overlapping each pass to ensure even coverage.

Take breaks as needed and allow for drying time between coats. This will help prevent drips and ensure a professional finish. Be sure to wear protective clothing, gloves, and a mask to protect yourself from paint fumes and overspray.

Once you’ve finished painting the underside of the pipe fence, step back and inspect your work. Look for any areas that may need touch-ups or additional coats. It’s better to catch these now than to discover them later.

Advertisement

Finally, clean up your equipment according to the manufacturer’s instructions. Properly store any leftover paint and dispose of any waste materials responsibly.

Now, step back and admire your newly painted fence. You’ve done a great job!

Continue Reading

Airless Paint Sprayers FAQs

How To Remove Exterior Paint From Airless Paint Sprayer

Published

on

By

An image showcasing a hand wearing protective gloves, holding an airless paint sprayer nozzle, while pointed towards a weathered wooden surface

If you have ever had to clean exterior paint from an airless paint sprayer, you know how time-consuming and labor-intensive it can be. Trust me, I have been there.

But fear not, my fellow DIY enthusiasts, because I’m here to share with you my tried-and-true method for getting that stubborn paint off your sprayer and back to its pristine state.

In this article, I will guide you through each step of the process, from gathering the necessary materials to properly storing the sprayer for future use.

With my knowledgeable, precise, and detailed instructions, you’ll be able to tackle this daunting task with confidence and efficiency.

So, let’s dive in and say goodbye to that pesky exterior paint once and for all!

Advertisement

Key Takeaways

  • Choose suitable cleaning solutions for the type of paint being used
  • Disconnect and prepare the sprayer for paint removal by removing the nozzle and spray tip
  • Use brushes or toothpicks to remove dried paint from the sprayer
  • Flush the sprayer with water to remove excess paint and clean the components thoroughly

Gather the necessary materials

To effectively remove exterior paint from an airless paint sprayer, it is imperative to gather all the necessary materials.

First, you will need cleaning solution alternatives that are suitable for the type of paint you are removing. It is important to choose the right cleaning solution to ensure the paint is effectively stripped off the sprayer.

Additionally, you should gather the best practices for spray gun maintenance. This includes having a brush or a toothpick to remove any dried paint from the nozzle or the tip of the gun. It is also helpful to have a clean cloth or paper towels to wipe down the exterior of the sprayer.

Once you have all the materials ready, you can proceed to disconnect and prepare the sprayer for paint removal.

Disconnect and prepare the sprayer

To prepare the sprayer for use, start by disconnecting it. This is crucial for safety reasons and to prevent accidents. Make sure the sprayer is turned off and unplugged from the power source.

Next, remove the nozzle and spray tip from the sprayer and clean them thoroughly. This step is important to avoid any clogs or blockages during the paint removal process.

Advertisement

In addition, check the hose for any leaks or damages. It’s always a good idea to ensure that the equipment is in proper working condition before using it.

To protect yourself from potential paint splatters, it’s recommended to wear protective gloves and goggles. Safety should always be a priority when working with any type of equipment.

Once the sprayer is disconnected and prepared, you can proceed to the next step of removing excess paint from the sprayer.

Remove excess paint from the sprayer

Advertisement

Now, let’s tackle any leftover paint that may be lingering in your trusty sprayer.

To remove excess paint from the sprayer, there are a few cleaning techniques and maintenance tips you can follow.

First, ensure that the sprayer is disconnected from the power source and any paint supply.

Then, remove the spray tip and guard, as well as any filters or screens.

Use a clean cloth or rag to wipe away any paint residue on the exterior of the sprayer.

Advertisement

For stubborn paint, you can use a brush or toothbrush to scrub it away. Remember to be gentle to avoid damaging the sprayer.

Once you have removed all excess paint, you can proceed to the next step of flushing the sprayer with water.

Flush the sprayer with water

After disconnecting the sprayer from the power source and any paint supply, it’s time to give it a good flush with water. Flushing is an essential step in removing excess paint and preventing clogs. To effectively flush the sprayer, follow these steps:

  1. Fill a bucket with clean water.
  2. Attach the sprayer’s hose to the bucket, ensuring a secure connection.
  3. Turn on the sprayer and spray the water into a waste container until it runs clear.
  4. Release the trigger and turn off the sprayer.
  5. Disconnect the hose from the bucket and empty any remaining water.

Common mistakes to avoid while flushing an airless paint sprayer include not using enough water and not thoroughly cleaning the sprayer’s components. By properly flushing the sprayer, you can maintain its longevity and prevent paint buildup. In the next section, we will discuss how to disassemble and clean the spray gun, ensuring its optimal performance.

Disassemble and clean the spray gun

Advertisement

To properly maintain your spray gun, you’ll need to disassemble and clean it thoroughly. Here are some cleaning techniques and maintenance tips to help you with this task:

  1. Start by removing the nozzle and the tip guard from the spray gun. This will allow you to access all the internal components that need to be cleaned.

  2. Use a cleaning brush or a toothbrush to scrub off any paint residue from the spray gun body. Pay close attention to the areas around the trigger and the air inlet.

  3. Soak the disassembled parts in a bucket of warm soapy water for about 15 minutes. This will help to loosen any stubborn paint particles.

  4. Rinse all the parts thoroughly with clean water to remove any soap residue. Make sure to inspect each component for any signs of damage or wear.

Now that the spray gun is clean, let’s move on to the next step of the process: cleaning the filters and nozzles.

Clean the filters and nozzles

After disassembling and cleaning the spray gun, it’s important to clean the filters and nozzles of your airless paint sprayer. These components play a crucial role in ensuring a smooth and consistent paint flow.

To clean the filters, remove them from the sprayer and rinse them thoroughly with water. Use a soft brush to gently scrub away any paint residue or debris.

For the nozzles, soak them in a bucket filled with warm soapy water for about 15 minutes. Then, use a small brush to remove any remaining paint or clogs. Rinse the nozzles with clean water and ensure they are completely dry before reassembling the sprayer.

Advertisement

These cleaning techniques and maintenance tips will help maintain the performance and longevity of your airless paint sprayer.

Moving on to the next section, let’s discuss how to use a cleaning solution for stubborn paint.

Use a cleaning solution for stubborn paint

If stubborn paint is giving you trouble, try using a cleaning solution to easily tackle the problem. Cleaning solutions are a great alternative to remove exterior paint from airless paint sprayers. They are specially formulated to break down and dissolve paint, making it easier to remove.

Here are three cleaning solution alternatives that can help you get the job done effectively and efficiently:

  • Acetone: This powerful solvent can quickly dissolve paint buildup and leave your sprayer clean and ready for use.
  • Vinegar: A natural and cost-effective option, vinegar can help prevent paint buildup and keep your sprayer in good condition.
  • Paint thinner: This versatile solution can effectively remove stubborn paint and restore your sprayer to its optimal performance.

By regularly using these cleaning solutions, you can prevent paint buildup and ensure the longevity of your airless paint sprayer. Once you have successfully cleaned the filters and nozzles, it’s time to move on to the next step: rinse and dry the sprayer components.

Rinse and dry the sprayer components

To ensure optimal performance and prevent potential damage, it is important to thoroughly rinse and dry all the components of your sprayer. Properly cleaning and maintaining your sprayer can increase its lifespan by up to 50%. Rinsing and drying the components is a crucial step in airless paint sprayer maintenance. After using a cleaning solution to remove stubborn paint, it is important to rinse off any residue to prevent clogs in the sprayer. Thoroughly rinse all the parts, including the spray gun, hose, and filters, using clean water. Once rinsed, make sure to dry each component thoroughly before reassembling the sprayer. This will help prevent any moisture-related issues and ensure that your sprayer functions at its best. Now, let’s move on to how to reassemble the sprayer and get it ready for your next painting project.

Advertisement

Reassemble the sprayer

To reassemble the sprayer, carefully fit the cleaned and dried components together like puzzle pieces, ensuring a snug and secure fit. Here are some important steps to follow in the reassembly process:

  • Start by reattaching the spray gun to the hose, making sure the connection is tight.
  • Next, insert the suction tube into the paint container, ensuring it is securely in place.
  • Attach the pump housing to the sprayer body, aligning the tabs and locking it into position.
  • Once the pump housing is secured, reattach the power cord to the sprayer.
  • Finally, double-check all connections to ensure they are tight and secure before testing the sprayer.

If you encounter any issues during the reassembly process, refer to the troubleshooting tips provided in the sprayer’s instruction manual.

Now that the sprayer is reassembled, let’s move on to how to properly store it for future use.

Properly store the sprayer for future use

After reassembling the sprayer, it’s time to store it properly for future use.

Properly cleaning the sprayer after each use is crucial to ensure its longevity and effectiveness.

First, I recommend flushing the sprayer with water or a cleaning solution to remove any leftover paint residue. This will prevent clogging and maintain the sprayer’s performance.

Advertisement

Next, disassemble the nozzle and clean it thoroughly, removing any dried paint or debris.

It’s also important to lubricate the sprayer’s moving parts to prevent rust and keep them in good working condition.

Regular maintenance is key to prolonging the life of your airless paint sprayer.

By following these steps and storing the sprayer in a clean, dry place, you’ll be ready for your next painting project with a sprayer that’s in top-notch shape.

Frequently Asked Questions

Can I use any type of cleaning solution to remove stubborn paint from the sprayer?

Sure, you can use a variety of cleaning solutions to tackle stubborn paint on your sprayer. Options like vinegar, rubbing alcohol, or paint thinner can be effective alternatives. Just be sure to follow safety precautions and test a small area first.

Advertisement

How often should I clean the filters and nozzles of the airless paint sprayer?

To keep your airless paint sprayer in optimal condition, it is important to clean the filters and nozzles regularly. This helps prevent clogs and ensures a smooth painting process. Troubleshoot common issues by checking for debris or worn-out parts.

Is it necessary to disassemble the spray gun in order to clean it properly?

To properly clean the spray gun, it is necessary to disassemble it. This allows for a thorough cleaning of all the components. There are also alternative cleaning solutions available that can help remove paint effectively.

Can I use a pressure washer to flush the sprayer with water?

I wouldn’t recommend using a pressure washer to flush an airless paint sprayer with water. It could damage the delicate parts. Instead, use a garden hose or consider alternative methods like using paint thinner or specialized cleaning solutions.

What is the best way to store the airless paint sprayer for future use?

Storing an airless paint sprayer properly is crucial for its future use. To ensure the best paint sprayer maintenance, clean the sprayer thoroughly, lubricate the parts, and store it in a dry, temperature-controlled environment. Preventing clogs in the airless paint sprayer is essential and can be achieved by using the right filters, strainers, and properly thinning the paint.

Conclusion

In conclusion, removing exterior paint from an airless paint sprayer requires careful preparation and thorough cleaning. By following the steps outlined in this article, you can ensure the longevity and efficiency of your sprayer.

Advertisement

Remember the old saying, ‘A clean tool is a happy tool.’ So, take the time to disassemble, clean, and reassemble your sprayer properly.

With regular maintenance and proper storage, your sprayer will be ready for future painting projects. Happy painting!

Continue Reading
Advertisement

Affiliate disclaimer

As an affiliate, we may earn a commission from qualifying purchases. We get commissions for purchases made through links on this website from Amazon and other third parties.

Advertisement

Trending