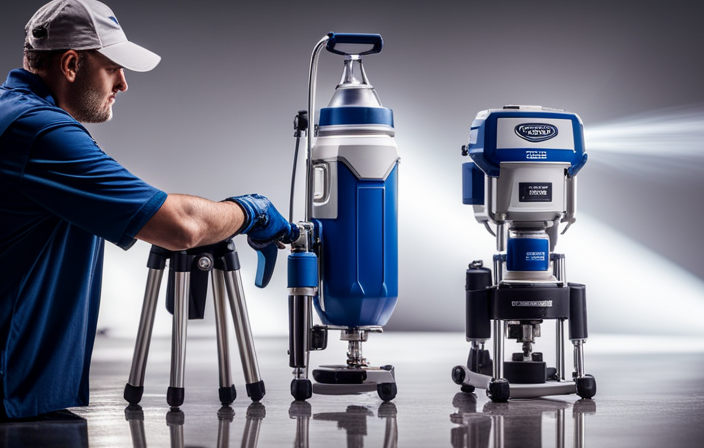
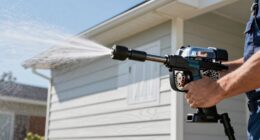
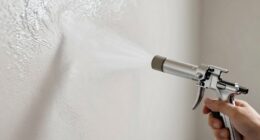
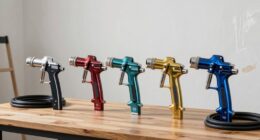
Do you want to give your home a new look with a high-quality paint job? I have just the solution for you – the air-assisted airless paint sprayer.
This incredible tool combines the power of an airless sprayer with the precision of an air sprayer, giving you the best of both worlds.
Imagine this: you’re standing in front of a blank canvas, ready to create a masterpiece. With each stroke of the sprayer, the paint flows effortlessly, leaving behind a smooth, flawless finish. It’s like magic.
In this article, I will guide you through the process of using an air-assisted airless paint sprayer, from understanding the basics to mastering the technique. We will cover everything from preparing your painting area and choosing the right paint, to adjusting the sprayer settings for optimal results.
So, grab your sprayer and let’s transform your home into a work of art!
Key Takeaways
- Proper cleaning and maintenance is crucial for optimal functionality
- Regularly check and clean/replace filters and screens to prevent blockages
- Troubleshooting can resolve 80% of common issues with sprayers
- Use appropriate nozzle size and adjust pressure for even application
Understanding the Basics of an Air-Assisted Airless Paint Sprayer
Now, let’s dive into the exciting world of using an air-assisted airless paint sprayer and discover the basics that’ll make your spray painting experience a breeze!
Air-assisted airless sprayers offer several benefits that make them a popular choice among painters. They combine the high pressure of airless sprayers with the added control of compressed air, resulting in a fine finish and reduced overspray.
One of the pros of using an air-assisted airless sprayer is that it allows for better coverage, especially on uneven surfaces. However, there are also some cons to consider. These sprayers can be more expensive than traditional airless sprayers, and they require additional equipment, such as an air compressor.
Now, let’s transition into preparing your painting area and surface by ensuring everything’s clean and free from any dust or debris.
Preparing Your Painting Area and Surface
Before you begin, make sure you’ve properly set up your workspace and prepped the surface for a flawless finish.
Painting safety is of utmost importance, so it’s crucial to choose a well-ventilated area and wear appropriate protective gear, such as goggles and a respirator mask.
Selecting the right surface is essential to achieve optimal results. Make sure it’s clean, dry, and free of any loose or peeling paint.
Sanding the surface can help create a smooth base for the paint to adhere to. Additionally, consider using a primer for better adhesion and durability.
Once your painting area and surface are ready, you can move on to choosing the right paint and thinning it properly to achieve the desired consistency for your air-assisted airless paint sprayer.
Choosing the Right Paint and Thinning it Properly
To achieve a flawless finish, you’ll want to make sure you’ve chosen the perfect paint and thinned it properly, so it glides on your surface like a dream.
Here are four key steps to follow when choosing the right paint and thinning it correctly:
-
Choosing paint colors: Consider the type of surface you’re painting and the desired effect. For smooth surfaces, opt for gloss or semi-gloss paints, while matte or satin finishes work well for textured surfaces. Take into account the overall color scheme of the area you’re painting to create a cohesive look.
-
Checking paint compatibility: Ensure that the paint you choose is compatible with your air assisted airless paint sprayer. Check the manufacturer’s recommendations or consult with a paint specialist if you’re unsure.
-
Selecting the correct thinning agent: Different paints require different thinning agents, so it’s important to choose the right one. Read the paint can label or consult the manufacturer’s instructions to determine the appropriate thinning agent for your paint.
-
Thinning the paint properly: Follow the instructions provided by the manufacturer to mix the paint and thinning agent in the correct ratios. Use a stir stick to blend the mixture thoroughly until it reaches a smooth consistency.
By choosing the right paint and thinning it properly, you’ll set the stage for achieving a smooth finish.
In the next section, we’ll explore how to adjust the sprayer settings for optimal results.
Adjusting the Sprayer Settings for Optimal Results
Achieving a flawless finish is all about finding the perfect settings for your sprayer to ensure optimal results. To achieve the best outcome, it is crucial to properly maintain your sprayer and troubleshoot any issues that may arise. Regularly inspecting and cleaning the sprayer’s filters, tips, and hoses can prevent clogs and ensure an even spray pattern. Additionally, checking for any leaks or loose connections will help maintain consistent pressure. When troubleshooting, common techniques include adjusting the air pressure, fluid flow rate, and fan width to achieve the desired coverage and atomization. It is also important to refer to the manufacturer’s guidelines for specific troubleshooting advice. By mastering sprayer maintenance and troubleshooting techniques, you can ensure that your air assisted airless paint sprayer is always ready to deliver professional-quality results. Now, let’s move on to practicing proper technique and holding the sprayer correctly.
Practicing Proper Technique and Holding the Sprayer Correctly
Mastering the art of holding the sprayer correctly and utilizing proper technique is like wielding a magic wand that brings your vision to life with precision and finesse.
To achieve flawless results, it’s crucial to maintain the proper hand position throughout the spraying process. By gripping the sprayer firmly but not too tightly, with your index finger on the trigger, you can ensure optimal control and stability.
Additionally, make sure to hold the sprayer at a consistent distance from the surface, usually around 12 inches, to avoid overspray and achieve even coverage.
Remember, practice makes perfect, so take the time to familiarize yourself with the sprayer’s weight and balance. Once you’ve mastered the proper hand position and technique, you can confidently move on to the next step of starting with a test spray and adjusting as needed.
Starting with a Test Spray and Adjusting as Needed
Now that you have mastered the proper technique and holding the sprayer correctly, it’s time to move on to the next step: starting with a test spray and adjusting as needed. This is a crucial part of the process as it allows you to fine-tune your spray pattern and ensure that everything is working smoothly before moving on to the actual project.
To begin, set up a test surface, such as a piece of cardboard or scrap wood, and adjust the spray pressure according to the manufacturer’s recommendations. This will help you achieve the desired coverage and prevent any potential issues. Once you have the pressure set, spray a small area and inspect the pattern. If it’s not to your liking, you can make adjustments by either increasing or decreasing the pressure until you achieve the desired result. This troubleshooting step is essential for ensuring a high-quality finish.
In the next section, we will discuss the importance of applying the paint in even strokes and overlapping patterns, which is key to achieving a professional-looking result.
Applying the Paint in Even Strokes and Overlapping Patterns
To ensure a professional-looking finish, I apply the paint smoothly and in overlapping strokes, creating a seamless and even coverage. When using an air-assisted airless paint sprayer, it’s important to maintain even pressure throughout the entire application process. This helps to achieve a consistent flow of paint and prevents any uneven patches or streaks.
I make sure to keep a steady hand and move the sprayer in a controlled manner, working in small sections at a time. By overlapping each stroke slightly, I ensure that there aren’t any gaps or missed spots. This technique results in a smooth and flawless finish.
Moving on to the next section about cleaning and maintaining the air-assisted airless paint sprayer, it’s crucial to keep the equipment in good condition for future use.
Cleaning and Maintaining Your Air-Assisted Airless Paint Sprayer
Cleaning and maintaining your air-assisted airless paint sprayer is essential in order to keep the equipment in top condition for future use. Proper cleaning techniques are crucial for preventing clogs and ensuring that the sprayer functions optimally.
Here are some key steps to follow:
- Start by thoroughly flushing the sprayer with an appropriate cleaning solution, removing any leftover paint or debris.
- Use a brush or cloth to clean the gun, nozzle, and other parts of the sprayer, making sure to remove any paint residue.
- Check the filters and screens regularly, cleaning or replacing them as needed to prevent blockages.
- Lubricate the moving parts of the sprayer to keep them functioning smoothly.
- Store the sprayer in a clean and dry place, protected from dust and moisture.
By following these cleaning techniques and maintenance practices, you can prolong the lifespan of your air-assisted airless paint sprayer and ensure its reliable performance.
In the next section, we’ll explore troubleshooting common issues and provide tips for success in using the sprayer effectively.
Troubleshooting Common Issues and Tips for Success
If you’re experiencing any issues with your equipment, troubleshooting can help you achieve success.
Did you know that 80% of common issues with air-assisted airless paint sprayers can be resolved by checking and cleaning the filters regularly?
Troubleshooting paint flow is crucial for achieving smooth finishes. Start by checking the paint viscosity and adjusting it if necessary. Ensure that all connections are secure and there are no clogs or obstructions in the spray tip.
If the sprayer is still not working properly, inspect the pump for any leaks or damage. It’s also important to maintain proper pressure and follow the manufacturer’s recommendations for tip size and distance from the surface.
By troubleshooting these areas, you can avoid uneven spray patterns and achieve professional results.
Now, let’s move on to finishing touches and finalizing your project.
Finishing Touches and Finalizing Your Project
Now that we’ve addressed common issues and shared tips for success with air-assisted airless paint sprayers, let’s move on to the final steps of completing your project. Achieving a professional finish requires paying attention to the finishing touches and employing polishing techniques.
To ensure a flawless final coat, consider the following:
-
Surface Preparation: Before applying the final coat, make sure the surface is clean, dry, and free from any imperfections.
-
Appropriate Application: Use the appropriate nozzle size and adjust the pressure to achieve an even and smooth application.
-
Thin Coats: Apply thin coats of paint to prevent drips and runs, allowing each coat to dry completely before applying the next.
-
Light Sanding: After the final coat has dried, lightly sand the surface to remove any imperfections and create a smooth finish.
-
Polishing Techniques: Finally, use polishing techniques such as buffing or waxing to enhance the shine and overall appearance of your project.
By following these steps and paying attention to the finishing touches, you can achieve a professional and polished result with your air-assisted airless paint sprayer.
Frequently Asked Questions
Can I use an air-assisted airless paint sprayer for outdoor projects?
Yes, you can use an air-assisted airless paint sprayer for outdoor projects. It offers a wide range of spray patterns, allowing for precise and even coverage. However, it also has some disadvantages such as higher cost and more overspray compared to other sprayers.
How do I clean the nozzles of my air-assisted airless paint sprayer?
To clean the nozzles of an air-assisted airless paint sprayer, start by disconnecting the sprayer from the power source. Then, use a nozzle cleaning tool or a small wire to remove any clogs or debris. Repeat the process until the nozzle is clean and ready for use.
Can I use water-based paint with an air-assisted airless paint sprayer?
Yes, you can use water-based paint with an air-assisted airless paint sprayer. It offers several benefits such as faster drying time, easy clean-up, and reduced fumes. Compared to a traditional paint sprayer, an air-assisted airless paint sprayer provides better control and a more even finish.
What safety precautions should I take when using an air-assisted airless paint sprayer?
When using an air-assisted airless paint sprayer, it’s crucial to prioritize safety. Always wear a respirator to protect your lungs from harmful fumes and use safety goggles to shield your eyes from potential paint splatters.
How do I know if I need to thin my paint before using it with an air-assisted airless paint sprayer?
To determine if paint needs thinning for an air-assisted airless paint sprayer, check its viscosity and consistency. If the paint is too thick or clumpy, it may need thinning with the appropriate solvent to ensure smooth and even spraying.
Conclusion
As I stand back and admire my newly painted masterpiece, I’m reminded of the power and precision of the air-assisted airless paint sprayer.
This tool, like a skilled artist’s brush, has transformed my painting experience into a symphony of colors and textures. With each stroke, the paint flowed effortlessly, creating a seamless and flawless finish.
The sprayer’s ability to effortlessly navigate corners and crevices was like a graceful dancer gliding across a stage. And just as a conductor guides an orchestra to perfection, I adjusted the sprayer settings to achieve optimal results.
With practice, patience, and a touch of finesse, I’ve unlocked the true potential of this remarkable tool. So, if you’re ready to elevate your painting game, embrace the air-assisted airless paint sprayer and let your creativity soar.
